Jump to content


Photo
- - - - -

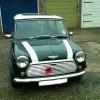
14Yr Old 1989 Mini Flame Project


  • Please log in to reply
30 replies to this topic

#1 brum,brum,mike

brum,brum,mike

    Super Mini Mad

  • Just Joined
  • PipPipPipPipPipPip
  • 554 posts
  • Location: Gloucestershire

Posted 23 November 2011 - 11:57 AM

Hi guys,

My names Mike, im 14 years old have a little job helping out in a garage specialising in vintage/classic cars and hopefully this mini will be my first car! :D I am hoping i will learn alot through the rebuild including (hopefully) how to weld. We have two minis, this one - and my dad is building a zcars mini van ('Busavan in zcars section), so he wants to be cracking on with that whilst i am doing what i can to this mini.

i already had a potential first car, that is also in need of restoration that i've had since i was 7, but minis come first :rolleyes: -
Posted Image

The morning it all started!
Posted Image
Posted Image

First job was to take bumpers, arches and boot lid off -
Posted Image

Posted Image
Started taking interior out, then sound deadening off of the floor -
Posted Image
Posted Image


rotten front floor, r/h side near subframe mount -
Posted Image
Posted Image

Edited by brum,brum,mike, 22 August 2012 - 07:26 PM.


#2 brum,brum,mike

brum,brum,mike

    Super Mini Mad

  • Just Joined
  • PipPipPipPipPipPip
  • 554 posts
  • Location: Gloucestershire

Posted 23 November 2011 - 11:58 AM

Rust around seat belt mount -
Posted Image
Posted Image

R/H side inner sill patch work, both inner sills will be replaced, does anyone know if the genuine inner sill from minispares includes the seat belt mounting plate? -

Posted Image

Both sides have cover outer sills, these will go and be replaced with normal, proper sills -
Posted Image

All sound deadening stripped and cleaned -
Posted Image
Posted Image

Bin full of sound deadening -
Posted Image

The car was sat on the bumpstops at the front!, new front doughnuts and hi los will be fitted -
Posted Image

not sure how to describe this rust, apart from bad! -

L/H side -
Posted Image

R/H side -
Posted Image

Taking the doors off was a pain, someone in the past had rounded off every single nut, we finally got them off with these -
Posted Image
Posted Image

Interesting repair/bodge on scuttle panel -
Posted Image

Someone in the past had jacked the car up on the floor, so the floor is lifted. front floor will be replaced both sides -
Posted Image

#3 brum,brum,mike

brum,brum,mike

    Super Mini Mad

  • Just Joined
  • PipPipPipPipPipPip
  • 554 posts
  • Location: Gloucestershire

Posted 23 November 2011 - 11:58 AM

Rust in rear pockets -
Posted Image
Posted Image

rotten boot floor - the rest of the boot floor had been replaced in the past - i dont think they bothered to take the fuel tank out, leaving this bit rotten. -
Posted Image

Also rear qtr inside -
Posted Image

door step -
Posted Image

wing, has either dropped sometime or just been fitted badly -
Posted Image

and on the other side, the wing isn't attached to the a panel on the lower part -
Posted Image
Posted Image

struggling to take the exhaust off at the moment, doesn't want to come off at the Y section, any tips? -
Posted Image

rust below both rear qtr windows -
Posted Image
Posted Image

and slightly around ariel - looking for a similar new ariel, as a accidently snapped this one off whilst washing it earlier this year :cry:
Posted Image

on the other wing, bubleing around indicator -
Posted Image

im hoping to save the front end, just rub down and treat the rusty areas, as the fron end has to be removed to do the scuttle. Any tips on removing the front end with out damaging it to an extent that it can't be used?

Thanks for looking, i will be asking on here a bit for some help and advice. Mike

#4 jim4eva

jim4eva

    Mini Mad

  • Members
  • PipPipPipPip
  • 261 posts

Posted 23 November 2011 - 12:08 PM

I must say I admire your courage to tackle something like that at your age, keep it up!

#5 LeaLeaCooper

LeaLeaCooper

    Speeding Along Now

  • Members
  • PipPipPipPipPip
  • 412 posts
  • Location: Waltham Abbey

Posted 23 November 2011 - 12:30 PM

you changing the seats on that thing? lol

#6 Mini 360

Mini 360

    Up Into Fourth

  • Members
  • PipPipPipPipPipPipPipPipPip
  • 4,933 posts
  • Location: Aberdeenshire
  • Local Club: Independent

Posted 23 November 2011 - 12:56 PM

Good potential! Good luck! I was 13 when i got my Mini so no worries with that work to do! 3 years to go till you need it so plenty of time! Wish i did the bodywork first.......Im only doing it now as part of my rest and its costing me ££££s!

#7 BensonJ

BensonJ

    Mini Mad

  • Noobies
  • PipPipPipPip
  • 142 posts
  • Location: York
  • Local Club: Geeks N Freaks Mini Club

Posted 23 November 2011 - 01:19 PM

Brill project, you do have a bit to do but as Mini 360 says you have plenty of time.... are you keeping it Red ?? Good look and if I can help with any advise I will do my best.

#8 Mini-Mad-Craig

Mini-Mad-Craig

    Crazy About Metro's

  • Members
  • PipPipPipPipPipPipPipPipPipPip
  • 9,298 posts
  • Location: Travelling in a fried out Kombi

Posted 23 November 2011 - 01:32 PM

Welcome to TMF and nice project... always refreshing to see new youngsters joining TMF and the Mini scene, I'm all grown up now :(

#9 brum,brum,mike

brum,brum,mike

    Super Mini Mad

  • Just Joined
  • PipPipPipPipPipPip
  • 554 posts
  • Location: Gloucestershire

Posted 23 November 2011 - 01:44 PM

Thanks for the comments guys - i know i have a long time until it's needed for me, but as i work on saturdays (either full day, or until 1) and go to school in the week (unless im ill, like today) i don't have much time to work on the car. Although dad has already mentioned getting another mini for next years shows, as there is now way this one, or his van will be done :gimme:

#10 brum,brum,mike

brum,brum,mike

    Super Mini Mad

  • Just Joined
  • PipPipPipPipPipPip
  • 554 posts
  • Location: Gloucestershire

Posted 23 November 2011 - 03:29 PM

Brill project, you do have a bit to do but as Mini 360 says you have plenty of time.... are you keeping it Red ?? Good look and if I can help with any advise I will do my best.


Hi, yeah, colour will be kept red, as i think keeping it red will show what the car was origionally, being a flame red model. And thanks for the luck, i think i might need it! also sorry i liked your comment, i miss clicked ;D not that i dont like your comment :wacko:

Edited by brum,brum,mike, 23 November 2011 - 03:32 PM.


#11 brum,brum,mike

brum,brum,mike

    Super Mini Mad

  • Just Joined
  • PipPipPipPipPipPip
  • 554 posts
  • Location: Gloucestershire

Posted 28 December 2011 - 10:41 PM

Bit of an update, done quite abit since last time.

Found more holes here -

Posted Image

And here -

Posted Image

Then started the procedure to take the engine out -
Considering only this amount of coolant went in this bucket, you can just imagine jhow much went all over the floor :whistling:

Posted Image
Posted Image

once the engine mount bolts were out it lifted straight out with our engine crane.

Posted Image
Posted Image

Next off was the front and rear subframes,

Posted Image
Posted Image

Both subframes seem to be in great condition, and this is how the car is currently. Next got to get the top & bottom dash rails out and look how much money we can spend on some new panels :whistling:

Posted Image

oh, and sorry for the bad photos. Camera doesnt seem to like focusing in the Garage light :(

#12 tiger99

tiger99

    Crazy About Mini's

  • Members
  • PipPipPipPipPipPipPipPipPipPip
  • 8,584 posts
  • Location: Hemel Hempstead

Posted 28 December 2011 - 10:55 PM

It should be a nice project! Plenty of welding to do, but not too far gone.

Looking at the picture of the front suspension, I would say it was sitting on the bump stops mostly because the knuckle joints are worn out (you can tell by the rubber boot on the knuckle being nearly flat), and there may still be a bit of life in the rubber cones.

But your plan for new cones and HiLos is a good idea anyway.

#13 brum,brum,mike

brum,brum,mike

    Super Mini Mad

  • Just Joined
  • PipPipPipPipPipPip
  • 554 posts
  • Location: Gloucestershire

Posted 13 March 2012 - 08:28 PM

Little update. Shell pretty much striped right back. Unsure wether the wiring loom, speakers and headlining needs to come out - might do this just stop any damage occuring.

Also bought some air tools.

3" air cut off tool - brilliant tool, not 'snatchy' like i thought it would be -

Posted Image

Air die grinder - also brilliant, but the stones dont seem to efficient. I will have to get around to buying some metal de burring bits -

Posted Image

And with the help of my new tools, i did this -

Posted Image

Then this -

Posted Image
Posted Image

I also took the windows out, discovered a few things -

Posted Image

Also discovered this, pretty bad and was pretty annoyed as i believe its a tricky job to undertake -Posted Image


And i suspect this side is exactly the same, under all the seam sealer stuff -

Posted Image

Thats pretty much it. I will get some more photos as the ones i have at the moment arn't too good. Another update soon.

Now i just have to wait for some panels to mark out where abouts to cut and prep the area. But as i do not get along with my sisters, i need to 'get real' (advised from dad :xxx: ). Not in the greatest mood at the moment, and as being a teenager i don't understand why i am the one in the wrong?!?!? :(

Thanks for reading, Mike.

Edited by brum,brum,mike, 04 April 2012 - 12:38 PM.


#14 obiwan riley

obiwan riley

    Stage One Kit Fitted

  • Noobies
  • PipPipPip
  • 76 posts

Posted 13 March 2012 - 08:51 PM

looking cool, wish i had had such access to tools at your age. :shifty:

#15 grahama

grahama

    Up Into Fourth

  • Members
  • PipPipPipPipPipPipPipPipPip
  • 2,442 posts
  • Location: Warrington
  • Local Club: None in my area !!

Posted 13 March 2012 - 08:54 PM

Hi Mike,

Bloody good effort pal. Are you tackling this yourself, at 14 I wouldn't have had a clue, at 42 I still dont, lol, that's why it all takes so long. A great project you have there I only wish I had bought the mini when my lad was 14 and had some extra time to get it sorted.

Good luck and plenty of pics.

Graham


1 user(s) are reading this topic

0 members, 1 guests, 0 anonymous users