Jump to content


Photo
- - - - -

My 1997 Mpi Project - Fin


  • Please log in to reply
22 replies to this topic

#1 mark-tkm

mark-tkm

    Mini Mad

  • Members
  • PipPipPipPip
  • 168 posts
  • Location: Derby
  • Local Club: DCMOC

Posted 06 January 2012 - 01:10 AM

Right Then,

The old thread was a bit unorganised and sloppy. so ive decided to start over.

Basically I've been involved with minis since I was very little, i was taken to hospital in a stripped out clubman when I was in the womb :)

I have always wanted a mini but I just never had the money or the time. so when the time came for me to get my first car it was inevitably going to be a mini :)

In August 2010 I started looking around mini.

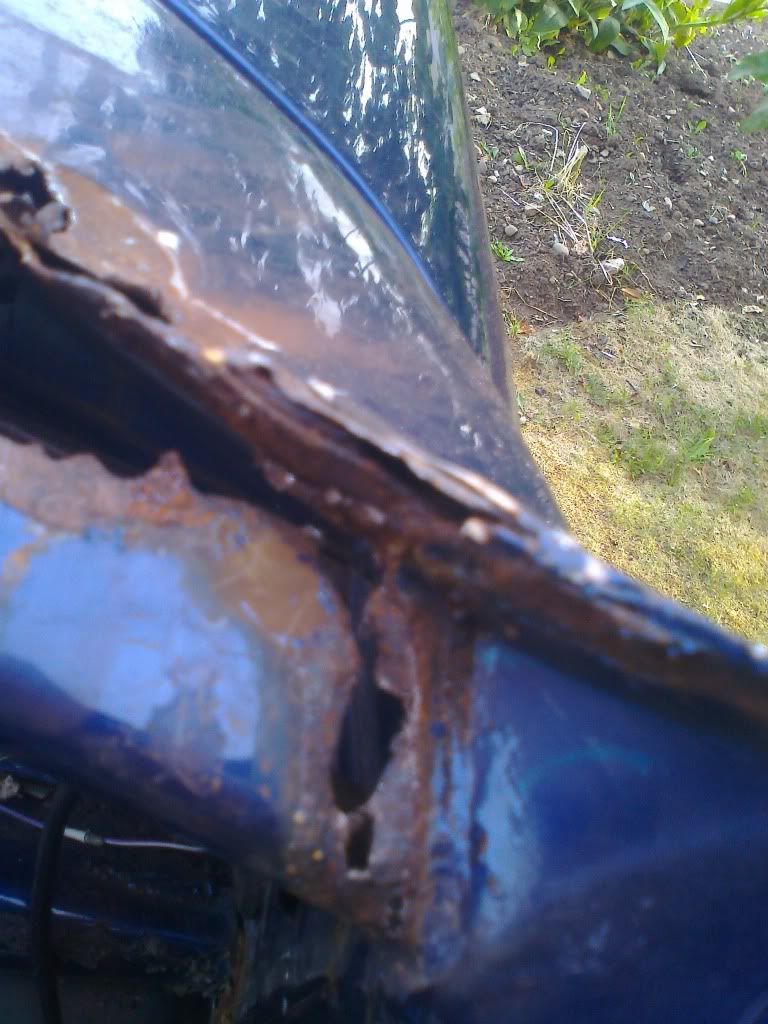
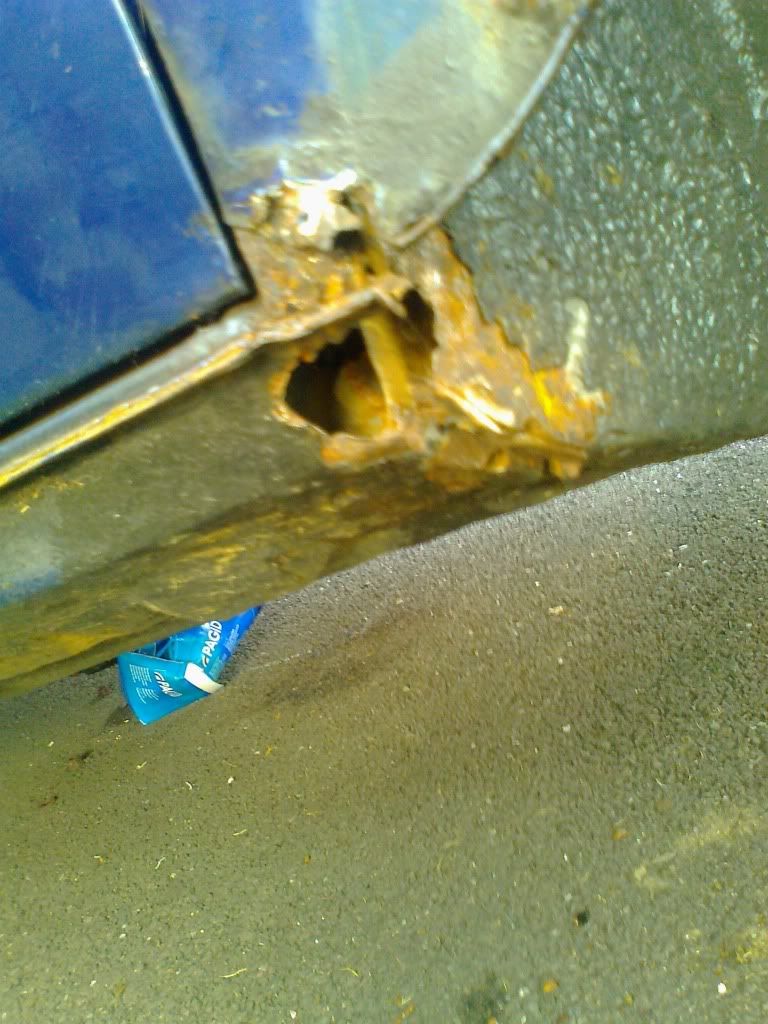
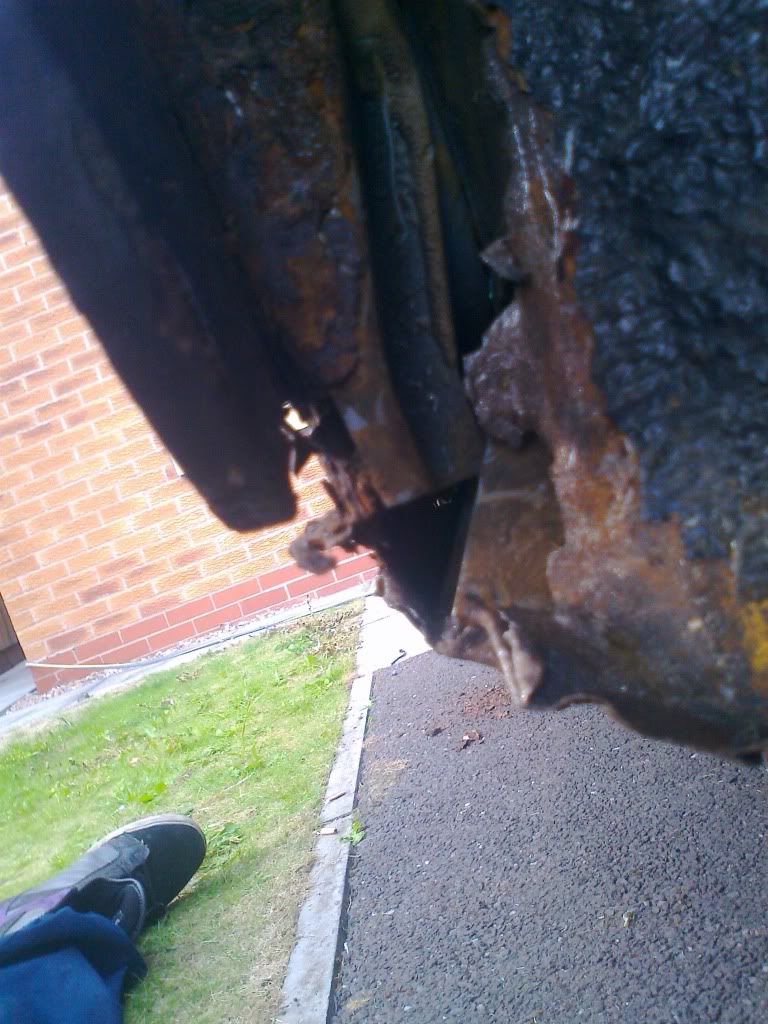
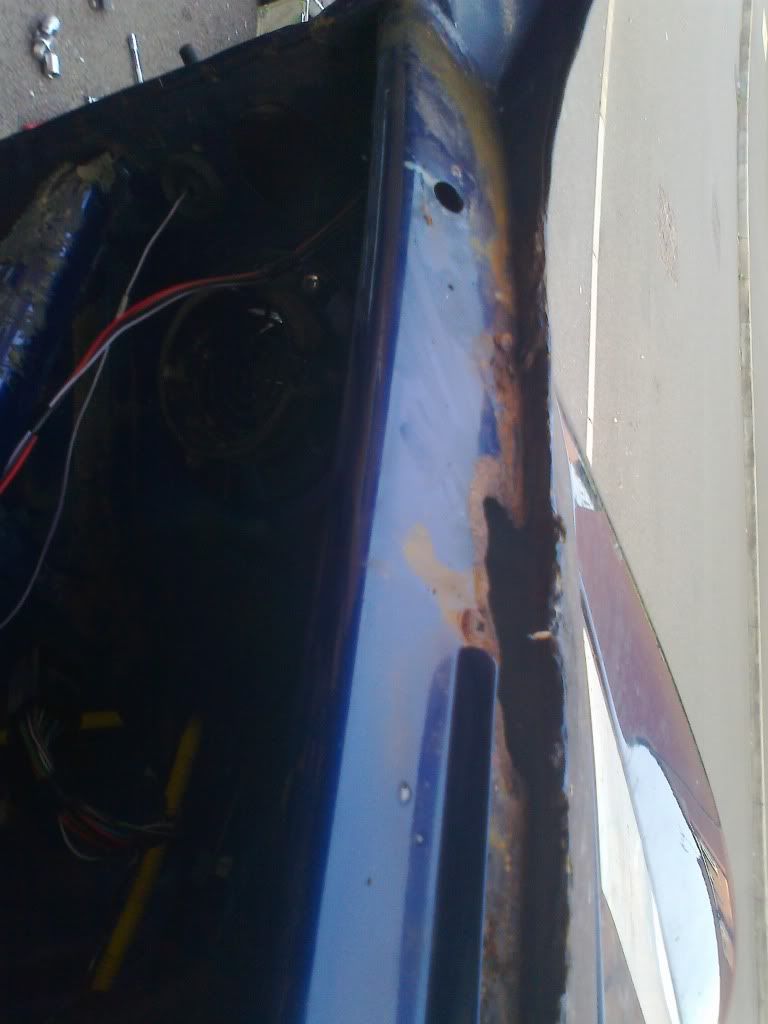
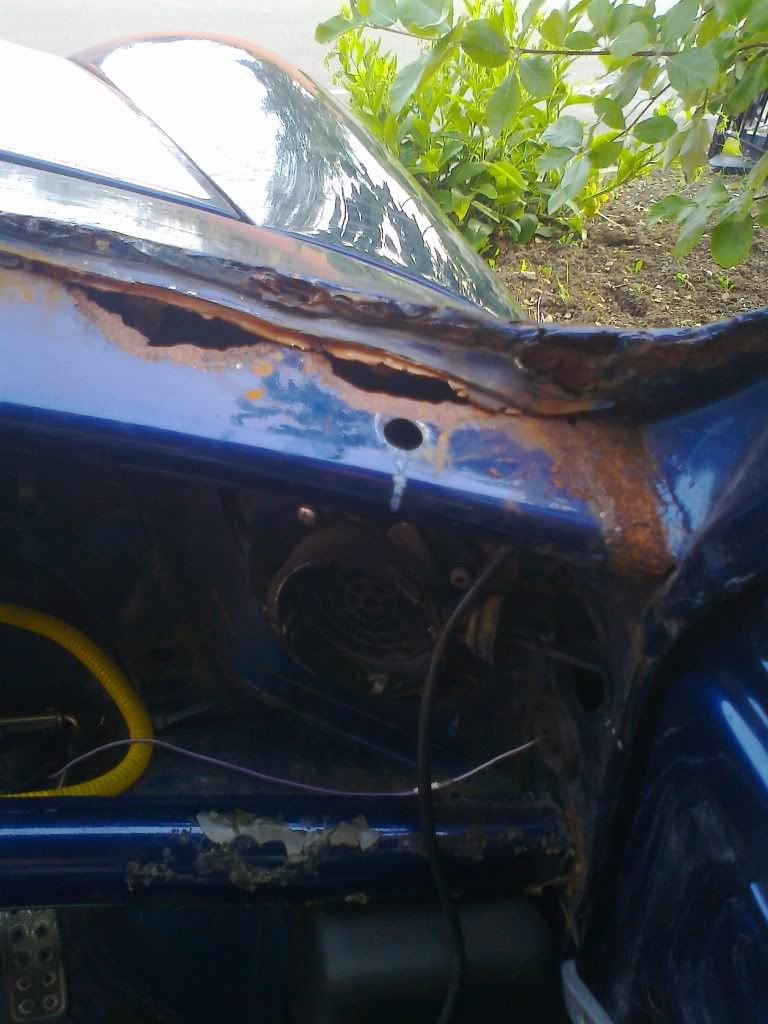
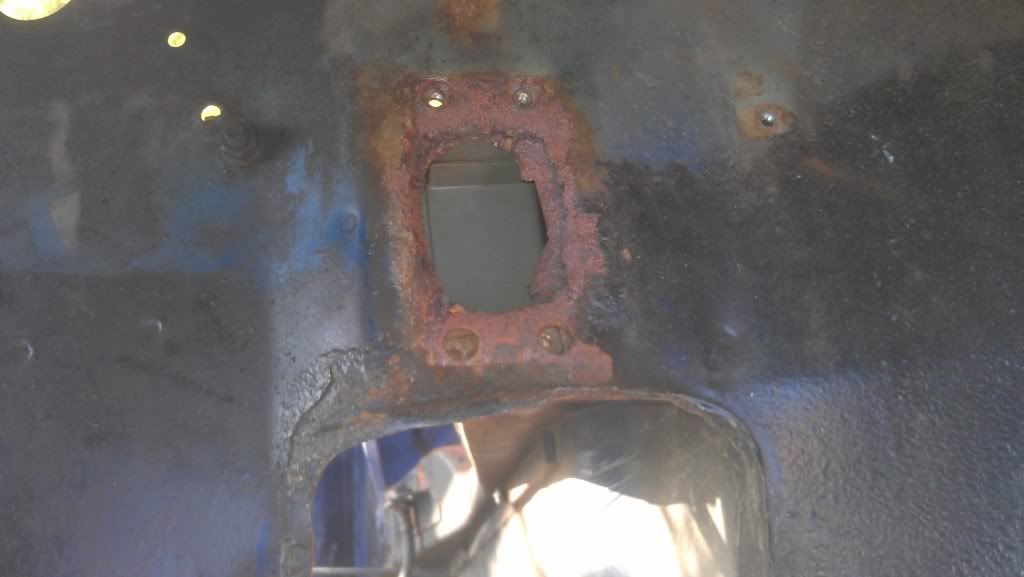
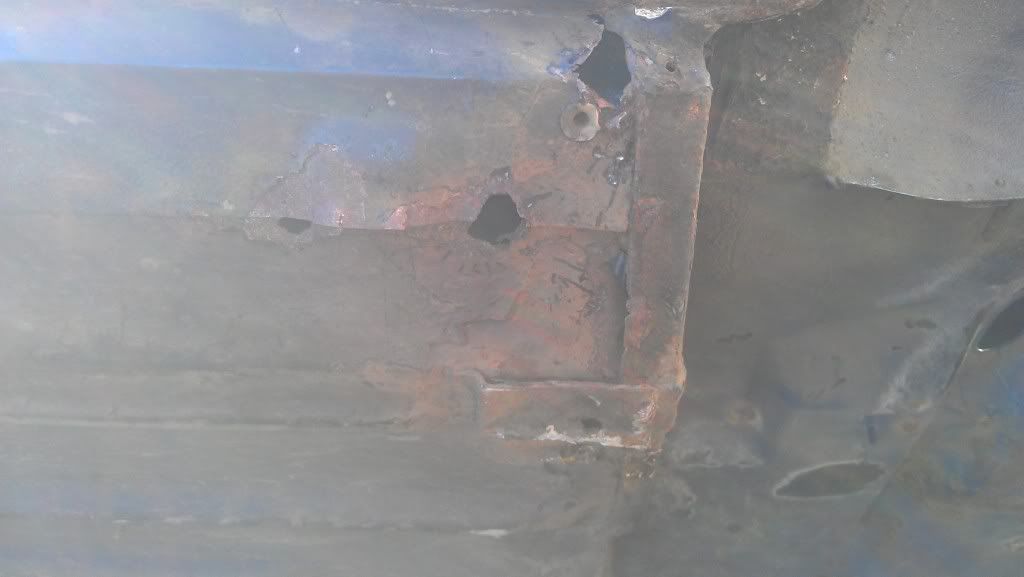
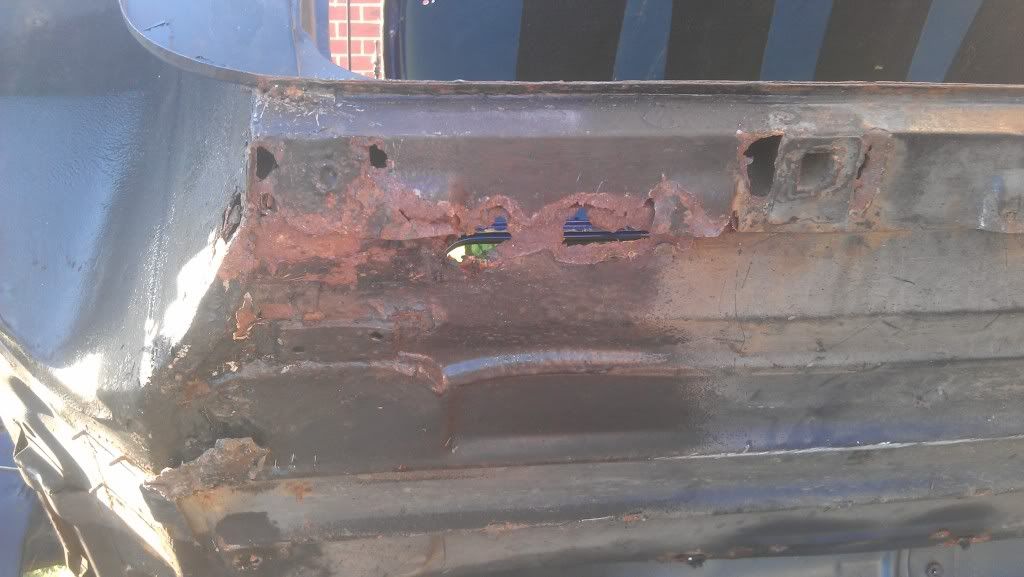
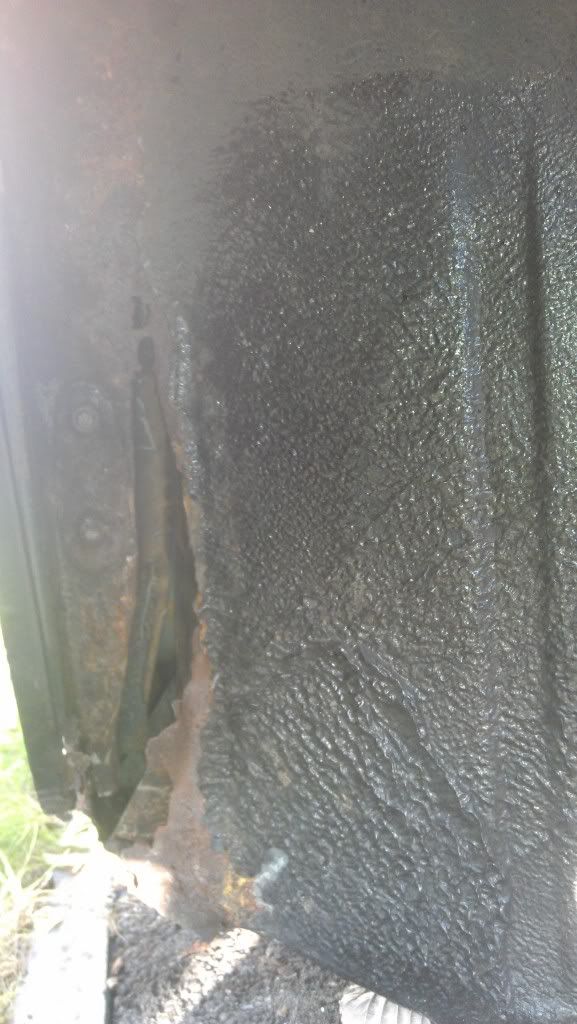
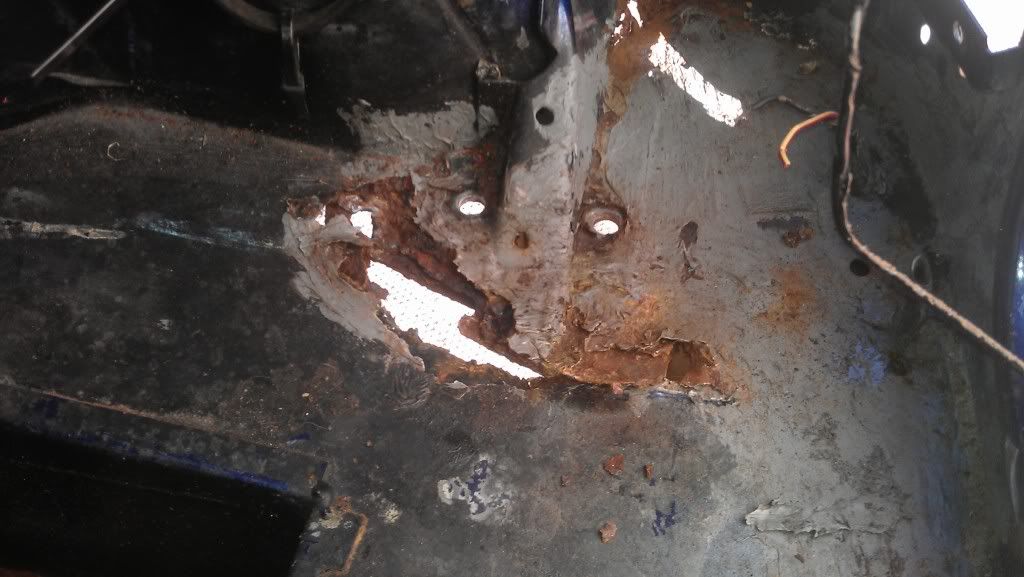
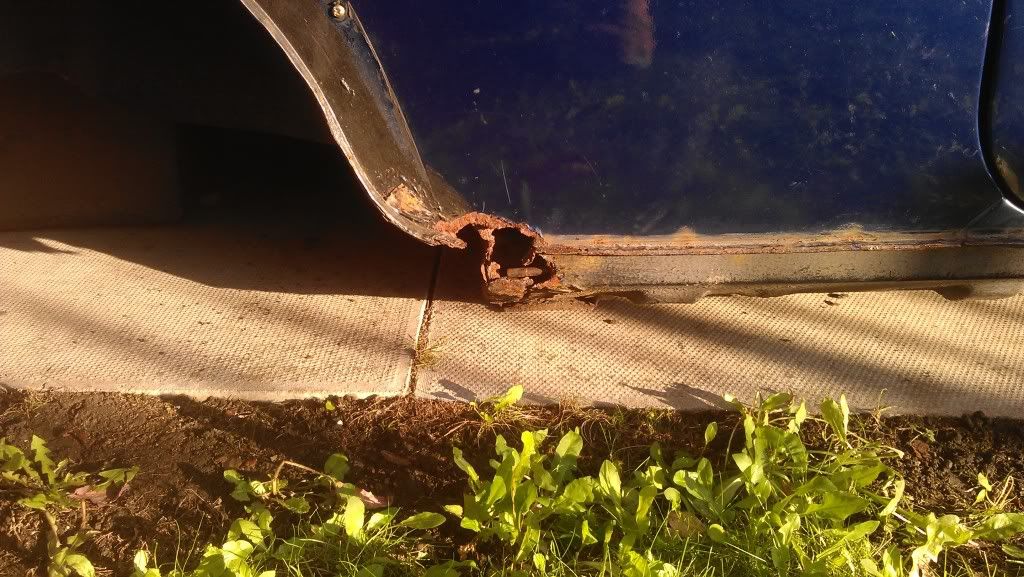
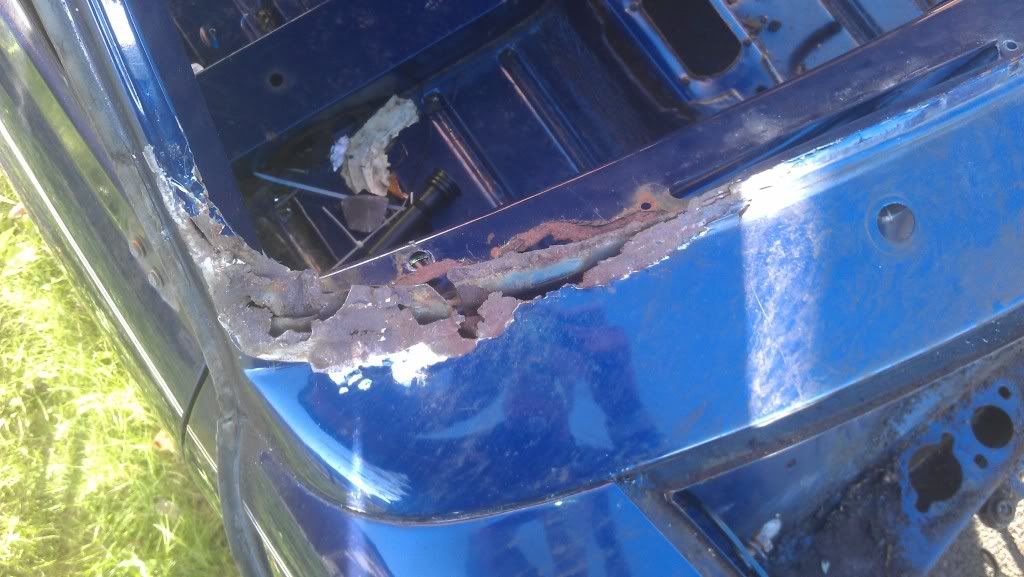
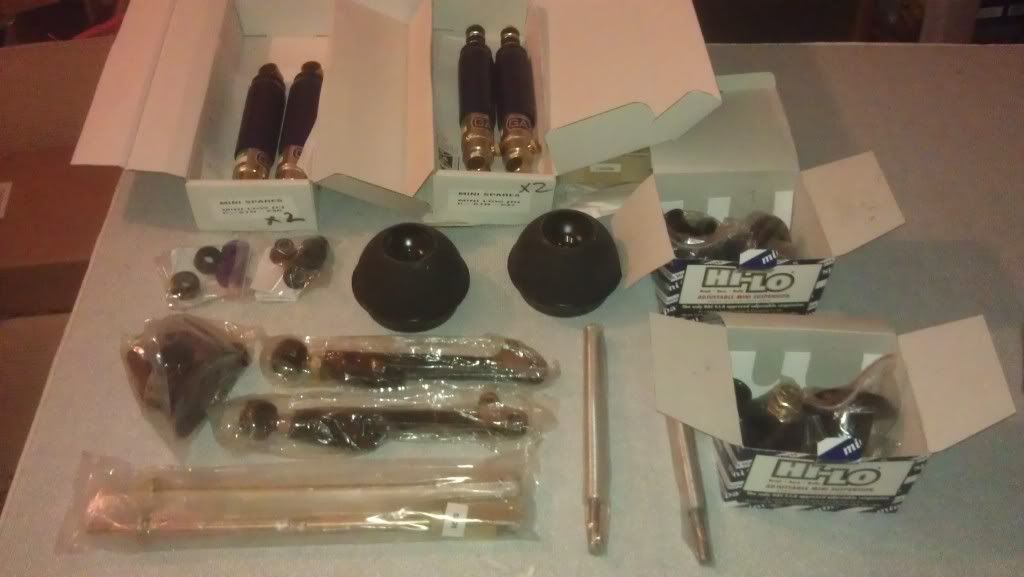
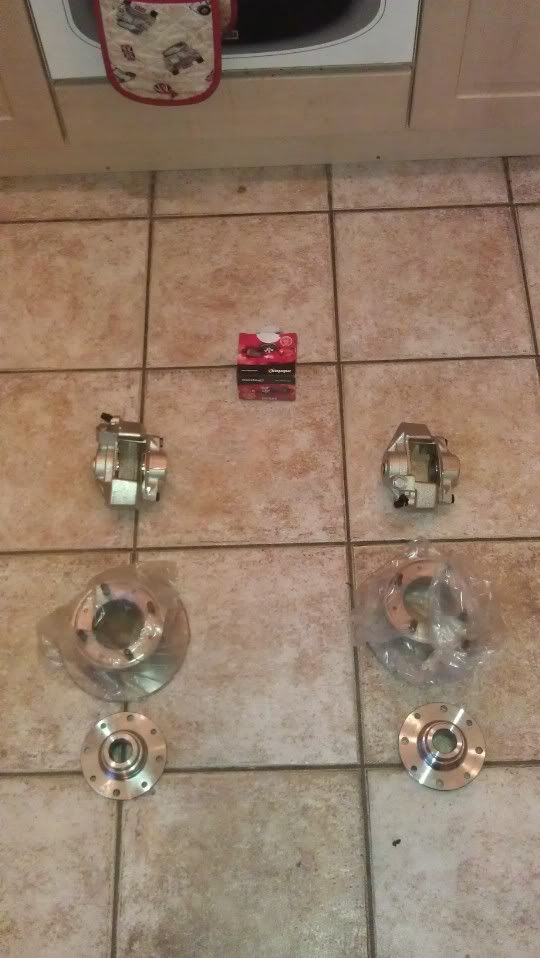
rather foolishly I bought the first car I went to look at (what I thought was a 1997 sportspack) I was (and still am) quite inexperieced with it all but I had a good root around in all the usual problem areas and it looked to be in good condition. so all excited I bought the car, i took it for a service after about one hundred miles and i was a little taken back as it needed:
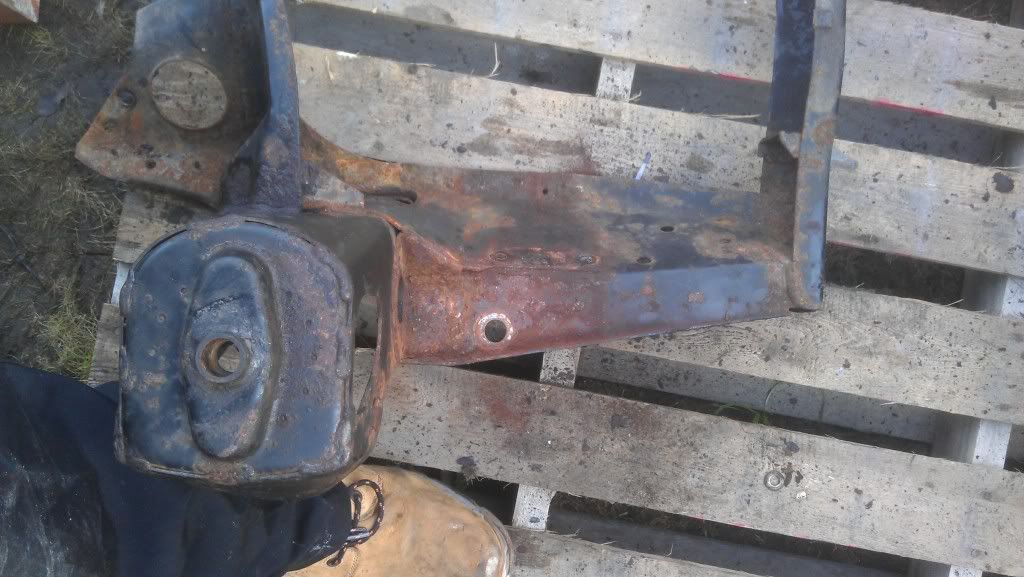
- Top and Bottom Ball joints each side
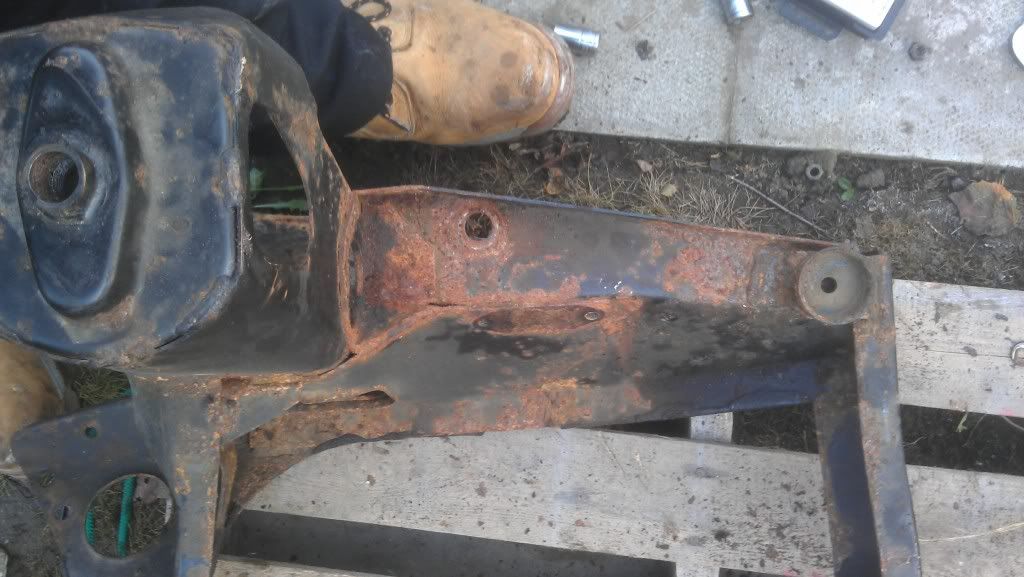
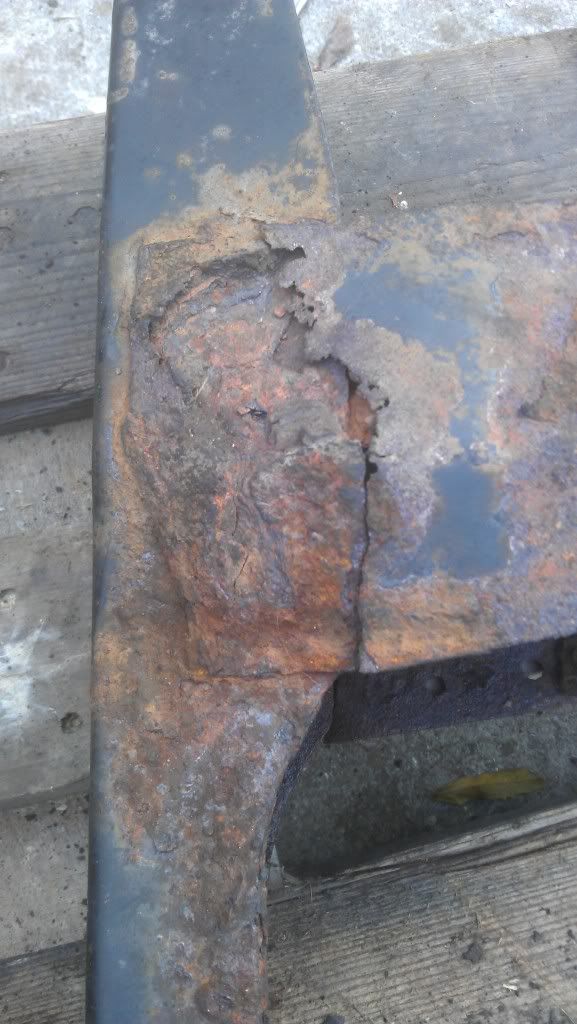
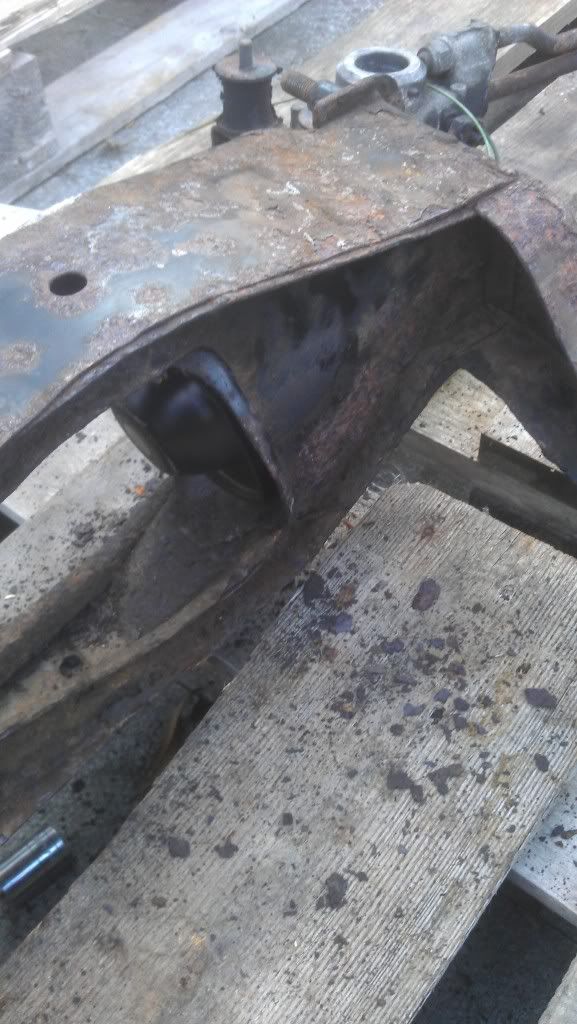
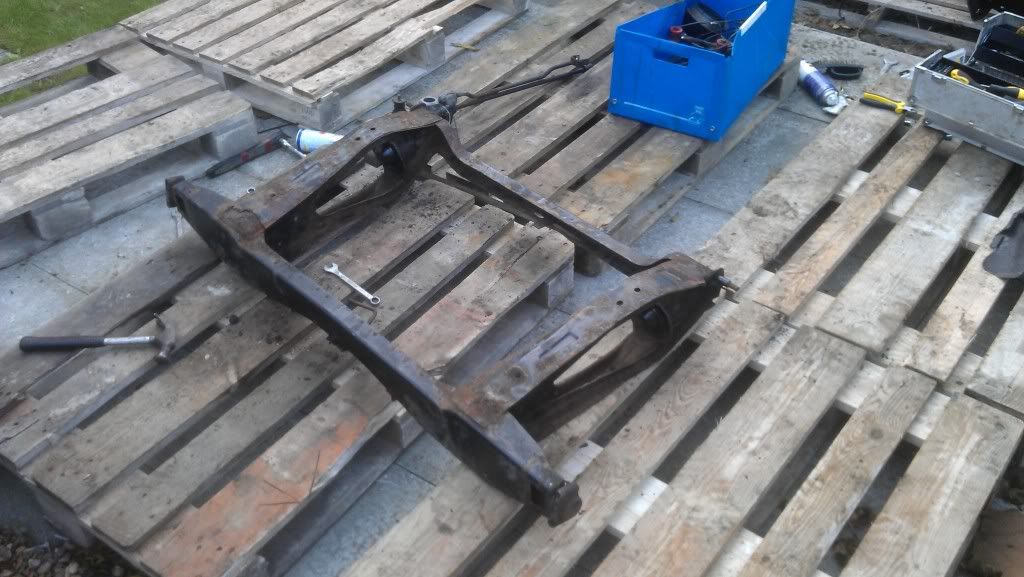
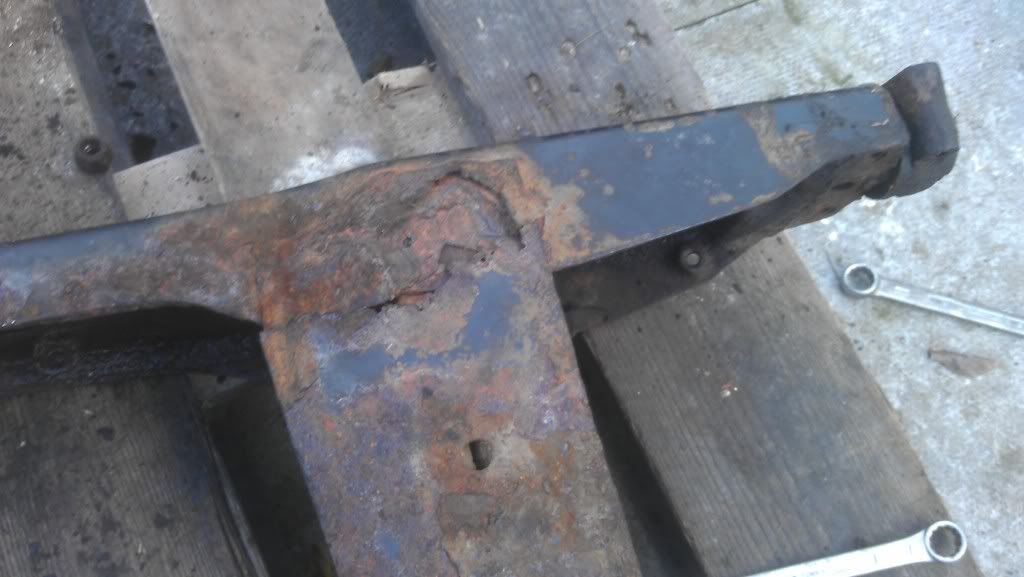
- Rear radius arms had a dangerous amount of play
- the manifold was blowing somewhere but they couldnt work out where ?!?
- the exhaust had dropped in the middle aswell.

thank fully I managed to get the money out of the guy who i bought it from to fix it.

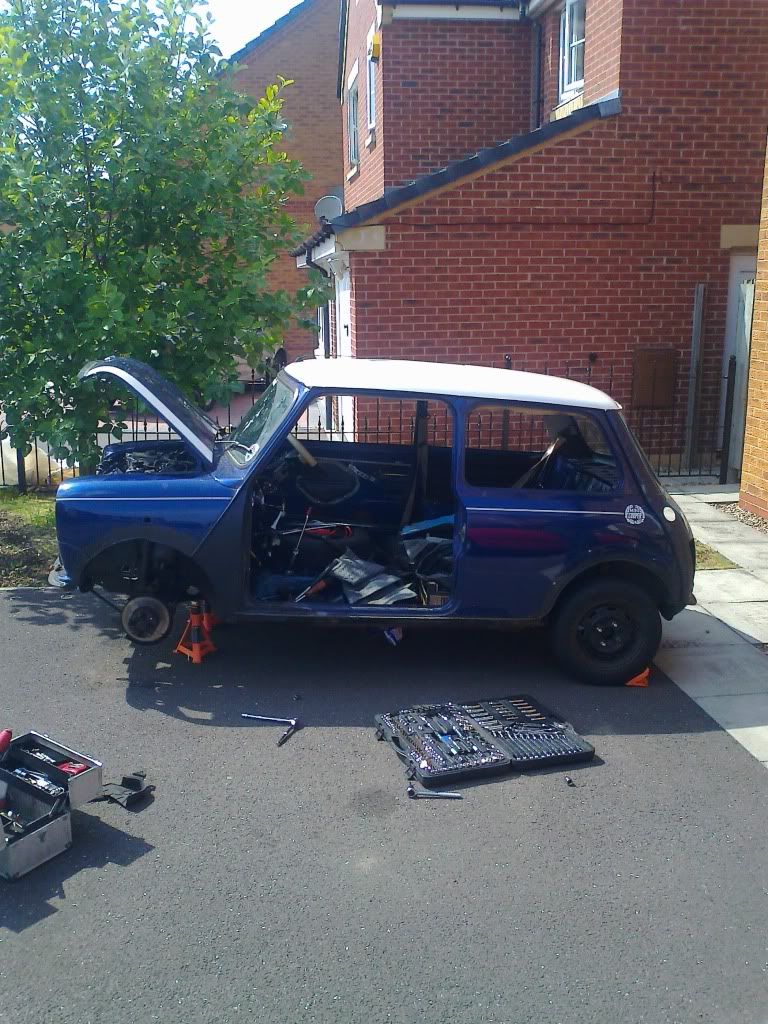
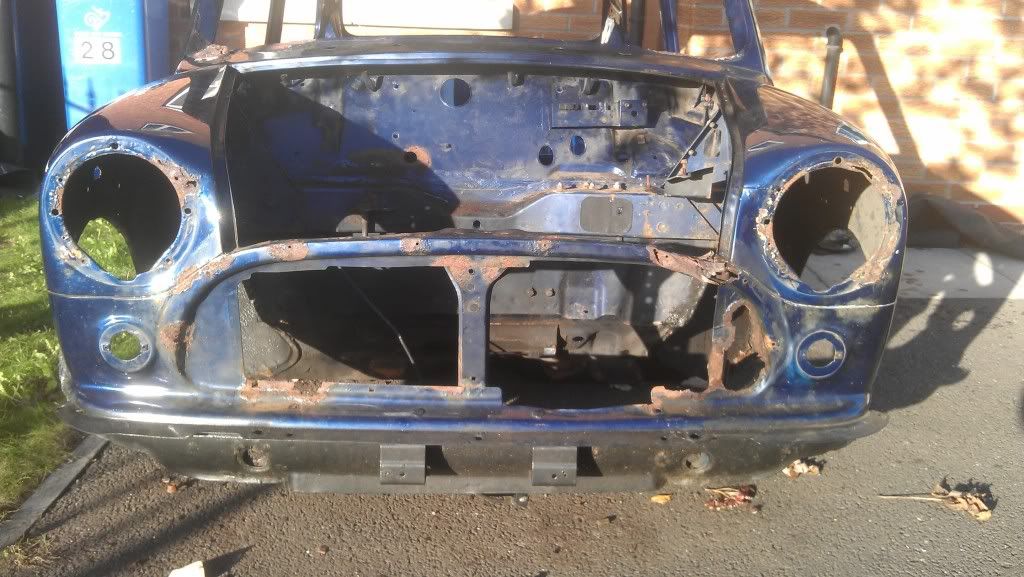
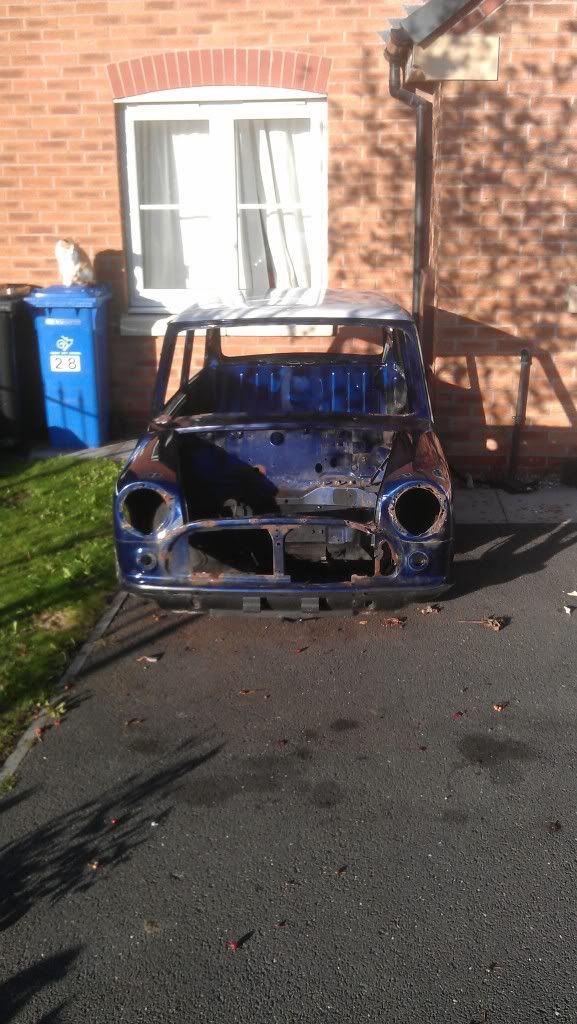
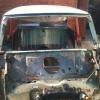
here is what the car looked like when I bought it:

Posted ImagePosted ImagePosted ImagePosted ImagePosted Image

#2 mark-tkm

mark-tkm

    Mini Mad

  • Members
  • PipPipPipPip
  • 168 posts
  • Location: Derby
  • Local Club: DCMOC

Posted 06 January 2012 - 01:13 AM

I drove the car for about 6 Months when a rather scary amount of rust began to show, I ended up getting the passenger side A-panel replaced, a repair to the inner wing and sill and some patching up in the boot.

Another couple of months after that I started poking around the front grille as there were some quite big rust bubbles under the lights, which then turned into this:

Posted Image
Posted Image
Posted Image
Posted Image
Posted Image
Posted Image

Posted ImagePosted ImagePosted ImagePosted ImagePosted ImagePosted ImagePosted ImagePosted ImagePosted ImagePosted Image


Im very lucky that the damper mount lasted out otherwise that could have been a bit messy!
Also I may have ended up having an unexpected hello from the rear subframe with the state of the mountings!

Now here comes the bit where some people may accuse me of cheating:

I cant weld, and at the moment dont have the time/space to learn and I got a quote for all of the welding that needed doing and it was going to be around 5500 including the panels. So i had quite a long think and chat with people and I though Sod it .. and I have a new shell from BMH on the way in around february. I had already put too much money into the car to sell it and when this is done I definately dont plan on selling it.

My ideas for the build are:

- keep the tahiti blue and white roof/bonent stripes
- Standard interior with retro touches ( classic steering wheel, also gonna have a 3 gauge dash
- WP arches or mini specials from minisport with 10x6 deep dish mini lights (im thinking polished lip with a gold centre)
- and most importantly - LOW

#3 mark-tkm

mark-tkm

    Mini Mad

  • Members
  • PipPipPipPip
  • 168 posts
  • Location: Derby
  • Local Club: DCMOC

Posted 06 January 2012 - 01:14 AM

The old shell has been taken away now, its supposedly going to be turned into a grass tracker/off road racer.

After All this I stripped the subframes and sent them off for blasting:

Posted ImagePosted ImagePosted ImagePosted ImagePosted ImagePosted ImagePosted Image


As you can see the subframes were pretty rusty! .. they have been welded up and ive given them the first coat of Epoxy mastic paint.

when stripping the front subframe I found that the Hi-Low trumpet had dislodged itself from the suspension cone and was cutting its way through! .. good job I found it when I did really:

Posted Image

We couldnt get any top repair plates, so we made a template and got some laser cut, we decided to get them a couple of mm thicker for strength

Posted Image

Posted Image

Posted Image

Once the subframes were blasted we got to painting, after another layer of Epoxy mastic I plan to seal any joins and then give it a light coat of stone chip

Posted Image
Posted Image
Posted Image

#4 mark-tkm

mark-tkm

    Mini Mad

  • Members
  • PipPipPipPip
  • 168 posts
  • Location: Derby
  • Local Club: DCMOC

Posted 06 January 2012 - 01:17 AM

Ive now got the majority of suspension and brake parts, just need some bearings and a few nuts and bolts etc.

Rear Adjustable camber brackets
Adjustable tie rods
Adjustable bottom arms
Polly Bushes
Lowered GAZ 36 point dampers
Genuine Hi-lows
2 new cones:

Posted Image
Posted Image

Also have some new rear backplates from minisport :) as mine were buggered!
Now we move onto the engine:

when i drained the engine oil some shards of what looks like brass came out with it:

Posted Image
Posted Image

Posted Image


block painted:

Posted Image


the engine is being rebuilt by a company called autospeed in Bollington (near macclesfield my hometown)

ive bought a few parts for the rebuild:


Oil Pump

Water Pump

Big End Bearings

Main Bearings

Timing Chain and Tensioner

Primary Oil Seal

Engine Gasket Set

Head Gasket Set

Gearbox Gasket Set

Oil Pressure Relief Valve


........................................................................................

Thats it so far guys,

any feedback is very much appreciated!

#5 mark-tkm

mark-tkm

    Mini Mad

  • Members
  • PipPipPipPip
  • 168 posts
  • Location: Derby
  • Local Club: DCMOC

Posted 06 January 2012 - 08:14 AM

I will be giving the subframes a final coat of epoxy mastic and then get to seam sealing and stone chipping this weekend :) Updates to follow.

#6 newnham500

newnham500

    Mini Mad

  • Members
  • PipPipPipPip
  • 221 posts
  • Location: weymouth

Posted 06 January 2012 - 09:04 AM

you took on some serious rust there, god i hate rust. very nice job though, did you find out what the shards of metal where

#7 Ryang556

Ryang556

    Up Into Fourth

  • Members
  • PipPipPipPipPipPipPipPipPip
  • 2,747 posts
  • Location: Worcestershire
  • Local Club: Top Mini

Posted 06 January 2012 - 09:11 AM

Bit of a worrying amount of rust >_<

At least it's all getting sorted properly by the looks of things

Good job! :lol:

#8 mark-tkm

mark-tkm

    Mini Mad

  • Members
  • PipPipPipPip
  • 168 posts
  • Location: Derby
  • Local Club: DCMOC

Posted 06 January 2012 - 11:08 AM

Thanks a lot! :):)

i was a tad worried by the amount of rust myself!

No I still dont know what the shards of metal are! I was hoping that someone on the forum could shed some light. Im taking the bits that come out of the engine over the to chap whos rebuilding it for him to have a look.

#9 mini_in_progress

mini_in_progress

    Super Mini Mad

  • Members
  • PipPipPipPipPipPip
  • 641 posts

Posted 06 January 2012 - 11:43 AM

i have yet to strip a mini engine but by that amount of metal them sizes id be checking bearings in rods and gearbox first buddy

good luck with your rebuild

#10 mark-tkm

mark-tkm

    Mini Mad

  • Members
  • PipPipPipPip
  • 168 posts
  • Location: Derby
  • Local Club: DCMOC

Posted 06 January 2012 - 11:53 AM

i have yet to strip a mini engine but by that amount of metal them sizes id be checking bearings in rods and gearbox first buddy

good luck with your rebuild


Okay thanks! my initial thought were thrust washers? I dont know much about the engines myself though

#11 ZEBERDEE

ZEBERDEE

    Mini Mad

  • Noobies
  • PipPipPipPip
  • 110 posts
  • Location: Surrey
  • Local Club: Box Hill Mini Club

Posted 06 January 2012 - 03:50 PM

Cant believe that there was that amount of rust on your car :ohno:
Looking forward to seeing when you get the new shell and get it all put back together.

#12 mark-tkm

mark-tkm

    Mini Mad

  • Members
  • PipPipPipPip
  • 168 posts
  • Location: Derby
  • Local Club: DCMOC

Posted 06 January 2012 - 04:03 PM

I dont understand myself! .. it looked in alright nick! .. and then it just disintegrated!

cheers man, I cant wait to get the new shell :) :D :D

#13 Ace Alex

Ace Alex

    Formally known as Pedal Pusher

  • Members
  • PipPipPipPipPip
  • 330 posts
  • Location: Somewhere

Posted 06 January 2012 - 08:25 PM

Another interesting Mpi project! The amount of underlying rust looks very daunting! Especially when I finally decide to refurbish my Sportspack!

What plan's do you have for the exterior? This project looks very promising. :-)

#14 chrisj

chrisj

    Mini Mad

  • Members
  • PipPipPipPip
  • 283 posts
  • Location: Leicestershire

Posted 07 January 2012 - 11:23 AM

I can't believe the rust on this, I've been looking at a few sports pack for a show car but this has seriously put me off.

I think uve gone the right way with a new shell, what's the plan for rust protection on the new shell? Well done for saving this though, many would have given up!

Chris

#15 mark-tkm

mark-tkm

    Mini Mad

  • Members
  • PipPipPipPip
  • 168 posts
  • Location: Derby
  • Local Club: DCMOC

Posted 08 January 2012 - 09:42 AM

Another interesting Mpi project! The amount of underlying rust looks very daunting! Especially when I finally decide to refurbish my Sportspack!

What plan's do you have for the exterior? This project looks very promising. :-)


for the exterior im thinking keeping the tahiti blue as I love the colour, with white roof and potentially bonnet stripes again.

Chrome bullet mirrors,

MK3 rear lights and removing the rear lamp from the boot and smoothing the holes off.

either Wood and picket arches or Mini special arches from mini sport

and 10x6 deep dish minilights .. im looking at gold centre with a polished lip atm.

so all in all im going for a slight modern/retro look :)


2 user(s) are reading this topic

0 members, 2 guests, 0 anonymous users