Jump to content


Photo
- - - - -

14 Year Old Takes On 3 Year Mayfair Complete Rebuild


  • Please log in to reply
118 replies to this topic

#1 lawrie124

lawrie124

    Camshaft & Stage Two Head

  • TMF+ Member
  • PipPipPipPipPipPipPipPip
  • 1,710 posts
  • Location: Reading

Posted 22 March 2012 - 08:25 AM

Well one lucky 14 year old (Lawrie) got his first road going mini for his birthday!

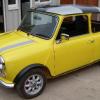
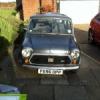
All told, it’s actually structurally very solid, with a lot of the welding work having already been done (and properly at that!) although we accept that until it’s stripped down you never know what horrors might await. Most of the car is complete too, bar the engine, but we’ve got a few of those kicking around. So apart from the dash clocks, front grille, front lights and indicator lenses it’s pretty much there.

So, phase one is as follows:

. remove subframes and strip to bare shell
. remove front, wings, A panels, and scuttle, and replace
. complete any other welding
. prep and paint shell in red oxide

Budget: £300 (£200 for panels, £100 for paint/consumables, and contingency)

Timeframe: 3 months (starting from when we’ve finished and MOT’d a clubman estate that is taking up the garage space)

As it’s being built for a 17 year old to insure, it will have to remain pretty standard (so no roll cages, harnesses etc) and the idea is to put disks up front and run it on 12” minilites (the 10” Dunlops are for sale to help pay for the new front panels).

The plan is to have a rolling shell by the end of the year, with freshly refurbished subframes, all new bushes, shocks etc. That doesn’t sound particularly ambitious, but we also have 2 oval circuit mini’s to upkeep and race which eats into a lot of time.

Lawrie’s main focus for the last 24 hours has been studying every picture in MiniWorld for the last 3 years (thanks Leaky!) for paint colour inspiration; I think he’s probably exhausted every know permutation now, but building a “stealth” grey/black car seems to be a consistent idea, or maybe orange, of maybe blue, and so it goes on!

Do wish him luck; will post up some pictures of the extent of the tinworm once it’s up in the air and stripping starts.

Mike (Dad)

Attached Files


#2 SamMason

SamMason

    Mini Mad

  • Members
  • PipPipPipPip
  • 235 posts
  • Location: North Devon

Posted 22 March 2012 - 09:52 AM

Wow.. Top marks to the lad! At least he has his target date.

I'll be watching this closely, as I plan to do a similar kind of build.. Only for my 21st & with a bit more 'go' ;D

Good luck to him, although, I dare say you'll get roped in at times >_<

#3 LTSwaby

LTSwaby

    On The Road

  • Noobies
  • PipPip
  • 48 posts
  • Location: Barnsley
  • Local Club: Barnsley mini club

Posted 22 March 2012 - 04:50 PM

hi i am 14 and got two minis a white 1976 mini 1000 with a blue roof and a cadburys purple 1987 mini city auto withe lime green trim that need lots of new pannels and lots of welding because they have rotten in awkward places.
so good look and if things get hard don't give up

Edited by LTSwaby, 22 March 2012 - 04:52 PM.


#4 minimad10

minimad10

    Mini Mad

  • Just Joined
  • PipPipPipPip
  • 114 posts
  • Location: south wales

Posted 22 March 2012 - 07:36 PM

hi im 15 and i got a 91 mayfair im restoring and looks like a nice project i will keep my eyes on this

#5 Neildanks

Neildanks

    Captain Slow!!!

  • Members
  • PipPipPipPipPipPipPip
  • 889 posts
  • Location: West Bromwich

Posted 22 March 2012 - 08:02 PM

Nice to see you young uns having a go instead of hanging on street corners. remember that theres lots of members on here who will gladly help if you get stuck just ask.

#6 LiamB

LiamB

    Mini Mad

  • Noobies
  • PipPipPipPip
  • 135 posts
  • Location: Astwood, Milton Keynes.

Posted 22 March 2012 - 08:08 PM

Same situation here! Got myself a nice little mayfair to restore.

Working on a budget isn't easy..

#7 Neildanks

Neildanks

    Captain Slow!!!

  • Members
  • PipPipPipPipPipPipPip
  • 889 posts
  • Location: West Bromwich

Posted 22 March 2012 - 08:49 PM

Try to get to the shows and get there early straight to the booters get your bargains that way and save your admision prices on parts

#8 leaky

leaky

    Iv never hit a penguin in the face with a casserole

  • TMF+ Member
  • PipPipPipPipPipPipPipPipPipPip
  • 6,890 posts
  • Location: Costa Del Tadley
  • Local Club: Basingstoke Mini Club

Posted 23 March 2012 - 12:17 AM

Good luck with this! I know you're do a good job.

Stealth is the way to go! Black and gray would look cool but maybe with a few bits painted a nice bright colour.

#9 Ryang556

Ryang556

    Up Into Fourth

  • Members
  • PipPipPipPipPipPipPipPipPip
  • 2,747 posts
  • Location: Worcestershire
  • Local Club: Top Mini

Posted 23 March 2012 - 12:50 AM

Any young people should be taken off the street and made to restore mini's :shifty:

#10 lawrie124

lawrie124

    Camshaft & Stage Two Head

  • TMF+ Member
  • PipPipPipPipPipPipPipPip
  • 1,710 posts
  • Location: Reading

Posted 23 March 2012 - 07:24 AM

Thanks for all the positive comments. Can't wait to get cracking on this little project, just one other car to finish and MOT first.

Bear with us for a few weeks before the 'photos start.

And yes, every youngster should be taught the basics of how a car works. Frightening how many can't change a wheel of check the oil!

Mike

#11 Mini 360

Mini 360

    Up Into Fourth

  • Members
  • PipPipPipPipPipPipPipPipPip
  • 4,933 posts
  • Location: Aberdeenshire
  • Local Club: Independent

Posted 27 March 2012 - 09:55 AM

Good luck Lawrie and of course dad! Ah the memories of being 13 working on the car with my dad....... :)

#12 lawrie124

lawrie124

    Camshaft & Stage Two Head

  • TMF+ Member
  • PipPipPipPipPipPipPipPip
  • 1,710 posts
  • Location: Reading

Posted 28 March 2012 - 08:47 PM

here's afew pictures to show recent progress.

We rolled the car into the garage on Sunday afternoon, stripped out the interior, and started the work of sanding and slapping on the red oxide.

Only found a couple of nasty pataches that need welding, so far so good!

Hope to be at the stage of finishing all the red oxide (including the underneath) in 3 or 4 weeks, then we start the welding, then off with the subframes. New front wings, scuttle and A panels ordered, which will reduce the amount of painting required!

Lawrie

Attached Files


#13 grahama

grahama

    Up Into Fourth

  • Members
  • PipPipPipPipPipPipPipPipPip
  • 2,442 posts
  • Location: Warrington
  • Local Club: None in my area !!

Posted 28 March 2012 - 09:01 PM

Hi,

like the planning ! I went through that stage too, only 2 years in I am aproaching a welded shell and rebuilt mechanicals. 3 months is a great target but minis do have a habit of biting you on the bum when you are looking the other way !! Mine looked pretty much mint, but lots needed doing, some mot waranted, some me being too particular, but glad I did it all now.

Please don't leave anything to do in the future as it will come back to haunt you. Anyway, you look like you are getting on nicely and will follow your build as my life has descended into a 'mini blur' now and my laptop wont do anything else but look at build threads, lol !!

Graham

#14 Sam Walters

Sam Walters

    Up Into Fourth

  • Members
  • PipPipPipPipPipPipPipPipPip
  • 2,765 posts

Posted 28 March 2012 - 09:19 PM

Dont ever use "red oxide primer" on a shell.

Its porus, it rusts. I know this as i stripped down an entire bootlid. It turned me pink and under the red oxide was surface rust.

Given your budget id etch bare metal then roller it.

#15 grahama

grahama

    Up Into Fourth

  • Members
  • PipPipPipPipPipPipPipPipPip
  • 2,442 posts
  • Location: Warrington
  • Local Club: None in my area !!

Posted 28 March 2012 - 09:21 PM

I agree, red oxided my flitch panels last Winter to protect them, surface rust in the Spring. Not as good as the old lead oxide !!


2 user(s) are reading this topic

0 members, 1 guests, 0 anonymous users


    Bing (1)