Yeah thats about what i was getting. Anything from 411 to 416mm, but there had been a fair bit of bodgery in the past and bits missing etc. I dont think the windscreen had sealed very well in the past, hence the leakage and rot.


1996 Mini 1.3I Yeah You Guessed It... Lots Of Rust!
Started by
n1tr0_9
, Aug 20 2012 04:52 PM
99 replies to this topic
#61

n1tr0_9
-
- Noobies
-

- 59 posts
Stage One Kit Fitted
- Location: Cranbrook, Kent
Posted 12 October 2012 - 09:01 AM
#62
n1tr0_9
-
- Noobies
-
- 59 posts
Stage One Kit Fitted
- Location: Cranbrook, Kent
Posted 12 October 2012 - 06:20 PM
Today i removed what was left of the scuttle panel and cleaned up the bulkhead flange. Then i zinc'd . With the top side of the scuttle closing panels exposed i covered them in rust neutraliser.

Then went over the top of that with black hamerite.

I then welded the dash panel to the bulkhead with little stitches of weld that i could then grind back. I refitted the dash top cover so i knew it would all fit properly.

Then i tacked in the new scuttle repair. This took a while to get aligned properly, and it was a bit of a fiddle.


Before committing to welding it in fully, i refitted the windscreen seal and windscreen to make sure it would still fit. I didnt fit the beading but it shouldnt make any difference.

Success! so i carried on welding. I got a bit of heat distortion, so its going to need a skim of filler, but there was plenty on here before so i dont feel too bad. At least its solid metal underneath!

#63
Minidarren83
-

- Members
-
- 1,207 posts
One Carb Or Two?
- Location: Stanford Le hope
Posted 12 October 2012 - 07:18 PM
now that is what you call a brave repair top work mate
#64
n1tr0_9
-
- Noobies
-
- 59 posts
Stage One Kit Fitted
- Location: Cranbrook, Kent
Posted 15 October 2012 - 06:07 PM
Thanks. Yeah i was pretty worried it would all warp and go a funny shape once it was cut out, but it was ok. Glad i welded that beam in though!
Now to repair the passenger side footwell, which looked like this


So i made a few templates before cutting the rot out. I wanted to replicate what was originally there as much as possible which was fairly hard.
Then i made my first patch.

And welded it in.


Then welded on my 2nd patch.

Then i made the third and final patch which i was particularly proud off. I tried and partially succeeded in replicating the channel that is pressed into the bullhead here. I did this using a blowtorch, the vice and a hammer and chisel.


Then i put the car back on the floor for the first time in ages. Good thing was that the doors all still align which is good. I then started mocking up the front.


#65
n1tr0_9
-
- Noobies
-
- 59 posts
Stage One Kit Fitted
- Location: Cranbrook, Kent
Posted 16 October 2012 - 05:34 PM
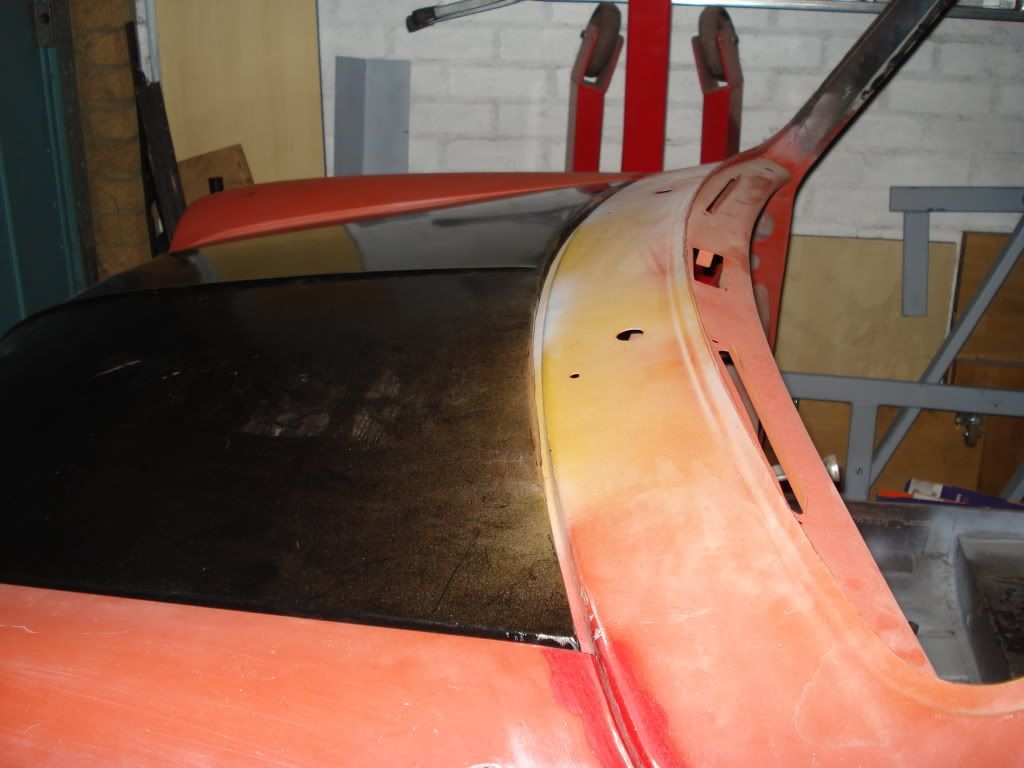
Had quite a frustrating day today. I bolted on the brand new bonnet only to find i couldnt close it. The bonnet comes with hinge points for mk1 and mk3 cvars and teh mk1 hinge points were hitting the relays. So i had to trim them off.

Next it was hitting what i think was another way of securing the bonnet stay, so that had to be cut off. So i had to salvage the bonnet stay holder form the old bonnet, so a bit of drilling and filling and it was sorted.

So finally i had enough clearance to shut the bonnet.... which gave me a massive gap at the rear to the scuttle. The hinges are slotted but there was no way this was going to be closed from just using the adjustment slots. I thought about using a file to open up the slots a bit more, but that wouldnt give me enough movement and i would ruinn th ebracket. Out of curiosity i measured the mount locations on the new bonnet vs the old. There was about 12mm difference which was why the gap was so big. So i had to drill out the spot weld on the new bonnet and re weld the hinges in a better location. I made a card template of the old bonnet location to help me lign it up properly.


Which gave me a much better gap at teh back. I took the front panel off again and prepped it for spot welding then began to clamp the front of the car together. Its a bit of a nightmare. It looks total crap at the moment, with bits touching and massive gaps, but ill get there in the end.


#66
n1tr0_9
-
- Noobies
-
- 59 posts
Stage One Kit Fitted
- Location: Cranbrook, Kent
Posted 18 October 2012 - 07:14 PM
Ive spent another frustrating day trying to get all the front end panels to fit together. Its been together, then apart more times than i care to remember. I ran out of clamps, so ive been using self tapping screws in a few places. I had to cut and reweld the sides of the bonnet and the rest ive fettled. Ill start welding it up tomorrow. Here are some pics of progress so far.


I took it apart again to prep the panels. I keyed the front panel on the inside and gave it some etch primer and then gloss black as the paint it came in was suspect. I zinc'd the bits that will be welded.


I took it apart again to prep the panels. I keyed the front panel on the inside and gave it some etch primer and then gloss black as the paint it came in was suspect. I zinc'd the bits that will be welded.


#67
sonikk4
-

- Admin
-
- 16,089 posts
Twisted Paint Polisher!!!
- Name: Neil
- Location: Oxfordshire
Posted 18 October 2012 - 07:36 PM
I know its a bit late now but you could have extended the hinge itself which is what i did on Project Erm. I have to say those new pattern bonnets are not that good
Came out alright but that was the least of my worries with the bonnet
Came out alright but that was the least of my worries with the bonnet
#68
n1tr0_9
-
- Noobies
-
- 59 posts
Stage One Kit Fitted
- Location: Cranbrook, Kent
Posted 18 October 2012 - 09:39 PM
That was an option, but i thought it would look strange. The bonnets are not only a poor fit, but the frame and hinges are so flimsy that they move alot relative to the skin. So i think i may put some bond seal between the frame and the outer skin near the hinges.
#69
n1tr0_9
-
- Noobies
-
- 59 posts
Stage One Kit Fitted
- Location: Cranbrook, Kent
Posted 19 October 2012 - 05:17 PM
This morning i put underbody seal on the back side of the front panel, in places which would be hard to get to once it was welded on.

I then seam sealed under the scuttle closing panels and other bits which would be hard to get to once the wings were on.

Then i gave the a-panels some more prep. I took all the crap paint off the inside, zinc'd parts to be welded and then gave the inside a coat of etch primer.

Then i ran out of stuff to prep and bit the bullet and started welding it all together. Its not quite finished yet, i have some more welds to do underneath, but its all solid and isnt going to come off again!


Tomorrow i hope to finish the welding, then fit the sportspack arches. Then i should only need another day to do misc touch up welds and then seal little bits and pieces, then its off for paint.
#70
n1tr0_9
-
- Noobies
-
- 59 posts
Stage One Kit Fitted
- Location: Cranbrook, Kent
Posted 20 October 2012 - 02:42 PM
Finished welding up the front, then ground down some of the welds along the tops of the wings so I had the bonnet off.
Ive put the big wheels on, and started looking at how the arches are going to fit. At this point its just taped on, but it looks really high up, so I'm gonna check out photos of others on the internet to see how they are meant to fit.

Ive put the big wheels on, and started looking at how the arches are going to fit. At this point its just taped on, but it looks really high up, so I'm gonna check out photos of others on the internet to see how they are meant to fit.

#71
Mini_Matt
-
- Noobies
-
- 96 posts
Stage One Kit Fitted
Posted 22 October 2012 - 12:48 PM
This is looking good. What size are those wheels?
#72
SMP
-
- Members
-
- 346 posts
Speeding Along Now
Posted 22 October 2012 - 05:40 PM
Just read thru the whole thread -some really good work here. Very impressed with your cutting skills - that scuttle repair was brilliant.
Steve
Steve
#73
n1tr0_9
-
- Noobies
-
- 59 posts
Stage One Kit Fitted
- Location: Cranbrook, Kent
Posted 22 October 2012 - 06:00 PM
Thanks guys. The wheels are 13" not sure how wide. Yeah the scuttle repair was a pain.
Put the arches on today. Even though these are fairly poor quality with very thin gel coat, they fit pretty well. I welded bolts to the backside of the mounting tabs because it was a pain in the butt having to keep doing up the fastenings with such poor access.


I put the bonnet back on after having given it a bit more adjustment.

I have someone coming round tomorrow to give me a quote for painting it.
#74
n1tr0_9
-
- Noobies
-
- 59 posts
Stage One Kit Fitted
- Location: Cranbrook, Kent
Posted 05 November 2012 - 10:13 PM
Well got a quote for paint, but they couldnt do it till January, so the car is going to be taken back north to get painted. Ill be taking it on Thursday, so ive got 3 days to finish all the metal work.
So i had a long day on the front arches. I adjusted the sportspack arches again as i wasnt happy they were level. I had to enlarge the front 2 holes on both left and right side of the car. I then welded penny washers on the inside, so that it was neat.
Then i set about trimming the arches so that if the car gets lowered in the future they wont rub on the tyres. I used the templates from mini spares website. That showed i needed to cut an inch off all the way round. So i measured up and got cutting!

That left me with this


The remaining wings were now quite floppy, so i used the bits i cut off and some new metal to create a new arch lip flange. I then stitch welded this along the top edge and all the way along underneath. So its strong, should be easy to seal, and if the tyre does hit then it will hit a flat face not a sharp edge. As the radius of the new lip was greater than the original, i had to cut slots and open it up to give the right curve. All of it was zinc'd before and after.


I also cleaned up the other welds under the front and zinc'd all the seams

Starting the other side

Welded

Inside

This actually took all day!
#75
n1tr0_9
-
- Noobies
-
- 59 posts
Stage One Kit Fitted
- Location: Cranbrook, Kent
Posted 06 November 2012 - 06:20 PM
It was pretty cold in the garage this morning, so i tackled a job which involved heat!
When teh passenger door was reskinned, i dont think the frame was square, or if not that, then maybe its had a knock since. Anyway, the top of the door frame was too far to teh rear at the top edge. So i heated up the four corners with the blow torch then gave it a few knocks with the rubber hammer, so it now sits much better. Well happy with this as i didnt think this would work.

Next i took both doors off to roll the a panel lip around, and finish welding up the front edges of teh door steps. I hadnt done this before as i couldnt get in there with the doors on. I used a hammer and dolly, vice grips, a block of wood wrapped in foam and an old number plate to do it.

After lunch i took a look at the passenger door again. The new one is from an earlier car and didnt have the crash bar in it like the later cars. So i tried to see if i could swap it into the new door. First problem was how to get it out. The bar is a tight fit inside the frame with a bolt either end, so even with the bolts out it took a hammer to get it to move. I couldnt get it out though so i cut a hole in the frame and extracted it that way.

Next i looked at how to fit it in the other door. After a lot of messing around i finally got it in without cutting holes in the frame. I didnt think it was going to go, but its in now. Still not sure quite how i did it. After it was inside the door i drilled holes for the bolts using templates i took off the old door. Then using the hammer i knocked the bar into position and bolted it up.

im chuffed with this as i didnt think it would work. I think these bars are fitted with the door skin off the frame.


Next i welded up the holes in the floor that are usually plugged with bungs and love to rust. Did the four at the front.


Then i welded up the hole in the wing for the aerial and the two redundant holes in the scuttle.

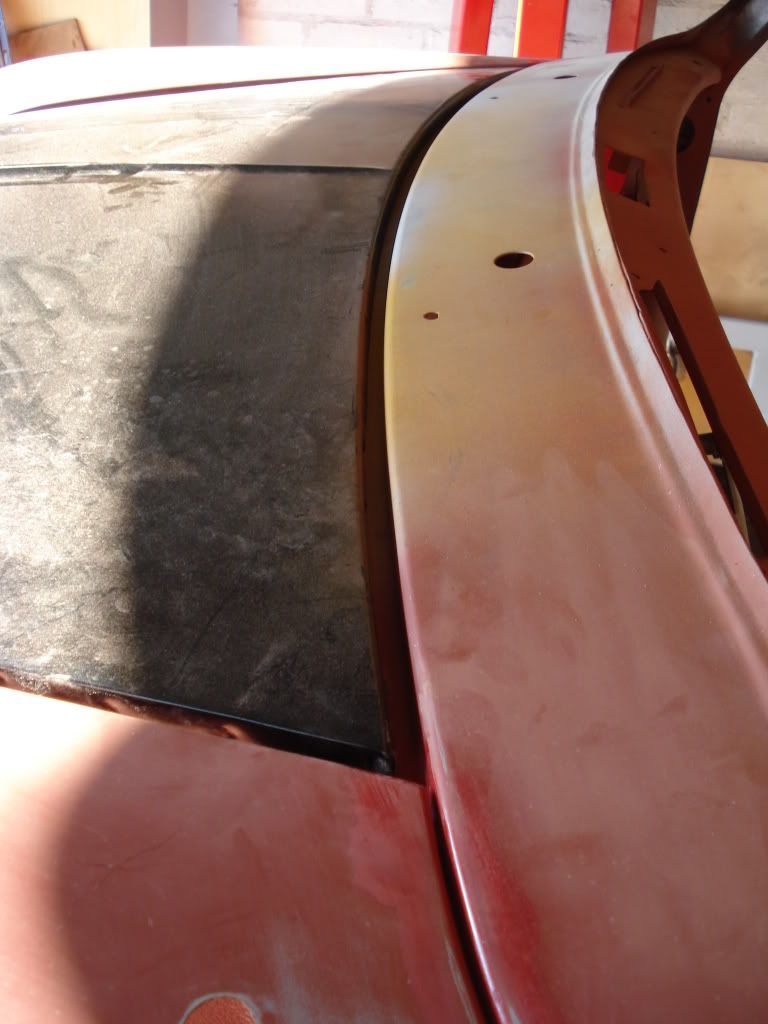
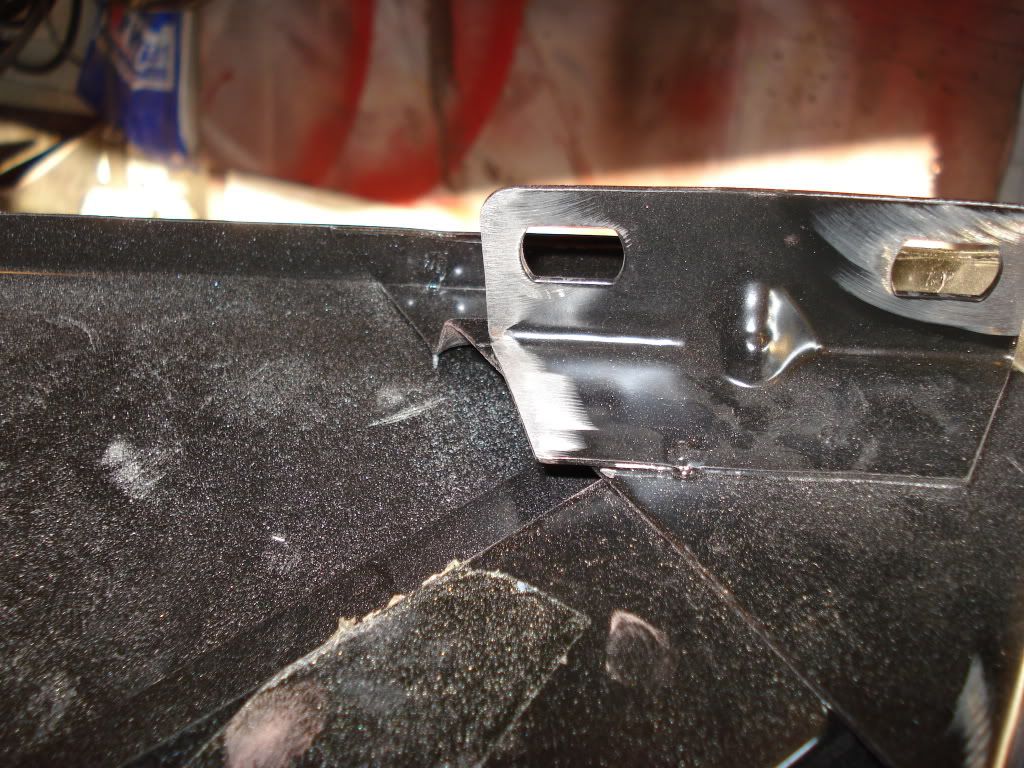
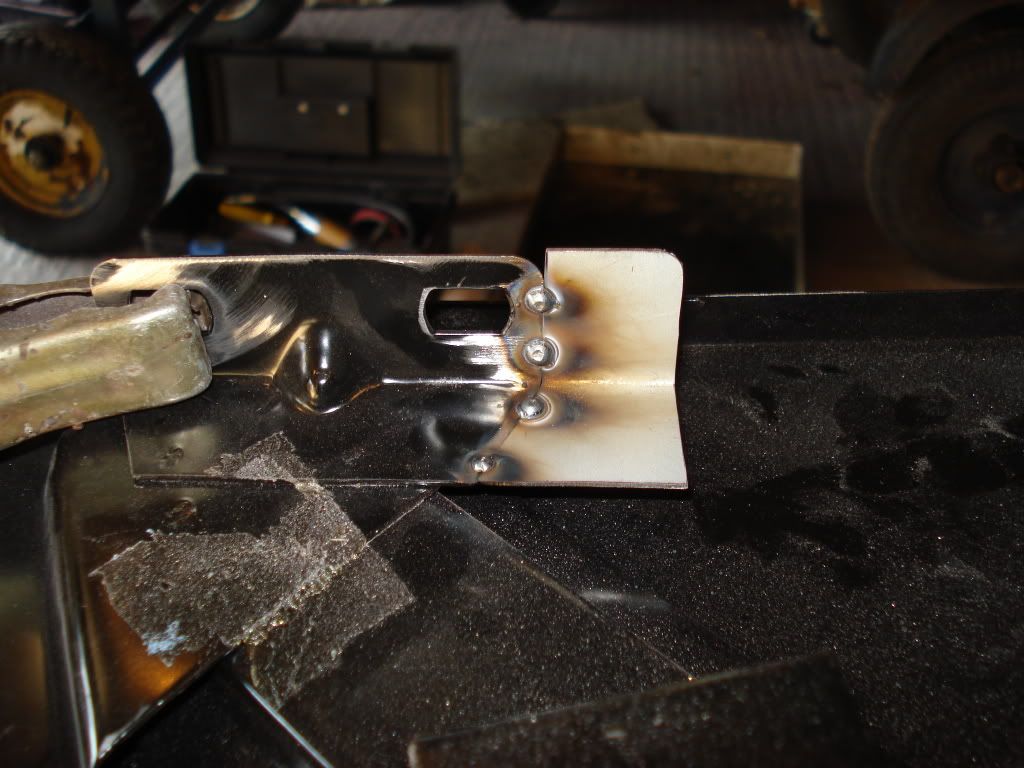
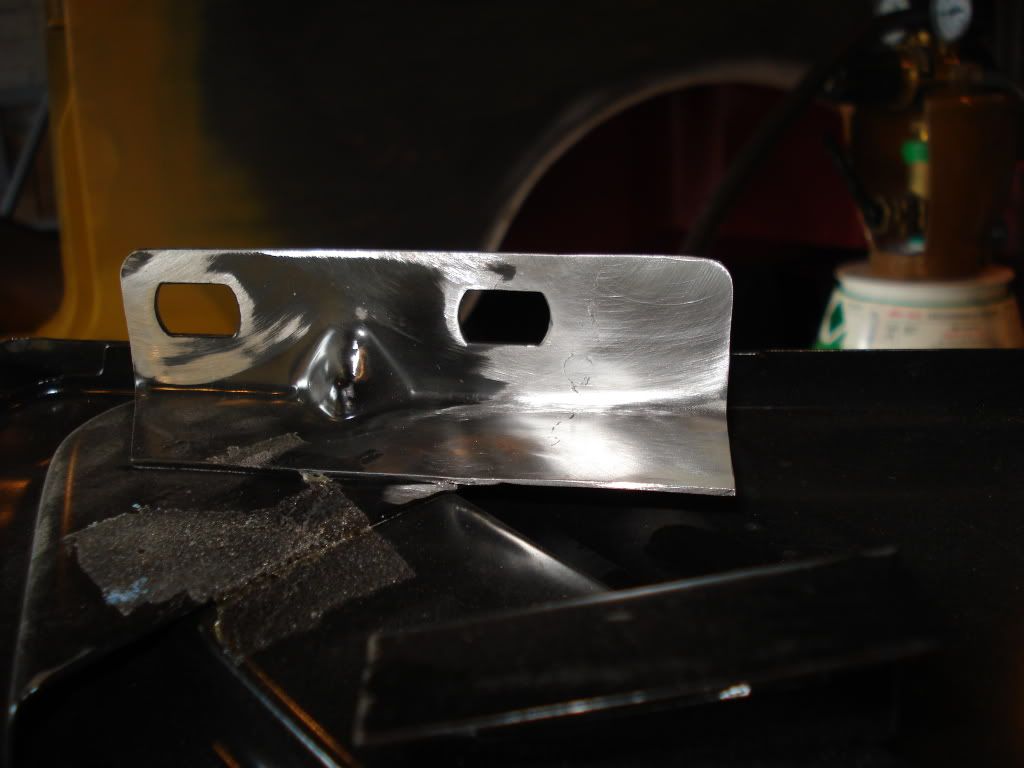
Last thing i refitted the bonnet latch that i had cut off the old bonnet.

Im Knackered!
When teh passenger door was reskinned, i dont think the frame was square, or if not that, then maybe its had a knock since. Anyway, the top of the door frame was too far to teh rear at the top edge. So i heated up the four corners with the blow torch then gave it a few knocks with the rubber hammer, so it now sits much better. Well happy with this as i didnt think this would work.

Next i took both doors off to roll the a panel lip around, and finish welding up the front edges of teh door steps. I hadnt done this before as i couldnt get in there with the doors on. I used a hammer and dolly, vice grips, a block of wood wrapped in foam and an old number plate to do it.

After lunch i took a look at the passenger door again. The new one is from an earlier car and didnt have the crash bar in it like the later cars. So i tried to see if i could swap it into the new door. First problem was how to get it out. The bar is a tight fit inside the frame with a bolt either end, so even with the bolts out it took a hammer to get it to move. I couldnt get it out though so i cut a hole in the frame and extracted it that way.

Next i looked at how to fit it in the other door. After a lot of messing around i finally got it in without cutting holes in the frame. I didnt think it was going to go, but its in now. Still not sure quite how i did it. After it was inside the door i drilled holes for the bolts using templates i took off the old door. Then using the hammer i knocked the bar into position and bolted it up.

im chuffed with this as i didnt think it would work. I think these bars are fitted with the door skin off the frame.


Next i welded up the holes in the floor that are usually plugged with bungs and love to rust. Did the four at the front.


Then i welded up the hole in the wing for the aerial and the two redundant holes in the scuttle.

Last thing i refitted the bonnet latch that i had cut off the old bonnet.

Im Knackered!


1 user(s) are reading this topic
0 members, 1 guests, 0 anonymous users


