Jump to content


Photo

1979 Mini Van Full Restoration


  • Please log in to reply
32 replies to this topic

#16 olds_kool_lews

olds_kool_lews

    Up Into Fourth

  • Traders
  • PipPipPipPipPipPipPipPipPip
  • 3,601 posts

Posted 23 December 2012 - 11:33 AM

That gap is normal, usually has foam strips wedged in there! Do i spot a clubman front end? U making a clubvan? If so heres some inspiration with the 1 i built ;)

Posted Image

#17 Sonic6103

Sonic6103

    Learner Driver

  • Just Joined
  • PipPip
  • 20 posts
  • Location: Lancashire

Posted 23 December 2012 - 02:40 PM

My dad was going to when he bought it 18 years ago but he never got around to doing anything with it but I decided to sell the clubman wings on eBay a few weeks back and just going to go with the usual front end, weld it all back on or continue with the flip front idea from the previous owner. I do really like the look of your van though! Maybe I shouldn't have sold the windgs, bonnet, etc just yet lol

Karl

#18 olds_kool_lews

olds_kool_lews

    Up Into Fourth

  • Traders
  • PipPipPipPipPipPipPipPipPip
  • 3,601 posts

Posted 23 December 2012 - 03:52 PM

Mine was an estate that i converted to a van (kicked off the trend for clubvans!) lol

#19 Sonic6103

Sonic6103

    Learner Driver

  • Just Joined
  • PipPip
  • 20 posts
  • Location: Lancashire

Posted 05 September 2013 - 08:39 PM

Well.... It's been a long time since I last posted on here, nothing much has gone on really because I've been in and out of hospital having more operations and me and my wife have just had our 2nd little boy too so the van was not getting any attention for most of the year.

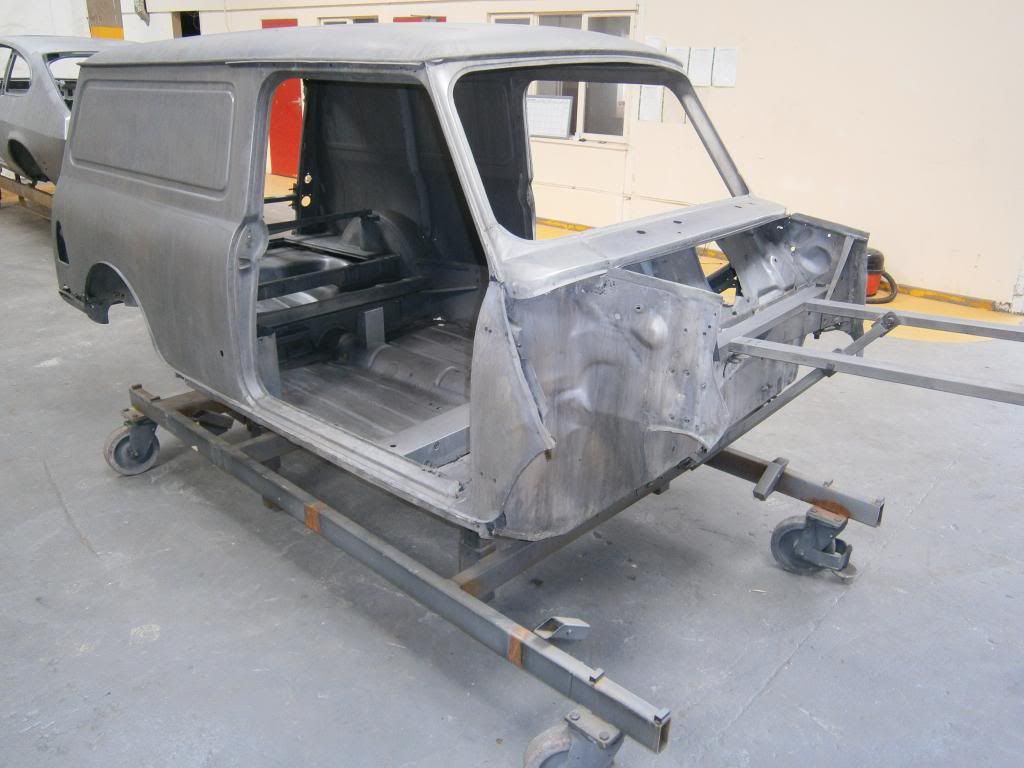
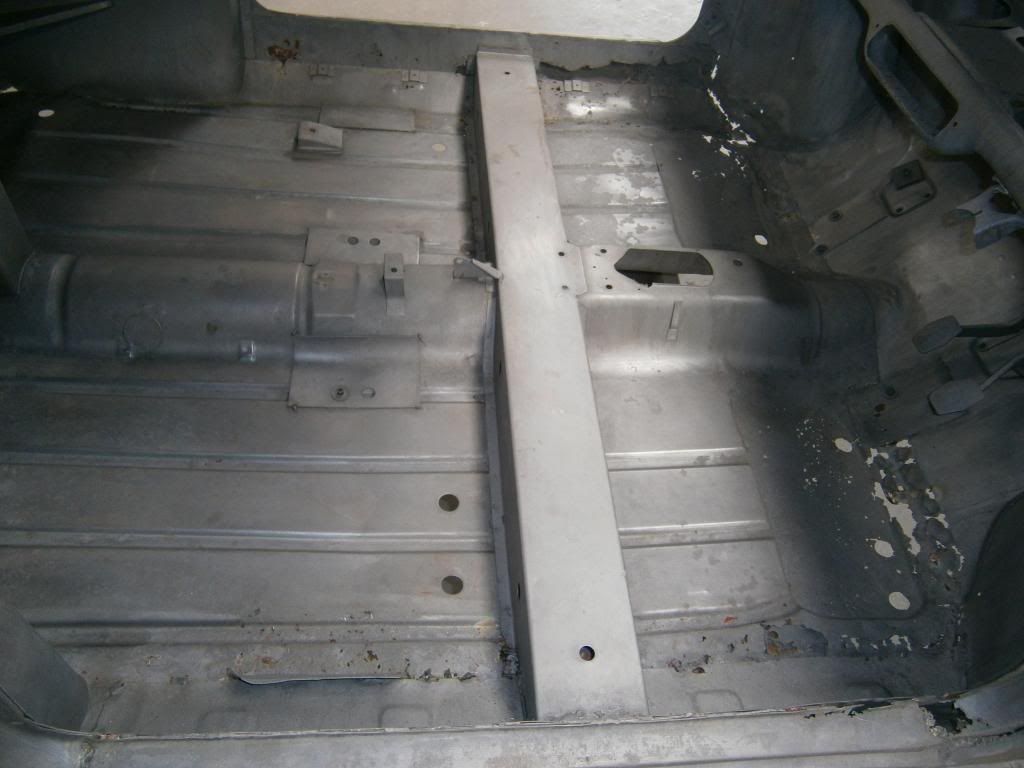
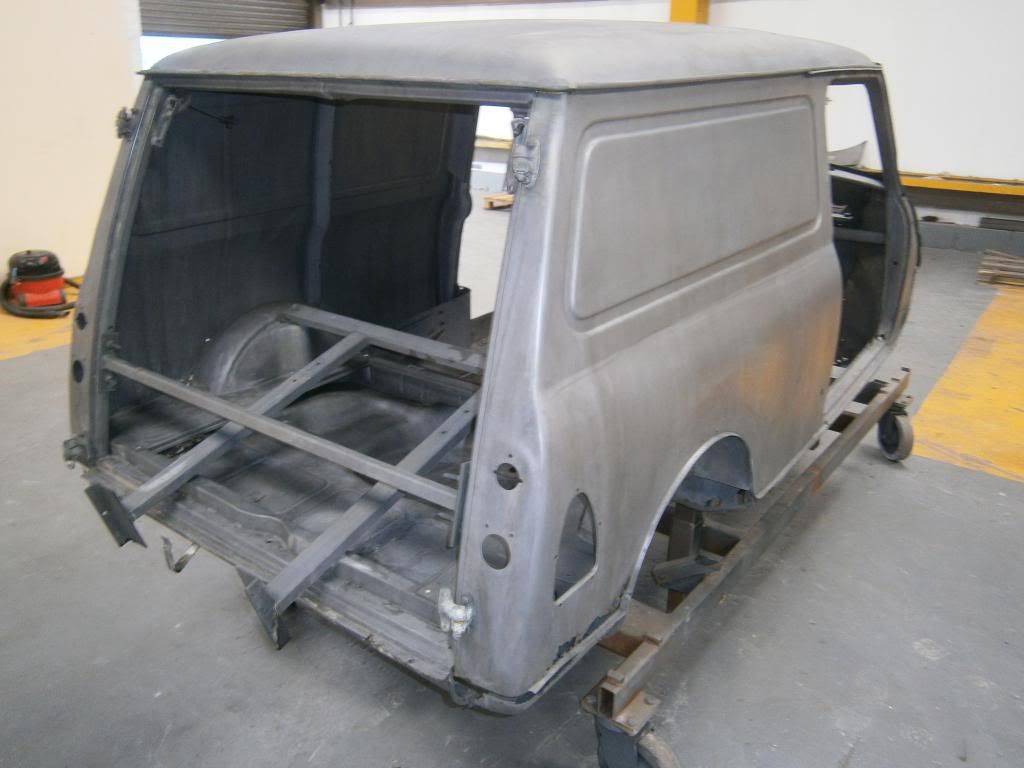
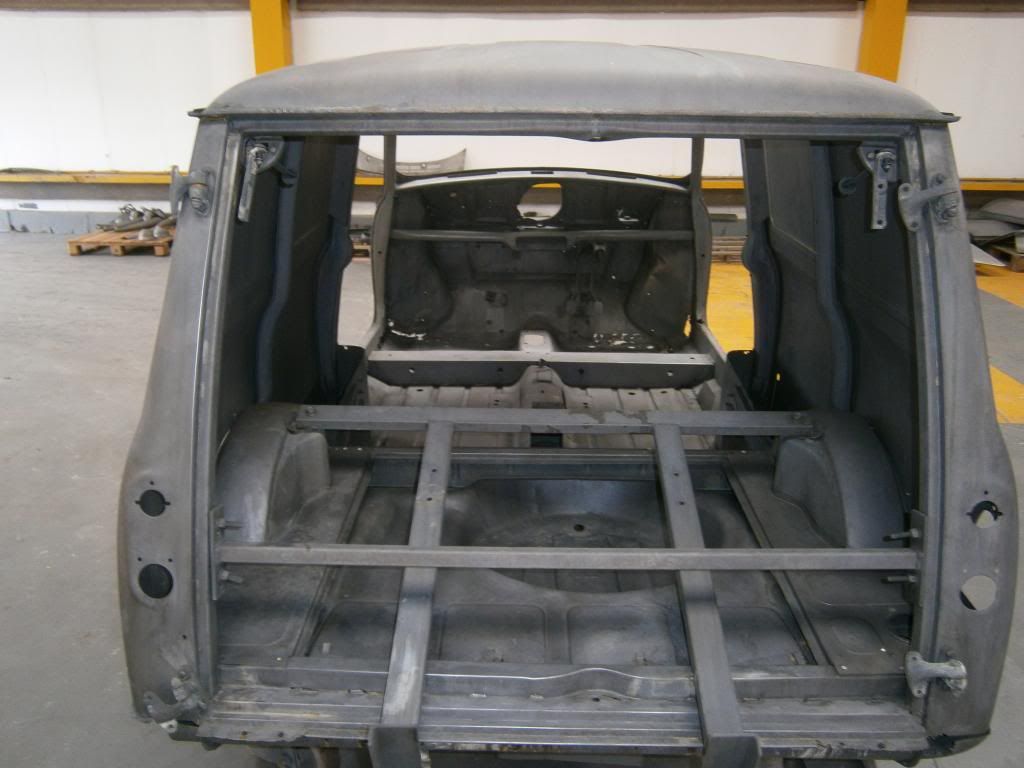
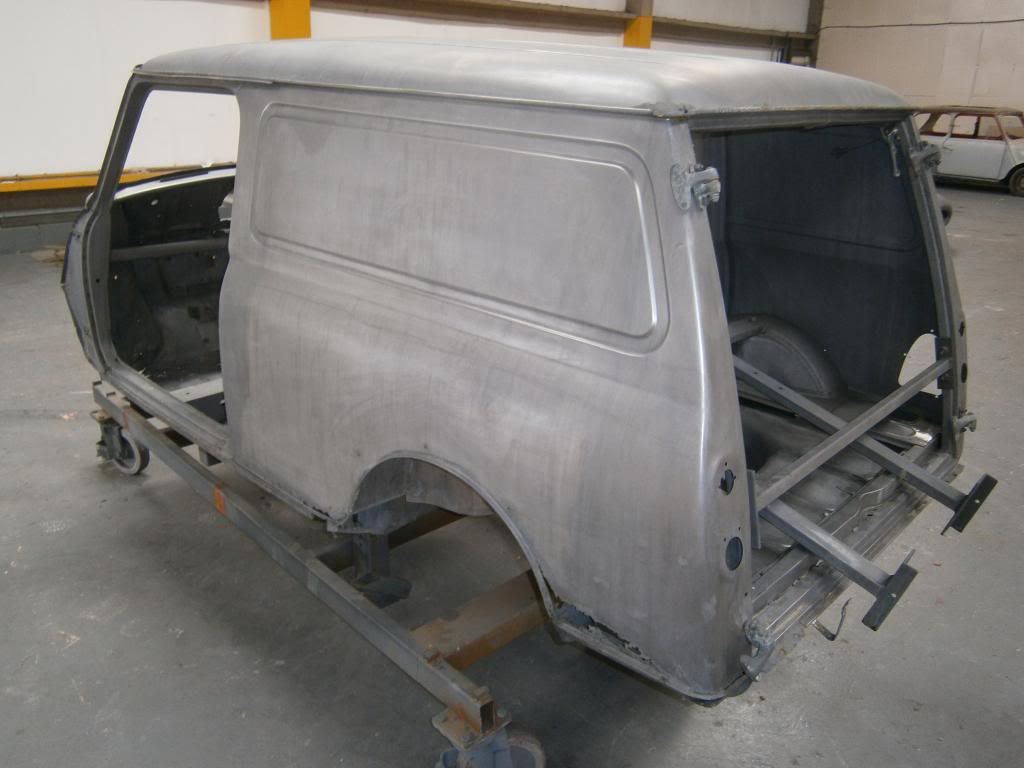
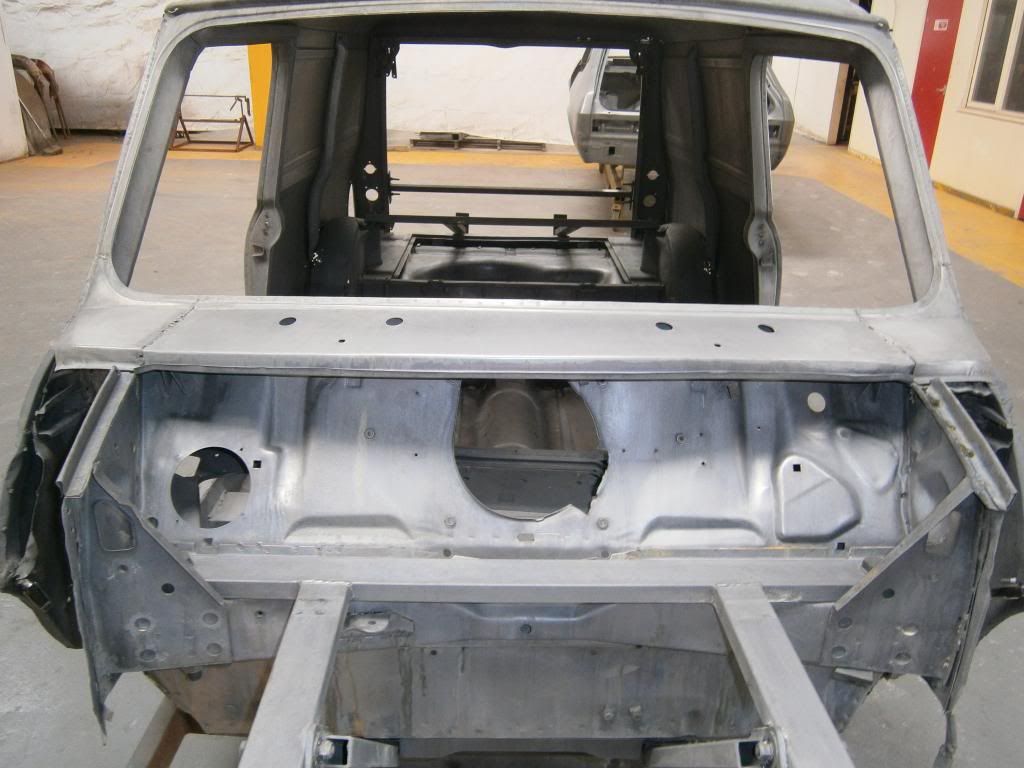
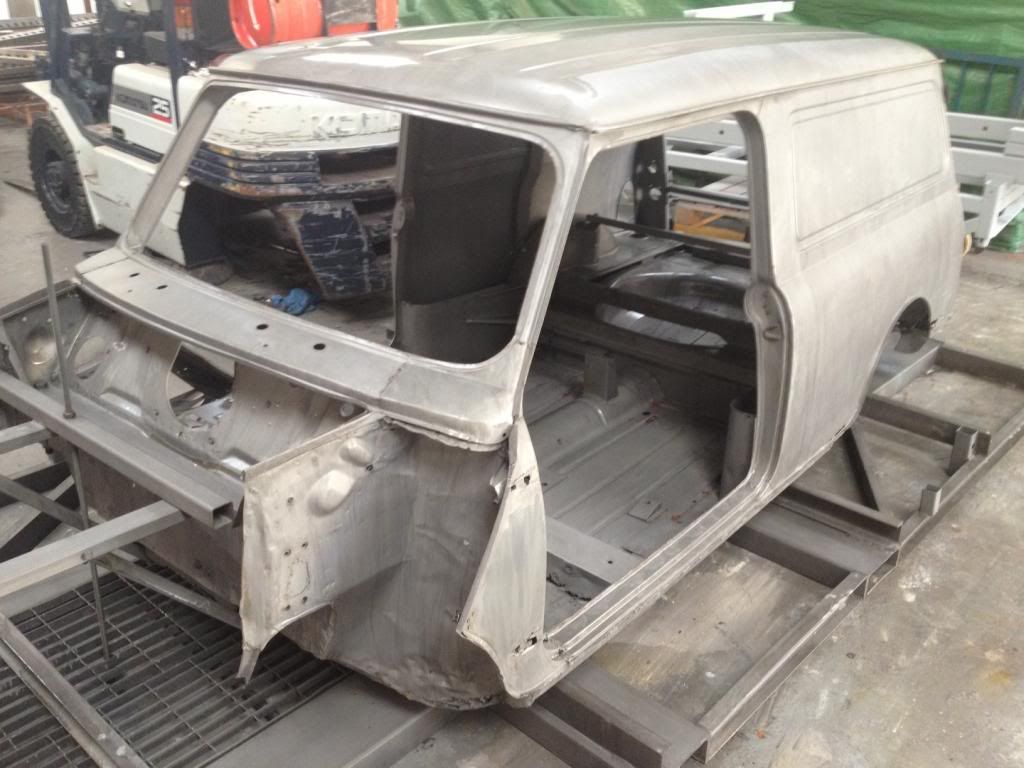
I did however decide against getting the van soda blasted and opted for a dipping instead but went against the acid dipping I've seen being used and went for a more environmentally friendly version.


I was VERY impressed with the company I used for this and would highly recommend them if anybody wants their details.


Here's some images of the van after the process had finished....
10_zps9d05aa4f.jpg


11_zpsd4ce4c0e.jpg


16_zps79bf282c.jpg


12_zps06067238.jpg


14_zpsd4bb850d.jpg


13_zps085b2eb5.jpg


15_zps014917af.jpg


#20 Sonic6103

Sonic6103

    Learner Driver

  • Just Joined
  • PipPip
  • 20 posts
  • Location: Lancashire

Posted 05 September 2013 - 08:48 PM

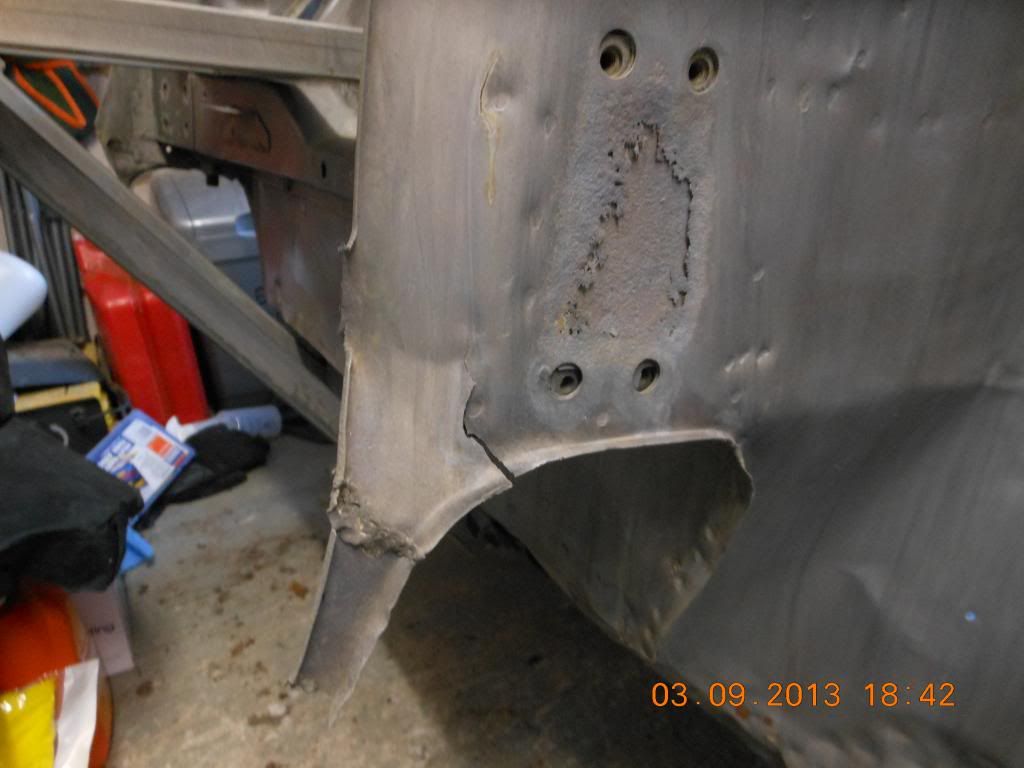
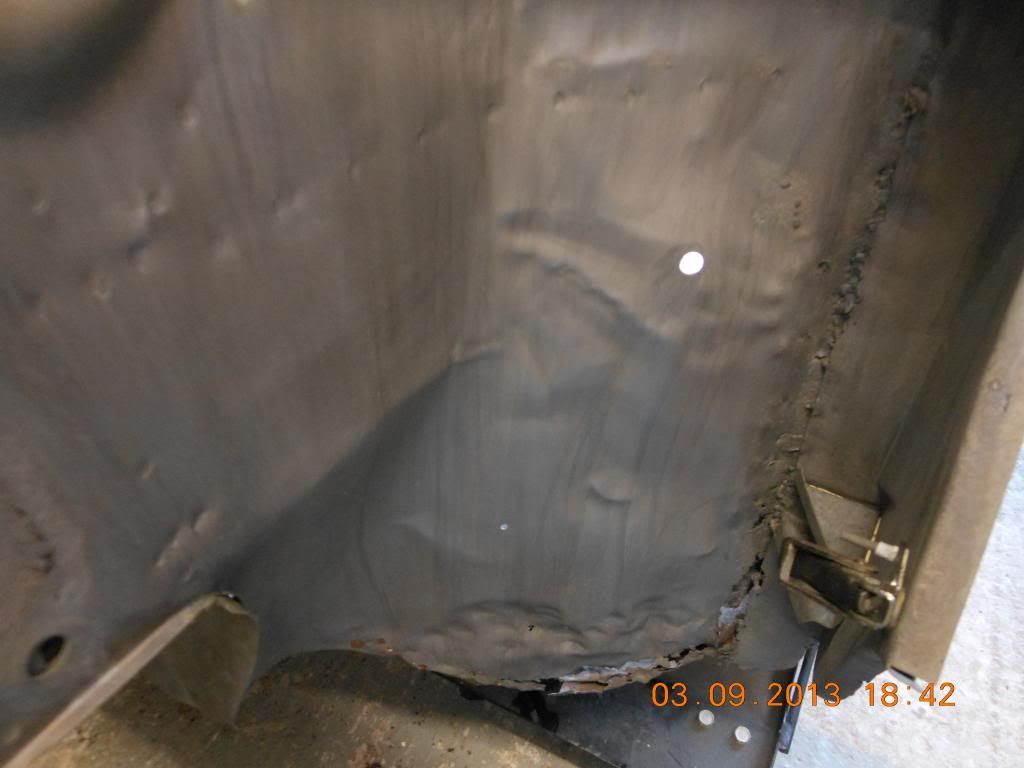
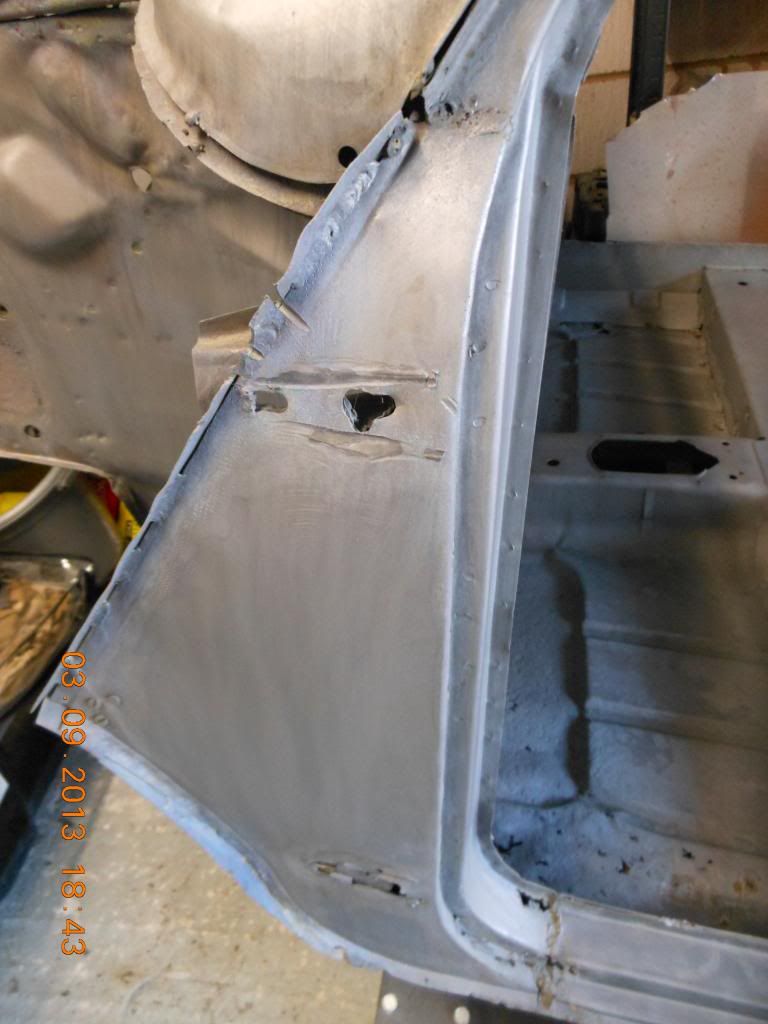
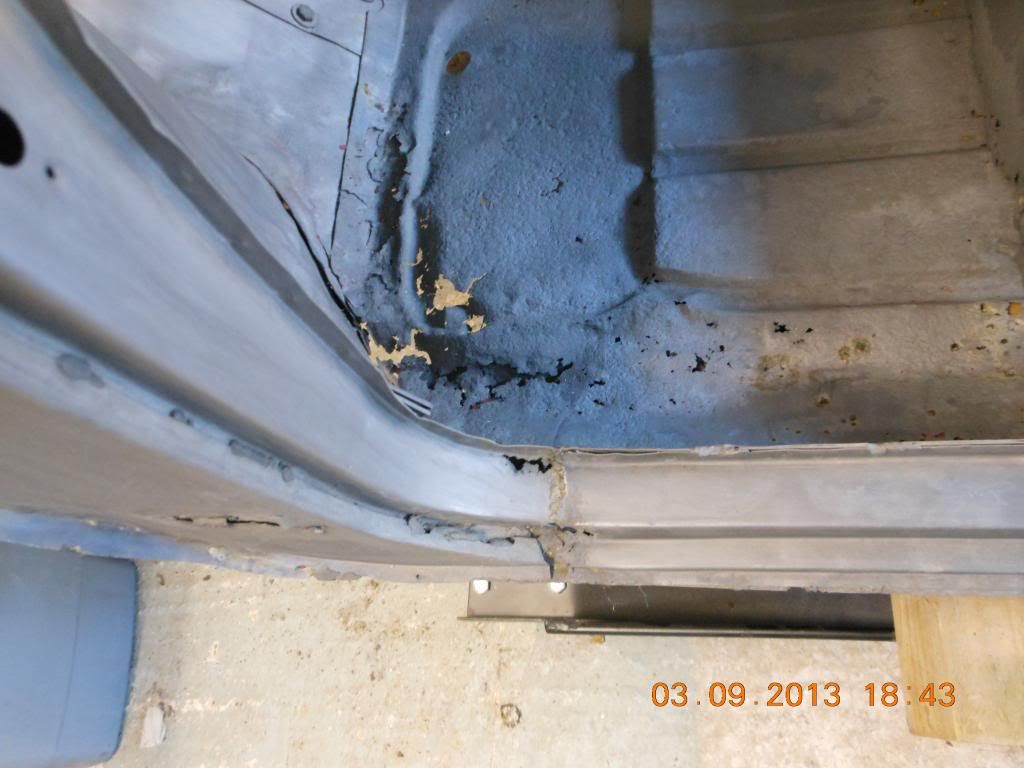
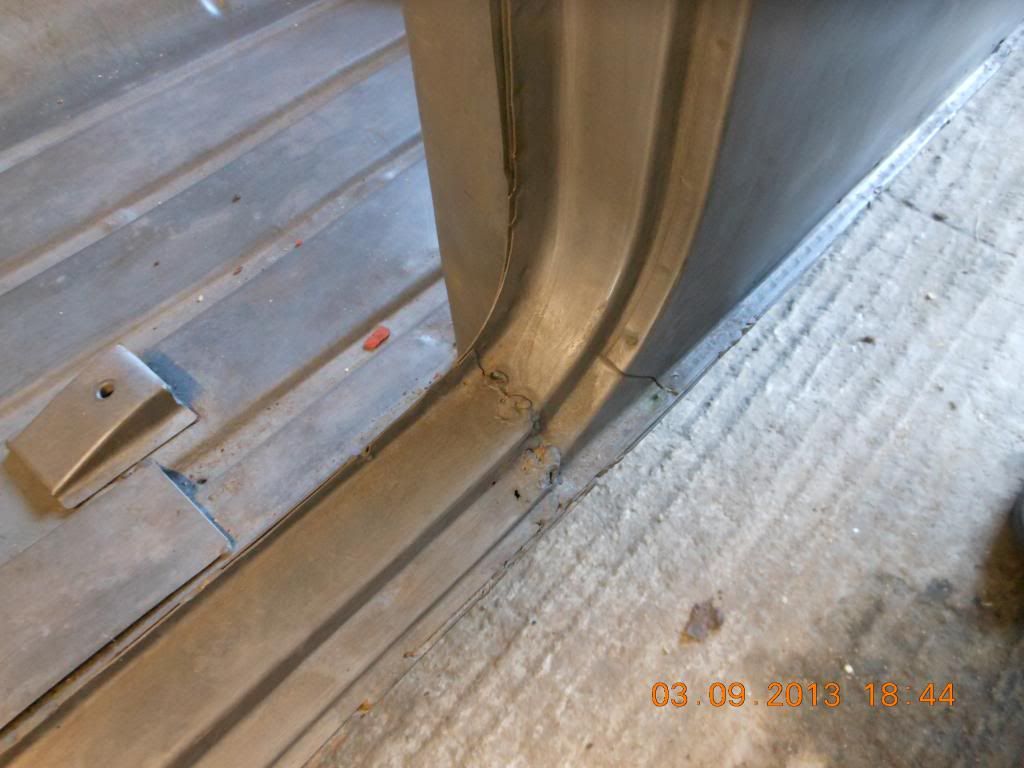
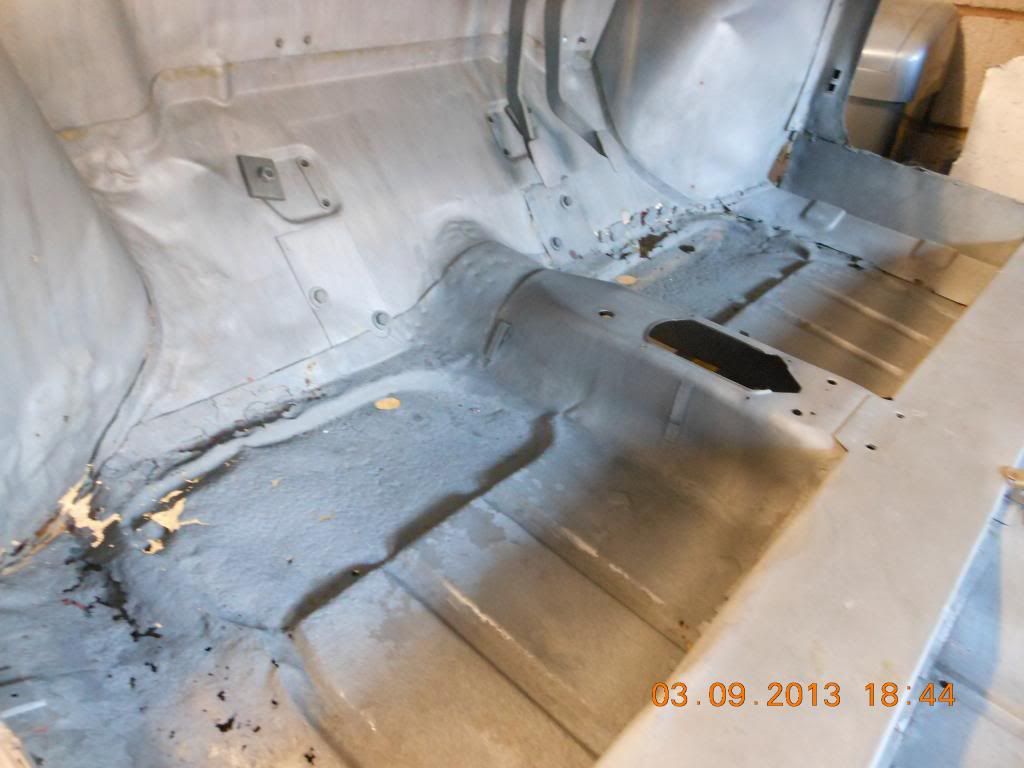
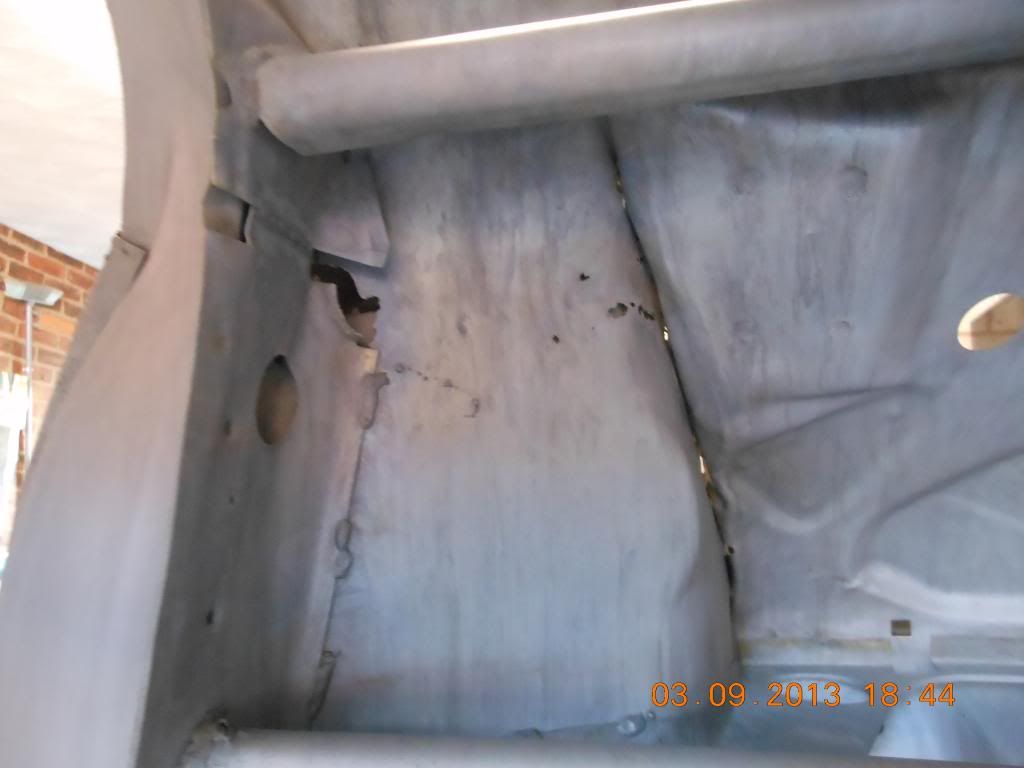
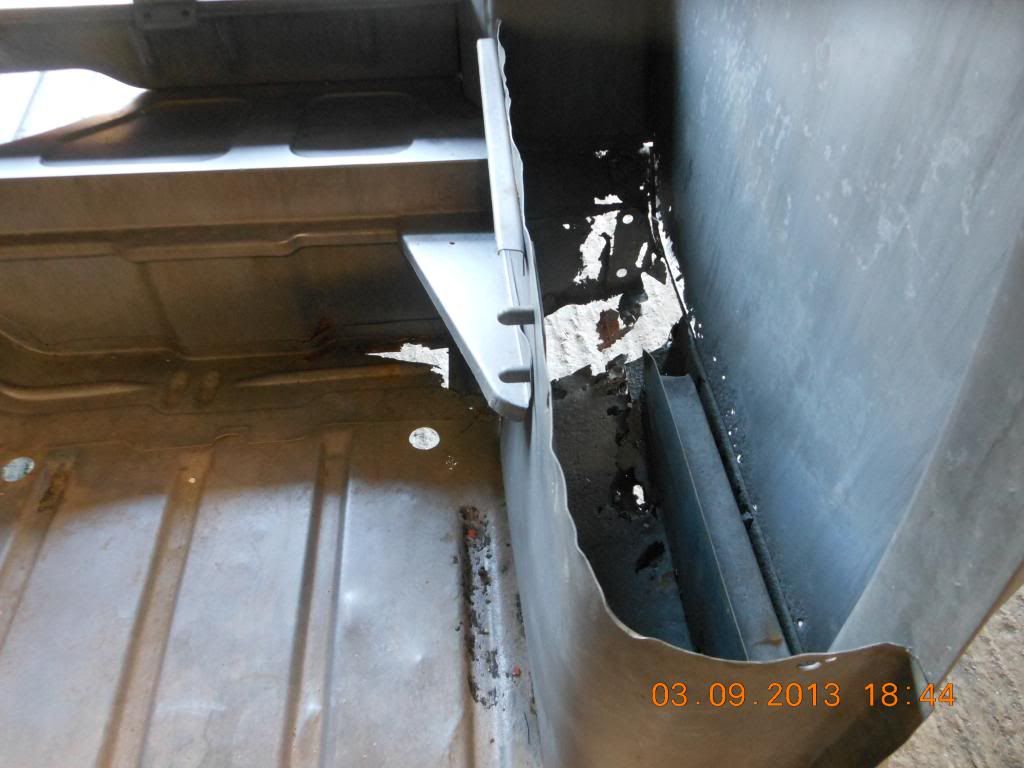
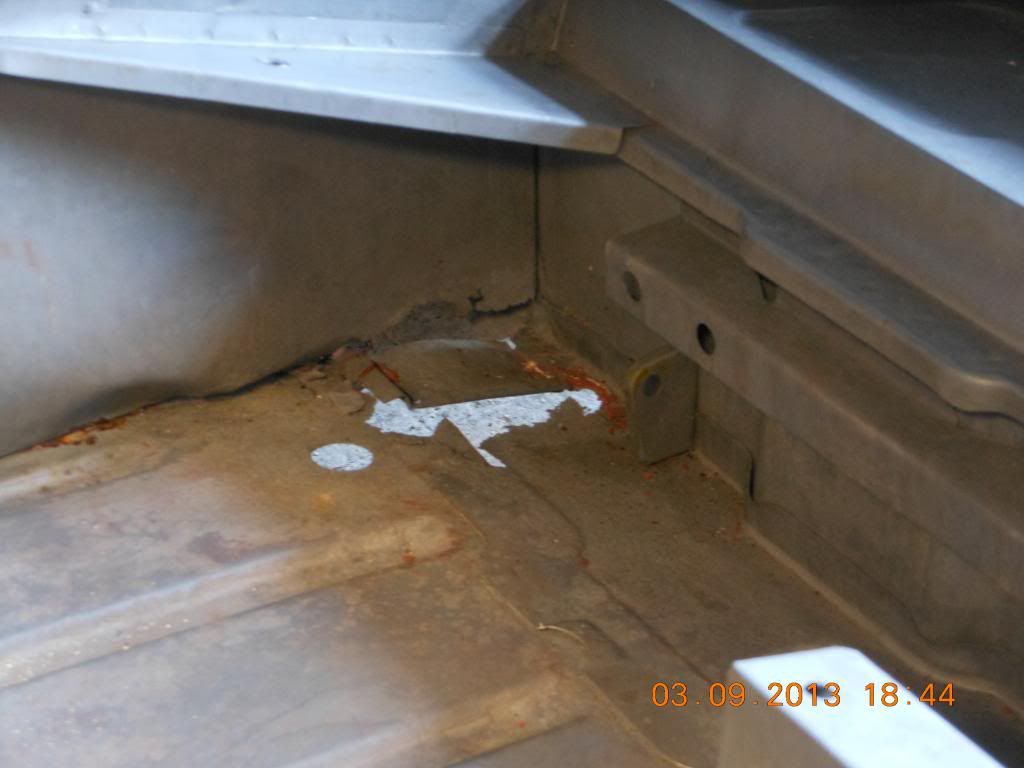
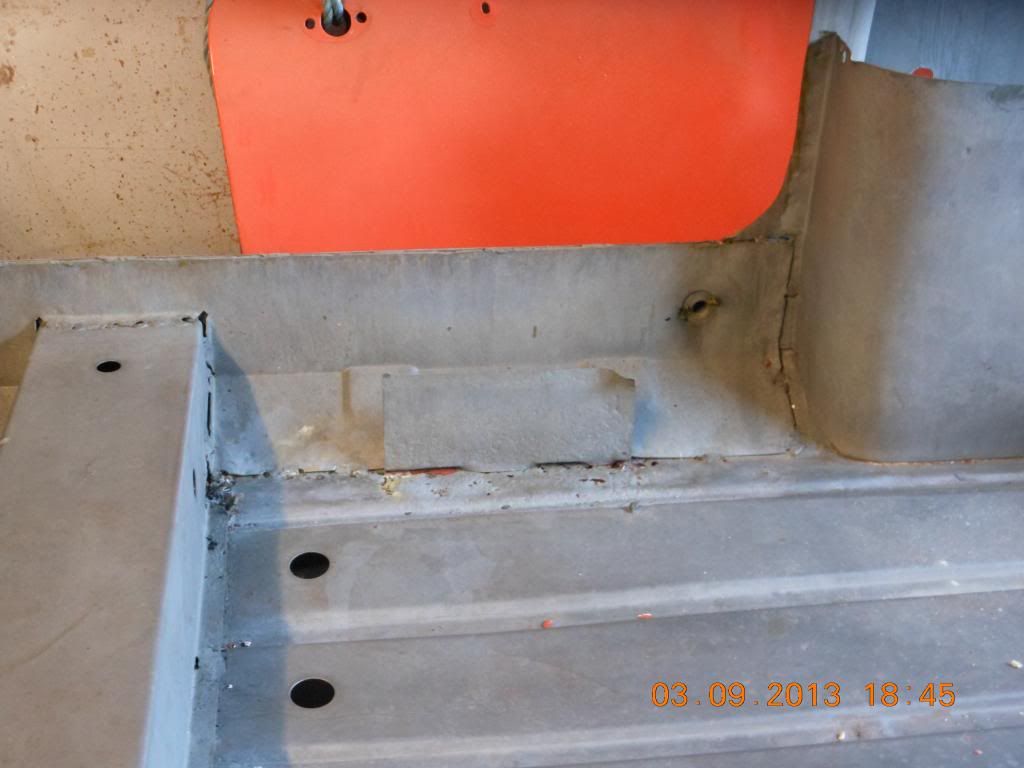
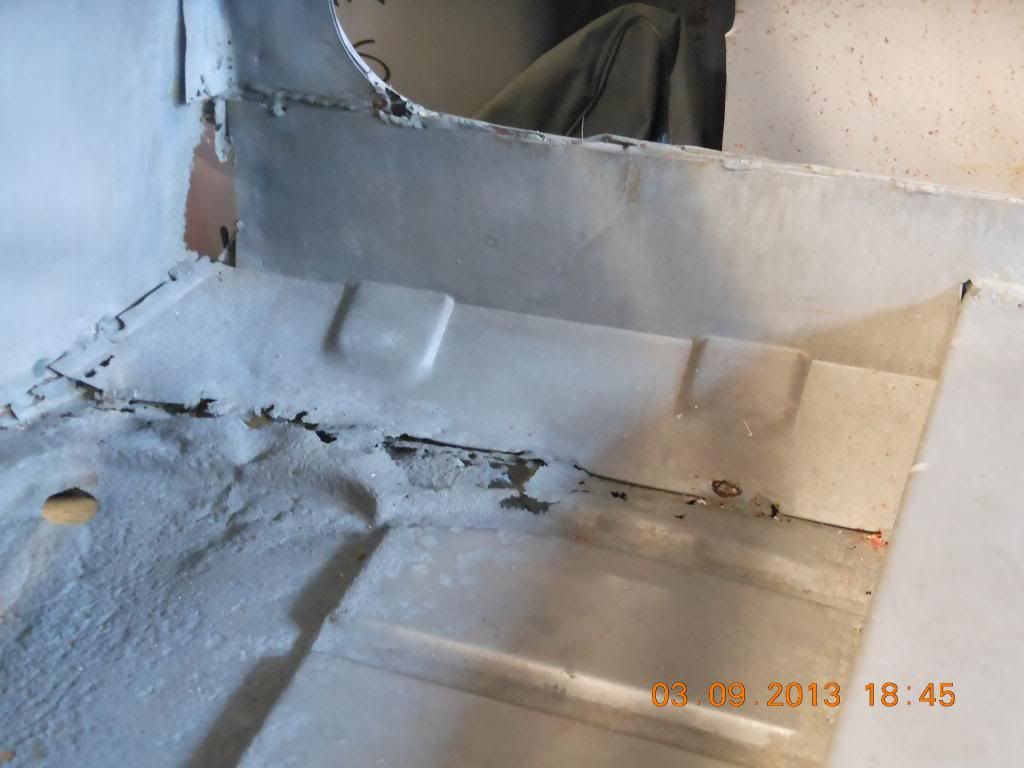
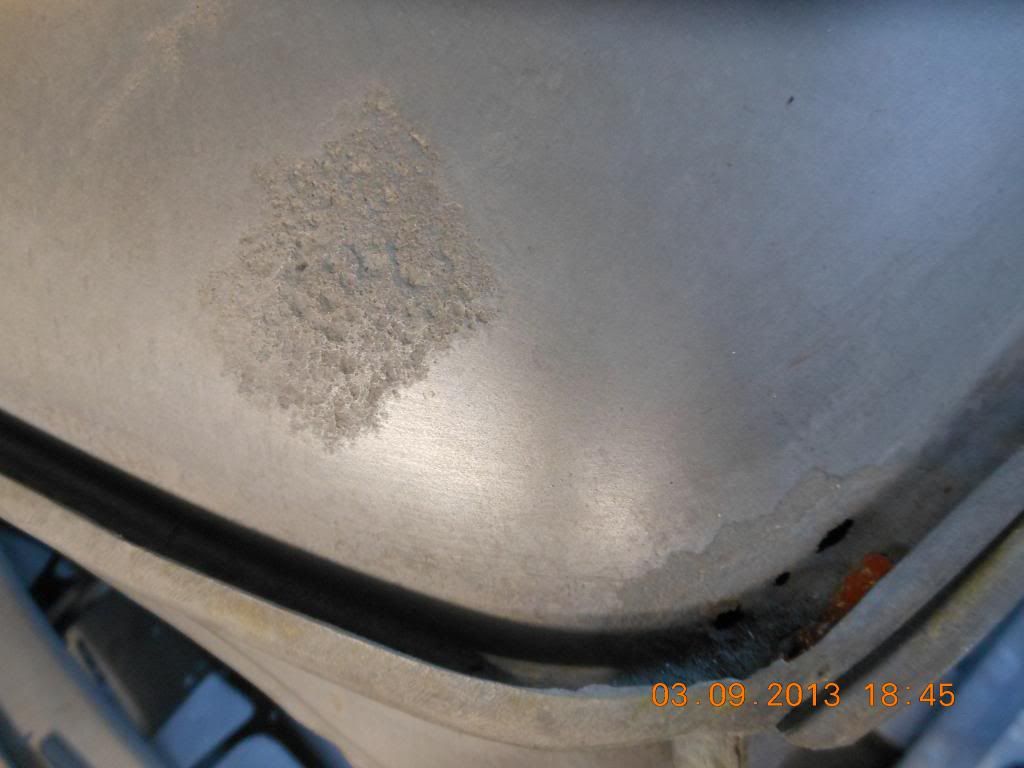
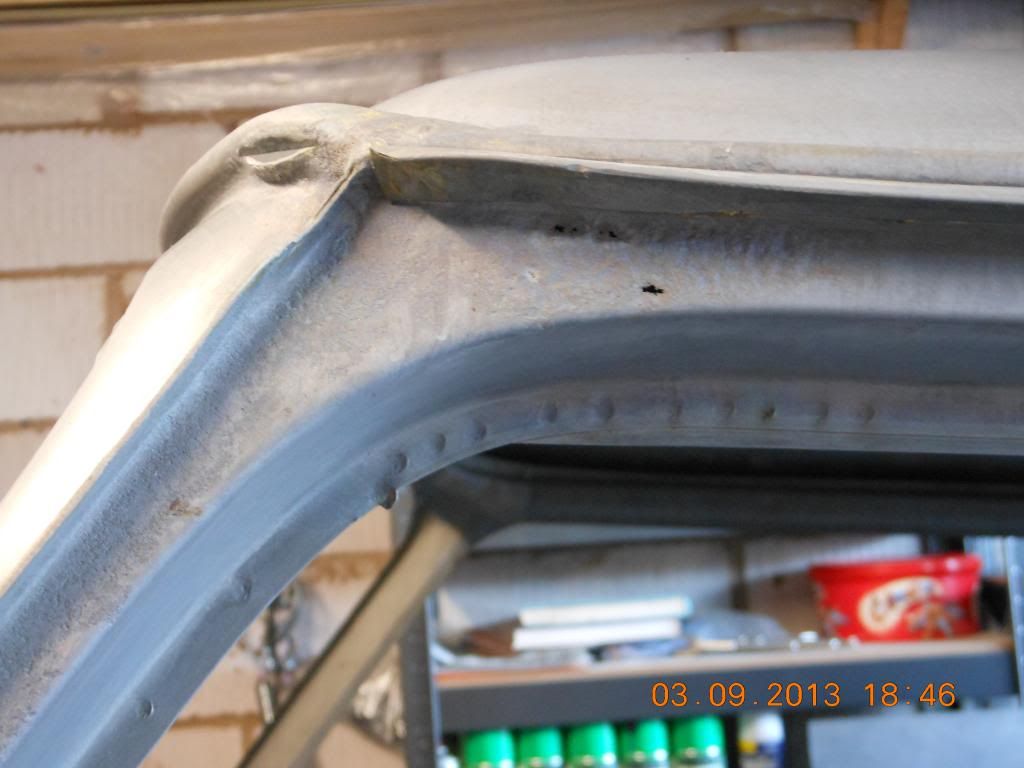
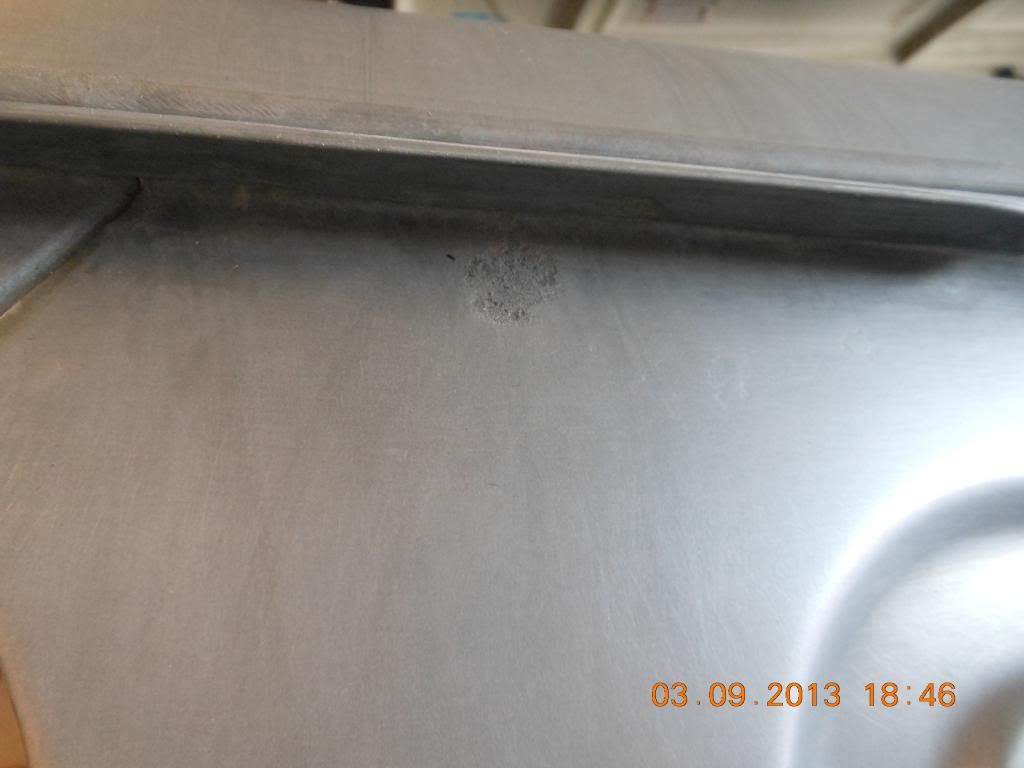
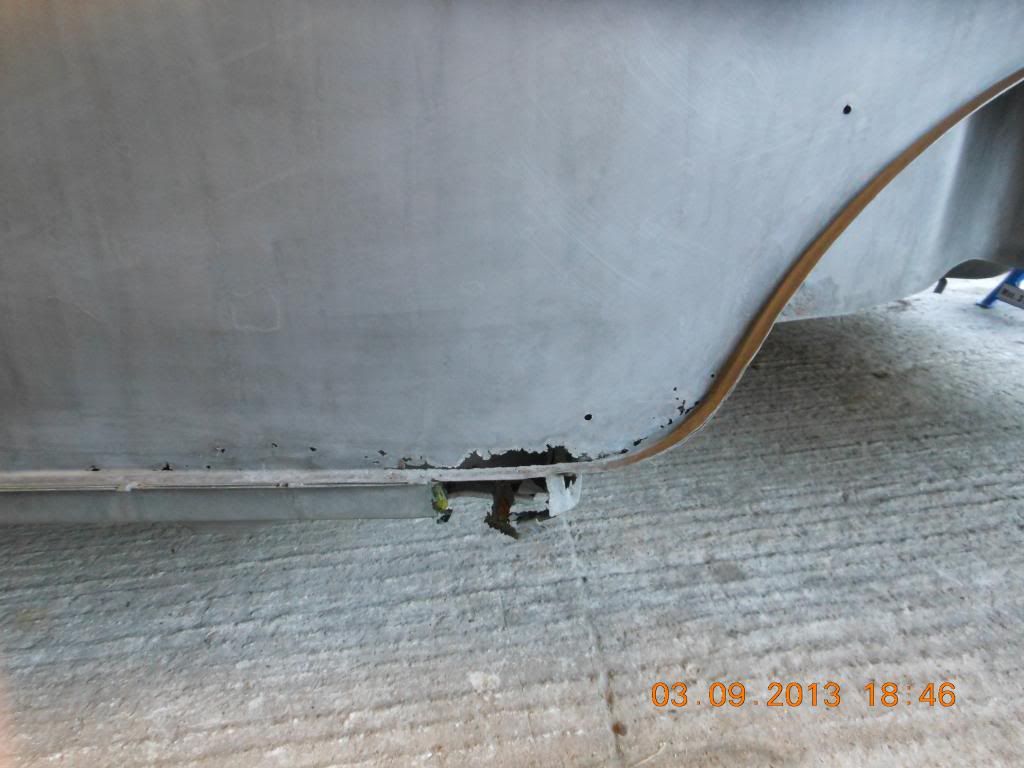
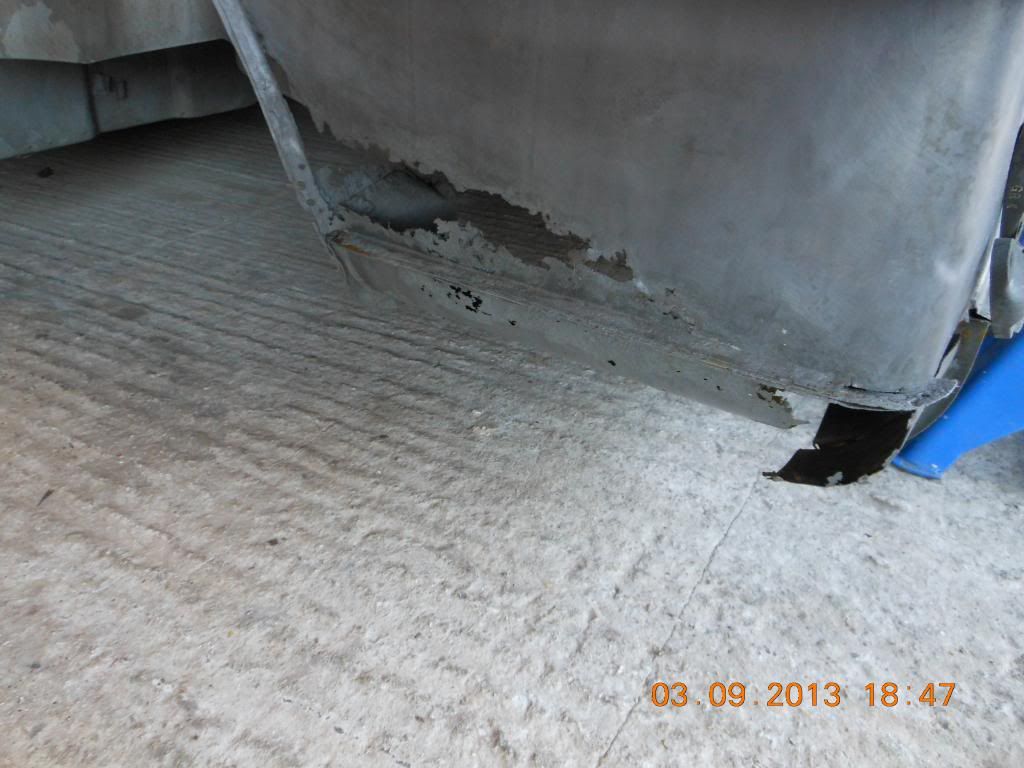
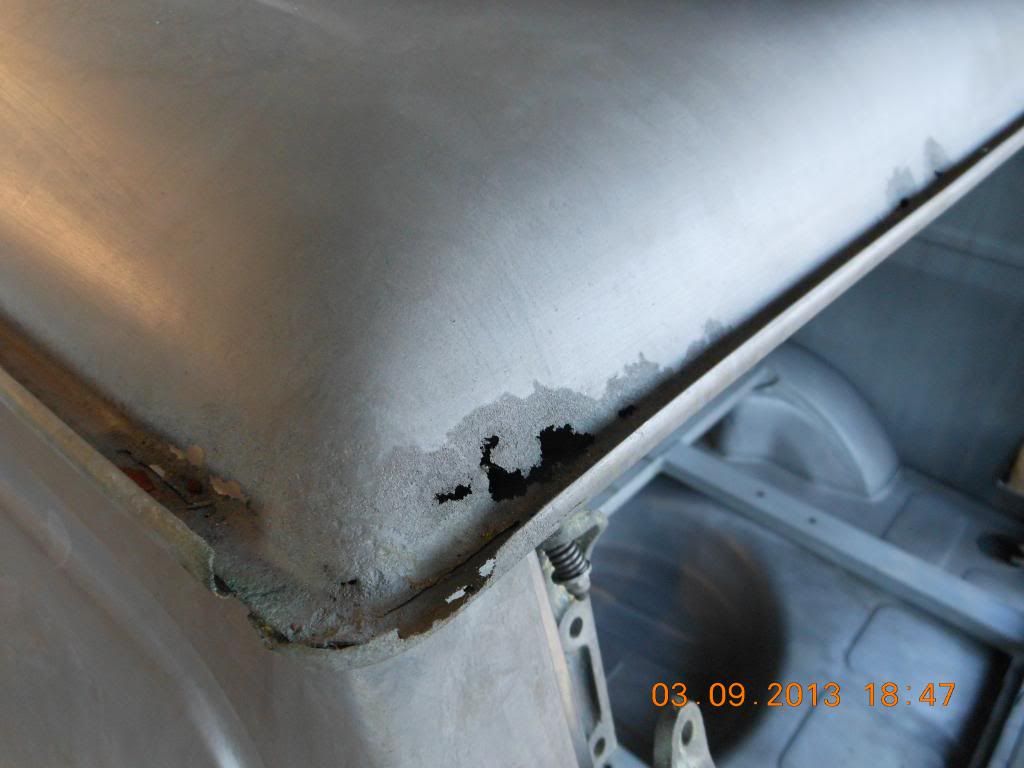
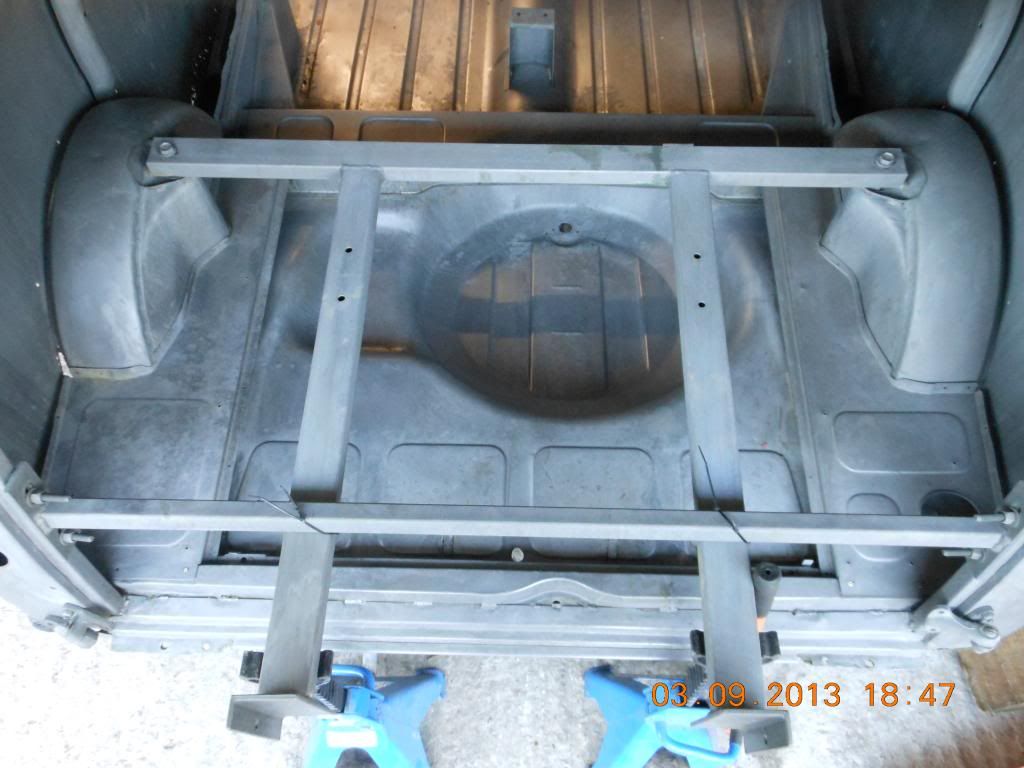
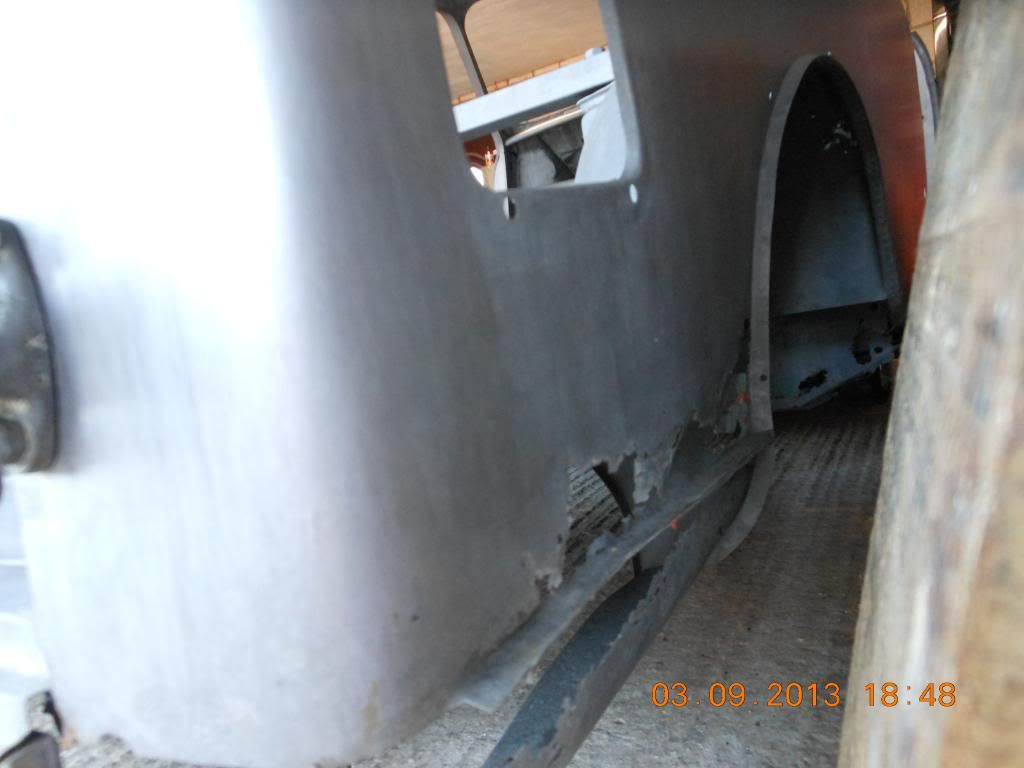
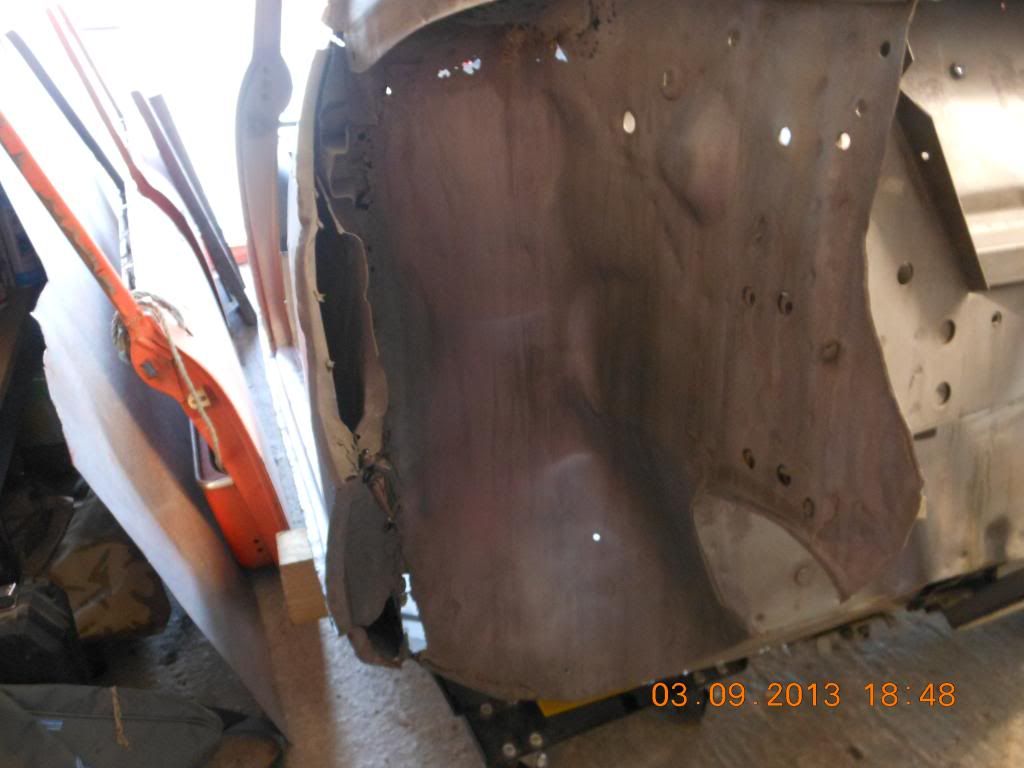
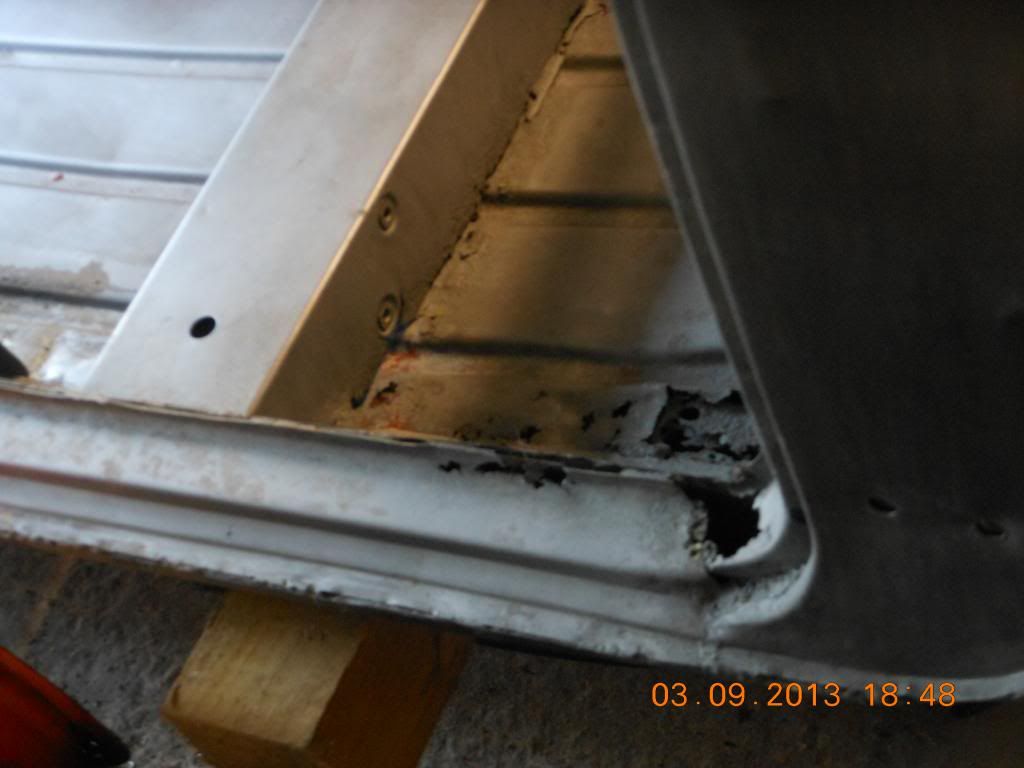
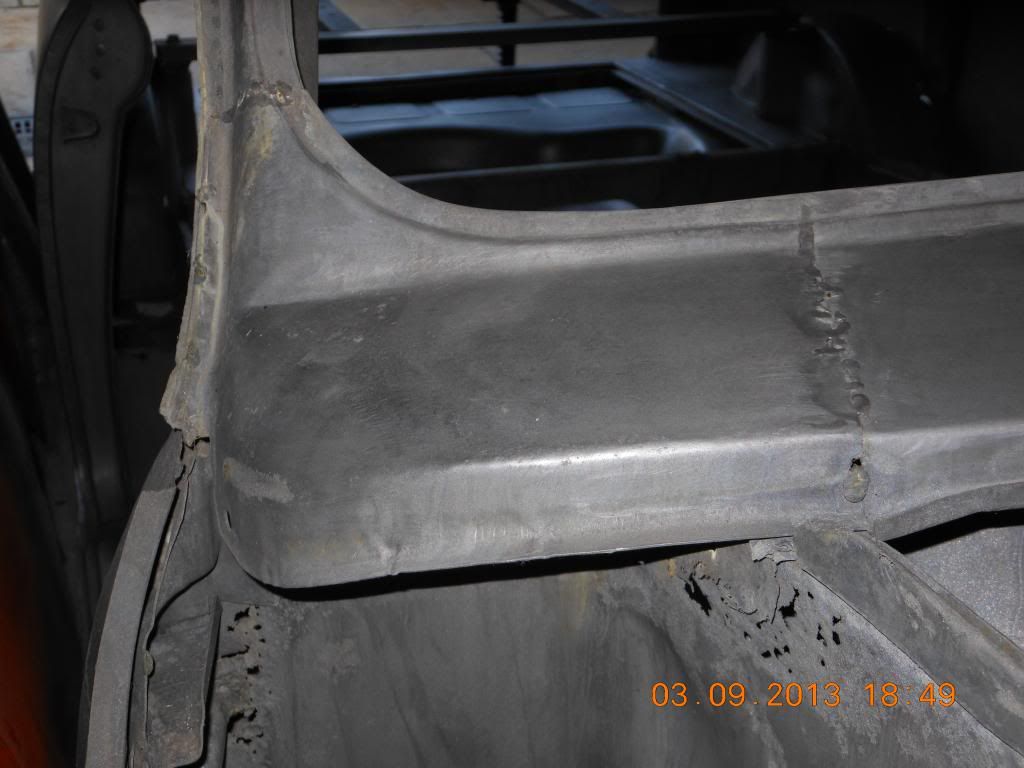
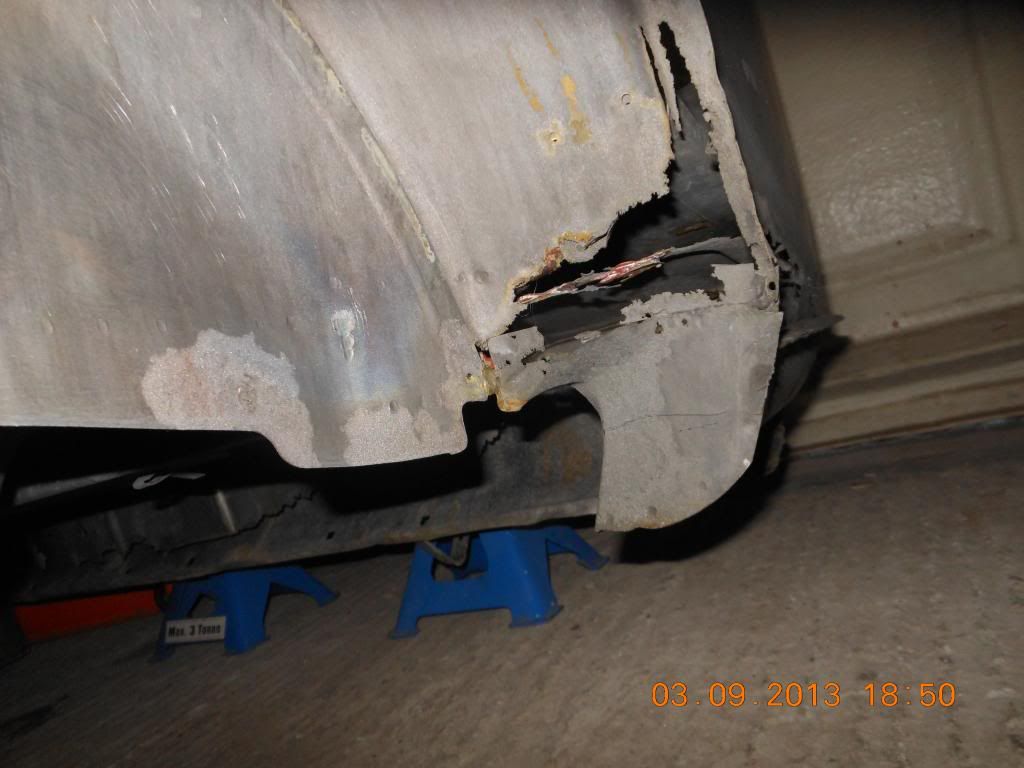
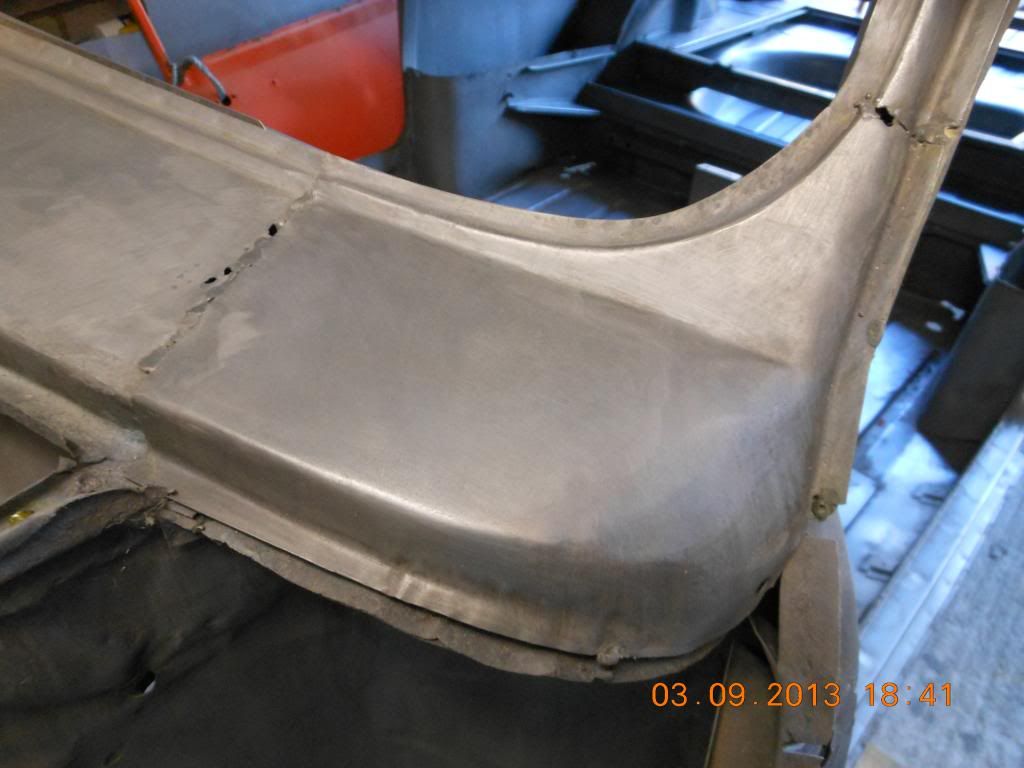
Once it arrived back home I had a quick look around the van to see what metalwork I could see that needed replacing so I can make my shopping list of panels.


Unfortunately I had already got it in my garage and to one side with the help of the delivery driver and my dad and then by the time I was taking these other photo's they had left so couldn't move the van by myself. Some of the images aren't very good but when climbing around a garage with one leg and on crutches whilst trying to take photo's too it can get quite challenging haha


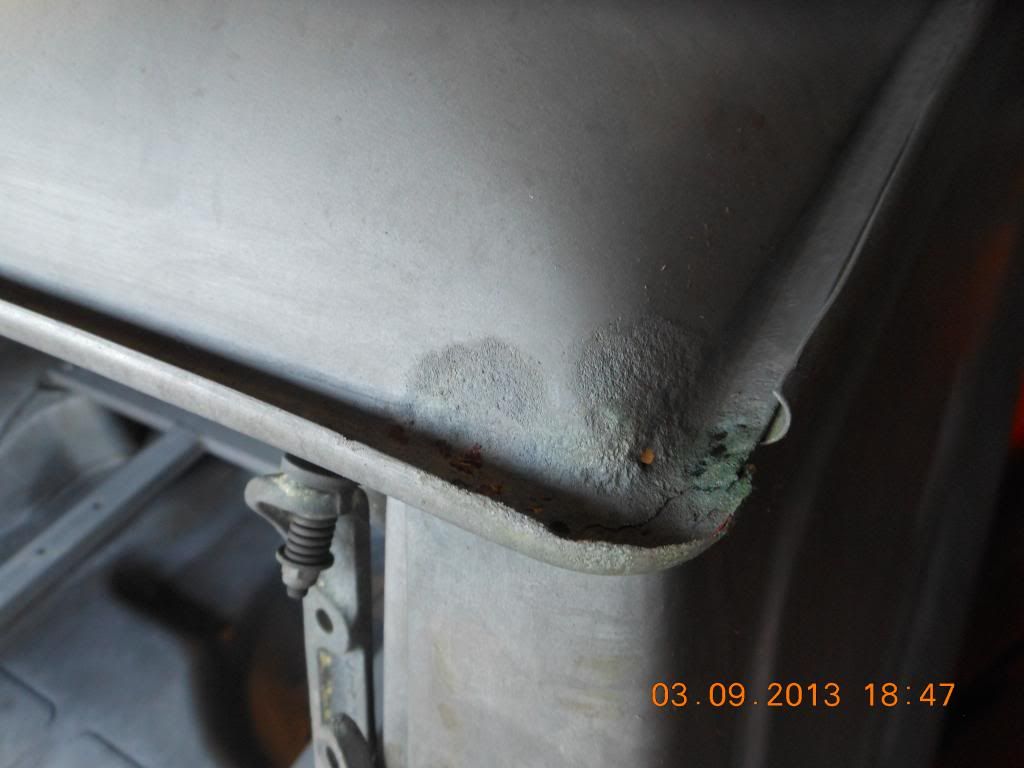
Here's the closer up images of the bad bits.....
DSCN2495_zpscc1c18ae.jpg


DSCN2496_zps7489d84c.jpg


DSCN2497_zps7da436ad.jpg


DSCN2498_zps4712238d.jpg


DSCN2499_zps0f4950d7.jpg


DSCN2500_zps84de8865.jpg


DSCN2501_zps4a487d78.jpg


DSCN2502_zps0c55eda7.jpg


DSCN2503_zpsa8359f0e.jpg


DSCN2504_zps9cc94f6f.jpg


DSCN2505_zps8ba86384.jpg


DSCN2506_zpsd4b4daf9.jpg


DSCN2507_zps4e4a1485.jpg


DSCN2508_zps516daf30.jpg


DSCN2509_zpse1aa1b82.jpg


DSCN2510_zps2a3eebff.jpg


DSCN2511_zps0ef7d5c4.jpg


DSCN2512_zpsba9adb02.jpg


DSCN2513_zps227f9ec8.jpg


DSCN2514_zps731020f9.jpg


DSCN2515_zpsa78d0282.jpg


DSCN2516_zpsc0020128.jpg


DSCN2517_zps39b84438.jpg


DSCN2518_zps2188279b.jpg


DSCN2519_zps017b6f67.jpg


#21 Sonic6103

Sonic6103

    Learner Driver

  • Just Joined
  • PipPip
  • 20 posts
  • Location: Lancashire

Posted 05 September 2013 - 08:49 PM

If anyone's planning on following this thread (hopefully there will be some people) then I hope you wont get bored of the very slow progress I'll be making  :proud:


#22 Sonic6103

Sonic6103

    Learner Driver

  • Just Joined
  • PipPip
  • 20 posts
  • Location: Lancashire

Posted 05 September 2013 - 08:57 PM

Not a clue why but I'm sure this was in the variants section when I started it off but I've just noticed it's in the saloon section so could somebody please transfer this thread over to the right section  :gimme:


Karl


#23 FlyingScot

FlyingScot

    Up Into Fourth

  • TMF Team
  • PipPipPipPipPipPipPipPipPip
  • 2,661 posts
  • Location: Inverclyde Scotland
  • Local Club: Mini Cooper Register

Posted 05 September 2013 - 09:16 PM

At least you can now see what you are dealing with rot wise mate. Nice project - yeah not sure why it's turned into a "saloon" !! :lol:

#24 Sonic6103

Sonic6103

    Learner Driver

  • Just Joined
  • PipPip
  • 20 posts
  • Location: Lancashire

Posted 05 September 2013 - 09:37 PM

Yeah, that's the reason I got it dipped before doing the welding work which most people seem confused when I tell them that but last thing I want to do is miss a bit and then be chasing the odd spot of rust around 12 months down the line.


Hopefully I'll start getting work done a bit quicker and have a decent update at least once a month at the least.


Karl


#25 AVV IT

AVV IT

    I am a shed dragger.

  • TMF+ Member
  • PipPipPipPipPipPipPipPipPipPip
  • 6,122 posts
  • Name: Dave
  • Location: Cambridgeshire
  • Local Club: Nobody will have me!!

Posted 05 September 2013 - 09:46 PM

Moved to Mini Variants section


#26 Sonic6103

Sonic6103

    Learner Driver

  • Just Joined
  • PipPip
  • 20 posts
  • Location: Lancashire

Posted 05 September 2013 - 10:22 PM

Thanks a lot AVV IT  :D


#27 ChrisCityE

ChrisCityE

    Speeding Along Now

  • Members
  • PipPipPipPipPip
  • 418 posts
  • Location: Bristol

Posted 06 September 2013 - 05:31 PM

Keep up the good work. Nice that you can see all the rubbish, with my Van it was finding a new hole every turn of the spit.


#28 Sonic6103

Sonic6103

    Learner Driver

  • Just Joined
  • PipPip
  • 20 posts
  • Location: Lancashire

Posted 07 September 2013 - 10:06 PM

Cheers Chris and yeah I know the feeling, did a few small areas like that and decided it's best to get it done this way and I'm glad I did because the pitted area on the roof corner and just above the door wasn't actually visible before hand. It's amazing how much was covered up by paint. It is my first project like this though so little things like this I'll pick up and use in other projects :)


#29 sonikk4

sonikk4

    Twisted Paint Polisher!!!

  • Admin
  • PipPipPipPipPipPipPipPipPipPipPip
  • 15,909 posts
  • Name: Neil
  • Location: Oxfordshire

Posted 07 September 2013 - 10:10 PM

There's certainly been some half arsed repairs going on there then. Good luck with it.


#30 Russw

Russw

    Mini Mad

  • Noobies
  • PipPipPipPip
  • 107 posts
  • Location: Leicester

Posted 08 September 2013 - 06:07 PM

I'd like to know where you had it dipped please, also do they put any protection on it after?
Cheers :)
Good luck with the project by the way


0 user(s) are reading this topic

0 members, 0 guests, 0 anonymous users