Hi All,
I know there has been a million and one threads started about people who's wheels are rubbing, but I am not sure those solutions will work for me. I previously had some 12 x 6 superlight wheels on my car, and have just purchased some 12 x 5.5 ultralight wheels with tyres in a set - these ones to be precise...
http://www.minisport..._Pinstripe.html
I went for the Yokohoma tyres as I thought these would be best - but both tyre sets would have bee the same size anyway. I was not sure about offset (I have never had to buy new wheels before) and even called up mini sport before buying them to ask what the offset was and if they would fit. They told me over the phone that they did not know what the offset was (was a bit shocked about this) but they assured me that they would definately fit still. I (naively) assumed that they would be fine as they were slightly slimmer than my old wheels too (or as far as I can tell - though perhaps I was wrong about my old wheel size)
So I fitted my nice new wheels and tyres yesterday, went to drive out of my road and the wheel is rubbing on both the arch and the body work so badly that the car is not drivable at all!!! I was not very happy when I realised this (understandably).
Having read through the other similar posts on here the common solution is to replace the cones - and although my cones are most likely to be very old, I do not think this will raise the car up enough to solve the problem. I do not really want to go cutting the body work away if it can be avoided, I do not know what other options I have though. Can anyone help please?
Thanks,
Christina
p.s dont really have many photos, but will post what i have up as soon as I find someone in my office with a cable that fits my phone.

Major Wheel Rubbing :( What Is The Best Solution?
Started by
Miniature
, Dec 17 2012 01:21 PM
16 replies to this topic
#2

Cooperman
-

- TMF+ Member
-

- 23,315 posts
Uncle Cooperman, Voted Mr TMF 2011
- Location: Cambs.
- Local Club: MCR, HAMOC, Chelmsford M.C.
Posted 17 December 2012 - 01:31 PM
With the car at standard ride height it may still be necessary to slightly relieve the very front end of the front wheel arch lip. It is not necessary to actually cut it away, just have it bent out so that the arch radius is reduced slightly over the final forward 4" or so of arch. This will make the lip a bit wider locally and all that is necessary is to dress off the excess width with a file or an angle grinder, then paint it where the finish is damaged.
The key is to have standard ride height and a set of Hi-Lo's is ideal in achieving the right height.
The key is to have standard ride height and a set of Hi-Lo's is ideal in achieving the right height.
#3
Miniature
-
- TMF+ Member
-
- 134 posts
Mini Mad
Posted 17 December 2012 - 01:44 PM
Thanks for your help Cooperman :)
Please excuse any silly questions, as I am still quite new to the mini world - but what else would i need to buy to convert my suspension to hilo's? Would something like this cover everything I need...
http://www.minispare...c/HILO-SET.aspx
or would there be other parts I would need to buy as well?
Also, is this going to make my car look like it is sitting really high? At the back it is already soo high it looks like I could almost fit my head between my wheel and arch - could I then lower the back slightly with these and bring the front up just enough to stop the rubbing? Or would that mess up the balancing of the car? How much gap is there supposed to be between the tyre and arch?
Thanks.
#4
Cooperman
-
- TMF+ Member
-
- 23,315 posts
Uncle Cooperman, Voted Mr TMF 2011
- Location: Cambs.
- Local Club: MCR, HAMOC, Chelmsford M.C.
Posted 17 December 2012 - 04:44 PM
The big advantage of Hi-Lo's is that you can set the back and the front to whatever height you want.
That kit is ideal, but if it were me I would also buy a set of 4 ball-ends which go into the ends of the Hi-Lo's and sit in the plastic cups.
As a job it's not too difficult, but you need a 'tower tool' (suspension compressor) to get the old front trumpets out and the new Hi-Lo's in and at the back you need to remove the fuel tank.
With those wheels you'll probably still need to dress the front of the front wheel arch lips a bit even with ride height set to standard in order to give clearance when on lock and bump, e.g. when turning tight on a bumpy surface.
#5
Bungle
-

- Members
-
- 28,971 posts
Original Spamster
- Location: Cornwall
- Local Club: cornish mini club
Posted 17 December 2012 - 05:01 PM
can you take some pics to show where the tyres are hitting the body work and the arches please
could it be bent tie bars ?
could it be bent tie bars ?
#6
Miniature
-
- TMF+ Member
-
- 134 posts
Mini Mad
Posted 17 December 2012 - 05:31 PM
I will get some more pictures and post them up tonight. Thanks everyone for your help though - I would be lost without you guys!! 
#7
Cooperman
-
- TMF+ Member
-
- 23,315 posts
Uncle Cooperman, Voted Mr TMF 2011
- Location: Cambs.
- Local Club: MCR, HAMOC, Chelmsford M.C.
Posted 17 December 2012 - 06:04 PM
One of the constant problems with Minis is the manufacturing tolerances between different body-shells. It is not at all unusual to find the wheel arch position 1/4" different from one car to another, or even from one side of a car to the other on the same car. The only way to get things right is to get the suspension and ride height set correctly front-to-rear and side to side, then 'adjust' the wings as necessary with a hammer. That is not meant as a joke. I had to 'adjust' the front of the front wing lips on my Cooper 'S' when I first built it and fitted 5" x 10" wheels with 'knobbly' forest tyres and one side had to be 'adjusted' a bit more than the other.
If you have wheel arch extensions it makes things easier as the extensions can be removed, then re-fitted to take the re-shaped wing lip and they cover the 'adjusted' area so that the wing usually doesn't need re-painting, just a little bit of brushed on primer and some Waxoyl to prevent rusting..
If you have wheel arch extensions it makes things easier as the extensions can be removed, then re-fitted to take the re-shaped wing lip and they cover the 'adjusted' area so that the wing usually doesn't need re-painting, just a little bit of brushed on primer and some Waxoyl to prevent rusting..
#8
Miniature
-
- TMF+ Member
-
- 134 posts
Mini Mad
Posted 18 December 2012 - 02:10 PM
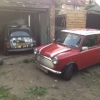
some photos to help people work out what the best solution to my problem is...
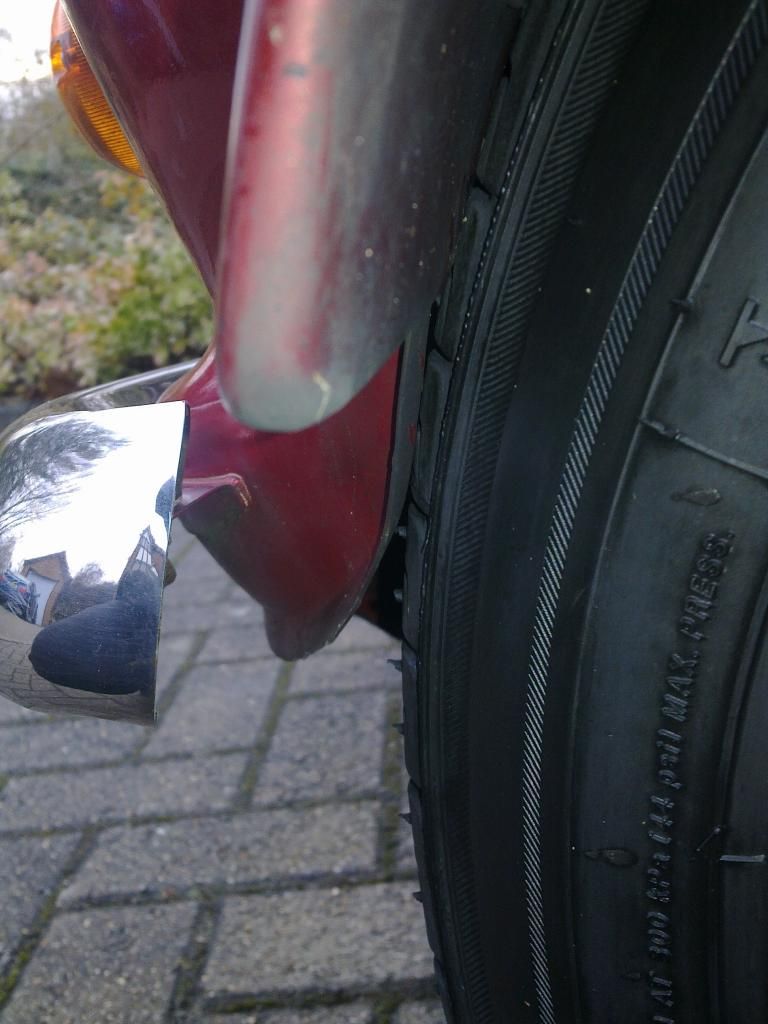
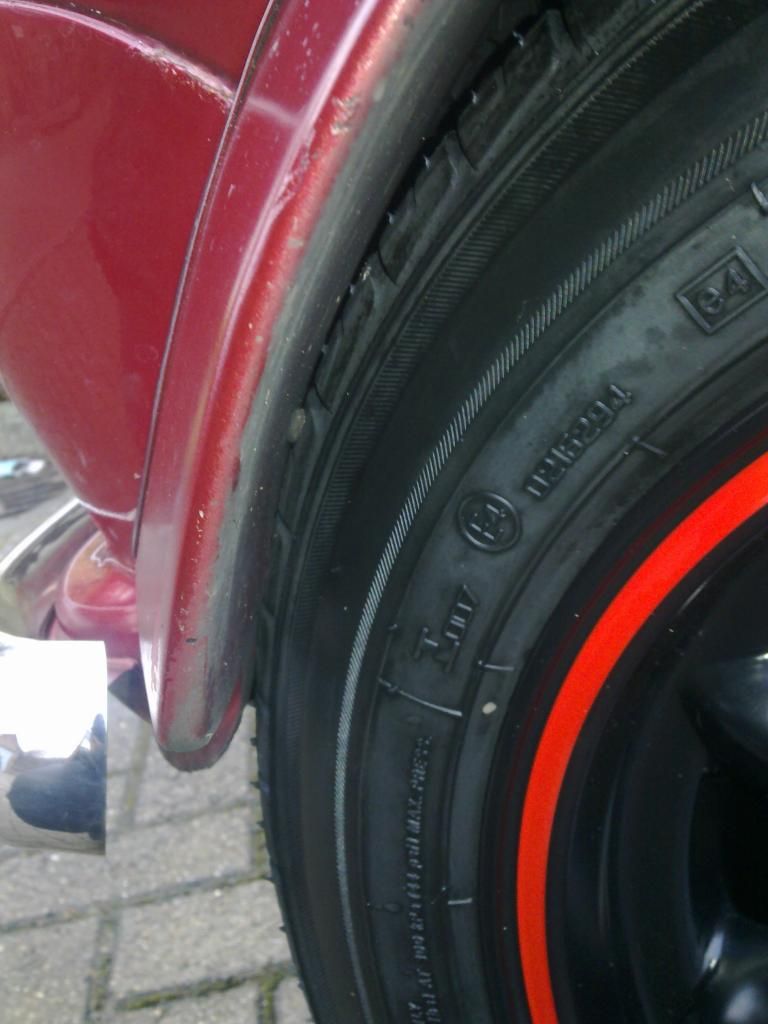
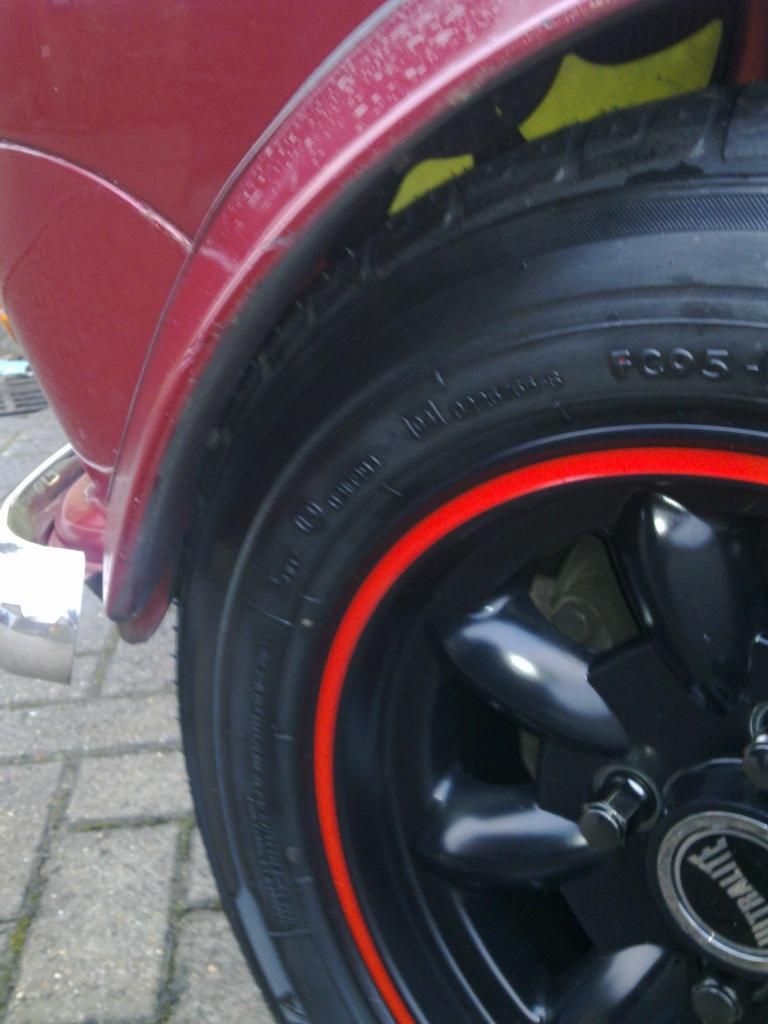
They are not very clear but its the best I could manage photo-wise. So as you can see its hitting pretty badly all the way down that edge on the arch and also the body work.
They are not very clear but its the best I could manage photo-wise. So as you can see its hitting pretty badly all the way down that edge on the arch and also the body work.
#9
Miniature
-
- TMF+ Member
-
- 134 posts
Mini Mad
Posted 18 December 2012 - 02:34 PM
Can anyone link me to the ball-ends that Cooperman suggested buying above? I am not sure I am looking at the right things on mini spares, and I dont want to buy the wrong parts.
I am still a little worried that I am going to have to pay £100+ for the new suspension, pay for that to be fitted (I wont be able to do it myself for many reasons), then pay for the arch and body to be bent/cut away, and then pay for it to be repainted around that area where it has been cut. Its going to add up very quick! The wheels and tyres alone pretty much emptied my bank account, especially at this time of year. But I cant go without a car that I can drive, and my old wheels and tyres were very dangerous in the state they were in so I do not want to put them back on.
I am still a little worried that I am going to have to pay £100+ for the new suspension, pay for that to be fitted (I wont be able to do it myself for many reasons), then pay for the arch and body to be bent/cut away, and then pay for it to be repainted around that area where it has been cut. Its going to add up very quick! The wheels and tyres alone pretty much emptied my bank account, especially at this time of year. But I cant go without a car that I can drive, and my old wheels and tyres were very dangerous in the state they were in so I do not want to put them back on.
Edited by Miniature, 18 December 2012 - 02:36 PM.
#10
harrymini2012
-
- Members
-
- 236 posts
Mini Mad
- Location: north london
Posted 18 December 2012 - 02:56 PM
i had exactly the same problem as you have there, except going from what you have on now to 12x6 superlights. rather than renweing the front suspention i ended up grinding off a little bit of the metal lip and touched it up to prevent rust etc. if you did go to a garage just to get a bit of the lip taken off/bent i doubt it would cost allot as i done both of mine in about 45 mins....
hope this helps, harry
hope this helps, harry
#11
corrado vr6
-

- TMF+ Member
-
- 678 posts
Super Mini Mad
Posted 18 December 2012 - 05:44 PM
This is only a suggestion to other members to see if they would agree..
Could he fit adjustable tie rods to move the wheel back a bit?
Could he fit adjustable tie rods to move the wheel back a bit?
#12
Bungle
-
- Members
-
- 28,971 posts
Original Spamster
- Location: Cornwall
- Local Club: cornish mini club
Posted 18 December 2012 - 06:25 PM
the wheel that far forwards points towards bent tie bars
#13
absx2
-

- Members
-
- 918 posts
One Carb Or Two?
Posted 18 December 2012 - 07:10 PM
I acquired A 1991 mini city with Rover minilight replicas and yoko 165/65-12 tyres and it was by far and away the worst handing mini I had ever driven (over 65 by the way). It had adjustable tie bars and drove like a shopping trolley because the previous owner had reduced the caster angle to stop the tyre rubbing on the front edge. I set the caster roughly by measuring a standard tie bar and it handled like a track car. Reducing the the castor angle below the recommended setting can be pretty dangerous when driven briskly or in an emergency so I wouldn`t go there but it didn`t half made the steering nice and light :)
#14
CityCharlie
-

- Noobies
-
- 56 posts
Stage One Kit Fitted
- Location: Warwickshire
Posted 18 December 2012 - 10:08 PM
Sorry to hijack but what if I had this issue on 5Jx12 Minilites (I think that's what they are) on 145/70R12s? It only seems to do it when almost on full lock very much like the original poster's car (i.e one portion of the front of the wheelarch).
Besides that the car actually drives very well.
Besides that the car actually drives very well.
#15
A-Cell
-

- Members
-
- 1,610 posts
Camshaft & Stage Two Head
- Location: Longbridge
Posted 18 December 2012 - 11:25 PM
As bungle says check that the tie bars are not bent. Also it is possible to fit packing shims part no 2A4292 between the body and the front subframe. This was done in the factory and sometimes these are removed by previous owners who don't understand the reasons for them. Are the tear drop mountings fitted, or have these be en removed completely and the front valance bolted directly to the subframe (this would reduce the clearance by over 18mm).
The 'ball ends' referred to by Cooperman for the Suspension struts are actually called Knucle Joints part no GSV1118
The 'ball ends' referred to by Cooperman for the Suspension struts are actually called Knucle Joints part no GSV1118


1 user(s) are reading this topic
0 members, 1 guests, 0 anonymous users


