Jump to content


Photo
- - - - -

Gradual Resto Of Our Ritz! Part 2!


  • Please log in to reply
217 replies to this topic

#91 alex-95

alex-95

    I am THE CLAMP MAKER

  • TMF+ Member
  • PipPipPipPipPipPipPipPipPipPip
  • 6,017 posts
  • Location: l

Posted 31 May 2013 - 09:14 PM

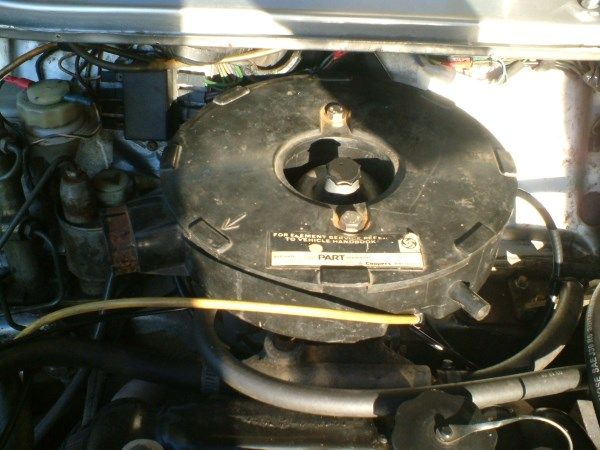
Bit of an update, Since the other air filter that the stage one kit come with was sucking in to much air and had duck tap on it to solve this problem, yesterday we fitted the standard air filter housing and a new filter that we bought from riv run. we had no wing nut srews that they need to hold the lid on, so we cut 2 lenghs of brass, drilled them out and tapped one side 1/4 bsw and the other 8mm, then fastened it done with them and 2 8mm bolts. We went out for a run in it a found it much better, it may a couple of holes drilling in it to add a tad more but will wait till we go for a longer drive.

DSCF3044_zpsa498ff57.jpg


#92 alex-95

alex-95

    I am THE CLAMP MAKER

  • TMF+ Member
  • PipPipPipPipPipPipPipPipPipPip
  • 6,017 posts
  • Location: l

Posted 31 May 2013 - 09:14 PM

Bit of an update, Since the other air filter that the stage one kit come with was sucking in to much air and had duck tap on it to solve this problem, yesterday we fitted the standard air filter housing and a new filter that we bought from riv run. we had no wing nut srews that they need to hold the lid on, so we cut 2 lenghs of brass, drilled them out and tapped one side 1/4 bsw and the other 8mm, then fastened it done with them and 2 8mm bolts. We went out for a run in it a found it much better, it may a couple of holes drilling in it to add a tad more but will wait till we go for a longer drive.

DSCF3044_zpsa498ff57.jpg


That's about it. 


Alex


#93 minimuk

minimuk

    Camshaft & Stage Two Head

  • Members
  • PipPipPipPipPipPipPipPip
  • 1,946 posts
  • Location: Midlands

Posted 31 May 2013 - 10:41 PM

looks good, glad you went back to the standard housing for the right reason, I done the same with MUK a year ago, but put a K&N filter in for more air rather then drilling holes. ;D


Edited by minimuk, 31 May 2013 - 10:41 PM.


#94 alex-95

alex-95

    I am THE CLAMP MAKER

  • TMF+ Member
  • PipPipPipPipPipPipPipPipPipPip
  • 6,017 posts
  • Location: l

Posted 19 June 2013 - 07:29 PM

Cheer's minimuk, What KN filter? one that goes in the origninal box?

We drilled three holes in the back of the filter box, right next to the intake hole which has made it better, if we find there is too much air going in then we can fit some rubber gromits in the holes.

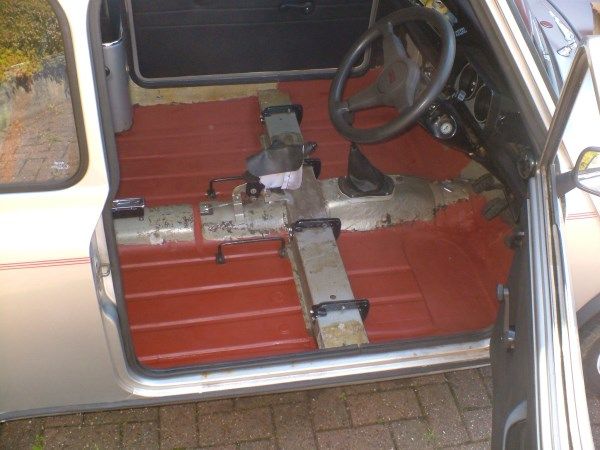
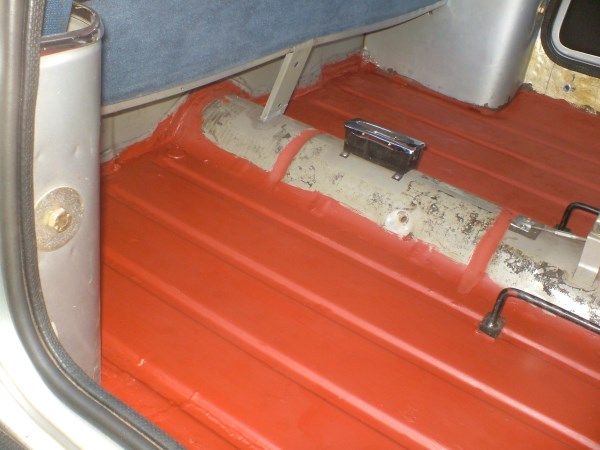
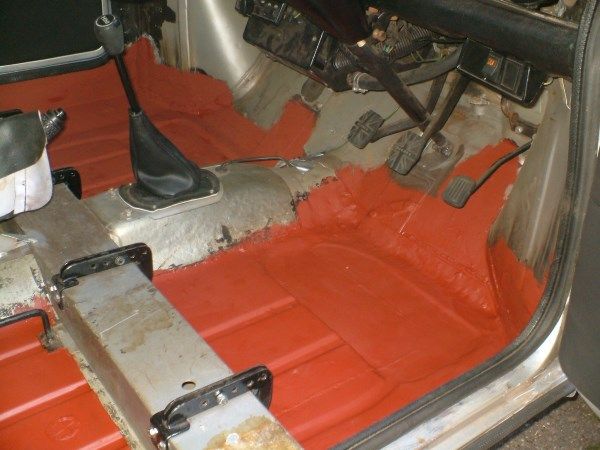
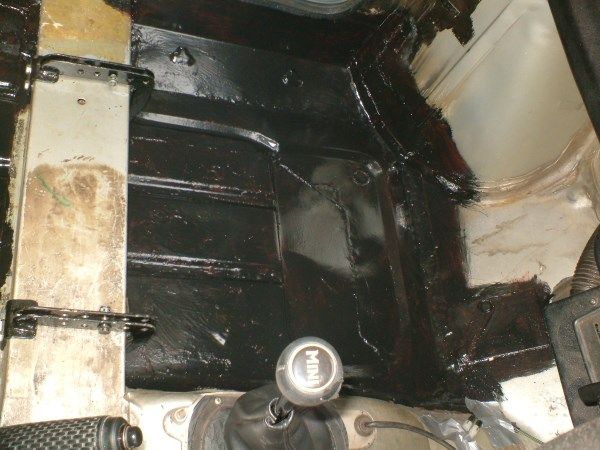
Anyway Since it was a nice day and I had nothing better to do, I stripped out the front seats and carpet etc again to paint the floor, I've used redoxide stuff but I'm going to paint over it with some black paint when it's dry which it doesn't look like it's going to be tomorrow <_<.

DSCF3048_zps39f7f5b3.jpg

DSCF3049_zpse2e109ef.jpg

DSCF3050_zps4dd4e87c.jpg


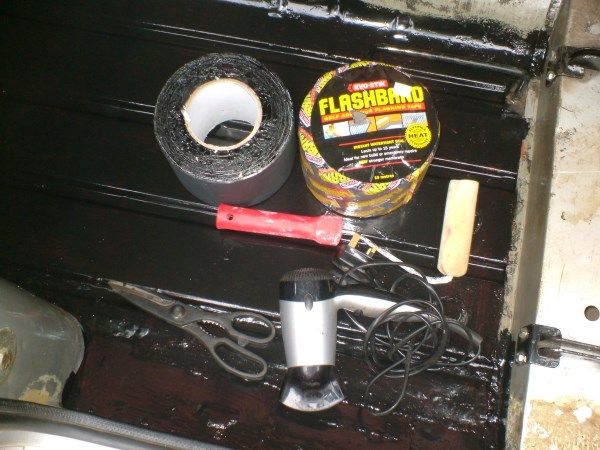
It should look a bit better with a full coat of black, When I've painted it we're going to put some flashing tape down (not tape that flashes) to try and quiet the inside down.


Alex


#95 grahama

grahama

    Up Into Fourth

  • Members
  • PipPipPipPipPipPipPipPipPip
  • 2,442 posts
  • Location: Warrington
  • Local Club: None in my area !!

Posted 19 June 2013 - 08:39 PM

I am putting the flashing tape down too. I have found that if u heat the tape up a little it is easily mouldable to the lines in the floor.

Looking good !

Graham

#96 grahama

grahama

    Up Into Fourth

  • Members
  • PipPipPipPipPipPipPipPipPip
  • 2,442 posts
  • Location: Warrington
  • Local Club: None in my area !!

Posted 19 June 2013 - 09:20 PM

I am putting the flashing tape down too. I have found that if u heat the tape up a little it is easily mouldable to the lines in the floor.

Looking good !

Graham

#97 alex-95

alex-95

    I am THE CLAMP MAKER

  • TMF+ Member
  • PipPipPipPipPipPipPipPipPipPip
  • 6,017 posts
  • Location: l

Posted 20 June 2013 - 07:36 PM

Thanks graham, I didn't think about heating it a bit but will do, How are you putting it down, along the a channel or across all of them?


I bought a tin of this paint today http://www.lidl.co.uk which should do the job, so hopefully it will be dry tomorrow so I can give it a coat after college.


#98 minimuk

minimuk

    Camshaft & Stage Two Head

  • Members
  • PipPipPipPipPipPipPipPip
  • 1,946 posts
  • Location: Midlands

Posted 21 June 2013 - 11:38 PM

Looking good Alex, good luck wiv the sound proofing second the heating-up bit from Graham, end is nearing.... ;D


#99 Shukran

Shukran

    Mini Mad

  • Noobies
  • PipPipPipPip
  • 129 posts
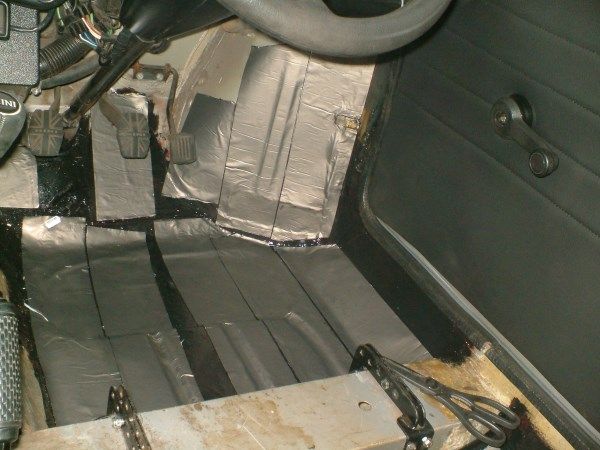
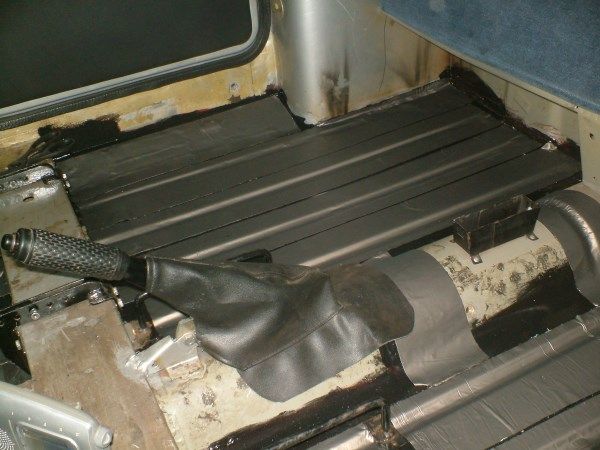
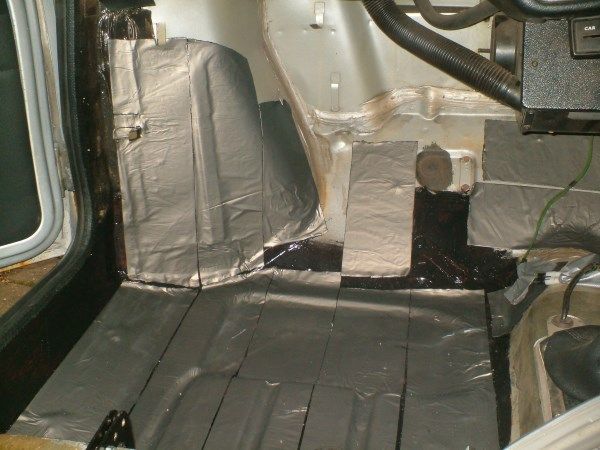
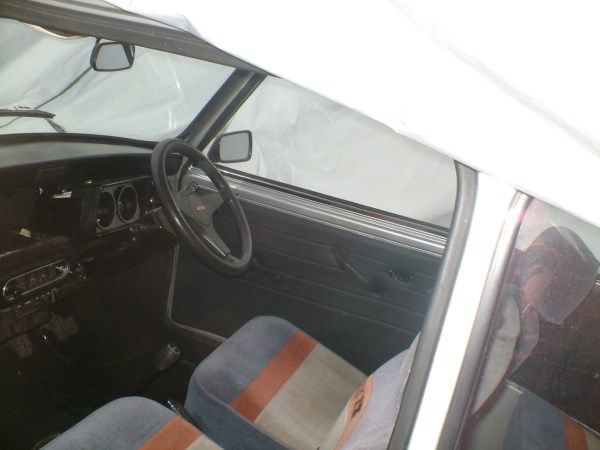
  • Location: In Abu Dhabi, missing Jo'burg

Posted 22 June 2013 - 06:39 AM

Alex


Are you not going to seam seal your new welds?


By the way the tape is called DUCT tape. You use something else on ducks.


Shukran


Edited by Shukran, 22 June 2013 - 06:39 AM.


#100 grahama

grahama

    Up Into Fourth

  • Members
  • PipPipPipPipPipPipPipPipPip
  • 2,442 posts
  • Location: Warrington
  • Local Club: None in my area !!

Posted 22 June 2013 - 07:35 AM

I am laying it across the floor,  door to door direction,  that way it will be easier to mold into the lines on the floor.


#101 alex-95

alex-95

    I am THE CLAMP MAKER

  • TMF+ Member
  • PipPipPipPipPipPipPipPipPipPip
  • 6,017 posts
  • Location: l

Posted 22 June 2013 - 09:01 AM


Looking good Alex, good luck wiv the sound proofing second the heating-up bit from Graham, end is nearing.... ;D

Thanks muk, The plan is to do it today and get everything back in today as we may be going to a vintage steam rally tomorrow :gimme: It's just little jobs now.


Alex


Are you not going to seam seal your new welds?


By the way the tape is called DUCT tape. You use something else on ducks.


Shukran

We're planning on doing the outside welds but not the inside, We need to do the a-panels too.

;D Extra%20Wide%20Duck%20brand%20Duct%20Tap


I am laying it across the floor,  door to door direction,  that way it will be easier to mold into the lines on the floor.

Ah right, Think I might go front to back (or back to front) Either put the tape in the middle of a channel or start on the "uppy" parts of the floor.


#102 Shukran

Shukran

    Mini Mad

  • Noobies
  • PipPipPipPip
  • 129 posts
  • Location: In Abu Dhabi, missing Jo'burg

Posted 22 June 2013 - 10:41 AM


 Extra%20Wide%20Duck%20brand%20Duct%20Tap


You must have done that on Photoshop! :shy:

 mJI4gFfAksZymQV333WoKsQ.jpg

Duck tape, my bottom. >_<


Edited by Shukran, 22 June 2013 - 10:45 AM.


#103 alex-95

alex-95

    I am THE CLAMP MAKER

  • TMF+ Member
  • PipPipPipPipPipPipPipPipPipPip
  • 6,017 posts
  • Location: l

Posted 22 June 2013 - 07:09 PM

So Yesterday I painted the floors with the black paint.

DSCF3052_zps398c4c93.jpg


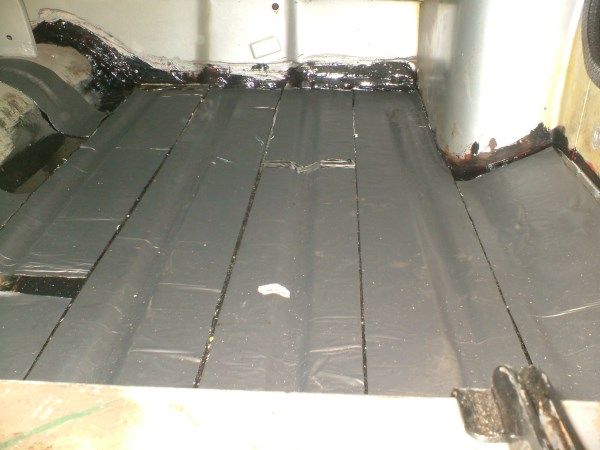
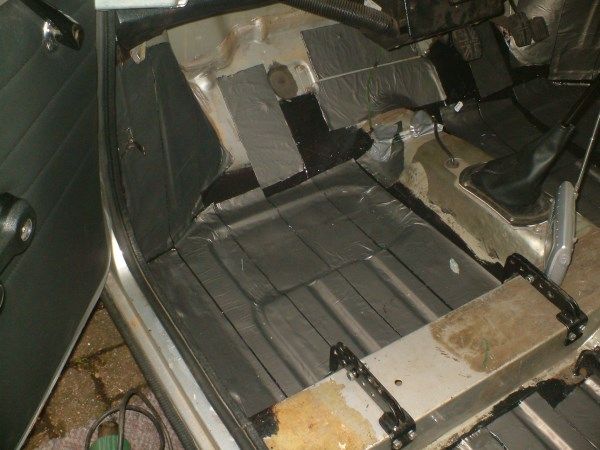
So today I added the flashing tape. I put it down Following the channels Which was quite easy, I started on the drivers side front floor which didn't go to well, but as I got going it was quite easy. for the chanels I pulled off half of the backing tape pressed it on and the pressed along the other half while pulling the rest of the backing off. It's best to cut all the tape to length for a trial fit then stick it down, so that you don't end up with a big gap Like the front floor of mine. I didn't heat it, Only when it lifted due to the dips and needed pushing down more or moulding to the shape.

DSCF3051_zpsb41c218d.jpg

DSCF3054_zps76951aa5.jpg

DSCF3053_zps13b843a0.jpg

DSCF3056_zps6e8be210.jpg

DSCF3055_zps1f5780ac.jpg

DSCF3058_zpsb1e721ad.jpg

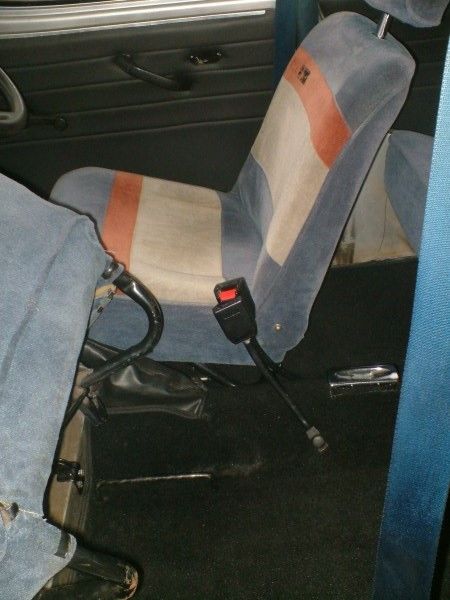
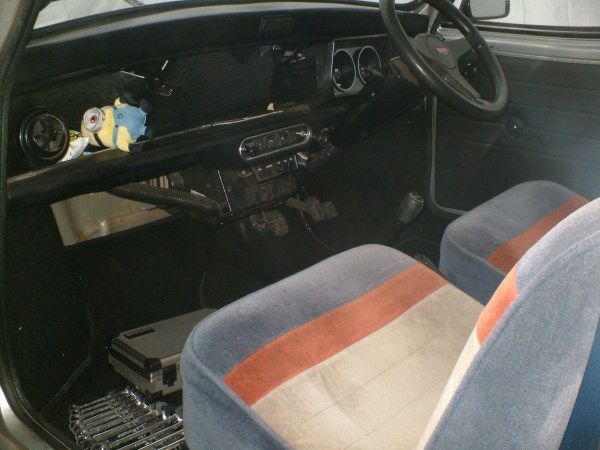
Then I fitted the carpets, seats, belts and also the foam bits and carpet for the flitch panels.

DSCF3059_zpsde51b010.jpg

DSCF3061_zps09171a98.jpg

DSCF3060_zps89f7d28f.jpg


Edited by alex-95, 22 June 2013 - 07:11 PM.


#104 minimuk

minimuk

    Camshaft & Stage Two Head

  • Members
  • PipPipPipPipPipPipPipPip
  • 1,946 posts
  • Location: Midlands

Posted 22 June 2013 - 10:59 PM

nice one.....bet yr glad that's done, messy job..... ;D


#105 joezone2001

joezone2001

    Speeding Along Now

  • Members
  • PipPipPipPipPip
  • 332 posts
  • Location: kirkby in ashfield

Posted 23 June 2013 - 10:01 AM

Nice, neat job alex. I bet you're pleased with it. I would be. I plan on using the same method for my mini when I get to that stage. Keep up the good work. Joe


1 user(s) are reading this topic

0 members, 1 guests, 0 anonymous users