Hi,
I'm currently up to my ears in gearbox and have reached the bit where the Haynes manual says: 8-9 thou, no shim required.
I have approx 50 thou gap! (not sure exactly how much as I run out of feeler guages at that point).
I've tried tapping the bearings to seat them in better (newly replaced) but this is as small as I can get it. There's no way I'm going to get the end cover to seat with this much gap and if I wang it down hard, I'll either break a cap or wear the bearing out in 3 miles
Anyone know what I do now???
Cheers
Ron


Differential Bearing Preload...help!
Started by
RonH
, Feb 08 2013 06:52 PM
16 replies to this topic
#2

The Principal
-

- Members
-

- 763 posts
One Carb Or Two?
- Location: Sussex
#3
RonH
-
- Noobies
-
- 49 posts
On The Road
- Location: Winchester
Posted 08 February 2013 - 11:40 PM
Thanks for the reply Mini mad, unfortunately the reference only deals with shimming under the plate to make sure there is adequate preload. What I have is 50+ thou gap around the plate with no gasket, where the bearings are too wide. If I put shims in, I'll get an even wider gap.
I know minis always leak oil, but this would be a total haemorage as the gasket won't fill this gap. I'll need at least 3 gaskets on top of each other to fill, and this is uncompressed.
The diff is a replacement but the bearings came from my existing gearbox so they are definitely the ones for the job.
Are there dfferent sizes of differential and diff bearing?
Could I have mixed up non compatible sizes?
Or do I just need to beat it a bit harder to settle them in more?
All suggestions appreciated
Cheers.
Ron
#4
Gr4h4m
-

- Members
-
- 1,802 posts
Camshaft & Stage Two Head
- Location: Chester
- Local Club: Club less.....
Posted 08 February 2013 - 11:53 PM
Are the bearings fully home?
#5
tiger99
-

- Members
-
- 8,584 posts
Crazy About Mini's
- Location: Hemel Hempstead
Posted 09 February 2013 - 12:17 AM
The diffs and casings are all the same nominal size, but are shimmed to take up manufacturing tolerances. Like Gr4h4m I think that the non-shimmed bearing may not be fully home against its seating on the diff cover. I have not done many diffs, but last time I put the diff well over towards the non-shimmed side to begin with,nipped the cover up loosely, and tightened up the non-shimmed side cover fully, so that the diff was being pushed by it. That way I knew the bearing was in hard contact with the side cover.
Are the inner races seated really tightly on the diff?
By the way, re-using old bearings is a bad idea, as they are often damaged during removal, especially when pulling the inner races off the diff, and in any case are usually well worn.
Are the inner races seated really tightly on the diff?
By the way, re-using old bearings is a bad idea, as they are often damaged during removal, especially when pulling the inner races off the diff, and in any case are usually well worn.
#6
The Principal
-
- Members
-
- 763 posts
One Carb Or Two?
- Location: Sussex
Posted 09 February 2013 - 07:41 AM
this was the vid I was trying to find, halfway through the guy forces the roller bearings onto the output shafts you do have to make sure they are hard up against the stops to overcome your problem, let us know how you get on
#7
Guess-Works.com
-

- Traders
-
- 19,838 posts
Gearbox Guru
- Local Club: Rugby Classic Mini Owners Club
Posted 09 February 2013 - 07:44 AM
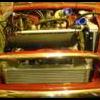
take some pictures of the diff unit in the case without the cover and also the measurements you are getting.
#8
Guess-Works.com
-
- Traders
-
- 19,838 posts
Gearbox Guru
- Local Club: Rugby Classic Mini Owners Club
Posted 09 February 2013 - 07:50 AM
this was the vid I was trying to find, halfway through the guy forces the roller bearings onto the output shafts you do have to make sure they are hard up against the stops to overcome your problem, let us know how you get on
Argh !!
I cant believe I've just seen him seat a bearing with the diff standing on the head of the output shaft... just think of the forces which are going through the shaft, into the pinion gears and onto the pin...
When you seat the bearings support the diff unit in a vice either clamping on the diff cage or on the other bearing.
What a ******* !
#9
The Principal
-
- Members
-
- 763 posts
One Carb Or Two?
- Location: Sussex
Posted 09 February 2013 - 08:46 AM
this was the vid I was trying to find, halfway through the guy forces the roller bearings onto the output shafts you do have to make sure they are hard up against the stops to overcome your problem, let us know how you get on
Argh !!
I cant believe I've just seen him seat a bearing with the diff standing on the head of the output shaft... just think of the forces which are going through the shaft, into the pinion gears and onto the pin...
When you seat the bearings support the diff unit in a vice either clamping on the diff cage or on the other bearing.
What a ******* !
I'm not sure either way is ideal, as you say he is transferring all the forces from one end of the diff to the other but clamping the opposite bearing in the vice runs the risk of damaging the roller.
Edited by The Principal, 09 February 2013 - 08:49 AM.
#10
Guess-Works.com
-
- Traders
-
- 19,838 posts
Gearbox Guru
- Local Club: Rugby Classic Mini Owners Club
Posted 09 February 2013 - 09:11 AM
I didn't say clamp the bearing, I said "ON" the other bearing, maybe I should have been clearer...
Actually I'll explain how I do it...
Obviously the diff is built with the unit held in a vice, with the crownwheel mating face uppermost. Once the crownwheel has been attached and the 6 bolts tightened to the specified torque, the bearing should be installed. The diff cage is supported in the vice therefore is supporting the load. When this is done remove the unit from the vice, turn over so the crownwheel and bearing are facing downwards, place this in the vice with the bearing being supported on the jaws of the vice. Now install the second bearing to the cage...
At no time have the internals of the the differential, crownwheel or output shafts been subject to a hammering blow.
#11
A-Cell
-

- Members
-
- 1,610 posts
Camshaft & Stage Two Head
- Location: Longbridge
Posted 09 February 2013 - 10:47 AM
And all those videos show the assembly being done without a drop of lubricant anywhere! This may be for film purposes but that is not said anywhere.
#12
RonH
-
- Noobies
-
- 49 posts
On The Road
- Location: Winchester
Posted 09 February 2013 - 11:27 AM
Thanks for the clip Mini mad, wish I'd seen that before all the gasket sealant went on...I would have put the end caps on without the diff housing.
Guessworks..I'll need to strip it down again to show this. I was deeply into much sealant in an attempt to have the worlds first non oil leaking gearbox.
Looks like another set of gaskets required all round. And, I suppose as I will need to wait for gasket delivery it makes sense to fit a new set of bearings at the same time. And I so wanted to be done this weekend!
Do these resurrection projects ever end?
Ron
[PS, can anyone explain in non Haynes language how to remove the idler gear nut? I read and re read the paragraph, checked all the photos and looked for a schematic which would show me which bits they were talking about but to no avail. In the end I stuck a screwdriver between the teeth of first gear to get the pinion wheel nut off but this seemed a bit drastic for the idler when I was attempting to jump on it at the same time.]
#13
Ethel
-

- TMF Team
-
- 25,943 posts
..is NOT a girl!
- Local Club: none
Posted 09 February 2013 - 11:40 AM
He also locks the box using reverse instead of 4th.
Idler nut? Do you mean how do you stop the gears from turning while you tighten/undo the nuts on the ends? He nearly gets that right in the Minimania vid, better to use 4th & 2nd gears though.
Idler nut? Do you mean how do you stop the gears from turning while you tighten/undo the nuts on the ends? He nearly gets that right in the Minimania vid, better to use 4th & 2nd gears though.
#14
mini13
-
- Members
-
- 3,810 posts
Up Into Fourth
Posted 09 February 2013 - 11:49 AM
to remove the rnut you need to lock the box by putting it into 1st and 4th at the same time,
to be able to get the box into 1st and 4th, you need to remove the right hand diff cover, remove the spring, ball and metal sleeve that surrounds them, this will then allou you to twist the gearchange anti clockwise too disengage from the three gear selector levers in the bottom of the box, you will then be able to slide the sycnro hubs int 1st and 4th.
also you should use 1st and 4th otherwise you can risk breaking gear teeth.
#15
Guess-Works.com
-
- Traders
-
- 19,838 posts
Gearbox Guru
- Local Club: Rugby Classic Mini Owners Club
Posted 09 February 2013 - 12:00 PM
I actually use reverse and 4th...
One, it's quicker, and two when you lock in reverse instead of 1st, the reverse idler locks into both the mainshaft and the layshaft at two different places thus spreading the load across, in total 3 interlocked gears, not just two as it would locking in 1st and 4th.
Always use 4th, as this locks the 1st motion shaft to the mainshaft and laygear,


1 user(s) are reading this topic
0 members, 1 guests, 0 anonymous users


