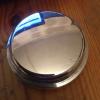
I have an air drill with a 13mm chuck which once I bought it and tried it found that it is very slow turning, handy for drilling as it dosen't burn the drill bit, also it has a reverse function. With it having a 13mm chuck it can fit directly onto the threaded part of the ball part, with some tape to protect the thread. I placed the cup into the vice and gently tightened it enough to hold it in place, then turned the ball part on a slow speed, fowards then reverse. After checking on minispares I've seen that a genuine set of new joints costs £20 a side so I'm thinking to just replace, however it dosen't stop you trying to fix the old stuff!


Balljoint Shimming
Started by
PaulColeman
, Mar 09 2013 08:04 PM
55 replies to this topic
#31

skoughi
-

- Members
-

- 1,199 posts
One Carb Or Two?
- Location: Lerwick
- Local Club: Shetland classic car club
Posted 10 March 2013 - 08:39 PM
#32
MRA
-
- Banned
-
- 7,607 posts
Previously known as 'mra-minis.co.uk'.
- Location: Due to move again....
Posted 10 March 2013 - 08:52 PM
However you still get a better job by hand as it is totally controllable, you can feel if it goes too tight, you cannot do that with a drill, at the end of the day Im only advising what is best engineering practice for safety and performance if any of you choose to ignore it that is ok,if you find a better method then that is good, I just don't agree with using a drill.
#33
Gr4h4m
-

- Members
-
- 1,802 posts
Camshaft & Stage Two Head
- Location: Chester
- Local Club: Club less.....
Posted 10 March 2013 - 11:39 PM
Ok the vid was never intended for TMF, it grew out of hand and is now consigned to the data bin in the sky.....
Maybe a TMF'er should do one, 10 mins with an iPhone, load onto YouTube and post the link, how hard can it be?
Graham
Maybe a TMF'er should do one, 10 mins with an iPhone, load onto YouTube and post the link, how hard can it be?
Graham
Regardless of speed (and I am not taking either side of this argument) the electric drill method has its own issues beyond heat.
First, if you run the drill "forward" you have to very carefully throttle both the drill's trigger and the wrench you are holding the nut with. This is not so much for speed control but for torque control. As you tighten the nut, if it gets just a tiny bit too tight the nut tightens itself further which can rip the drill out of your hand. Meanwhile, you have the chuck clamped on the threads of the stud so that's not helping either, especially if the chuck slips.
I have lapped 3 or 4 sets with a drill but I have made some special tools to hold the hub in a vice, another tool to thread onto the stud to protect its threads, and I set my drill on the lowest speed as Spitz suggested. Electric drill lapping can be made to work but I would never encourage anyone to try it if they were not mechanically inclined. I have had two "students" come to my house to use the tools I made for this task. While I had them do the work I stood over them and watched each step so they wouldn't hurt themselves or ruin the parts.
I saw the YouTube video years ago before it was pulled or made private. It showed the basics of the method but did not warn against speed or torque, nor did it show the "wobbly" figure-8 motion that Martin mentioned. I was told the video was pulled for liability reasons. Perhaps this is true but I have no first hand knowledge of why the video was really pulled.
#34
skoughi
-
- Members
-
- 1,199 posts
One Carb Or Two?
- Location: Lerwick
- Local Club: Shetland classic car club
Posted 11 March 2013 - 07:31 AM
Not ignoring your advice at all, just admiting to how i did it at the time with whatever tools i had at my disposal. Then having the guts to admit it on a public forum so that more experenced guys like yourself can pass on your knowledge and put me right. I will take your advice and replace along with the other pointers, thank you for your help.However you still get a better job by hand as it is totally controllable, you can feel if it goes too tight, you cannot do that with a drill, at the end of the day Im only advising what is best engineering practice for safety and performance if any of you choose to ignore it that is ok,if you find a better method then that is good, I just don't agree with using a drill.
#35
TopCatCustom
-

- Members
-
- 1,134 posts
Previously known as C4NN0N.
Posted 11 March 2013 - 09:08 AM
I did mine yesterday- probably took an hour to do 2, a bit of lapping with fine valve grinding paste, and LOT of playing with shims and torque wrench to get them what I think perfect. Just stiff enough that you need a medium amount of pressure to move them by hand- and pretty smooth in all positions.
p.s. I wouldn't consider using a drill, it really wouldn't save that much time that it's worth messing around with. IMO doing stuff by hand gives a much better indication of when it is done right, you don't get much feedback from a machine- hence why I torque stuff up by hand NOT using an impact driver!!!
p.s. I wouldn't consider using a drill, it really wouldn't save that much time that it's worth messing around with. IMO doing stuff by hand gives a much better indication of when it is done right, you don't get much feedback from a machine- hence why I torque stuff up by hand NOT using an impact driver!!!
Edited by TopCatCustom, 11 March 2013 - 09:10 AM.
#36
mk=john
-
- Members
-
- 1,167 posts
One Carb Or Two?
- Local Club: Milton Keynes Mini Club, Mini Cooper Register
Posted 11 March 2013 - 09:17 AM
Hi
When i did the ball joint on my mini, i also used valve paste to bed the joint in. There are youtube videos which show woking the joint with a handheld electric drill. but caution would need to be used at low speed, and remember to move the joint in all directions evenly so the paste can do its work properly.
I wouldnt like to recommend what speeds the parts should move at, but in my case i used an electric drill at low speed with the joint moving in all directions and this seemed to work fine. It goes without saying, as others have mentioned, to throughly clean all traces of paste when you are finished.
But of course do what is safest in your mind. I am not saying usign a drill is any better. I used it in small spurts, then also did a bit by hand following say, 10 seconds with the drill. It worked for me but everyone is different.
Check and recheck the resistance and smoothness of the joint, after short intervals, whatever method you use
John
Edited by mk=john, 11 March 2013 - 09:22 AM.
#37
MRA
-
- Banned
-
- 7,607 posts
Previously known as 'mra-minis.co.uk'.
- Location: Due to move again....
Posted 11 March 2013 - 09:47 AM
Not ignoring your advice at all, just admiting to how i did it at the time with whatever tools i had at my disposal. Then having the guts to admit it on a public forum so that more experenced guys like yourself can pass on your knowledge and put me right. I will take your advice and replace along with the other pointers, thank you for your help.
However you still get a better job by hand as it is totally controllable, you can feel if it goes too tight, you cannot do that with a drill, at the end of the day Im only advising what is best engineering practice for safety and performance if any of you choose to ignore it that is ok,if you find a better method then that is good, I just don't agree with using a drill.
I think "ignore" is probably not the best choice of words to use Sorry if anyone took offence.
#38
grahama
-

- Members
-
- 2,442 posts
Up Into Fourth
- Location: Warrington
- Local Club: None in my area !!
Posted 11 March 2013 - 10:28 AM
What you have to be careful of using a drill is the threads on the ball joint's bolt. It is very easy to nip the nut up too tight and the joint freezes up instantly although the drill keeps turning, stripping your threads. I have done mine with a drill and had this issue but got away with it fortunately. A drill does an excellent job as the hand method will do, but quicker.
Just be careful !!
Graham
Just be careful !!
Graham
#39
MRA
-
- Banned
-
- 7,607 posts
Previously known as 'mra-minis.co.uk'.
- Location: Due to move again....
Posted 11 March 2013 - 10:30 AM
and when it grips and your fingers fall off. don't point your finger at me !
#40
tiger99
-

- Members
-
- 8,584 posts
Crazy About Mini's
- Location: Hemel Hempstead
Posted 11 March 2013 - 10:57 AM
I would add two things to what, this time around, is a very sensible discussion, with no complete idiot advocating having them too tight, as sometimes happens.
First, if you insist on using a drill, don't grip your threaded end of the ball pin in a chuck, make some sort of threaded adaptor (your chuck is not likely to be big enough to grip on a nut).
Secondly, the Rover manual allows between "no nip" and 3 thou endfloat, with a 3 thou shim to be added if in doubt, so it is really not worth worrying about a TINY bit of endfloat. It will not shorten the life significantly. Too tight, as has been well said already, may seriously shorten YOUR life, or maybe just end the life of the car, or leave you with massive repairs, if you are lucky.
#41
MRA
-
- Banned
-
- 7,607 posts
Previously known as 'mra-minis.co.uk'.
- Location: Due to move again....
Posted 11 March 2013 - 11:38 AM
Mr Tiger99
It actually says add 0.002" shim.
Its not the initial end float that is the issue, its the high spots that wear quickly and then lead to more than specified end float.
The older BMC workshop manual, states the following "with the ball housing fully tightened it must be possible to move the ball pin without any sign of free play"
Now I know that 0.003" is a small amount of free play, it is none the less a size that you would be able to feel by hand.
I suspect that the later ball joints although of a similar quality the decision was made to avoid the extra work of lapping in and the tolerance increased to resolve broken taper pins, possibly due to safety issues.
There are different quality parts available, however lapping them all in will still increase their lifespan, the time required to lap them in will differ due to the quality purchased.
Edited by mra-minis.co.uk, 11 March 2013 - 11:50 AM.
#42
lrostoke
-

- Members
-
- 6,923 posts
Crazy About Mini's
- Location: Maybank, Staffordshire
- Local Club: none
Posted 11 March 2013 - 11:48 AM
I've done a couple of sets with a battery drill, set the torque low so that if it does bind the drill stops turning so no risk of whipping it out your hand or stripping threads
Battery drills can be made go pretty slow...I used gland pliers to grip the domed nut and applied pressure there or loosened if it felt to tight.
Battery drills can be made go pretty slow...I used gland pliers to grip the domed nut and applied pressure there or loosened if it felt to tight.
#43
tiger99
-
- Members
-
- 8,584 posts
Crazy About Mini's
- Location: Hemel Hempstead
Posted 11 March 2013 - 04:21 PM
mra-minis, thanks for pointing out my mistake, it is indeed 2 thou. I don't have the older BMC manual, but 30 or 40 years ago it was usual to set them up on the loose side, i.e. moving freely, but with no discernible end float, much the same as we are mostly suggesting here. I would not have accepted 3 thou of end float, it is always possible to make a fine adjustment to the face of the ball nut, as Doug has described somewhere above, but for a quick job, it would do. Of course they were better made in those days. I always used either Unipart or Quinton Hazell (likely from the same factory), and lapping was not needed. Alas, it is nowadays.
#44
TopCatCustom
-
- Members
-
- 1,134 posts
Previously known as C4NN0N.
Posted 11 March 2013 - 04:47 PM
How ******* hard are you all gripping the ball cup, you just need to put light pressure on it and a couple of fingers is enough..........Sounds like your all hanging onto 'em like you life depended on it.......
Obviously people are lapping it in place bolted onto the hub- otherwise why would we be saying "be careful of it nipping up and chewing up your hand or the thread", it wouldn't be able to "nip up" if you were only holding the nut...
#45
MRA
-
- Banned
-
- 7,607 posts
Previously known as 'mra-minis.co.uk'.
- Location: Due to move again....
Posted 11 March 2013 - 04:55 PM
How ******* hard are you all gripping the ball cup, you just need to put light pressure on it and a couple of fingers is enough..........Sounds like your all hanging onto 'em like you life depended on it.......
Obviously people are lapping it in place bolted onto the hub- otherwise why would we be saying "be careful of it nipping up and chewing up your hand or the thread", it wouldn't be able to "nip up" if you were only holding the nut...
I think that some people only do the cap half, I always do both seat and cap.


1 user(s) are reading this topic
0 members, 1 guests, 0 anonymous users


