Ok, I'm back now.
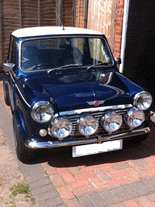
You'll need some parts. A couple of relays and bases, a couple of fuse holders, some ring eye fittings, at least one switch, wire and other stuff that'll be mentioned as I go along. You need to decide how you want your lamps switched. Neither set is permitted to be on all the time. The spot lamps must be wired so that it is not possible to have them illuminated while the headlamps are dipped. The conventional way to do this is to use a relay to control them, but you may decide you also want a switch in line so that you can turn them off independantly of the dip switch. While this is not required, it is a good idea. The fog lamps must be switched so that you can turn them on and off as required. I like to do this by using a second main lighting switch (with the front swapped for the one with the foglamp logo), setup so that in the sidelight position the rear fogs only are on and in the headlamp position both the front and rear fogs are illuminated. If you do this you will need to fit a warning lamp onto the dash to tell you when the front fogs are on as required by law. If you used a seperate additional fog lamp switch the lamp in that would be used as the tell tale so a seperate lamp would not be required.
You must take a new feed to supply both of these sets of lamps, the easiest place to get this is at the main battery terminal of the starter solenoid and for this you will need the ring terminals. I think you need 8mm ones to fit the stud. Run a cable from here to a position where you can mount some relay bases and fuse holders, probably the inner wing.
Connect the feed (or feeds) to a pair of fuses (one for each set of lamps). The fuse for each pair will need to be rated at 10 amps continuous. If you use glass cartridge fuses these will be labelled as 25 amp, if you use blade fuses they will be red 10 amp ones. This is simply because the two types are labelled in different ways, there is little difference between the two.
Each fuse should now connect to the load side of one relay (terminal labelled as 30). The other load terminal (terminal 87) of each relay should now be connected to the pair of lamps it is switching. The bulbholders of each lamp need to be connected in parallel, normally these lights use H1 style lamps which have a trailing blade connector for the supply. Using enough wire between them to get the lamps where you want them connect both of these together and connect to the relay base.
Now for the switching sides of the relays. Terminal 86 on each relay must be earthed to the shell. Terminal 85 of each relay must be wired to wherever you will mount your switches. This means getting inside the passenger cabin. Always run wires through the bulkhead by using grommets to protect them, preferably use an existing wiring grommet. These wires can be fairly small as they will be carrying very low current due to the use of relays. This helps with getting them inside the car. Take a feed from the sidelight circuit and connect to one side of the new foglamp switch, connect the other side to the wire from the foglamp relay making sue you also connect to the telltale lamp. The other side of the telltale will need earthing.
As for the spotlamps, wire the switch in the same way but the feed for the switch must be taken from the main beam circuit. A telltale is not requird for these lamps. If you choose not to have a switch for your spotlamps, the switching side of the relay can be connected to the main beam lighting circuit in the engine bay rather than running wires back into the cabin. There is an unused position in the bullet connector behind the slam panel which is ideal for this supply.
All the wiring you use everywhere must be capable of carrying at least the current rating of the fuses you use for this. This means 10 amp cable minimum for the load side of each circuit and the lamp earths. If you choose to use a single wire to supply the pair of fuses at the start of the circuit then it must be rated to at least 20 amps. The switch wires and the relay earths can be lighter gauge cable as I said above if you prefer but I wouldn't use less than 1mm cable myself which will probably be labelled as 8 amps.
That's about it. I'll be back later with a diagram.
Ok, I'm back now.
You'll need some parts. A couple of relays and bases, a couple of fuse holders, some ring eye fittings, at least one switch, wire and other stuff that'll be mentioned as I go along. You need to decide how you want your lamps switched. Neither set is permitted to be on all the time. The spot lamps must be wired so that it is not possible to have them illuminated while the headlamps are dipped. The conventional way to do this is to use a relay to control them, but you may decide you also want a switch in line so that you can turn them off independantly of the dip switch. While this is not required, it is a good idea. The fog lamps must be switched so that you can turn them on and off as required. I like to do this by using a second main lighting switch (with the front swapped for the one with the foglamp logo), setup so that in the sidelight position the rear fogs only are on and in the headlamp position both the front and rear fogs are illuminated. If you do this you will need to fit a warning lamp onto the dash to tell you when the front fogs are on as required by law. If you used a seperate additional fog lamp switch the lamp in that would be used as the tell tale so a seperate lamp would not be required.
You must take a new feed to supply both of these sets of lamps, the easiest place to get this is at the main battery terminal of the starter solenoid and for this you will need the ring terminals. I think you need 8mm ones to fit the stud. Run a cable from here to a position where you can mount some relay bases and fuse holders, probably the inner wing.
Connect the feed (or feeds) to a pair of fuses (one for each set of lamps). The fuse for each pair will need to be rated at 10 amps continuous. If you use glass cartridge fuses these will be labelled as 25 amp, if you use blade fuses they will be red 10 amp ones. This is simply because the two types are labelled in different ways, there is little difference between the two.
Each fuse should now connect to the load side of one relay (terminal labelled as 30). The other load terminal (terminal 87) of each relay should now be connected to the pair of lamps it is switching. The bulbholders of each lamp need to be connected in parallel, normally these lights use H1 style lamps which have a trailing blade connector for the supply. Using enough wire between them to get the lamps where you want them connect both of these together and connect to the relay base.
Now for the switching sides of the relays. Terminal 86 on each relay must be earthed to the shell. Terminal 85 of each relay must be wired to wherever you will mount your switches. This means getting inside the passenger cabin. Always run wires through the bulkhead by using grommets to protect them, preferably use an existing wiring grommet. These wires can be fairly small as they will be carrying very low current due to the use of relays. This helps with getting them inside the car. Take a feed from the sidelight circuit and connect to one side of the new foglamp switch, connect the other side to the wire from the foglamp relay making sue you also connect to the telltale lamp. The other side of the telltale will need earthing.
As for the spotlamps, wire the switch in the same way but the feed for the switch must be taken from the main beam circuit. A telltale is not requird for these lamps. If you choose not to have a switch for your spotlamps, the switching side of the relay can be connected to the main beam lighting circuit in the engine bay rather than running wires back into the cabin. There is an unused position in the bullet connector behind the slam panel which is ideal for this supply.
All the wiring you use everywhere must be capable of carrying at least the current rating of the fuses you use for this. This means 10 amp cable minimum for the load side of each circuit and the lamp earths. If you choose to use a single wire to supply the pair of fuses at the start of the circuit then it must be rated to at least 20 amps. The switch wires and the relay earths can be lighter gauge cable as I said above if you prefer but I wouldn't use less than 1mm cable myself which will probably be labelled as 8 amps.
That's about it. I'll be back later with a diagram.
Hi Dan,
I just saw your original wiring post.
As I want to wire in 4 lights, could I not use a 60 amp relay, 30 amp cable & 20 amp blade fuse or equivalent?
I'm not keen on wiring in two lots of cables & relays if I don't need to & have just found that the previous owner has chopped the wiring back to the loom so my original plan of using the OE wiring for two lamps & adding a new loom for the others is scuppered.
Thanks
Edited by SlamDunc, 01 May 2013 - 08:43 PM.