Jump to content


Photo
- - - - -

Sportspack To Luxury Cruiser With The Help Of Tmf


  • Please log in to reply
29 replies to this topic

#1 evansisgreat

evansisgreat

    One Carb Or Two?

  • TMF+ Member
  • PipPipPipPipPipPipPip
  • 1,131 posts
  • Local Club: Not yet

Posted 28 May 2013 - 09:39 PM

So I thought I’d start a thread on my project because I’m pretty much at the needing help stage. I’ve not got too much experience at this and I definitely need tmf looking over my shoulder. I did have a previous thread which was a rolling resto, but the car broke down and I saw it as an opportunity to make it the mini I really want.


Part of this thread is to show everyone that if they have enough patience they can learn everything they need from all of the knowledge here and that anyone can have the mini they want.


I’ll mention this right now, this is a long term project.

So I’ve had a while to think about what I really want and the normal track weapon isn’t for me. I may be only 26 but I want to create the most comfortable mini I can, retaining all four seats so I can take friends. Fit air con (that’s a biggy and I’ve already bought an evaporator that fits behind that dash)and have a decent stereo. The interior has been the thing I’ve been thinking about most as I plan to have the car more or less standard on the outside.

The car has been meticulously stripped with everything boxed and labelled, but I’m sure there are bits and bobs that fell by the way side so we’ll see how good a job I’ve done. Everything I can replace with stainless or alloy will be done. Smiffy’s bits will be getting a fair few quid from me, lol.

Anyway all these nice things are a way away; I’ve a bunch of welding to do first. I done a welding short course at a local college but that was over a year ago so I’ll need to get practicing again. I’ve plenty to do so I’ll be an expert by the end. So far my panel list is…

Front panel

Complete inner wing (both sides)

A panels (both sides)

Wings (both)

Inner wing / front panel stiffener bits

Scuttle

Scuttle closing panels

Door skins (both)

Complete floor

Door step (both sides)

Outer sill (both sides)

Boot floor repair

Rear valance

Valance closing panels

+Possibly

Rear passenger quarter (been rippled by terrible roads)

Bulkhead repairs

Heel board side repairs

Upper dash rail


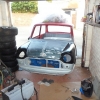
It’s currently on a spit which is really handy and makes getting into places much simpler. I took a bunch of photos today to give you an idea of what I have to start with.


IMAG0774_zpse2980313.jpg

The garage is almost cleared, I took 5 loads out of it in my new daily.


IMAG0791_zpsc0ae2301.jpg

boot floor repair NEEDED!


IMAG0790_zps6121de8c.jpg

Wheel arch might need some attention


IMAG0789_zps2192baa2.jpg

Toeboard/bulkhead should be fine with some attention.


IMAG0788_zps91b7d058.jpg

Passenger floor is a proper mess!


IMAG0787_zpsd72a47b3.jpg

Evidence of previous repairs, this was under one of the sportspack arches


IMAG0786_zps14a56744.jpg

Rear of drivers door/rear quarter.


IMAG0785_zpsbc04fcdb.jpg

Front of the same door opening.


IMAG0784_zpsf5f309fc.jpg

Not sure what to do about this.


IMAG0783_zps3c4e289a.jpg

Upper dash rail.


IMAG0782_zpsbc8df273.jpg

Hiding under the scuttle/closing panel


IMAG0781_zpsc16ea66e.jpg

Drivers flitch, or where it used to be at least.


IMAG0775_zps90bff66c.jpg

Valance closing panels still need to be removed.


IMAG0777_zps5303f47d.jpg

My air con evaporator roughly in place.


The list’s just whole panels I think I need, there’ll also be some repairs, like I think I need to repair the toe board corners and some other bits and bobs.

It’s a big list for someone with so little experience, so I’m really relying on tmf to guide me.

I’m just getting some cash together now for my first panel order, I’m not sure where to start, except to buy some angle and start reinforcing. I plan on using genuine panels only even though it’ll cost a fortune, but I’ve seen the troubles people have with non-genuine ones and I don’t want to make things any harder for myself.

As you can see the car is on a spit and I also have a nice new mig, a 100l compressor, a powder coating system and a little roll cab filled with most things I need.

I’ll buy some sheet steel and get my welding back up to scratch this week and put in an order this month for my first lot of panels, probably to the value of about £500, so where do I start?



#2 Petrol

Petrol

    One Carb Or Two?

  • Members
  • PipPipPipPipPipPipPip
  • 967 posts

Posted 28 May 2013 - 11:00 PM

This looks as bad as my MPI, maybe worse? It's not easy but have a look at the thread in my sig, might help you a bit.


I'm not a fan of powder coating as there are massive downsides, look forward to your progress and another MPI will be saved!


Pete


#3 domdee

domdee

    Formally known as dominicdee

  • Members
  • PipPipPipPipPipPipPip
  • 1,183 posts
  • Location: hull
  • Local Club: hull clubs on FB

Posted 29 May 2013 - 07:19 AM

looking forward to your progress!


#4 Minidarren83

Minidarren83

    One Carb Or Two?

  • Members
  • PipPipPipPipPipPipPip
  • 1,207 posts
  • Location: Stanford Le hope

Posted 29 May 2013 - 10:37 AM

See now your just showing off a all that rust and a powder coating thingymajig

Good luck I too had no experience and had rust just like yours worse in places but better in others I used mostly non gen panels and the fit is ok just time consuming
Keep it up, Darren

#5 evansisgreat

evansisgreat

    One Carb Or Two?

  • TMF+ Member
  • PipPipPipPipPipPipPip
  • 1,131 posts
  • Local Club: Not yet

Posted 14 April 2015 - 07:55 PM

So after a bit of a false start, I'm back in the game. I just made a big order to minispeed and I'm waiting on a pile of panels. I've been reading threads and feel like I at least know how they go together >_<


I've been blasting and powder coating parts so I have a pile of them waiting for a nice shell and that's the plan. Some of the parts that came off were in a real sorry state, rear brake back plates are a prime example.


IMAG14901_zps4kmy55wh.jpg


This was after being blasted and soaked in Deox C, it was still crusty in the seams so I drilled out the spotwelds.


IMAG14921_zpstdedi46t.jpg


IMAG14931_zpsedmyofxj.jpg


Pure crusty delicious-ness


I blasted the parts separately and welded them back together, then powder coated.


DSCF0851_zpscr9q0gbo.jpg


Some other parts I've done recently


DSCF0850_zpsnqpfgvru.jpg


As you can see the better condition the part, the better the finish.


DSCF0853_zps123dbfhv.jpg


I've been stripping the roof gutter on the shell as It's a place I'm particularly worried about. As you can see, they're pretty nasty!


IMAG1536_zpsroripbmc.jpg

IMAG1531_zpsrfuls2wc.jpg

IMAG1534_zpshjtnurk4.jpg


This is the windscreen surround (passenger side) after 3 threatments with Deox gel


IMAG1518_zpsmdrtsw0v.jpg


IMAG1520_zpsw0ljvn4u.jpg


The plan is the save the gutter from the B pillar back and replace from the B pillar forward as extra expense of panels is not that high due to the existing corrosion, so a full widscreen surround and full door surrounds are added to the shopping list.


After a good few applications of deox gel the rest of the gutter is now pretty decent.


This is part of it during the disgusting wire brush stage (note the multiple layers of paint!)


IMAG15081_zpswlgbxgon.jpg


Clean and shiney

IMAG1524_zps2xh9j0gt.jpg


Although, note the filler in the spot weld (has since been cleaned up) there was only primer under it, surely it wouldn't have had filler from the factory...? I'll add that were was a skim of filler in this area, and three paint jobs over it. Very strange.


I leave you with that mystery, thanks for looking.


Edited by evansisgreat, 14 April 2015 - 07:58 PM.


#6 Ben_O

Ben_O

    Mill Road Garage

  • Paint Doctor
  • PipPipPipPipPipPipPipPipPipPip
  • 9,794 posts
  • Location: Isle of Wight

Posted 16 April 2015 - 12:59 AM

It's all pretty standard MPI rust.


As for the gutters, in the places where it is really crusty, you could see if someone can cut the required sections out of a scrap shell and graft them in. I am having to do this in quite a few places on my project's roof. It is time consuming to do a nice job of it but well worth it in the long run.


Good luck with your future progress and if you need any help and advice, just ask.


Ben


#7 minimissions

minimissions

    Up Into Fourth

  • Members
  • PipPipPipPipPipPipPipPipPip
  • 3,427 posts
  • Location: North West
  • Local Club: M.M.O.C

Posted 16 April 2015 - 05:36 AM

Looks like a fair amount of panels to be replaced but looking good, these poor mpi's do suffer. But nice to see another being saved :) Good luck with the build


#8 evansisgreat

evansisgreat

    One Carb Or Two?

  • TMF+ Member
  • PipPipPipPipPipPipPip
  • 1,131 posts
  • Local Club: Not yet

Posted 20 April 2015 - 09:18 PM

Managed to do a little stripping today (oo-err!) Been trying to decide how much of the back panel to use so I decided to take it to bare metal.


IMAG14961_zpspq73dd11.jpg


efdaiy_zpsxyx5jttp.jpg


Here is a close up of the area between the left rear light and boot opening (lower part has been cut away) The filler is almost 10mm deep!


IMAG14971_zpsnisxtvek.jpg


So I answered the question, how much of the panel will I be using? All of it.


IMAG14981_zpsabauycdd.jpg


And under the filler? the metal was in such bad nick I threw some paint on it to give you an idea.


IMAG15011_zpsg0l1qbyd.jpg


IMAG15021_zpszdxgxpyh.jpg


The other side has some secrets too, I found more filler there although it's no where near as bad. There is so much paint and hidden filler on this car I think I have no option but to bare metal the whole thing... (weight reduction bro...?)


IMAG14991_zpsidckcpe6.jpg


Holes for a dummy filler neck I think.


IMAG15001_zps65xo57ht.jpg


#9 evansisgreat

evansisgreat

    One Carb Or Two?

  • TMF+ Member
  • PipPipPipPipPipPipPip
  • 1,131 posts
  • Local Club: Not yet

Posted 19 May 2015 - 07:44 PM

So I had a few weeks away from the project helping my girlfriend with her PhD. But I've been back out in the garage and I made a mess...


DSCF0875_zpspaxhfzry.jpg


And I made a hole.


DSCF0864_zpswf3e2cp7.jpg


And another one.


DSCF0862_zpsx9pzpzrz.jpg


This TERRIFIED me! This is the first time I've ever done any bodywork and the only reference I've had are project threads, so thanks to everyone who has a project thread, because I'm sure I learned something on it.


On the bright side, I quickly popped the new panels in and they fitted like a dream, I'm so glad I bought heritage panels.


DSCF0861_zpsrcxtm4on.jpg


DSCF0858_zps27ymhdt1.jpg


So, I've been prepping to weld on my first ever panel, with is exciting, I went over the panel and looked for in perfections in the ecoat and have marked up where the cuts should be. I'll cut so it's still got a few milimeters spare and take it from there. Fingers crossed I don't mess up a ­£200 panel.


Also picked these beauties up on ebay. Been looking for a set for a while, I really love period accessories. Already have a smiths stick on heater, a supascope mirror and the obligatory Paddy Hopkirk pedal which was given to me by a neighbour. The last neighbour I would have guessed, everyone loves a mini!


DSCF0876_zpsq6x7rlat.jpg


Only the smallest little bit of corrosion, will clean up beautifully.


DSCF0878_zpsjkew2dgh.jpg


#10 CityEPete

CityEPete

    Up Into Fourth

  • Members
  • PipPipPipPipPipPipPipPipPip
  • 3,920 posts
  • Location: On my soapbox....

Posted 19 May 2015 - 08:19 PM

Great thread so far, count me as subscribed. What did Rover do to those mpi shells?! My SPI bodied carb Mayfair has very little paint on the factory finished areas like the gutter etc and looking at mine I wouldn't put my weeks wages on all the runs in the paint on yours being from later repair work either, good old Longbridge,lol

#11 mk1leg

mk1leg

    Crazy About Mini's

  • Members
  • PipPipPipPipPipPipPipPipPipPip
  • 9,343 posts
  • Location: Jersey
  • Local Club: Mini Club Jersey, MCR

Posted 19 May 2015 - 09:37 PM

nice work....I see that the dreaded tin worm has got out of control.....lol


#12 sonikk4

sonikk4

    Twisted Paint Polisher!!!

  • Admin
  • PipPipPipPipPipPipPipPipPipPipPip
  • 16,184 posts
  • Name: Neil
  • Location: Cotwolds.

Posted 20 May 2015 - 02:36 PM

Judging by the rear panel damaged its been in a shunt. Now depending on how hard the impact was there maybe some issues with the quarter panels as well. If you are changing them I would seriously consider mocking up the rear of the car with new quarters if you are changing them.

The only reason I'm saying this is I'm going through all of this right now and it's surprising on how much gets knocked out of kilter. I had issues with the right side of the car due to the previous accident damage and it took quite a bit of faffing around to get the quarter panel to fit. I wish I had not welded the rear panel in place first. I should have just pinned it in and this would have given me the luxury of ease of fittment. It fits now but do not rely even on the Heritage panels for alignment, they still need to be tweaked around with.

#13 evansisgreat

evansisgreat

    One Carb Or Two?

  • TMF+ Member
  • PipPipPipPipPipPipPip
  • 1,131 posts
  • Local Club: Not yet

Posted 20 May 2015 - 09:12 PM

I made some measurements to see if the back end was symmetrical and it seemed as good as a handmade car should be. Regarding quarters, there is so much rust I had just decided to replace both body sides of the car. Replacing the quarter up to the roof gutter allows me to get behind the C pillars and clean the seams and isn't that much more expensive and it allows me to replace the ruined gutter seam.

The door frame is also rusted beyond belief so it's getting replaced too, hence the thought of the body side shown here  http://www.minispeed...ete-lh-1970-on/


Do you think I could get away with removing the full rear quarter and door frame as well as what's missing with appropriate bracing?


Made it out for a few hours, mainly cleaning the mess I've made but I also removed the MPI specific boot door switch panel thing. Shown on the left. Means I'll be able to have an alarm and boot light that'll go on when the boot opens.


DSCF0882_zpsq9tgcbda.jpg


Look at the rust in that seam! It looked fine before I removed it, hmmmm. I wonder why that happened.


DSCF0883_zpsjxjfacqs.jpg


So when I removed the one on my new e-coated panel, wait is that...?


DSCF0885_zpsf6bnkps5.jpg


Bare metal? How dare you! So, all new panels with any spotwelds must be given attention. I think Pete's (Petrol on here) method of splitting seams and filling with zinc rich paint is the future. Also his thoughts on a new heritage shell perhaps not being as good as you'd hope would seem to ring true.


I also managed to do this.


DSCF0886_zpsrz0fzrrf.jpg


But the funny thing is, it fell of the shelf and banged me on the elbow then hit the concrete and seemed fine, I even plugged it in as I thought it was a goner. Then I was draining the compressor drain screw and I heard a strange sound. It turned out the be the glass breaking, on its own back up on the shelf!

I then moved it to my bench and tried to carefully remove the glass as a whole to make a template, but it kept cracking on its own still in the housing. Even when it was in the pile shown, it was still like popcorn in the microwave! Bizarre.


#14 sonikk4

sonikk4

    Twisted Paint Polisher!!!

  • Admin
  • PipPipPipPipPipPipPipPipPipPipPip
  • 16,184 posts
  • Name: Neil
  • Location: Cotwolds.

Posted 21 May 2015 - 01:51 AM

You will need some serious bracing if you decide to remove the whole quarter and door frame. I think I would be using some box section to mirror the door B pillar then run something across the top to the C pillar as well. Then run a couple of diagonals to the floor. Mock everything up before final fit including refitting the door.

#15 Hendred

Hendred

    Speeding Along Now

  • Members
  • PipPipPipPipPip
  • 484 posts
  • Location: Cleobury Mortimer Nr Ludlow, Shropshire Name: John

Posted 21 May 2015 - 06:45 AM

Nice project, same jig as me


0 user(s) are reading this topic

0 members, 0 guests, 0 anonymous users