Hi I am about to remove my rear subframe to finish off some rear boot floor repairs and in anticipation that there will be some rot in the rear panel behind the sub frame I bought some rear sub frame mounting repair panels (Mini Spares MS51R or MS51L) . Anyone got any tips on how to line these up before welding to ensure that the subframe fits when.it goes back on??

How To Line Up Rear Sub Frame Mounting Repair Panels
Started by
JonnyAlpha
, Jun 21 2013 09:28 PM
14 replies to this topic
#1

JonnyAlpha
-
- Members
-

- 2,744 posts
Up Into Fourth
- Location: North Devon
- Local Club: Exmoor Minis
Posted 21 June 2013 - 09:28 PM
#2
filski
-
- Members
-
- 162 posts
Mini Mad
- Location: Oxford
- Local Club: Essex Mini Club
Posted 21 June 2013 - 09:40 PM
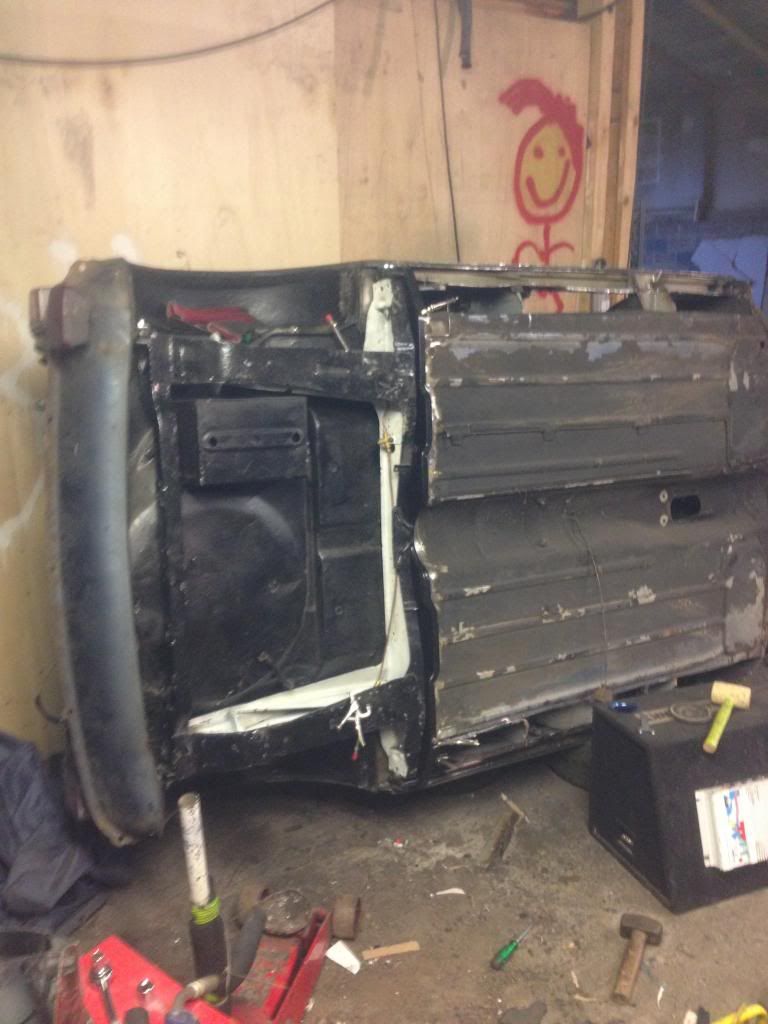
Hey Bud, Im an amateur but I did similar thing. However i went with the whole panel.
Depending on how you doing the welding i did mine with my mini on its side, so i went on to attach the subframe and the panel then spot welded it in place then took the subframe off to finish the welding and then reattached the subframe to make sure it fitted.
here is a pic, id suggest to get a mate to help out.
#3
Carlos W
-

- TMF+ Member
-
- 10,110 posts
Mine is purple, but I have been told that's normal
- Location: Sittingbourne, Kent
Posted 21 June 2013 - 09:42 PM
I did exactly this too
#4
chrisj
-

- Members
-
- 283 posts
Mini Mad
- Location: Leicestershire
Posted 21 June 2013 - 09:48 PM
You could replace the panel in two parts, first of all take plenty of measurements using different reference points.
Remove the subframe, cut out half the panel then bolt up the new half panel to the subframe, re mount the subframe to the original panel that's still in place and then check all of your measurements and tack in the new panel, by leaving half the original panel in place it should give a good indictation of position, remove subframe and weld up. Repeat for the other side if needed.
That's the way I would tackle it, but as I say make sure you take and record plenty of measurements to ensure the new panel is in the correct position.
Edited by chrisj, 21 June 2013 - 09:49 PM.
#5
JonnyAlpha
-
- Members
-
- 2,744 posts
Up Into Fourth
- Location: North Devon
- Local Club: Exmoor Minis
Posted 22 June 2013 - 07:05 AM
Thanks guys, doesn't look as simple as I thought!!! Turning the Mini over is not an option, unless I remove the engine!! Looks like I'll have to do it the hard way crawling on my hands and knees bent up crooked looking upside down as usual  if I give myself e.ough clearance I should be able to do one at a time refitting the subframe each time to check.
if I give myself e.ough clearance I should be able to do one at a time refitting the subframe each time to check.
#6
Tamworthbay
-

- Members
-
- 7,025 posts
Crazy About Mini's
- Name: Clive
- Location: Tamworth
- Local Club: A5 minis
Posted 22 June 2013 - 08:28 AM
I was told a clever trick for doing this a while back. Before you remove the subframe drill two holes about 150mm apart in the middle of the rear leg of the subframe. They need to go through the heel board as well. You can they remove and clean up the area and fit the new ends with your other measurements and a tack of weld. Then put the subframe back in and use the two holes to solid mount the subframe. You will need washers to pack the gap and need the bolts to be a snug fit in the holes. You can then double check alignment before final welding. Obviously this only works if you are doing the ends rather than the whole heel board,
#7
black olive
-

- Members
-
- 262 posts
Mini Mad
Posted 22 June 2013 - 02:27 PM
I made a jig up with a length of steel bar and two tabs on the end. these tabs were at the right width for the subframe mounting points and I marked and drilled them off the holes in the car. i then used this to jig up the heelboard repair sections one at a time. its a bit easier than lugging a subfame about ! if your in the north west your welcome to borrow it
#8
filski
-
- Members
-
- 162 posts
Mini Mad
- Location: Oxford
- Local Club: Essex Mini Club
Posted 22 June 2013 - 06:52 PM
Good lick mate hope it wount be too! ;)
#9
JonnyAlpha
-
- Members
-
- 2,744 posts
Up Into Fourth
- Location: North Devon
- Local Club: Exmoor Minis
Posted 22 June 2013 - 09:12 PM
I made a jig up with a length of steel bar and two tabs on the end. these tabs were at the right width for the subframe mounting points and I marked and drilled them off the holes in the car. i then used this to jig up the heelboard repair sections one at a time. its a bit easier than lugging a subfame about ! if your in the north west your welcome to borrow it
Mmm sounds like a plan......have to make my own one though as sadly I am at the other end of the country - South West (Tucked away in North Devon). I get the jist of what you did, sounds like you made a pattern of the front of the rear of the Sub Frame and used it to line up the repair panels? If you combine your idea with Tamworthbay's by making up the jig and then lining it up with the existing sub frame mounts and then drill two holes through it into the heel board. This way the heelboard repair sections will be in exactly the correct position??
#10
black olive
-
- Members
-
- 262 posts
Mini Mad
Posted 24 June 2013 - 10:04 AM
some pics here, hope they give you an idea how the jig works :)
Attached Files
-
 DSC_1788.jpg 52.55K
156 downloads
DSC_1788.jpg 52.55K
156 downloads
-
DSC_1766.jpg 64.35K
180 downloads
-
DSC_1772.jpg 62.13K
110 downloads
-
DSC_1774.jpg 66.35K
136 downloads
-
DSC_1776.jpg 62.97K
114 downloads
#11
JonnyAlpha
-
- Members
-
- 2,744 posts
Up Into Fourth
- Location: North Devon
- Local Club: Exmoor Minis
Posted 28 June 2013 - 10:49 AM
That's perfect - just the job - many thanks.
P.S. Are those home made panels? Or have you just cleaned them up. And is that a rear floor repair panel? Reckon I might end up needing one of those as well?
#12
black olive
-
- Members
-
- 262 posts
Mini Mad
Posted 28 June 2013 - 09:19 PM
glad to be of help mate. theyre M machine panels. good quality steel, good thickness, and they dont paint them so you dont have to start cleaning it off for welding
it was an inner sill/floor repair section 21.33.01.27 (LH) 21.33.01.28 (RH)
loads more pics here by the way
https://www.facebook...lopments?ref=hl
#13
RMSCDN
-

- Noobies
-
- 2 posts
Starting My Mini Up
Posted 29 June 2013 - 04:22 PM
Hi
Located in Canada. Reading this over coffee. I'm in the same predicament. I've replaced the floor, square cross tunnel. Did a lousy repair on the heel board but with the subframe still in place. Welding new nuts inside the heel board that were actually on the bolts going through the heel board mount. Welded them.. Installed new outer sills. Decided to remove the subframe. I'm looking at the the two ends of the heel board and I'm not happy.
Are the nuts supposed to be 'inside the heel board? Can I just weld a new plate over the existing metal and leave holes big enough to access the welded in nuts.
Bob
London, Ontario, Canada
#14
JonnyAlpha
-
- Members
-
- 2,744 posts
Up Into Fourth
- Location: North Devon
- Local Club: Exmoor Minis
Posted 10 July 2013 - 07:04 AM
Bob,
On the repair panels I bought the nuts where already welded in place as part of the panel.
You can either get LH and RH Heel Board Repair Panels or a whole Heel Board.
I think the original build was slightly different as it looks like the nuts are part of a bracket welded to the inner sill.
P.S. hope you had a Tim Hortons Doughnut with that Coffee
#15
JonnyAlpha
-
- Members
-
- 2,744 posts
Up Into Fourth
- Location: North Devon
- Local Club: Exmoor Minis
Posted 29 January 2014 - 03:53 PM
Hi; its been over 6 months since starting this thread however the Subframe removal was delayed until now and I need to resurrect the post with some associated questions, if anyone thinks I should start a new thread or add it to my project post let me know.
Anyway for lining up the rear panels I will be adopting Black Olive's tip above but before I remove the Subframe I need to ask another question.
In order to carry out welding repairs on the rear end I had to remove the Rear Subframe supports and as I have now repaired the boot floor using a boot floor repair panel I no longer have any holes for the rear sub frame mounts and due to not having finished off repairing the rear arches I have not yet fitted the new Subframe Mount Support Brackets.
To ensure that I do things in the correct order and don't end up with a problem downstream In need a little advice.
Question:
Before removing the Rear Subframe my plan is to drill holes through the rear mounts into the boot floor for several reasons:
1. To use the holes to position the Rear Subframe Supports.
2. To help line up the rear sub frame and ensure that the front mounting point repair panels are aligned?
3. To help me repair the rear arches correctly.
P.S. I have no intention of replacing the rear arches (I cannot afford it)!!
Any advice would be appreciated 
P.S. Planning to finish this project for the summer and attend at least one Mini Rally!!!


0 user(s) are reading this topic
0 members, 0 guests, 0 anonymous users


