Jump to content


Photo

Filler Tips


  • Please log in to reply
17 replies to this topic

#16 myredmini

myredmini

    My Mummy Says It's OK

  • Members
  • PipPipPipPipPipPipPipPipPip
  • 3,211 posts
  • Name: Dan
  • Location: Teesside
  • Local Club: BOG MOG

Posted 13 July 2013 - 10:44 AM

I have taken some pictures especially for this to show how we do this at work where we restore many classic cars and never had an issue with this technique.


VW Karmann Ghia


This one is not a full restoration, just a tidy up, but still gives the same idea.


All of the repair panels were welded in on the vehicle like so.


20130704_162843_zpse30f1faf.jpg


Around the repairs, the edge of filler/ paint was feathered out using a DA and p80 grade discs.


Has had repair panels all around the vehicle, here is filler applied and shaped around the front end.


20130704_162625_zps92ddbb83.jpg


20130704_162641_zpsb20e60f8.jpg


20130704_162620_zps3404440c.jpg


20130704_162601_zps0a3c390e.jpg


20130704_162550_zps2daa7680.jpg


The filler has the top knocked off with p40 on a block, then p80 then is lightly DA'd off with p180 before final stopper/filler etc


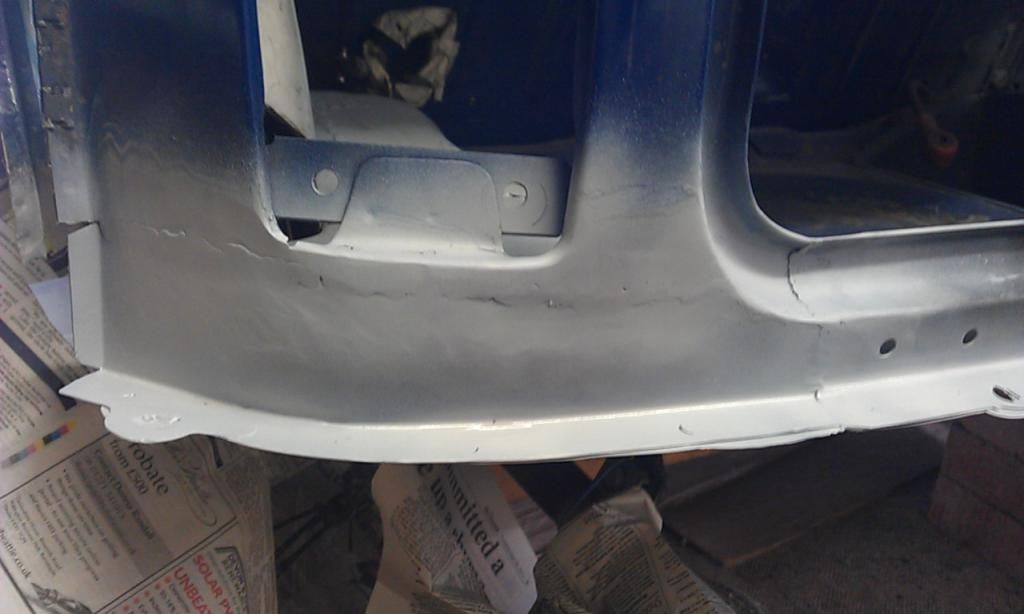
It is roughly masked just for primer.


20130712_141529_zps5fbef346.jpg


20130712_141522_zps0ba120ec.jpg


20130712_141541_zps33435392.jpg


Now for the etch. This is blown over the bare metal areas like so, even though some has gone onto the filler this is ok!


20130712_144059_zps68f02e38.jpg


20130712_144051_zps17aafac4.jpg


20130712_144106_zps705c314f.jpg


20130712_144101_zps85e11588.jpg


20130712_144112_zps8b5bd1a8.jpg


20130712_144122_zps9bbec00c.jpg


20130712_144132_zps99dd54fd.jpg


Once dry, high build primer was applied straight over the top.


20130712_161028_zpsfa66894f.jpg


20130712_161041_zps35dfd244.jpg


20130712_161045_zps7b376457.jpg


20130712_161048_zps5f6e18d7.jpg


20130712_161054_zps8c0cd567.jpg


20130712_161116_zpsc523d7f0.jpg


20130712_161121_zpse76ad397.jpg


The red/pink on the primer is the guide coat to show imperfections when flatted down, hope this helps you.


Heres some examples of the work done to show you wont have an issue.


20130704_162707_zps66db9489.jpg


20130704_162818_zps9c107b18.jpg


Dan.


#17 JonnyAlpha

JonnyAlpha

    Up Into Fourth

  • Members
  • PipPipPipPipPipPipPipPipPip
  • 2,748 posts
  • Location: North Devon
  • Local Club: Exmoor Minis

Posted 13 July 2013 - 02:59 PM

Dan;


That's fantastic mate, I finished dressing down the welds today on my rear end repair but ran out of time as I have to disappear for 6 months at work so I did not have time to apply any filler (I never had any yet). I did price up some U-POL Fantastic from a local Auto Part Dealer @ £19.99 + VAT.


To protect the repair until I return I cleaned up with a wire brush attachment, panel wiped and sprayed with U-POL ACID #8 Etch Primer.


When I get back I'll have to remove the Etch Primer from the areas to be filled? Do you recommend Wire Brush attachment to get in any holes or stripper (Thinners or something? (Could be a bit messy and much up the Acid Etch)?      


I hate having to go back on myself but just didn't have the time to complete and did not want to come back to a rusty mess!!


#18 JonnyAlpha

JonnyAlpha

    Up Into Fourth

  • Members
  • PipPipPipPipPipPipPipPipPip
  • 2,748 posts
  • Location: North Devon
  • Local Club: Exmoor Minis

Posted 13 July 2013 - 03:26 PM

Here's a couple pics of the repair so far covered with Etch Prime to protect whilst I am away.


IMAG3073_zpscae2aeda.jpg

IMAG3080_zps406c8b32.jpg


1 user(s) are reading this topic

0 members, 1 guests, 0 anonymous users