Jump to content


Photo

Refurbishing And Painting A Rear Subframe


  • Please log in to reply
23 replies to this topic

#16 JonnyAlpha

JonnyAlpha

    Up Into Fourth

  • Members
  • PipPipPipPipPipPipPipPipPip
  • 2,744 posts
  • Location: North Devon
  • Local Club: Exmoor Minis

Posted 11 March 2014 - 09:24 PM

Just resurrecting this post as i am still deciding the best way to go. I never got a reply from the galvanising company probably too small a job for them however, I have found another local ish firm about 40 miles away so i'll touch base with them.


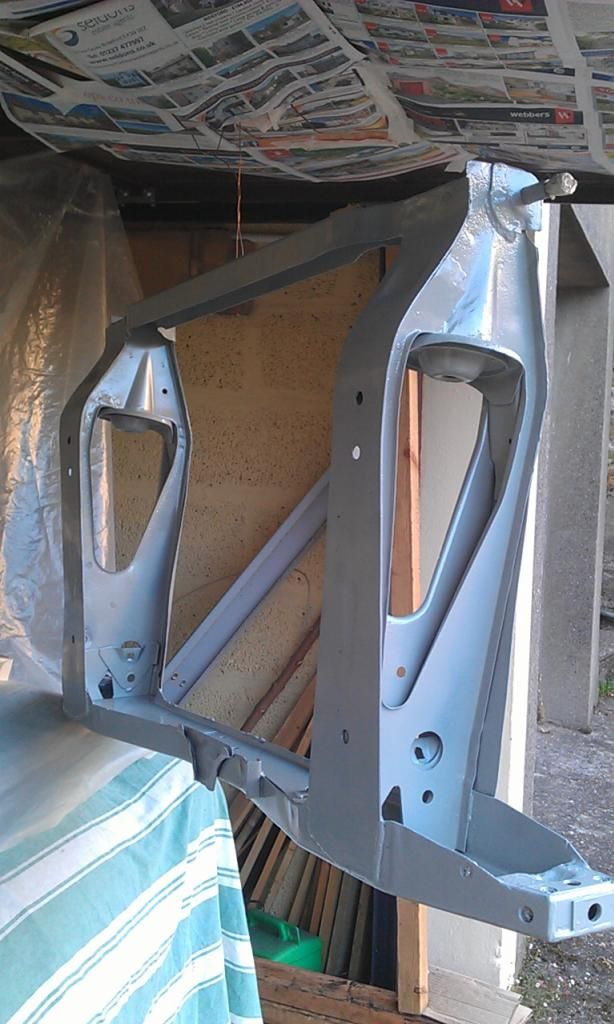
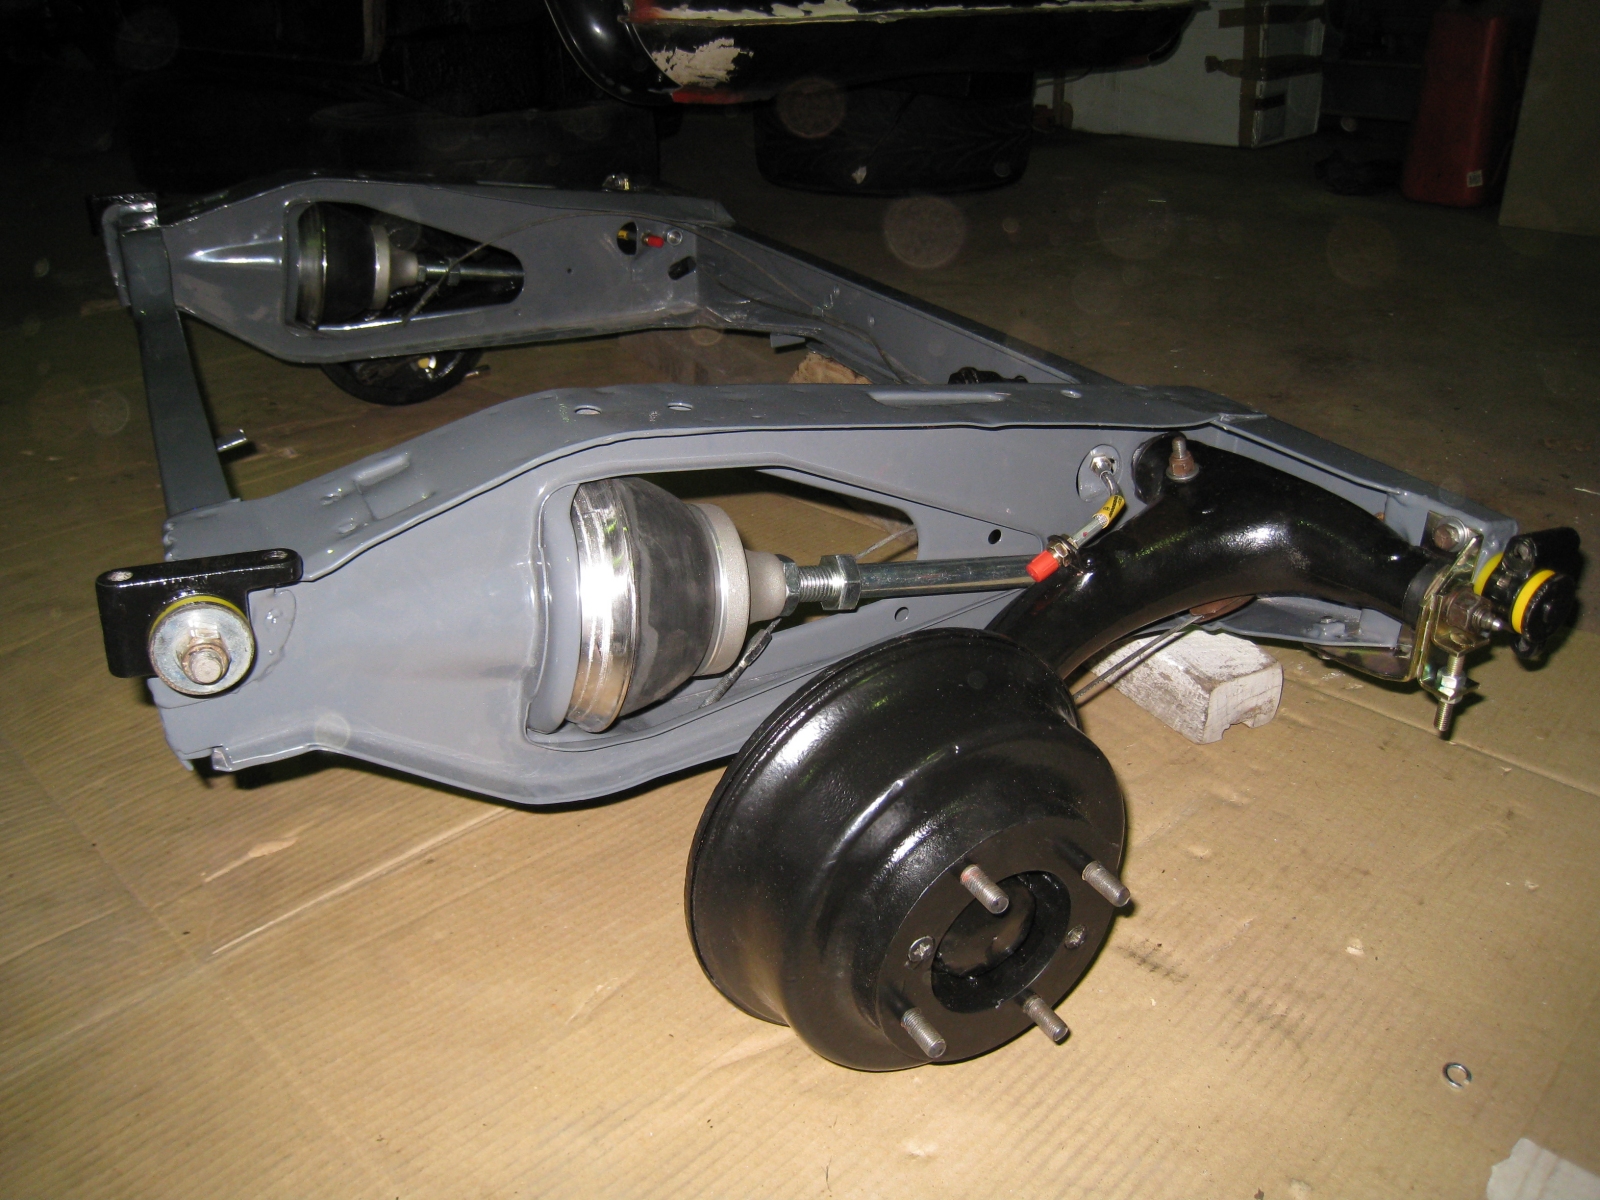
This is how I want my Subframe to look, grey with black (or poss red) semi gloss attachments:


Rear-Subframe-Rebuilt.jpg


The options I am considering and costing are:


1. Galvanise as recommended by tiger99, galvanise, primer for zinc, epoxy primer, stone chip and top coat, anyone estimate the cost if I do the painting myself?


2. POR 15 with an added Top Coat?


If I decide to use POR 15 can you paint over it? If so what with? They do a POR 15 Grey here http://www.amazon.co...r 15 grey paint


However some of the reviews suggest that the grey is not as thick, and I have also read that POR 15 fades, hence the question ref Top Coat


The reason I am considering POR 15 is because I may not be able get the subby galvanised and as I will not be able to manually strip it down to bare metal and remove all the rust POR 15 may be my other option.


Any further advice would be great.


#17 HarrysMini

HarrysMini

    I do not have short legs!!!

  • Members
  • PipPipPipPipPipPipPipPipPip
  • 3,352 posts
  • Location: .

Posted 11 March 2014 - 09:40 PM

POR15 has three steps:


Marine Clean - Cleans/degreases and generally prepares the surface

Prep & Ready - Etch primes the clean surface and further prepares the surface for top coat 

POR15 - A very thick top coat that generally needs no more than 2 coats (1 in most cases). This forms an extremely hard finish that will not chip easily. 


You buy the above produce separately or as a kit for £25 from ebay/Frost UK.


Finish with some Bilt Hamber Dynax S50 which forms a further protective, self healing layer to protect the paint and repel water.


#18 jcslocum

jcslocum

    Stage One Kit Fitted

  • Noobies
  • PipPipPip
  • 76 posts
  • Location: New York, 75 Miles North of NYC

Posted 12 March 2014 - 02:59 AM

Por15 is going to fade because it has no UV protection. It's a great product for what you want to do and is tough as hell. There are other similar products out there. Eastwood makes one that does have the UV protection so doesn't need to be top coated if it will be in sunlight. They also have some rust converters that you could use to pour into the hidden areas to stop the rust and then por15 it by pouring POR 15 in. Do this in a well ventilated area as the fumes are bad.

#19 JonnyAlpha

JonnyAlpha

    Up Into Fourth

  • Members
  • PipPipPipPipPipPipPipPipPip
  • 2,744 posts
  • Location: North Devon
  • Local Club: Exmoor Minis

Posted 12 March 2014 - 08:13 PM

POR15 has three steps:


Marine Clean - Cleans/degreases and generally prepares the surface

Prep & Ready - Etch primes the clean surface and further prepares the surface for top coat 

POR15 - A very thick top coat that generally needs no more than 2 coats (1 in most cases). This forms an extremely hard finish that will not chip easily. 


You buy the above produce separately or as a kit for £25 from ebay/Frost UK.


Finish with some Bilt Hamber Dynax S50 which forms a further protective, self healing layer to protect the paint and repel water.


How much POR 15 would I need for a complete Rear Subframe? saw a post somewhere about buying several small tins as they are a pig to re-seal once opened? Found a starter set on ebay but its only 118ml of paint? 

http://www.ebay.co.u...=item338a9a1595


With regards to the Bilt Hamber Dynax S50 again how much and what method of delivery, would a 750ml Aerosol do it?


#20 dolph

dolph

    Stage One Kit Fitted

  • TMF+ Member
  • PipPipPip
  • 50 posts
  • Location: midlands

Posted 12 March 2014 - 08:53 PM

i'm considering what to do with mine at the moment. galvinising is appealing because of the chemical dipping first but i'm worried about distortion during the galv proess.

I suppose if you hoose a place that know what the are doing with items like this is shouldn't be a problem?


#21 sonikk4

sonikk4

    Twisted Paint Polisher!!!

  • Admin
  • PipPipPipPipPipPipPipPipPipPipPip
  • 15,909 posts
  • Name: Neil
  • Location: Oxfordshire

Posted 12 March 2014 - 08:56 PM

If you add extra welds to the subframe it should not distort. Mines seriously welded wherever i can add extra weld like this

IMG_2077_zps3d069ea8.jpg


#22 jcslocum

jcslocum

    Stage One Kit Fitted

  • Noobies
  • PipPipPip
  • 76 posts
  • Location: New York, 75 Miles North of NYC

Posted 13 March 2014 - 02:11 AM

A bit more info on the Eastwood stuff for you:

http://www.eastwood....content_reviews

#23 JonnyAlpha

JonnyAlpha

    Up Into Fourth

  • Members
  • PipPipPipPipPipPipPipPipPip
  • 2,744 posts
  • Location: North Devon
  • Local Club: Exmoor Minis

Posted 19 July 2014 - 09:26 PM

Resurrecting this thread again. 

I have finished welding the Subframe and have applied 2 x Spray Coats of Epoxy Primer (Jotun Jotamastic 87). Should I Seam Seal and then Apply another coat or poss two more Primer and then Top Coat or Seam Seal and then Top Coat.


My Top Coat is Fast Engine Paint as recommended by my paint supplier (Old English White)


Here's the Subby - well chuffed so far :-)


IMAG6005_zps7172c0c2.jpg


Just ordered a few bits for it today, only odds n sods like Brake Adjusters, Gaskets, New Knuckles and a set of Brake Pipes in Cupronickle (Already have Flexi Goodridge Brake Hoses for the Radius Arms. Also have a set of adjustable Cambers (The holes in my brackets are elongated so I thought best to change them).    


#24 Daz1968

Daz1968

    Up Into Fourth

  • Members
  • PipPipPipPipPipPipPipPipPip
  • 2,058 posts
  • Location: Dudley

Posted 19 July 2014 - 11:04 PM

Be careful when seam sealing as you can cause water to get trapped inside as the frame is open and any water that gets inside needs to drain out.


0 user(s) are reading this topic

0 members, 0 guests, 0 anonymous users