Jump to content


Photo
- - - - -

Italian Job Rebuild


  • Please log in to reply
133 replies to this topic

#46 Gillybobs

Gillybobs

    Mini Mad

  • Members
  • PipPipPipPip
  • 243 posts
  • Location: Sheffield
  • Local Club: Sheffield Mini Club

Posted 20 July 2015 - 07:57 PM

Well not much progress of late as I've had a few other things to do. 

I have had a bit of good luck though! I won 3rd prize in the swiftune engine raffle. These goodies arrived today. 

4F0800B2-0C0C-41F5-9E31-CBE1F42ABD1E_zps

A01CBC67-1098-4389-A704-B366A799C421_zps


A nice little treat. Ill have to crack on and get the subframe refitted. 


#47 Gillybobs

Gillybobs

    Mini Mad

  • Members
  • PipPipPipPip
  • 243 posts
  • Location: Sheffield
  • Local Club: Sheffield Mini Club

Posted 31 August 2015 - 07:28 PM

Well I don't about know about cracking on but today I go the subframe back on! 


I've cleaned and under sealed the the under side of the boot floor ready for the subframe

134C2E2E-6E33-4082-BE30-708702DAF8CA_zps


Also fitted all new brake lines and hose's to the subframe ready for it to be refitted to the car. All the nuts and bolts are stainless as well. 

3B928984-DACB-47BA-8233-E60C2782D123_zps


Got the subframe up and fitted with out too much drama. 

A35E2B88-D722-46F0-9F79-35EEFB395D5E_zps


Then I fitted the nearside  radius arm and new shock. Found this very hard on my own! Found it even more annoying when realised I'd forgot the fit the little rubber dust cover things on the radius arms and had to take it all apart again!  

92764B4A-2CF0-4504-BE27-7A8EB90EF02E_zps


Have to see if i can get a couple of hours in the evenings and get the other radius arm on the get the brake plates and hubs fitted.


#48 xMarshyy

xMarshyy

    Learner Driver

  • Noobies
  • PipPip
  • 23 posts
  • Location: Sheffield

Posted 02 September 2015 - 03:59 PM

The shells has been painted. Cant wait to see it unmasked and the doors ,Bonnet and Boot lid hung! 2251E1EC-F5B1-4AD7-98FE-0C0AFE5C950A_zps

119B102F-4EE3-471A-A9F2-966019292EF5_zps

52325FD9-C27E-40D1-954A-40E90D5E1E48_zps

B7554F5A-9F34-4774-814A-EDECD8744860_zps


That finish just looks amazing  :o  :o


#49 Steve220

Steve220

    Up Into Fourth

  • Members
  • PipPipPipPipPipPipPipPipPip
  • 4,896 posts
  • Location: Shropshire
  • Local Club: BMC

Posted 02 September 2015 - 04:03 PM

Fresh paint done properly always is, you never want to reveal it to the elements! Lol!

Class rebuild quality here. Which under seal are you using?

#50 Gillybobs

Gillybobs

    Mini Mad

  • Members
  • PipPipPipPip
  • 243 posts
  • Location: Sheffield
  • Local Club: Sheffield Mini Club

Posted 02 September 2015 - 08:25 PM


Class rebuild quality here. Which under seal are you using?


Just using some Hammerite brush on underseal .

8DD57266-7200-4442-849C-3DA3EDD61814_zps


I've cleaned up the underside of the boot floor, Then treated any rust with jenolite then touched any bare metal with zinc primer and then green Hammerite. After that I under sealed it all.


#51 Gillybobs

Gillybobs

    Mini Mad

  • Members
  • PipPipPipPip
  • 243 posts
  • Location: Sheffield
  • Local Club: Sheffield Mini Club

Posted 01 November 2015 - 08:35 PM

Well had a little set back. Realised that the rubber boot on the suspension knuckle had ripped when I put it all together so I ve had to strip it all back down again! On getting the suspension stripped again I also realised the rubber suspension cones were past there best. The rubber was separating from the metal and I decided i didn't want to use them.

Anyway I order some new minispares cones which came last week.

BCE6EC03-0E1D-40F3-A398-BF37EBC7A045_zps


They look good quality but the black paint on the on the metal is rubbish. It just scratches off with your finger nails so I rubbed all the paint off them and etch primed them and repainted them black. 


Managed to grab a couple of hours this afternoon and got one side of the rear suspension built back up again. 

A238BBCF-124E-464A-AE09-EA522B3E342A_zps


Feel like im getting some where again so hopefully get the other side built up soon.

Should be back on it wheels soon! 


#52 Gillybobs

Gillybobs

    Mini Mad

  • Members
  • PipPipPipPip
  • 243 posts
  • Location: Sheffield
  • Local Club: Sheffield Mini Club

Posted 04 November 2015 - 09:38 PM

Managed to grab another couple of hours tonight and got the other side radius arm built up! All went together nicely.  

Hopefully the car will soon be rolling again! 


19741FA7-9CCF-4F69-97C4-B7D5287F01B8_zps


#53 neillydun

neillydun

    Learner Driver

  • Noobies
  • PipPip
  • 18 posts
  • Location: Scotland

Posted 16 November 2015 - 01:23 AM

The shine on that paint looks fantastic. Almost looks like you've fitted suspension to a brick wall!


Excellent work tho.


Neil


#54 minimissions

minimissions

    Up Into Fourth

  • Members
  • PipPipPipPipPipPipPipPipPip
  • 3,427 posts
  • Location: North West
  • Local Club: M.M.O.C

Posted 16 November 2015 - 06:43 AM

Nice work paint work looks great on this build seems like its really coming together :)


#55 slidehammer

slidehammer

    One Carb Or Two?

  • Members
  • PipPipPipPipPipPipPip
  • 1,081 posts
  • Location: Surrey
  • Local Club: LSMOC

Posted 16 November 2015 - 01:32 PM

Nice to see a more progress, looking very good, keep the updates coming


#56 Gillybobs

Gillybobs

    Mini Mad

  • Members
  • PipPipPipPip
  • 243 posts
  • Location: Sheffield
  • Local Club: Sheffield Mini Club

Posted 22 November 2015 - 09:36 PM

Well had a couple more hours today. Had an exciting time cleaning under the the floor and undersealing it. To be honest a job I was dreading but it went better than I expected! Looks clean and tidy under then car now.

4042B524-E367-4246-9646-2818CBE04BBF_zps


Also fitted a new hand brake cable . Under the subframe looks nice and shiny too! 

42524613-C33E-47D1-A51D-F1D88022353F_zps

66395982-F3AC-4E54-950D-5A1C52B3A768_zps


So hopefully Ill have the car back on it wheels and turn it round in the garage and start having a look at the front brakes and suspension. It looks like theres going to be plenty to keep me busy.


38EC8923-A71F-4702-A6E9-FFE1C04E37F2_zps


I've also been having a poke round the car electrics. Theres lots of green terminals and poor repairs been happening under the bonnet. Some of the spade connectors coming off of the main fuse box are that green they have corroded off of the wires! Think I'm going to replace the fuse box and and spades as i think its going to be the only way to make the car reliable. All the other inline fuse need cleaning as well as they are all green inside as well. The car must have been kept somewhere really damp at some point in its life. 


Well thats it for now. More updates soon! 


#57 Gillybobs

Gillybobs

    Mini Mad

  • Members
  • PipPipPipPip
  • 243 posts
  • Location: Sheffield
  • Local Club: Sheffield Mini Club

Posted 06 December 2015 - 09:11 PM

Done a bit more today. Fitted the rear wheel arches, Refitted the resprayed fuel tank and got the car on its wheels.

C3DB1B7F-5B7E-4867-9B4E-B3231A690DAA_zps


Put a bit of petrol in and got the car running so I could turn it round. Only had the hand brake to stop the mini so that was a bit nerve racking to say the least!!


Bought some new wheel arches from Huddersfield Mini spares last week as i went to have a look at there winter sale. Fitted them with some stainless screws and put some nice rubber beading between the arch and the body of the car . Think they look quite smart! The back ends sitting a bit high at the moment with the new suspension cones but that should settle when I use the car.

9231E31D-6947-4007-8D5A-E7CAE9A0108E_zps

CF899426-41E3-4EF0-9FF3-74CDE7E9079E_zps


Also fitted one head lamp . Got some new plastic bowls and halogen conversion. Need to have a look at the wiring though as the dim dip part doesn't seem to be work.


So Ive  got the car back in the garage I think I'm going to put the car back up in the air and refurb the front suspension and brakes. Also need to address  a few jobs on the engine. The drive shaft and gear selector oil seals need replacing and the core plugs need replacing as the look very rusty. I've also got a maniflow lcb and mg metro inlet I'd like to fit. I've also got a playmini cat back exhaust I want to fit.


So theres plenty to keep me busy!  


#58 Gillybobs

Gillybobs

    Mini Mad

  • Members
  • PipPipPipPip
  • 243 posts
  • Location: Sheffield
  • Local Club: Sheffield Mini Club

Posted 21 February 2016 - 09:48 PM

A little update! 

Not got much done as the mini took a back seat as I'm going to be a dad again so I've been having to do a few jobs on the house!! I was aiming to get the car on the road this summer but I cant see that happening now.


I got a few goodies for christmas. Got some new rear light headlamp rims and some alloy window winders and door handels.

C1674C22-CC9C-4ABC-9363-6EDDE48126DA_zps


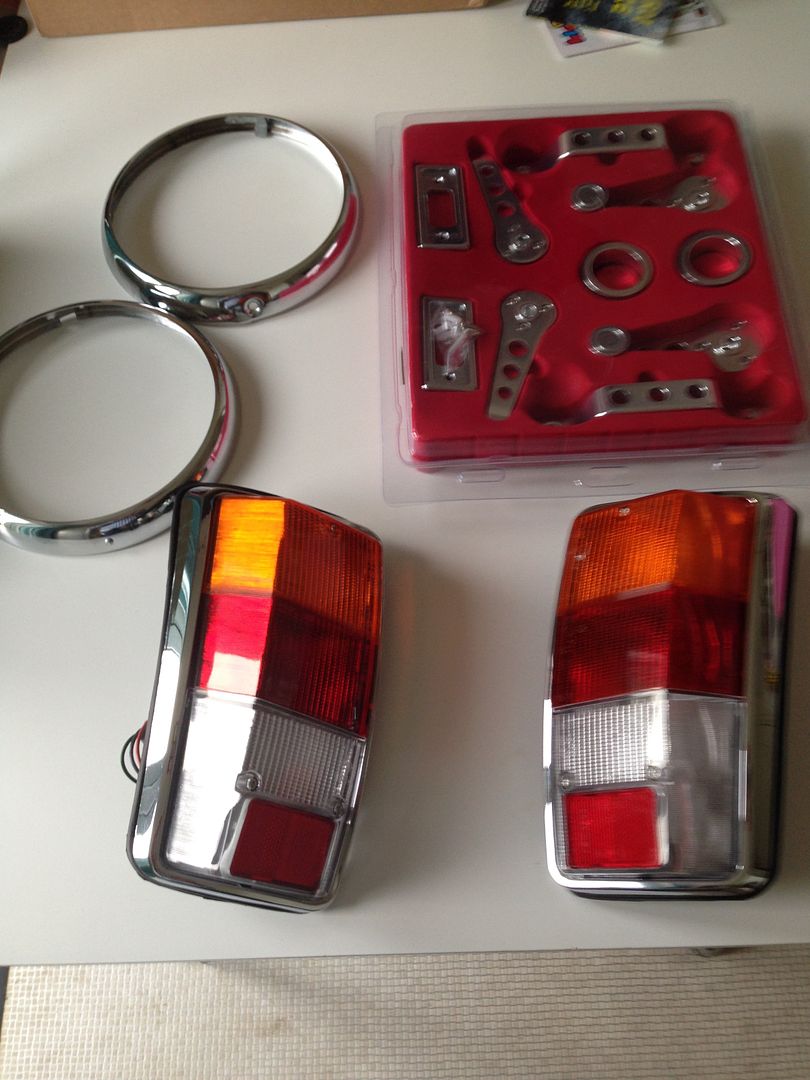
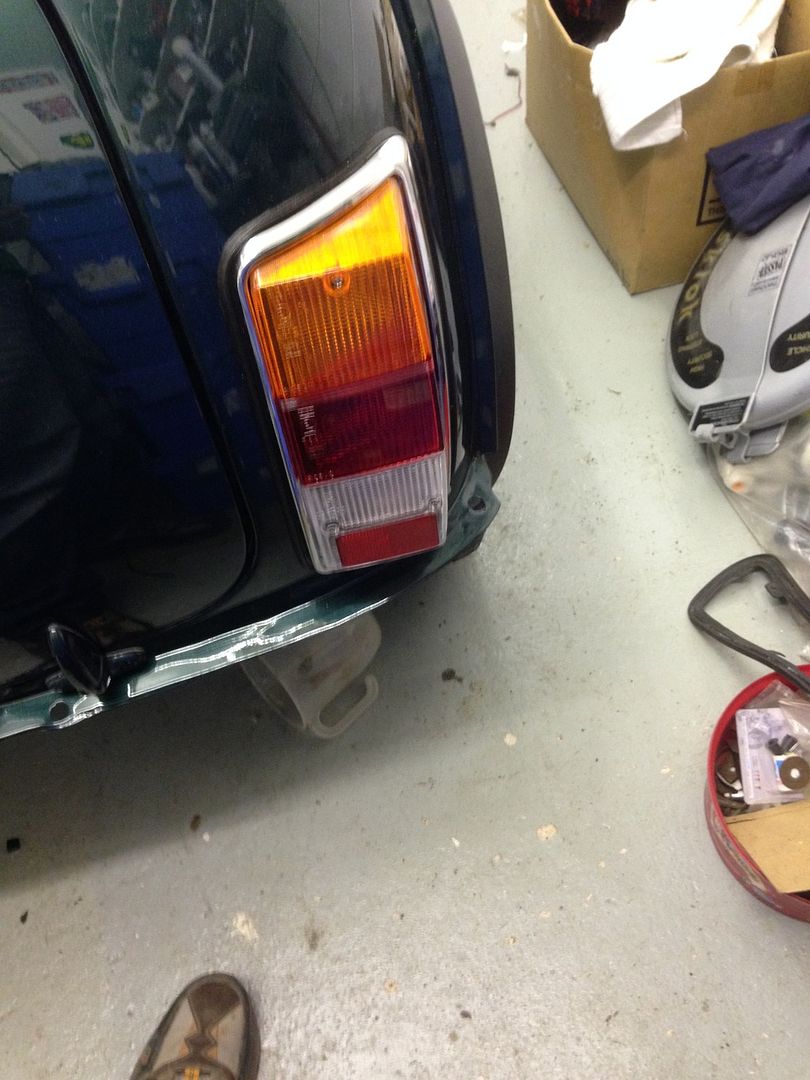
Had a bit of struggle to get them in at first the rubbers seemed really grippy and I couldn't get the rubbers to seat behind the lamps nicley. In the end I had to use a thin smear of silicone grease to get them in. They look very smart with the shine chrome and bright new lenses.

F0D74662-E512-492C-B40C-D6F499A6174A_zps


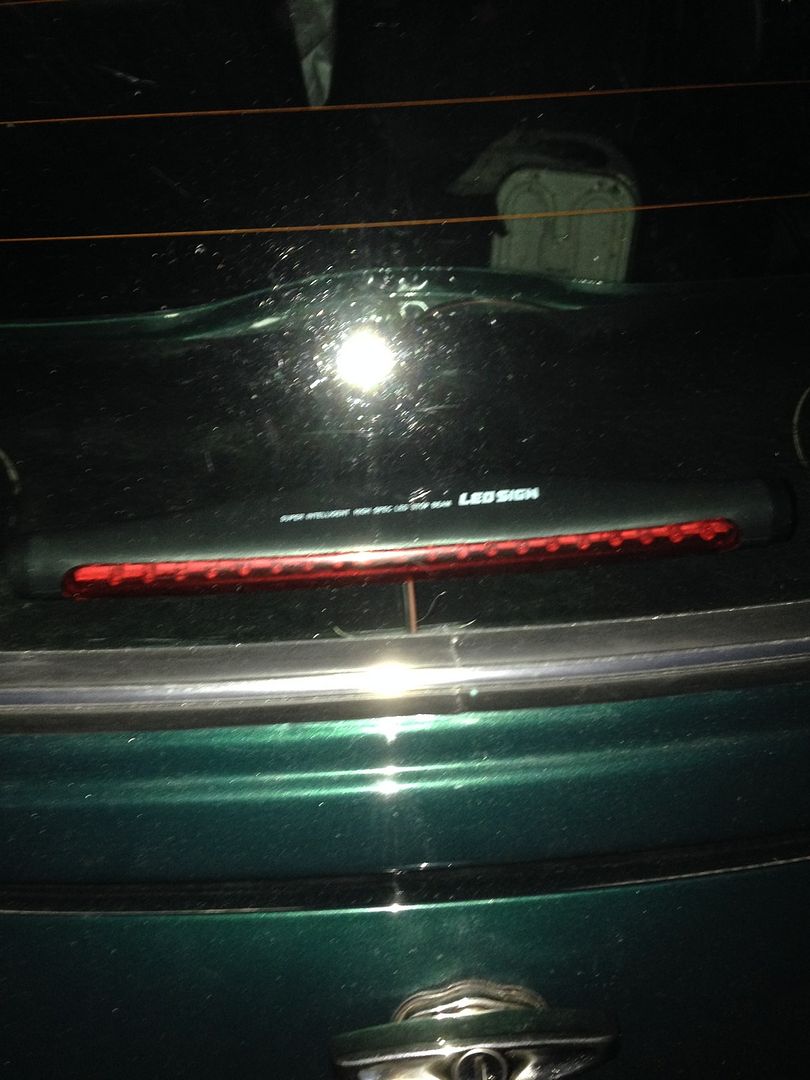
I also wanted a high level brake light in the rear of the car. Bought this cheap on off ebay which fits the back window quite nicley.

E6F70C04-7488-46FB-B731-FAFDBAA3C8C2_zps


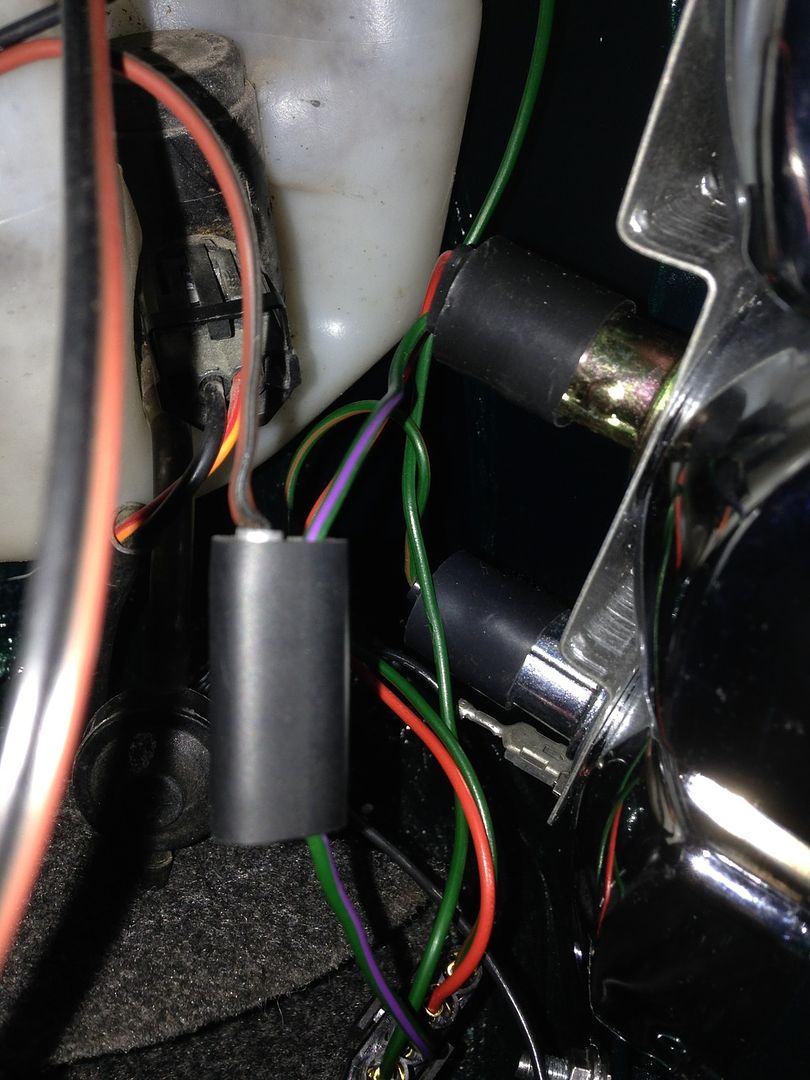
Before I fitted the new rear light cluster I split the wire to the brake lamp and soldered some bullet connectors on so I could put a a joint block on to feed the high level brake light.

0A598319-EDA1-46E7-B011-5E1F960DC95D_zps


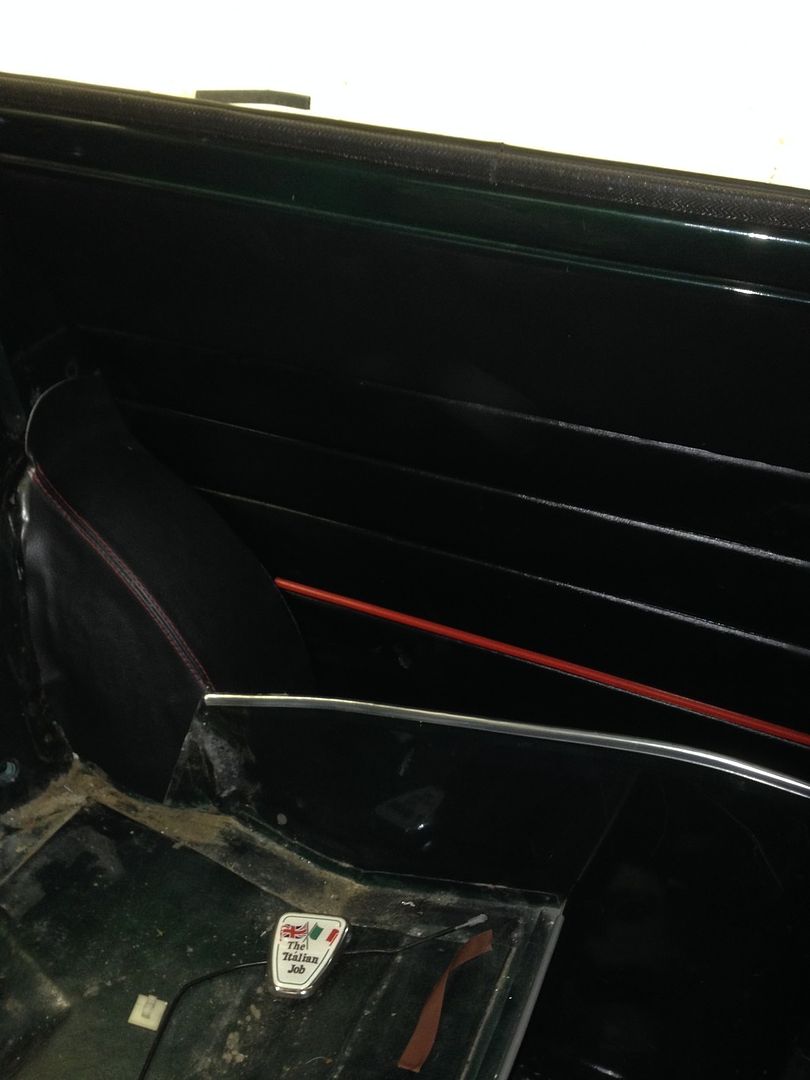
I have also got round to trimming the seam covers down. Was very apprehensive about cutting them down. I wrapped them in masking tape and held them gently in the vice. To my amazement I managed to cut them both down without scratching the paint! I bought a touch up pen kit from halfrauds and just touched the very end up where the bare metal was. Really please with the result as I though I would damage them doing this. Got them fitted to the car now. 

3F636D2A-F999-486B-968B-DAE7774E8E17_zps


Been having a look at some of trim starting to clean that up a bit. Got the rear door cards fitted.


7FB25FF2-0B21-4D99-BDC4-D570C4FDB133_zps


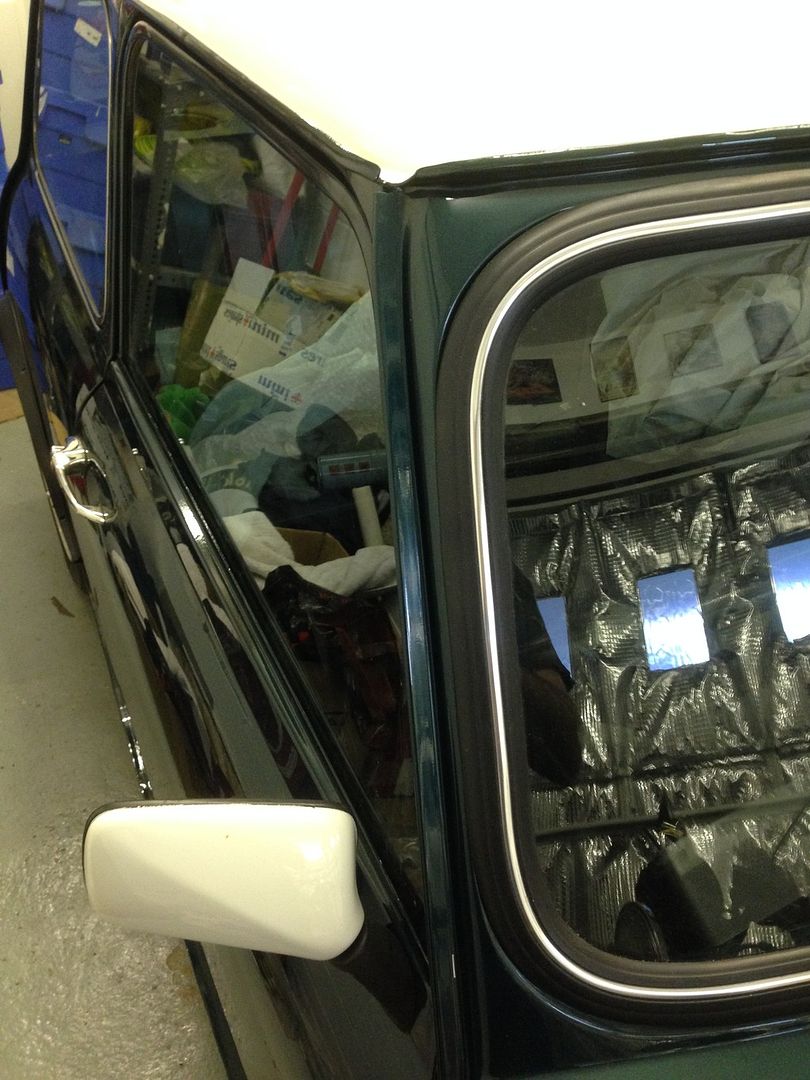
Today I fitted the drivers side window and regulator. Did it on my own how it shows in the haynes manual with a wooden wedge. I masked all the door up with masking tape to avoid scratching any paint. It went together really well! Another job done. 


938ED007-B203-46D0-954D-F7FB0E828C2A_zps


#59 Zeemax Adventure

Zeemax Adventure

    Speeding Along Now

  • TMF+ Member
  • PipPipPipPipPip
  • 301 posts
  • Location: Llandudno

Posted 01 March 2016 - 12:49 PM

Looking good, not long to go now :) its always hard trying to juggle everything.  My mini took a back seat for a whole year when I ended up renovating my house.  Fingers crossed I have it ready for L2B


#60 Gillybobs

Gillybobs

    Mini Mad

  • Members
  • PipPipPipPip
  • 243 posts
  • Location: Sheffield
  • Local Club: Sheffield Mini Club

Posted 02 March 2016 - 09:35 PM

Looking good, not long to go now :) its always hard trying to juggle everything.  My mini took a back seat for a whole year when I ended up renovating my house.  Fingers crossed I have it ready for L2B

Yes theres always something more important to do!! The minis a hobby so im trying not stress myself trying to get it done for a deadline. It will be done one day!!!


0 user(s) are reading this topic

0 members, 0 guests, 0 anonymous users