Keep up the good work :)

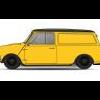
Project Van, 1969.
#61

Posted 15 July 2014 - 08:03 PM
Keep up the good work :)
#62

Posted 16 July 2014 - 07:30 AM
Hello Aaron, The welding was a combination of both me and another forum member "Shifty".
I myself had never welded in a panel before but I had a go at the wings and A panels and was quite pleased with the results, Although I did have Shifty re do one of the A panels for me as we wasn't 100% happy with it,
There's a member within the traders section who may be able to help you out "Cradleyheathen" His welding skills are fantastic and he has many happy customers within the forum.
Best of luck with your Mini mate, I hoe you manage to get it sorted ![]()
#63

Posted 17 July 2014 - 11:01 PM
Its been a while since I updated and so just a quick one..
Unfortunately I've come to the conclusion it wont be ready for IMM,
Its had to have a complete brake overhaul with an all new braking system, A new master cylinder, limiter valve, all brake lines and hoses, pressure regulator, drums, shoes, wheel cylinders, hand brake cables etc, The lot has had to be changed even though what was on there looked quite new the parts must of been put on new quite some years ago, The clutch system was just as bed, again even thou the clutch master cylinder looked quite new it too was shot and had to be replaced and so a complete clutch overhaul was needed as well as a suspension overhaul, The van had new standard dampers on, even these turned out to be unusable, This was suppose to of been a budget build lol, How that idea has gone out of the window..
At least I know it has been done properly and will last for a good number of years,
Im also running behind myself due to unforeseen circumstances and the last thing I want to do is start rushing into things to get it finished,
This way I can take my time making sure its as near perfect as can be ![]()
Oh on a plus side its now at the paint shop, No soon as the ford pop has been done the van will start to see some paint..
 van 20.jpg 38.07K
15 downloads
Click on the images for larger picture`s ![]()
Edited by leeuk, 04 October 2014 - 11:10 AM.
#64

Posted 18 July 2014 - 06:13 AM
#65

Posted 22 August 2014 - 09:56 PM
Its been a month since my last update (sorry guys) but i have tried to update my thread on 2 separate occasions but for some reason after writing everything out and then when I've come to add some pictures my laptop has crashed and sent me back to the TMF home screen so this time I`ll add the pictures after writing this lol...
Things have defiantly took a turn for the better !!
At the moment the van is stripped down to just a bare shell, totally stripped back to nothing !!
The upside of the van has been prepped ready for paint including both of its rear and front doors also its bonnet,
I've been awaiting the arrival of a spit so as I can take the next step by cleaning and painting up the underside of the van and then I can fit the petrol tank and run its new brake and petrol lines.
The rear subframe has been fully stripped too, cleaned up and prepped ready for some paint, I`ll be doing the front subframe, suspension and the engine next week, The radius arms have been reconditioned and painted and a pair of new built up backplates have been added.
All of its small bits and pieces from around the van have been keeping me busy for the past week, I've been busy cleaning and prepping allsorts ready for paint such as its door catches and hinges, its window wiper motor, radiator, horn, engine steady's and brackets, switch panel, steering rack etc....
I'm hoping all being well to be fitting it back up within 2- 3wks, the spit should be ready for next week so fingers crossed its plain sailing ![]()
..
#66

Posted 22 August 2014 - 10:13 PM
After taking away the engine I was able to clean and prep the engine bay, 2 coats of Bilt Hammond Hydrate 80 was used to keep those rusty pinholes at bay, In fact I've gone a bit mad and used the Hydrate 80 where ever I can treating everything, I've nearly used a litre and a half of the stuff lol ![]()
1st coat
 van 31.JPG 60.99K
10 downloads
2nd coat
 van 32.JPG 55.15K
7 downloads
 van 28.JPG 48.5K
7 downloads
Click on the images for larger picture`s ![]()
Edited by leeuk, 04 October 2014 - 11:11 AM.
#67

Posted 23 August 2014 - 06:59 AM
#68

Posted 23 August 2014 - 07:57 AM
Looking good then, watching this one, do you have a finish time in mind?
Cheers mate ![]()
No finish date to be honest but as soon as its painted its just a matter of building it back up and then putting it thru an MOT, I have everything needed for the rebuild including many new parts so it shouldn't take too long really, I reckon this time next month all being well I shall be driving it about ![]()
#69

Posted 23 August 2014 - 08:38 AM
#70

Posted 23 August 2014 - 04:27 PM
Looks like you'll be driving around before me then!
Looking good though fella.
#71

Posted 04 September 2014 - 09:29 PM
Update time ![]()
As you can see from the pictures I decided to save time and hassle and go ahead without the use of a spit so the van was tipped up onto some tyres instead ![]()
Since then I have been able to concentrate on the underside, The first job was quite a messy one and one I wasn't looking forward too as i had to clean all the muck and grease away.
 underside 1.JPG 60.62K
10 downloads
I was then able to start stripping it back to its bare steel in preparation for some Hydrate 80
 van 33.JPG 71.57K
9 downloads
 van 34.JPG 74.01K
5 downloads
 van 35.JPG 62.5K
13 downloads
2 coats of Hydrate 80 and 24hrs later
 van 37.JPG 65.6K
12 downloads
I then was able to apply the seam sealant
 van 38.JPG 51.81K
20 downloads
Click on the images for larger picture`s ![]()
Next on the list to do is to apply some of Bilt Hamber`s Electrox Zinc rich primer in preparation for some either U-pol`s Raptor or Gravitex, I've not quite made my mind up on the one that im going with yet although I have already purchased the Raptor ![]()
Edited by leeuk, 04 October 2014 - 11:11 AM.
#72

Posted 05 September 2014 - 05:05 AM
#73

Posted 07 September 2014 - 01:10 AM
Just a couple more pictures taken yeserday.
Applying the Electrux -
 van 40.jpg 25.64K
32 downloads
And 2 coats later
 van 39.JPG 53.55K
22 downloads
Click on the images for larger picture`s ![]()
Ive still yet to do inside the wings and behind the front panel as these need a little more work before aplication but as you can see much better with a coat of colour even if it is a dull grey (for now that is) ![]()
Edited by leeuk, 04 October 2014 - 11:12 AM.
#74

Posted 17 September 2014 - 11:02 PM
The van now has its first lot of colour as the underside has now been painted,
Firstly it was treated with Bilt Hammond`s Active 8 all over the underside then it was covered with 3 coats of Bilt Hammonds Electrox Zink primer followed by 2 coats of primer and 2 coats of stonechip, Another 2 coats of primer before 3 good coats of topcoat I should hope it keeps good for many years to come. Ive still yet to cover the underside and fill the cavities with another one of Bilt Hammonds products "Dynax".
The colour is a little deceiving in the pictures as they make it look quite multi-coloured lol
 van 44.jpg 24.71K
13 downloads
 van 46.jpg 28.4K
14 downloads
 van 45.jpg 19.68K
11 downloads
The rear subframe and tank have come out quite nice.
 van 43.JPG 43.83K
12 downloads
This bit has been quite a messy job to do but it is now fully cleaned and degreased and I have since gone over the whole of the engine with a wire wheel attachment in preparation for paint,
 van engine 6.JPG 85K
16 downloads
Click on the images for larger picture`s ![]()
I a, still in the process of cleaning up the front subframe but it wont be long now before it and its components are also in paint ![]()
Edited by leeuk, 04 October 2014 - 11:12 AM.
#75

Posted 18 September 2014 - 01:19 PM
1 user(s) are reading this topic
0 members, 1 guests, 0 anonymous users


