Jump to content


Photo

More Bl**dy Rust


  • Please log in to reply
18 replies to this topic

#1 Amsfeld

Amsfeld

    Mini Mad

  • Noobies
  • PipPipPipPip
  • 120 posts
  • Location: Broxburn
  • Local Club: The Mini Clan

Posted 20 June 2014 - 11:38 AM

Just when I thought everything is going well with with getting the last of bodywork fixed ready for painting, I found yet more problems.


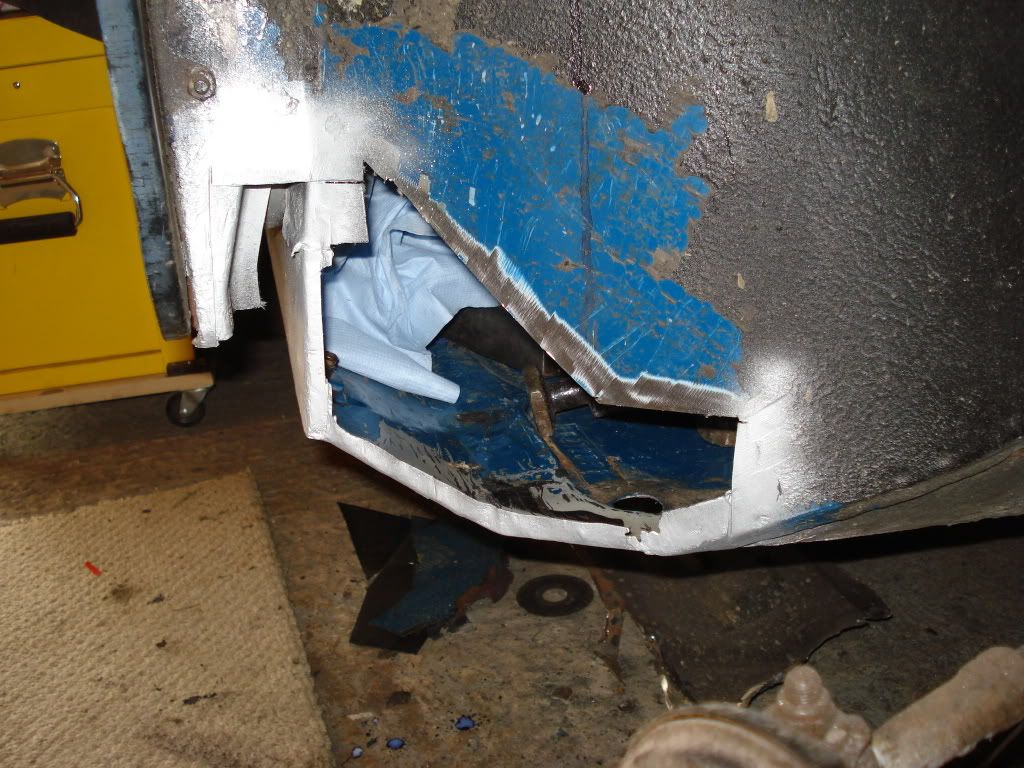
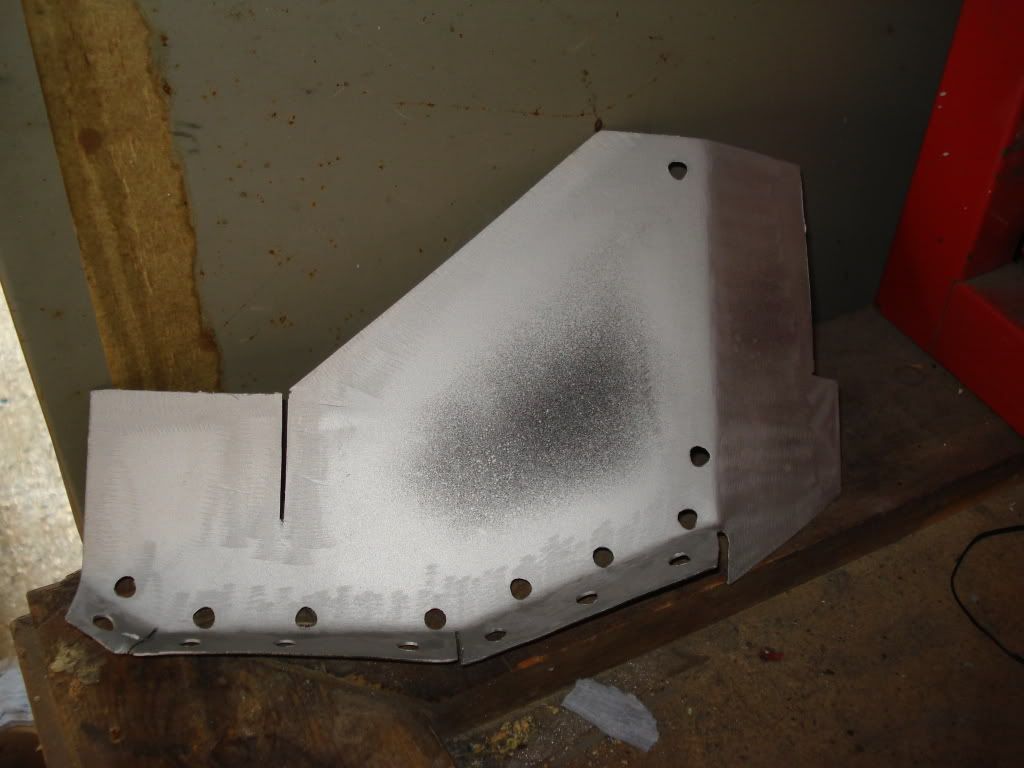
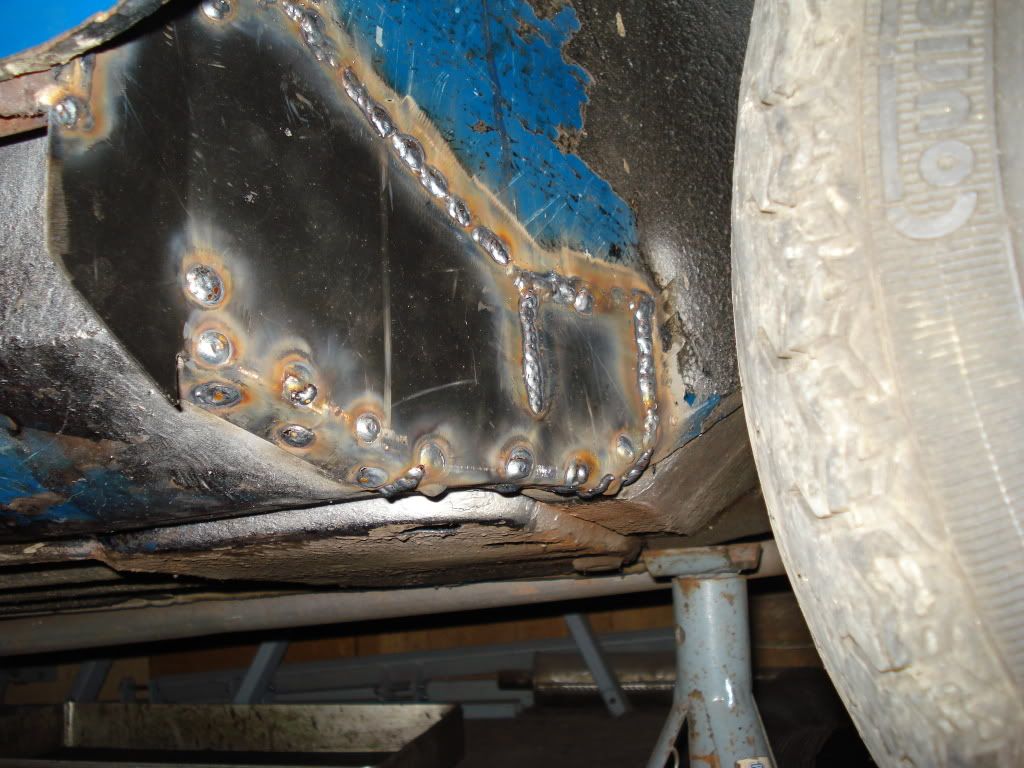
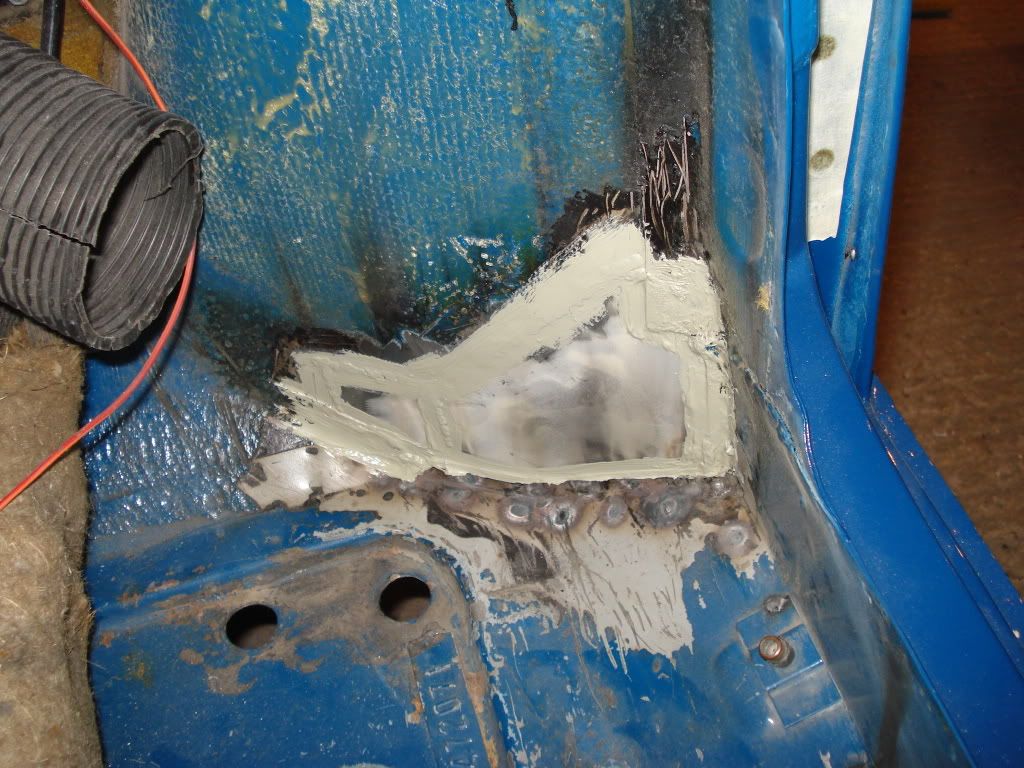
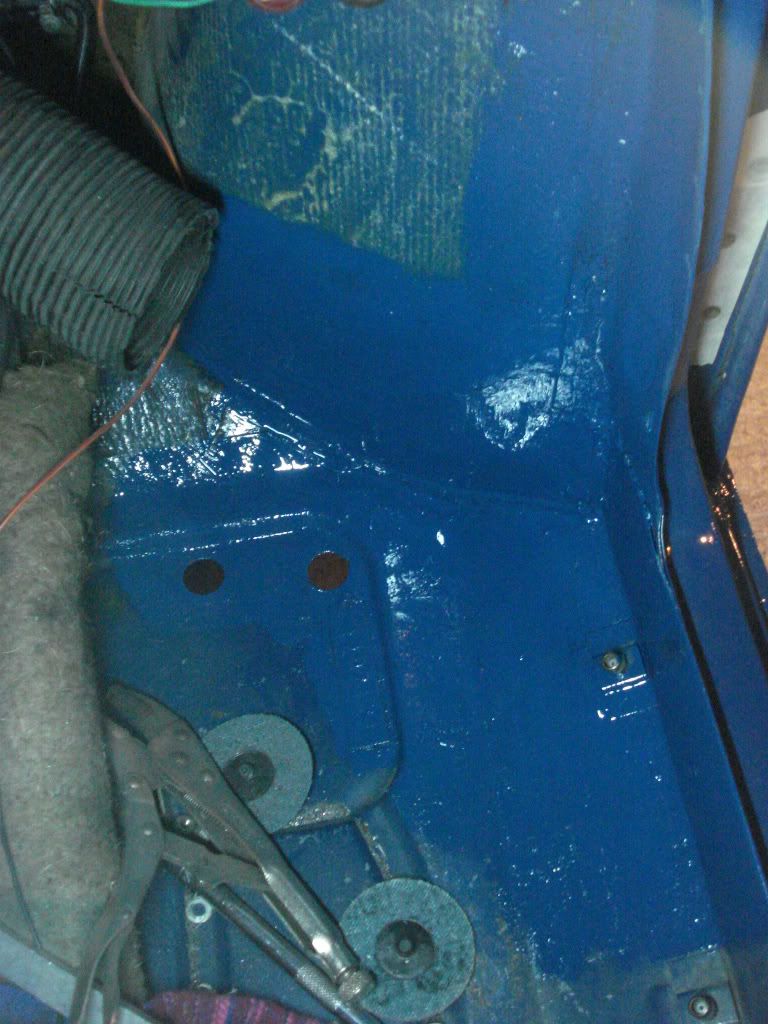
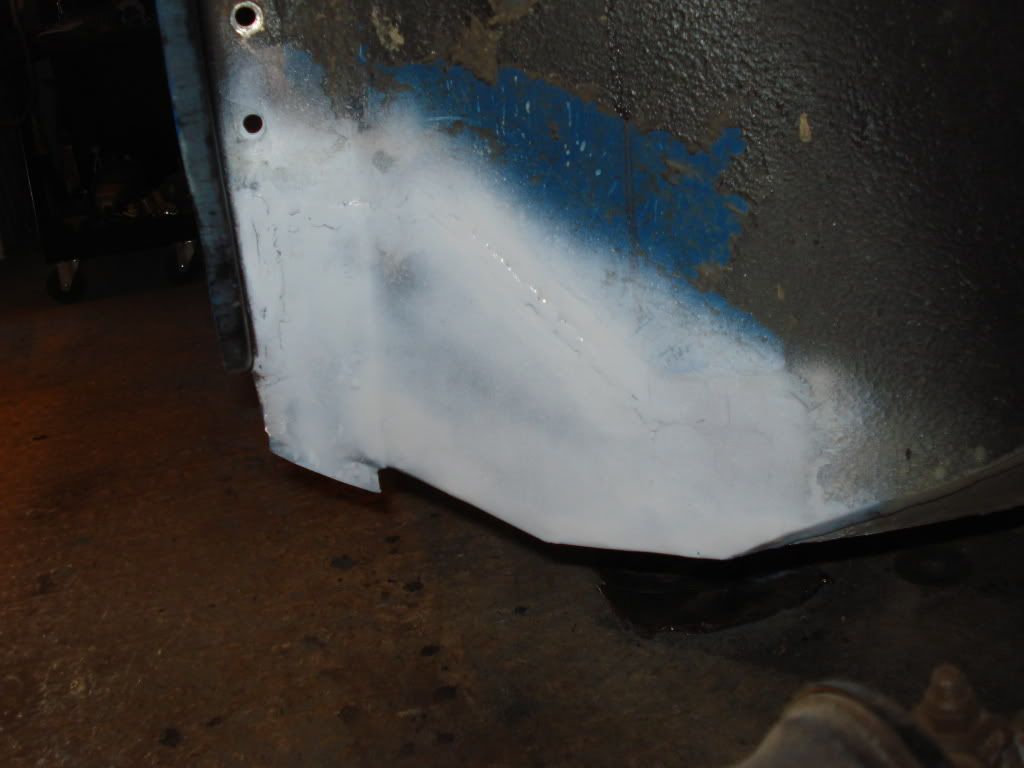
I’ve put some pictures of the problems below, would any of you guys be able to give me an idea of what body panels I need to replace, and what I might be looking at cost wise?  Paint I’ll do myself, but the rust looks nasty.  Unfortunately I can’t weld.  The area looks to be about 25cm long on the drivers side under the door.


Probably like a lot of minis, I’ve got oversills fitted from what I can see.  I am saving up to get them fixed, but don’t have the money yet.  Can I get the problems fixed now, and get the oversills done this time next year?


The floor on the inside of the car looks and feels solid, so I’m hoping that’s a good sign…..


Attached File  IMG_20140620_105001.jpg   37.22K   56 downloadsAttached File  IMG_20140620_105052.jpg   57.21K   72 downloadsAttached File  IMG_20140620_110651.jpg   63.96K   40 downloadsAttached File  IMG_20140620_110745.jpg   45.47K   44 downloads


#2 robminibcy

robminibcy

    Camshaft & Stage Two Head

  • Members
  • PipPipPipPipPipPipPipPip
  • 1,516 posts
  • Location: birmingham

Posted 20 June 2014 - 12:07 PM

I would do all the rust at the same time and put off paint work until bodywork is fully sorted. You cant really fix this with out doing the sills anyway. you will at least need a sill and door step and thenm possible also a jacking point and inner sill.

Looking at that pic though i dont think you do have an over sill. where the flutes are (bulges down) is there a gap at the back? if so they are propper sills not over sills.


#3 Amsfeld

Amsfeld

    Mini Mad

  • Noobies
  • PipPipPipPip
  • 120 posts
  • Location: Broxburn
  • Local Club: The Mini Clan

Posted 20 June 2014 - 12:40 PM

Thanks for that.  What do you think it's going to cost me for the parts and welding?  Or is it a case of "how long is a piece of string"?


#4 sonikk4

sonikk4

    Twisted Paint Polisher!!!

  • Admin
  • PipPipPipPipPipPipPipPipPipPipPip
  • 15,909 posts
  • Name: Neil
  • Location: Oxfordshire

Posted 20 June 2014 - 01:19 PM

Mmm potential can of worms. Take a picture of the sill itself and we can confirm what sill you do have fitted. Judging by your pictures you will need a door step and outer sill. The rust does not look too bad but it all starts from inside so I guarantee the step is shot along with the sill.

You will more than likely need a new jacking point and if you want to keep them both internal slinging brackets.

As for a price it's all dependant on what's under there so it's all a guess at the moment. I would budget for somewhere around £300 per side. It maybe more it maybe less. A straight sill and step swop is quite quick to be honest but if it's an Oversill fitted there will be nasties lurking.

#5 Amsfeld

Amsfeld

    Mini Mad

  • Noobies
  • PipPipPipPip
  • 120 posts
  • Location: Broxburn
  • Local Club: The Mini Clan

Posted 21 June 2014 - 11:46 AM

Hi,


I’ve (hopefully) got some better pictures.


As you do, I’ve poked at the rust with a screw driver to see how bad it is.  I think I can see the inner sill behind the outer sill, and it looks to be in good condition, as does the jacking point, although I’m not completely sure what I’m looking at….


Do you think I may have regular sills, rather than over sills?  The passenger side of the car doesn’t look to have any rust on it at all.


I’m going to try to get someone out next week to give me a price for the welding.  He does mobile welding, and classic car restoration, so fingers crossed!  It would be good to get some idea of what I can expect though.


Attached Files


#6 Blitzman

Blitzman

    On The Road

  • Noobies
  • PipPip
  • 40 posts
  • Location: Banff & Donegal

Posted 21 June 2014 - 12:11 PM

Looks like you have the original outer sills on there.

To repair this properly you'll need original outer sills and some of the door step replaced.

http://www.minispare...ic/14A9535.aspx

http://www.minispare...|Back to search

If your lucky the inner sill (which is part of the floor pan) will just need some sheet metal patches.

Oh and MIG welding is easy really.

Try to learn it will save you loads of cash and it's great to learn a new skill.


Edited by Blitzman, 21 June 2014 - 12:13 PM.


#7 sonikk4

sonikk4

    Twisted Paint Polisher!!!

  • Admin
  • PipPipPipPipPipPipPipPipPipPipPip
  • 15,909 posts
  • Name: Neil
  • Location: Oxfordshire

Posted 21 June 2014 - 12:21 PM

Well the good news is you have standard short sills fitted so you should not have any damage normally associated with over sills.

I would order a standard short sill and a door step. HOWEVER the non Heritage door steps from Magnum are atrocious so depending on budget you could get a Heritage one which includes part of the A and B post.

It's difficult to ascertain from the pics as to what state the jacking point will be like without the sill off. If it's original which it does appear to be there will be some rust on Ii but hopefully surface only. The whole jacking point is cheap and I normally buy mine from M Machine along with the short sill.

With the internal slinging brackets you won't know what they are like until the sill is off. Now personally I delete mine anyway. My choice and others may disagree but they are a nice rust trap. I also remove the external ones to prevent anybody using them as jacking points. Plus they harbour dirt and crud which will lead to rust forming. You can buy new slinging shoes and internal brackets if you desire to keep the car looking as original as possible.

#8 Cooperman

Cooperman

    Uncle Cooperman, Voted Mr TMF 2011

  • TMF+ Member
  • PipPipPipPipPipPipPipPipPipPipPip
  • 23,047 posts
  • Location: Cambs.
  • Local Club: MCR, HAMOC, Chelmsford M.C.

Posted 21 June 2014 - 09:28 PM

For the first time I used the M-Machine combined inner/outer sill and jacking point sub-assembly complete with a few inches of new floor (see photos).

I have to say it fitted very well and made the whole job much easier.


th_Green850-6_zps3667a60d.jpg


th_850newsill_zps6aca0d2e.jpg


#9 Amsfeld

Amsfeld

    Mini Mad

  • Noobies
  • PipPipPipPip
  • 120 posts
  • Location: Broxburn
  • Local Club: The Mini Clan

Posted 23 June 2014 - 11:55 AM

Thanks for all the help!  I've got a mobile welder coming tomorrow to quote me, but I've managed to find more rust - I'm almost scared to keep looking!


What do you think about the pics below?  The rust is in the driver foot-well, and goes all the way through.  Do you think it's something that can have the rusted sections cut out and be patched?

Attached Files


#10 Amsfeld

Amsfeld

    Mini Mad

  • Noobies
  • PipPipPipPip
  • 120 posts
  • Location: Broxburn
  • Local Club: The Mini Clan

Posted 23 June 2014 - 12:04 PM

Cooperman - did you get that panel directly from M Machine, and how much was it?  It may make the job much easier/quicker!


#11 Blitzman

Blitzman

    On The Road

  • Noobies
  • PipPip
  • 40 posts
  • Location: Banff & Donegal

Posted 23 June 2014 - 02:14 PM

That looks like it MIGHT be a lot worse than you think.

Crustyness under sealer.

But it may just need bits here and there.

Although the MiniMachine panel would be great you might not need that much.

As said you will need the outer sill and door step panel but what you need to look at is the inner sills.

The floor where it meets the inner wing has gone so should be able to patch that easily.

Try and do it properly so it's strong and better for resale in future.

You'll probably need to look at where the door hinge nuts are,rots there.

And be careful about the subframe mounts,probably crusty there too.

At least it's getting work done before it's become really bad.

Get some photo's up of the inner sills including inside the companion boxes. :-)


#12 Amsfeld

Amsfeld

    Mini Mad

  • Noobies
  • PipPipPipPip
  • 120 posts
  • Location: Broxburn
  • Local Club: The Mini Clan

Posted 23 June 2014 - 03:01 PM

I think this is the inside of the companion box (I assume the companion boxes are in the back, next to the back seat, where the seat belts are mounted?).  I took the picture when I was getting photos of the rust.  It all looks ok, but we'll soon see....


The door hinges are all ok - I removed the door yesterday to give myself more space to work.  I'll have a more thorough look later though.

Attached Files


#13 Blitzman

Blitzman

    On The Road

  • Noobies
  • PipPip
  • 40 posts
  • Location: Banff & Donegal

Posted 23 June 2014 - 03:15 PM

Well that looks fine.

What about just to the right where the inner sill meets the subframe mount.

The outer sill only fits on about 2" of the inner sill.

Here's a shot of the inner sill gone a wee bit where it meets the outer sill and where it's gone where it meets the inner wing like yours.

This only needs patches on the inner sill by the looks of it. :-)

Obviously this one could be far worse,just a photo of Google.

dscn8658640x480-1.jpg


Edited by Blitzman, 23 June 2014 - 03:18 PM.


#14 sonikk4

sonikk4

    Twisted Paint Polisher!!!

  • Admin
  • PipPipPipPipPipPipPipPipPipPipPip
  • 15,909 posts
  • Name: Neil
  • Location: Oxfordshire

Posted 23 June 2014 - 03:22 PM

Right for that damage you have there you can either fabricate a repair section or buy a flitch repair panel and cut out from that what you need for the lower section of the flitch.


The floor pan area will need a piece of suitably folded steel sheet 0.9mm in thickness to repair that or if you happen to have a front floor panel sitting around then cutout from that what you will need. Don't be tempted to plate over it all as that will make things worse.


This is what i did with my Clubman

DSC04521.jpg


DSC04522.jpg


DSC04577.jpg


DSC04734.jpg


DSC04738.jpg


DSC04709.jpg


What you are looking for in the companion bin is not the inner sill stiffener you have shown in your picture but the inner sill section inboard of the stiffener. If there is nothing there then happy days.


#15 Amsfeld

Amsfeld

    Mini Mad

  • Noobies
  • PipPipPipPip
  • 120 posts
  • Location: Broxburn
  • Local Club: The Mini Clan

Posted 06 July 2014 - 10:40 AM

Hi guys, sorry for the delay in updating.


Thankfully nothing has been as bad as I feared!  The passenger side was fine, and didn't need any work done, so we just needed to focus on the driver's side.


You can see from the pictures below that the rust didn't properly make it through to the inner sill - just a bit of surface rust.


Attached File  WP_20140705_002.jpg   43.33K   11 downloads

Attached File  WP_20140705_001.jpg   44.44K   7 downloads


When we took the door step and sill off, the backs of them were in surprisingly good condition.


Attached File  WP_20140705_007.jpg   43.13K   7 downloads

Attached File  WP_20140705_008.jpg   52.6K   6 downloads


Looks like there was some repaired accident damage in the area that I didn't know about - you can see around 5mm of filler under the paint.


Attached File  WP_20140705_011.jpg   38.26K   5 downloads


The hole in the floor is coming along nicely, everything tacked in place for the moment.


Attached File  WP_20140705_004.jpg   58.08K   5 downloads


I wasn't brave enough to attempt the welding myself, so after trawling the internet, got in touch with Sean at Raptor Smart Repair.  He works out of his own 39 year old classic car - just a shame it's a Beetle.....


Now I'm just trying to fix the damage after my own accident.  I'm finding the body filler pretty easy to work with at the moment, although I'll see how it looks with paint on it.


Attached File  WP_20140705_013.jpg   52.37K   14 downloads


At this rate I'll have to start my own blog.


0 user(s) are reading this topic

0 members, 0 guests, 0 anonymous users