Jump to content


Photo
- - - - -

Front Ride Height Uneven

suspension

  • Please log in to reply
13 replies to this topic

#1 Back2mini

Back2mini

    Learner Driver

  • Noobies
  • PipPip
  • 12 posts
  • Location: Buckinghamshire

Posted 02 November 2014 - 11:35 PM

I have an '89 which rides about 25mm higher on the n/s than the o/s.  There is 23mm difference bolt to bolt between the lengths of the front dampers and the gap between bump stop and top arm is about 10mm on the low side and about 36mm on the high side.

The cones are new Minispares standard, the trumpets are identical, the knuckles are both new.

The angles of the two top arms are clearly different.


Measuring down the tower bolt hole using the spring compressor, the threaded part of the cone on the low side appears to be 6mm higher, which would explain about 18mm of difference, but I don't understand how it can be???

Measuring down the tower bolt hole, the top of the subframe to the top face of the crossmember is within 1mm from side to side.


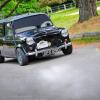
What is odd, is that on the low side (o/s) the subframe tower hole is displaced forwards and the cone compressor has to angled forwards to engage the thread.  See the photo.Attached File  IMG_0208.jpg   70.38K   22 downloads


I am beginning to think the top of the subframe tower may be cracked around the back, where I can't see it and the top plate may be flexing and allowing the suspension to settle.  I did have to weld up fatigue cracks around the top plates on my '71 car 20yrs ago when I noticed them while the subframe was out, but I can't find any reference to this happening on later rubber mounted subframes.


Can anyone suggest a sure check that will enable me to work out what the problem is without removing the subbie?  I know I will have to drop it to weld if it turns out to be cracked.

Was hoping it was a bent top arm but having got the parts, that hope faded when I took more measurements.  (Should learn something from that.)


Many thanks for any suggestions.


#2 Back2mini

Back2mini

    Learner Driver

  • Noobies
  • PipPip
  • 12 posts
  • Location: Buckinghamshire

Posted 02 November 2014 - 11:38 PM

I should add that all the measurements were taken with the rear balanced on a timber beam across the rear subframe back rail, pivoting on a bit of broomstick on the jack.  

So there should be no influence from the ground or the shape of the shell.


#3 sonikk4

sonikk4

    Twisted Paint Polisher!!!

  • Admin
  • PipPipPipPipPipPipPipPipPipPipPip
  • 15,903 posts
  • Name: Neil
  • Location: Oxfordshire

Posted 02 November 2014 - 11:40 PM

Has the trumpet and knuckle joint fully engaged in the cup, if not that will give you a height difference.


#4 sixtyeight

sixtyeight

    Super Mini Mad

  • Members
  • PipPipPipPipPipPip
  • 630 posts
  • Location: Newcastle, Australia
  • Local Club: forums.minidriver.com.au

Posted 03 November 2014 - 05:57 AM

is the cone seated properly?


#5 GraemeC

GraemeC

    Crazy About Mini's

  • TMF+ Member
  • PipPipPipPipPipPipPipPipPipPip
  • 7,315 posts
  • Location: Carnforth

Posted 03 November 2014 - 07:36 AM

I would also be looking at whether the cone has seated onto the ring in the subframe properly.


#6 Gadgets

Gadgets

    Speeding Along Now

  • Members
  • PipPipPipPipPip
  • 471 posts
  • Location: Somerset

Posted 03 November 2014 - 07:41 AM

Sounds to me like you have a broken subframe mount? Have a good look at the front subframe rear mounts on the left and right, if one has broken it will make it drop one side?


#7 Back2mini

Back2mini

    Learner Driver

  • Noobies
  • PipPip
  • 12 posts
  • Location: Buckinghamshire

Posted 03 November 2014 - 07:29 PM

Thanks for the suggestions, the cone is properly seated both sides and I have checked the dim to the metal rim.
The knuckles are both seated and the dim from trumpet rim to top arm is identical.
I will check the rear subframe mounts again but they feel the same.

I looked at the old cones again last night because I remembered the one from the low side was eccentric.
It is still distorted with the lower ring tilted a few degrees and pushed off centre. The old cone has recovered a bit in the 3 weeks since I changed it but still visibly different to the old one from the high side which is symmetrical.

Surely the tower top plate has cracked and tilted forward?

Attached Files


#8 nicklouse

nicklouse

    Moved Into The Garage

  • TMF+ Member
  • PipPipPipPipPipPipPipPipPipPipPip
  • 17,947 posts
  • Location: Not Yorkshire
  • Local Club: Anonyme Miniholiker

Posted 03 November 2014 - 07:39 PM

Don't forget the cone is not compressed linearly.

Are your top arms the same?

Double check everything.

#9 Back2mini

Back2mini

    Learner Driver

  • Noobies
  • PipPip
  • 12 posts
  • Location: Buckinghamshire

Posted 03 November 2014 - 08:27 PM

Top arms not the same casting pattern but all centres match.
I have a matching pair to fit but don't want to wast time fitting them only to strip it a fourth time.

#10 GraemeC

GraemeC

    Crazy About Mini's

  • TMF+ Member
  • PipPipPipPipPipPipPipPipPipPip
  • 7,315 posts
  • Location: Carnforth

Posted 03 November 2014 - 10:18 PM

Thanks for the suggestions, the cone is properly seated both sides and I have checked the dim to the metal rim.


What dimension have you checked? Anything measurable to the metal rim will still be correct if the cone isn't sat in the top of the subframe tower correctly. Your photo shows the cone off centre - this is exactly how they look when they're not sat properly on the locating ring in the top of the tower.

#11 Back2mini

Back2mini

    Learner Driver

  • Noobies
  • PipPip
  • 12 posts
  • Location: Buckinghamshire

Posted 03 November 2014 - 10:58 PM

Yes, I hoped the old one was seated wrong but I was super careful with the new cones and the ride height is still uneven.

I could only measure from the edge of the upper ring on the cone to the top of the subframe towers at the front each side, which was identical.


Measuring down the spring compressor hole to the nut in the cone, the dimension is 6mm shorter on the low side, which is the side where the tower is skewed forwards.  If that cone was not seated properly, I would expect it to show a greater dimension.


Will try to get something in between the top of the tower and the crossmember and bounce it to see if it is flexing.  The low side (o/s) does feel more flexible when you push down on the wing.


I really appreciate all the suggestions.


#12 Phil-R

Phil-R

    Formally known as chrome

  • Members
  • PipPipPipPip
  • 196 posts
  • Location: Birmingham

Posted 03 November 2014 - 11:27 PM

Small mirror and torch to look inside the subrame with the spring removed.


Look for witness marks on the spring painted surfaces to see where they've both contacted the subframe


Use Plastigauge or similar around the top most edge of the spring to see if it seats correctly all the way around.


#13 Back2mini

Back2mini

    Learner Driver

  • Noobies
  • PipPip
  • 12 posts
  • Location: Buckinghamshire

Posted 30 November 2014 - 11:06 PM

Latest update: I dropped the front subframe and engine, and neither tower top is cracked.  That had me stumped; I had even got the welder out, so convinced I would find the top of the tower flexing.


So, I split the top ball joints and removed both top arms.  It is true, you can do it without a compressor, which I could not use with the subframe under the car.  I undid the pivot pins and drove them lightly forward, then with a bit of a twist and a pop, like removing a chicken leg, out they came.


Pulled out the nice new knuckle cups I put in a few weeks ago, and there was the culprit.  The off side one, was distorted from a neat cone to a dome, where it had settled down into a very worn top arm!  I should have looked more critically at it first time.   :shy:   It is difficult, but possible to see and feel the difference in the hole but much easier to see the effect on the nylon cup.


I have a replacement pair of arms and I looked very carefully at the old cups I pulled out of those and they are perfectly conical.  My tip is to check with a straight edge.


Now to put it all back together, this time with Hi-Lo trumpets to adjust out any remaining tolerance, and with solid subframe mounts all 'round while I can get to them.


Thank you all for your help.  I will post a note about how to check top arms unless there is one already.


#14 Back2mini

Back2mini

    Learner Driver

  • Noobies
  • PipPip
  • 12 posts
  • Location: Buckinghamshire

Posted 30 November 2014 - 11:32 PM

The proof will be when I put it all back together, but I would like to share my tip for checking that your top arms are not worn out where the knuckle has at at some time worn right through the nylon cup and into the steel socket.  You never know the history of old mini parts.


Attached is an image of a worn socket that was causing (I really hope) about 20mm of sag on one side, even after everything else had been renewed or checked.  You may just be able to see a bit of a rounding in what should be a conical bottom of the hole.


When you look at the nylon cup, however mangled, it should show the profile of the socket.  I hope you can see the difference between a cup that has been in a good arm and one that has suffered in a bad one.


Best to replace the arm if the socket is at all worn.

Wish me luck with the re-assembly.

Attached Files


Also tagged with one or more of these keywords: suspension

1 user(s) are reading this topic

0 members, 1 guests, 0 anonymous users