I'm looking for some advice on fitting half inner wing both left and right and hoping some of you will be able to help. Can the wings be cut to match the existing metal work and then welded on? I don't really want to cut the existing metal back any more.

Fitting Half Inner Wings
Started by
Nigeldejong
, Nov 24 2014 09:41 PM
Best Answer Nigeldejong , 09 December 2014 - 06:56 PM
Thanks once again all, that's pretty clear.
Go to the full post 
10 replies to this topic
#1

Nigeldejong
-
- Noobies
-

- 5 posts
Just On Tickover
- Location: Hockley
Posted 24 November 2014 - 09:41 PM
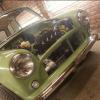
Hi, I'm new to the forum and to mini restoration. I've just acquired a 1989 1000 city E as a project for the winter from a previous owner that ran out of time. The photos shown are as I got the vehicle , the previous owner was going to put a flip front on but I'm going for metal panels instead.
I'm looking for some advice on fitting half inner wing both left and right and hoping some of you will be able to help. Can the wings be cut to match the existing metal work and then welded on? I don't really want to cut the existing metal back any more.
I'm looking for some advice on fitting half inner wing both left and right and hoping some of you will be able to help. Can the wings be cut to match the existing metal work and then welded on? I don't really want to cut the existing metal back any more.

#2
Ben_O
-

- Paint Doctor
-
- 9,781 posts
Mill Road Garage
- Location: Isle of Wight
Posted 24 November 2014 - 09:53 PM
If i were fitting the half inner wings, i would be fitting them behind the shock mounts.
Now the best way to do that is to unbolt the shock mounts, then clamp the new panel in place making sure that the bolt holes in the new one line up with the existing ones then bolt the shock mount back in place. This way you can have a measure up or even try the new wings on for size and once you are happy then it is just a case of carefully scribing the cut line using the back edge of the repair panel as a guide.
Once scribed, remove it all again and then cut the inner wing at the scribe line and get the unwanted bit out of the way. This will now leave you with a perfect fitting inner wing that can be clamped back in place and seam welded at the join and plug welded back to the front crossmember and strengthener panel.
I would avoid welding the inner wing to where you currently have it cut in your photo as this is a high stress area and would be much more likely to tear after a while.
If you have any questions, just ask away!
Ben
#3
Tupers
-

- Members
-
- 4,105 posts
Up Into Fourth
- Location: Devon
Posted 24 November 2014 - 09:55 PM
I would highly recommend fitting this type inner wing repair that comes back past the damper mount holes. Clicky Clicky
If you welded new ones on at the point where they stop at the moment you may well suffer cracking of the joint in the future.
Bringing the joint further back means it will much better supported by the existing body structure and you will also be left with less of a visible seam. You will need to remove the old portion of inner wing where the new panel over laps but that should only take 30 mins a side.
It's also bolting the front panel on and checking the fit of the wings before welding the inners on as any misalignment could cause a lot of grief down the line.
#4
Tupers
-
- Members
-
- 4,105 posts
Up Into Fourth
- Location: Devon
Posted 24 November 2014 - 10:05 PM
Great minds hey Ben.
#5
Ben_O
-
- Paint Doctor
-
- 9,781 posts
Mill Road Garage
- Location: Isle of Wight
Posted 24 November 2014 - 10:06 PM
Great minds hey Ben.
Yes indeed mate!
#6
Nigeldejong
-
- Noobies
-
- 5 posts
Just On Tickover
- Location: Hockley
Posted 25 November 2014 - 07:10 AM
Thanks guys this is really helpful.
Will probably be a few weeks before I get started, I still have the boxes of parts that came with it to sift/organise but at least I can get on and order the panels.
Thanks again.
Nigel
Will probably be a few weeks before I get started, I still have the boxes of parts that came with it to sift/organise but at least I can get on and order the panels.
Thanks again.
Nigel
#7
Nigeldejong
-
- Noobies
-
- 5 posts
Just On Tickover
- Location: Hockley
Posted 06 December 2014 - 06:04 PM
Hi, sorry to pester again on this one - just got to the point of fitting the inner wings and while lining up to mark out where to cut back the inner wing it occurred that it all seems to fit ok if I were to just overlap the remaining metal with the repair section..... Is this advisable or should I cut it back to where I've scribed? The metal I have left is all ok, no rust . If it should be cut back, should any overlap or should I line up the 2 pieces of metal and weld down that line?
Any comments on this really appreciated..
Any comments on this really appreciated..
#8
Ben_O
-
- Paint Doctor
-
- 9,781 posts
Mill Road Garage
- Location: Isle of Wight
Posted 07 December 2014 - 05:33 AM
Hi, sorry to pester again on this one - just got to the point of fitting the inner wings and while lining up to mark out where to cut back the inner wing it occurred that it all seems to fit ok if I were to just overlap the remaining metal with the repair section..... Is this advisable or should I cut it back to where I've scribed? The metal I have left is all ok, no rust . If it should be cut back, should any overlap or should I line up the 2 pieces of metal and weld down that line?
Any comments on this really appreciated..
You would be better off cutting back the original inner wing to the scribe mark.
If you leave the existing bit on there and overlap, you will just create a huge rust trap.
You might as well do it the proper way then at least you can be sure that everything is in order and you won't cause yourself any future head aches.
You might also find that the extra thickness of steel might set the inner wing out of line causing panel fit issues.
Ben
#9
The Matt
-

- Admin
-
- 17,229 posts
You don't escape that easily.....
- Name: Matt
- Location: Overton, North Wales
- Local Club: Welsh Border Minis
Posted 07 December 2014 - 08:08 AM
Exactly as Ben has said above. You risk creating a rust trap. I've used half inner wings before like you are doing. I overlapped (thinking that it would fit fine) and 5 years later I'm replacing the full inner wings as the rust behind them was horrendous. But also I found that the fit wasn't perfect doing it this way. I do admit that the fitting issues were more down to me than to the overlap though.
#10
Nigeldejong
-
- Noobies
-
- 5 posts
Just On Tickover
- Location: Hockley
Posted 09 December 2014 - 06:56 PM Best Answer
Thanks once again all, that's pretty clear.
#11
bluemini17
-
- Members
-
- 158 posts
Mini Mad
- Location: Bangor
Posted 09 December 2014 - 10:09 PM
just a small note, I welded in new 'half inner wings' a while back as my mini had also been cut for a flip front.
As per above, I welded the inner wing as far back as possible, the bolt holes on the new inner wing were helpful for tying it into the shock mount.
This is where things get random, I trial fitted the outer wings and also the front panel (taking time to bolt it to the sub frame via the tear drop mounts)
I found that the inner wing flange met the outer wing flange perfectly but no matter what I did I could not get the front flange of the inner wing to meet comfortably on the front panel.
By pushing the front panel I was able to make it touch the inner wing but then upon fitting the bonnet , the bonnet over hung the front panel by roughly 5mm.
In the end I left a slight gap between the inner wing and front panel. I later secured the front panel to the inner wing with a slice of metal.
Sorry for such a long rant, the key is to check the bonnet, front panel and outer wing fitment. This will then remove the chance of having your bonnet overhang at the front.
David


0 user(s) are reading this topic
0 members, 0 guests, 0 anonymous users


