Jump to content


Photo

Another Pickup Called Percy


  • Please log in to reply
191 replies to this topic

#31 carthorse

carthorse

    Mini Mad

  • Members
  • PipPipPipPip
  • 256 posts
  • Location: Cheshire

Posted 12 April 2015 - 06:29 PM

Percy looks sweet.I have the same trouble sticking stuff in the back of my pickup.I may have to borrow that tool though,as I have a cover ready to be fitted.


No probs if you want to borrow it, send me a pm via the forum and we can sort something out. It does make the job a heck of a lot easier.

#32 carthorse

carthorse

    Mini Mad

  • Members
  • PipPipPipPip
  • 256 posts
  • Location: Cheshire

Posted 15 April 2015 - 03:17 PM

The worlds longest and most disastrous brake bleeding session is not yet over. When we last left the action after spilling build everywhere I'd given up due to finding a leaky union on the production break connector in the brake line down to the front subframe. 

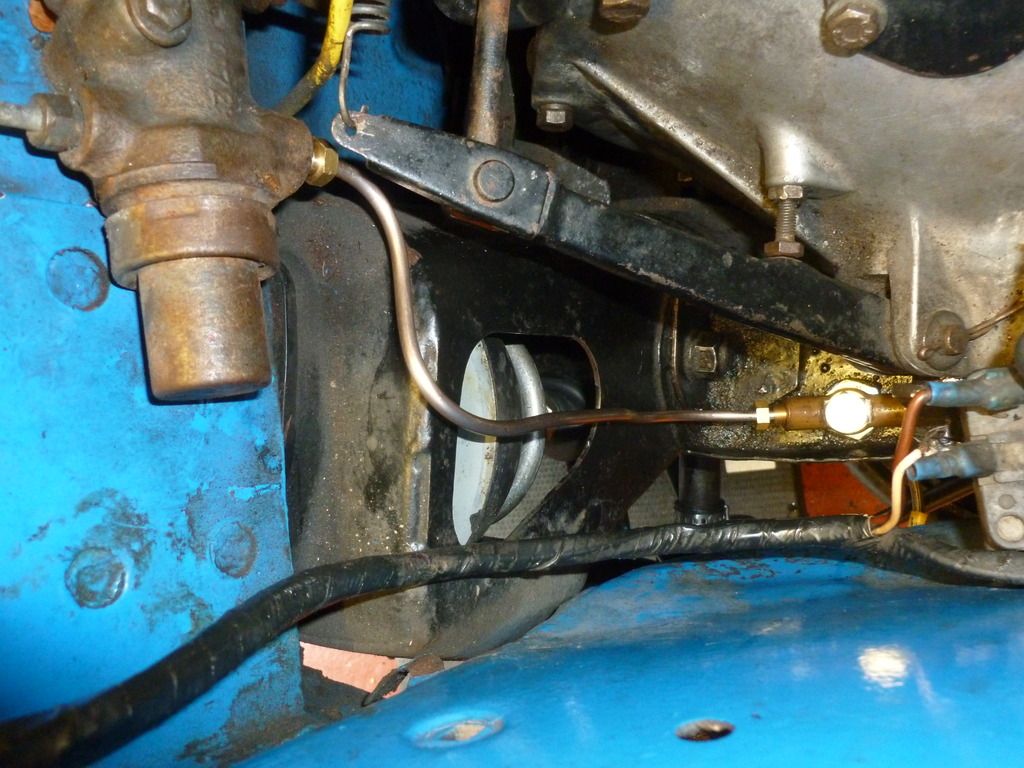
The minispares pipe which does away with this connector turned up a couple of days ago and after some quick bending slotted straight in. While I was down there I replaced the copper washers I'd bodged up last time on the three way union on the subframe and treated it to a new banjo bolt as the old one was a little corroded.

P1010518.jpg

So far so good...... A bit of bleeding with my nice new eBay vacuum bleeder resulted in a firmish pedal but I wasn't 100% happy with it. 

As I could heard the sounds of the kids playing hell with each other and my poor long suffering wife sticking her head into the garage to ask how long I was going to be I knocked it on the head for the day and took the youngest out to the park before blood was spilt in the house...... :angel:

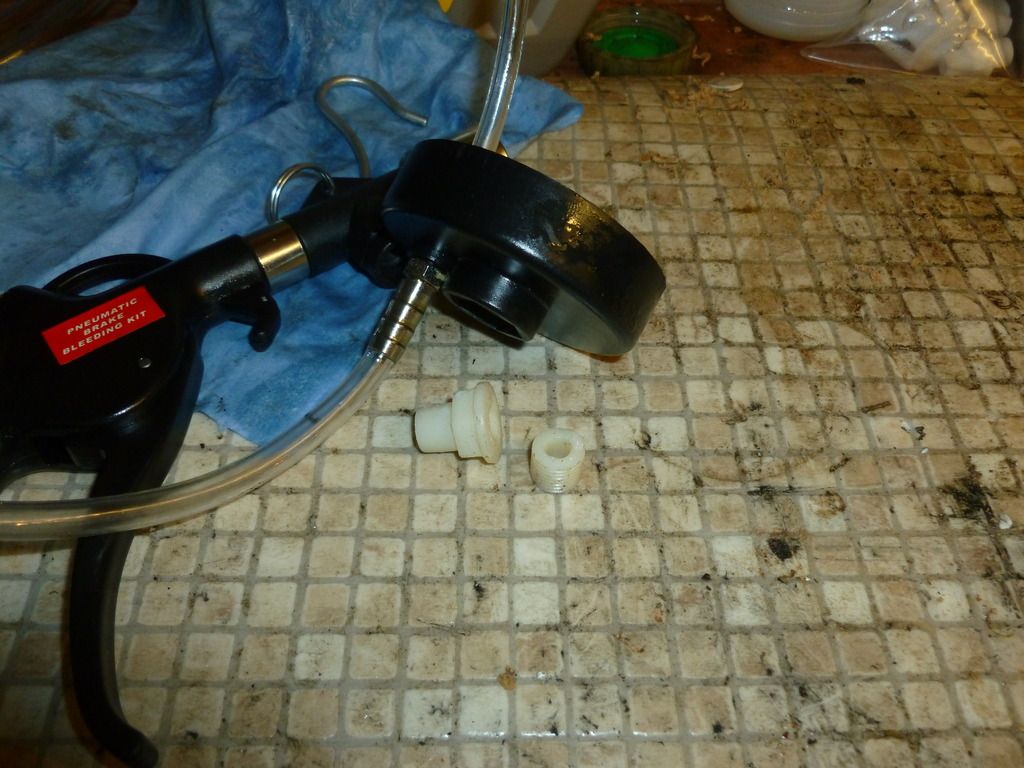
Went back into the garage this afternoon to find my quality new bleeding equipment which id left hanging from the rear subframe in 2 bits in the floor   :xxx: on investigation the plastic union which attached the vacuum trigger assembly to the top of the reservoir had broken in two, the plastic had softened apparently due to contact with brake fluid! unbelievable but it does show that you get what you pay for!

In the pic below you can see the reservoir cap and the broken union.

P1010522.jpg

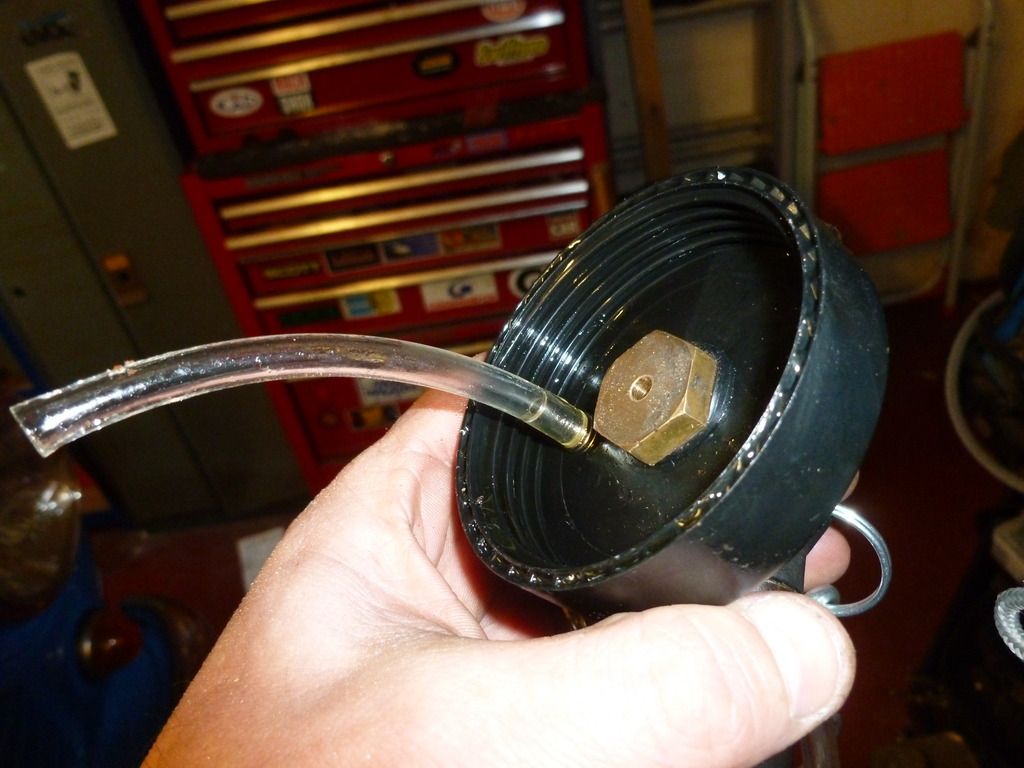
After kicking my work bench a few times I calmed down and found a brass threaded plug in my tin of 'bits I know i'll need one day' that screwed beautifully through the cap and into the trigger assembly. It just needed a hole drilling through it for the vacuum. 

Amazingly I won one of those mini unimat lathes on eBay last week and it was perfect for this job.

P1010524.jpg

All screwed back together and one better than new functioning brake bleeder!  :highfive:

P1010525.jpg


Well i'd had a kicking, but got up fought back and emerged victorious right?............. wrong!.............


It turns out the reason for the slightly soft pedal was a weeping rear wheel cylinder which was leaking from the bleed nipple. I tweeked it up delicately using my years of professional engineering experience and stripped the thread completely  :xxx:  :xxx:  :xxx:  :xxx:  :xxx:  :xxx:  :xxx:  :xxx:  :xxx:


I will email Simon at minispares tomorrow to get my tmf+ discount applied and get some cylinders ordered, but right now I have a urgent appointment with some amber hops based refreshment :geek:


Edited by carthorse, 15 April 2015 - 03:20 PM.


#33 carthorse

carthorse

    Mini Mad

  • Members
  • PipPipPipPip
  • 256 posts
  • Location: Cheshire

Posted 28 April 2015 - 03:23 PM

Still no brakes........ I'm developing a serious complex about the whole braking issue, is it just me? is it Percy? is it my pumping technique?


I've got a horrible suspicion my master cylinder maybe cream crackered as theres a small trace of brake fluid making a track through the paint on the bulkhead behind the brake/clutch cylinder top plate and that area seems a bit permanently damp. I'll investigate further when I've regained some enthusiasm........ don't hold your breath folks  :rolleyes:


I am starting to seriously reconsider my plan to get Percy back on the road and use him this summer till his mot expires in August. With all these little problems coming to light I'm wondering if it would just be best to keep him on his nice comfy axle stands and start his restoration now? watch this space!


To take my mind off the brakes and stop me tripping over the bonnet every time I look for something in the garage I've fitted a set of Minivations hinges.

P1010526.jpg

To be honest i'm a little disappointed. The access is brill, but for the money I was a little underwhelmed with the quality and they were a total pig to fit. I was less than impressed when the first thing I did on getting them out of the box was cut my finger on a sharp burr of badly finished alloy  :angry: and for over £100 with p&p I didn't think id have to download and print out my own set of instructions either.....


Still they're fitted now so i'll see how they go.


Cheers, Mick


#34 carthorse

carthorse

    Mini Mad

  • Members
  • PipPipPipPip
  • 256 posts
  • Location: Cheshire

Posted 29 April 2015 - 12:00 PM

Nice little mojo boost came in the post today, and fitting it was quick clean and didn't involve dot4 fluid so it a win/win all round !

P1010527.jpg


#35 minimissions

minimissions

    Up Into Fourth

  • Members
  • PipPipPipPipPipPipPipPipPip
  • 3,427 posts
  • Location: North West
  • Local Club: M.M.O.C

Posted 29 April 2015 - 12:36 PM

Loving the sticker :)


#36 carthorse

carthorse

    Mini Mad

  • Members
  • PipPipPipPip
  • 256 posts
  • Location: Cheshire

Posted 30 April 2015 - 03:42 PM

Finally finished the marathon brake bleeding fest by leaving Percy's backside jacked up with the brake pedal wedged down over night. Loads of air splurged out of the rear brakes this afternoon so happy days. 

Finally got Percy back on all four wheels and pushed out of the garage so I could have a decent tidy up!

Heres a picture of him enjoying the sunshine: 

P1010529.jpg

Think I'm defo going to need to fit arches of some description which is a shame, but a lot cheaper than a new set of wheels!

P1010530.jpg

I'm thinking w&p arches colour coded to the body would be the best choice.

Anyway I ran out of time again so the mountain bikes got stuck on the back to check they fitted on the mounts I'd fitted to the back of the cab and he got shoved away again.

P1010532.jpg

Next jobs: torque up the front hub nuts and spanner check the suspension and adjust the clutch properly because its dragging.

Then get some insurance & tax sorted and enjoy 850cc's of throbbing power  :D

Cheers, Mick


#37 Vinay-RS

Vinay-RS

    Put's foolish ideas in peoples heads

  • TMF+ Member
  • PipPipPipPipPipPipPipPipPip
  • 2,093 posts
  • Location: Cape Town

Posted 30 April 2015 - 03:46 PM

Well done on the brakes :) Have you considered chrome external hinges? I think they look pretty cool.


#38 wingnut

wingnut

    Speeding Along Now

  • Members
  • PipPipPipPipPip
  • 462 posts
  • Location: bury st edmunds

Posted 30 April 2015 - 08:27 PM

Good job on getting the brakes sorted,but your well chuffed.My pickup is an 850,great round town but runs out of puff on the open road,but it's great!

#39 carthorse

carthorse

    Mini Mad

  • Members
  • PipPipPipPip
  • 256 posts
  • Location: Cheshire

Posted 01 May 2015 - 06:24 PM

Well done on the brakes :) Have you considered chrome external hinges? I think they look pretty cool.

Mmmmm, chrome hinges? Never seen those before. Percy's previous owner painted the n/s door hinges white for some reason but I think I'll prob just paint them body colour eventually.

Good job on getting the brakes sorted,but your well chuffed.My pickup is an 850,great round town but runs out of puff on the open road,but it's great!

I used to run round in a little 850 saloon a few years back, it was great fun down the lanes round here so hopefully Percy's engine is a good one, I don't know really what state it's in as I haven't had him on the road yet.
I have got a spare 998 engine and box in the garage that hopefully I'll get round to rebuilding at some point, but the body really needs urgent attention first, he may look good in the pictures but underneath he's helps together with patches on top of patches!

#40 Vinay-RS

Vinay-RS

    Put's foolish ideas in peoples heads

  • TMF+ Member
  • PipPipPipPipPipPipPipPipPip
  • 2,093 posts
  • Location: Cape Town

Posted 01 May 2015 - 06:32 PM


Well done on the brakes :) Have you considered chrome external hinges? I think they look pretty cool.

Mmmmm, chrome hinges? Never seen those before. Percy's previous owner painted the n/s door hinges white for some reason but I think I'll prob just paint them body colour eventually.

This is one in our local club with chrome hinges. Though it is not original like yours, so I guess body colour hinges would look better.


DSC01345_zpsdbcf9138.jpg


#41 carthorse

carthorse

    Mini Mad

  • Members
  • PipPipPipPip
  • 256 posts
  • Location: Cheshire

Posted 09 May 2015 - 06:37 PM

Good news and bad ....... first the good, pickups are a bit light on the instrumentation front, and as i'd never actually driven Percy any distance I really had no idea of how healthy or otherwise his engine might be.

The depths of my 'bits of minis long gone' box yielded a old triple instrument cluster complete with wiring harness which was rescued from an old Wolsey Hornet i'd found years ago in a scrap yard. My spare engine gave up its water temp sender and oil pressure union which were painlessly installed in Percy's engine bay.

A few mins perusal of the trusty Haynes manual revealed the old oil pressure warning light cable could be repurposed as the water temp sender wire, and the new binnacle plugged straight into Percy's loom. 

P1010534.jpg

Running him up to temp showed a rock solid oil pressure plumb in the centre of the gauge and temperature which stayed acceptable as well, so it looks like hopefully Percy's engine is a good one.


Now the bad news - no matter how many times I bleed and adjust the clutch its still dragging slightly. The clutch and slave cylinder are new so I think i'll have to whip the engine out to investigate properly.


Rats.


#42 carthorse

carthorse

    Mini Mad

  • Members
  • PipPipPipPip
  • 256 posts
  • Location: Cheshire

Posted 25 May 2015 - 09:02 PM

After a few weeks of life getting badly in the way of time in the garage, and freshly inspired by a trip out to a local classic car show this morning I asked permission from the missus to tidy up a bit in the garage after lunch and this happened.........

P1010580.jpg

proof that the bonnet doesn't have to come off if you have Minivation hinges and your careful!


Keen to get to the bottom of the dragging clutch the clutch cover was swiftly removed. Nothing obvious wrong, but I treated the assembly a new clutch arm, clevis pins top and bottom and a actuating piston. (sorry forgot to take pictures....)

With nice shiney new engine mounts fitted the engine was dropped back in having resisted the temptation to take it to bits to clean it up and address  the oil leaks and we now have a clutch than functions as Austin intended  :D


The only minor hiccup was somehow I forgot to put the fuel hose back on the carb...... worryingly enough was spraying out of the pipe and finding its way into the float bowl for Percy to start and roll in and out of the garage a few times under his own power while I sat in him feeling smug thinking he was running a bit rich because of the pong of petrol ....... :X


Cue lots of mopping up, complaints about the smell from the rest of the family and me resolving to buy a bigger fire extinguisher for the garage!


Now we have working gears insurance tax and some road testing are just round the corner.  :D


#43 JewSkii

JewSkii

    Mini Mad

  • Members
  • PipPipPipPip
  • 218 posts
  • Location: Melbourne
  • Local Club: Looking For One

Posted 25 May 2015 - 11:18 PM


Well done on the brakes :) Have you considered chrome external hinges? I think they look pretty cool.

Mmmmm, chrome hinges? Never seen those before. Percy's previous owner painted the n/s door hinges white for some reason but I think I'll prob just paint them body colour eventually.

This is one in our local club with chrome hinges. Though it is not original like yours, so I guess body colour hinges would look better.


DSC01345_zpsdbcf9138.jpg


Thats One cool little pickup.


Love It


After a few weeks of life getting badly in the way of time in the garage, and freshly inspired by a trip out to a local classic car show this morning I asked permission from the missus to tidy up a bit in the garage after lunch and this happened.........

P1010580.jpg

proof that the bonnet doesn't have to come off if you have Minivation hinges and your careful!


Keen to get to the bottom of the dragging clutch the clutch cover was swiftly removed. Nothing obvious wrong, but I treated the assembly a new clutch arm, clevis pins top and bottom and a actuating piston. (sorry forgot to take pictures....)

With nice shiney new engine mounts fitted the engine was dropped back in having resisted the temptation to take it to bits to clean it up and address  the oil leaks and we now have a clutch than functions as Austin intended  :D


The only minor hiccup was somehow I forgot to put the fuel hose back on the carb...... worryingly enough was spraying out of the pipe and finding its way into the float bowl for Percy to start and roll in and out of the garage a few times under his own power while I sat in him feeling smug thinking he was running a bit rich because of the pong of petrol ....... :X


Cue lots of mopping up, complaints about the smell from the rest of the family and me resolving to buy a bigger fire extinguisher for the garage!


Now we have working gears insurance tax and some road testing are just round the corner.  :D


well there si something i didnt know. all thouse times i have removed the bonnet and had to take my time realineing it :)


#44 carthorse

carthorse

    Mini Mad

  • Members
  • PipPipPipPip
  • 256 posts
  • Location: Cheshire

Posted 02 June 2015 - 03:37 PM

Picked up possibly the most significant item for Percy's eventual rebuild today:-

P1010581.jpg

Now last time i used a mig welder was about 9 years ago when I replaced the sill's and patched the floor on my cooper spi. as that was done outside on the drive I used a gasless Clarke hobby mig, and the results were certainly not pretty. Strong enough certainly, but definitely a bit agricultural!  O_O


After finding the instructions for the Clarke machine online and digging it out from the back of the garage I realised I could convert it to gas operation which seems to be the way to go for neater welds.


One ebay regulator and a trip to my local gas supplier or wire and gas later and I found out it was just as easy to blow holes in metal as I remembered!

P1010582.jpg


Still in my defence the only sheet metal I could find was some manky 1mm sheet so it wasn't ideal practice material..... :shy: 
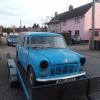
but deffo a bit more practice required before I attack Percy's rapidly disintegrating floorpan!


#45 Ben_O

Ben_O

    Mill Road Garage

  • Paint Doctor
  • PipPipPipPipPipPipPipPipPipPip
  • 9,781 posts
  • Location: Isle of Wight

Posted 03 June 2015 - 03:33 PM

Have a go at practising actual joins. When lining up the join, make sure you have a 1mm gap between the two.


You will soon get the hang of it

Ben


0 user(s) are reading this topic

0 members, 0 guests, 0 anonymous users