Great guide. I'm looking at doing some outer/inner sill repairs soon.
The Heritage costs for the repair panels is a bit scary. More economical to buy the complete floor.
But M-Machine options make it a bit more realistic.
Cheers.

One Carb Or Two?


Posted 27 July 2015 - 03:12 PM
Great guide. I'm looking at doing some outer/inner sill repairs soon.
The Heritage costs for the repair panels is a bit scary. More economical to buy the complete floor.
But M-Machine options make it a bit more realistic.
Cheers.
Twisted Paint Polisher!!!
Posted 27 July 2015 - 06:14 PM
Great guide. I'm looking at doing some outer/inner sill repairs soon.
The Heritage costs for the repair panels is a bit scary. More economical to buy the complete floor.
But M-Machine options make it a bit more realistic.
Cheers.
It is cheaper to do it this way and now i'm on my second time of using them. Just a bit of a bugger to get them in place. On Wills car i left the flitch repair to last so i could feed the inner sill in that way. Unfortunately with paddy i have already repaired the flitches so i have had to do it somewhat differently. Every job is still a school day.
So with this in mind its best to remove either the complete floor crossmember or just the side you are repairing.
Mini Mad

Posted 27 July 2015 - 07:57 PM
Twisted Paint Polisher!!!
Posted 27 July 2015 - 08:06 PM
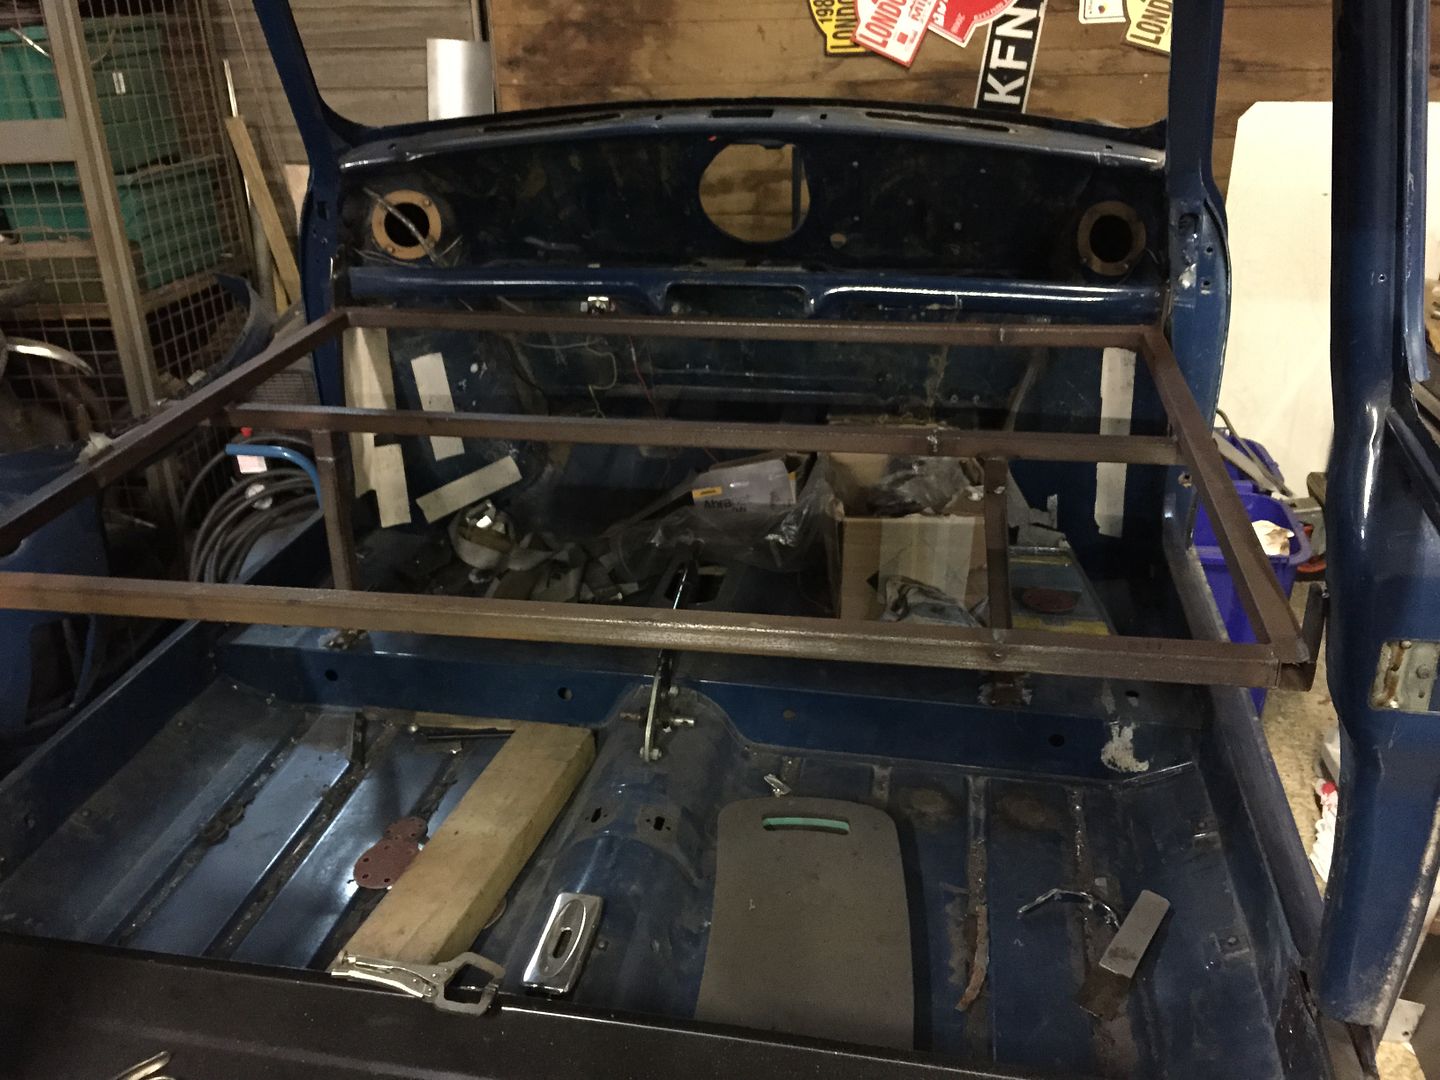
I welded a section across A post to B pillar then boxed that across the car so B pillar to B pillar, A post to A post.
Then i welded another section across the width of the car directly above the floor crossmember. From that i did two drop downs to the crossmember and tacked them in place. This helps to support the floor. All of these were welded together to form a frame than can be removed as one piece.
Now all of this i welded just above the height of the companion bins as i removed these as well.
The thickness of box you have is plenty thick enough for your needs.
Mini Mad
Posted 27 July 2015 - 08:09 PM
Mini Mad
Posted 27 July 2015 - 08:17 PM
Twisted Paint Polisher!!!
Posted 27 July 2015 - 08:18 PM
Have a look at the Project Paddy link under my signature. You will see how far i have gone with him with regards to metal removal.
Learner Driver

Posted 14 August 2015 - 04:34 PM
Thanks for this I've been searching about for info on this as I'm a complete noobie to minis and I'm pretty sure i need to do the inner sills on the passenger side!!
Twisted Paint Polisher!!!
Posted 20 February 2016 - 06:55 PM
As an alternative method for getting the inner sill in place you will need to carefully remove a section of the floor crossmember to just past the inner sill cutline on the floor. This will let you drop the inner sill neatly into place. Once in and you are happy the inner sill is trimmed up correctly then you can reweld the section of crossmember back in place.
I took a different approach on Paddy. I really did not want to disturb the crossmember so i cut the inner sill in to two pieces. Once in i then seam welded them back together. Would i do it this way again well the answer is no, i would remove the crossmember.
Learner Driver

Posted 24 July 2017 - 09:58 PM
This is great, thank you for your effort!
Up Into Fourth

Posted 20 June 2018 - 11:17 AM
Twisted Paint Polisher!!!
Posted 20 June 2018 - 11:43 AM
Up Into Fourth
Posted 20 June 2018 - 04:14 PM
Speeding Along Now

Posted 04 July 2018 - 04:42 PM
Twisted Paint Polisher!!!
Posted 04 July 2018 - 05:12 PM
Thanks for the guide, I’ve read through project Paddy my initial though was wow glad I don’t need to change bootfloor and heal board, I was wrong!! Anyway in some of the pics you have painted panels specifically the sill, it looks like you have topcoat on the surface that you are going to plug weld. Do you clean this off before welding
I normally clean those areas of contact with a scriber to remove the paint from the plug weld area.
I've tried several approaches to this. Just Weld thru primer although good is not water resistant. Epoxy primer is but its not weld through. So now i use epoxy primer and topcoat, clean the individual areas where i plug weld as i go.
Only time will tell which is the best route.


0 members, 0 guests, 0 anonymous users


