Jump to content


Photo

"bad Boy" Pickup


  • Please log in to reply
174 replies to this topic

#106 g111mds

g111mds

    Speeding Along Now

  • Members
  • PipPipPipPipPip
  • 432 posts
  • Location: Edinburgh

Posted 06 January 2018 - 05:35 PM

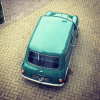
Back in business. Ill keep the receipt for this one just in case it packs up too!

Attached File  97BC7D8C-7AC4-4756-93F6-2736DC4FE057.jpeg   55.83K   0 downloads

Edited by g111mds, 06 January 2018 - 05:41 PM.

#107 g111mds

g111mds

    Speeding Along Now

  • Members
  • PipPipPipPipPip
  • 432 posts
  • Location: Edinburgh

Posted 07 January 2018 - 08:41 PM

Little bit more time on the door repairs yesterday and today. Lower frame section in, and pretty much finished off. I've got one other small repair to make, and then it should be kurusting and then priming the frame ready for the door skin. Welding slowly improving.

#108 g111mds

g111mds

    Speeding Along Now

  • Members
  • PipPipPipPipPip
  • 432 posts
  • Location: Edinburgh

Posted 13 January 2018 - 11:36 PM

Well, that escalated! Trying to tidy up the first of a few patches on the bulkhead and even on low power settings, blowing holes in the old metal. 40 years old, pitted, and obviously very thin metal. Will be replacing just about every single other parts of the Pup, so... bulkhead being replaced too. Ive hummed and hawed about changing it, but decision make and action taken.

Added extra bracing on both side in case the roof starts to want to move. Ill do the same down to the door steps too before I go much further, plus probably an extra brace across the lower portion of the cab with some pickup points off the toe board.

Attached File  FF88BF2D-4A1B-4FFA-93C3-FDFD5C13BBB8.jpeg   58.62K   4 downloads

Attached File  944D5AE3-FCC9-468C-B517-B804096E412D.jpeg   79.25K   4 downloads

Edited by g111mds, 13 January 2018 - 11:42 PM.


#109 g111mds

g111mds

    Speeding Along Now

  • Members
  • PipPipPipPipPip
  • 432 posts
  • Location: Edinburgh

Posted 14 January 2018 - 07:55 PM

Little more work on the bracing tonight ready to take the rest of the bulkhead off. Brackets cut, holes drilled, and bolted to the toeboard ready to have bars welded to them dropping off the additional lower bracing I'm going to add. Busy couple of weeks coming up, so won't get much more time at all to spend until next month :(

#110 FlyingScot

FlyingScot

    Up Into Fourth

  • TMF Team
  • PipPipPipPipPipPipPipPipPip
  • 2,660 posts
  • Location: Inverclyde Scotland
  • Local Club: Mini Cooper Register

Posted 14 January 2018 - 10:15 PM

Best solution mate, New bulkhead on one of mine for same reason. Easier all around.

FS

#111 g111mds

g111mds

    Speeding Along Now

  • Members
  • PipPipPipPipPip
  • 432 posts
  • Location: Edinburgh

Posted 14 January 2018 - 10:30 PM

Best solution mate, New bulkhead on one of mine for same reason. Easier all around.

FS


Cheers FS. Took me a while to come round to it, but too late now to change my mind! :)

#112 g111mds

g111mds

    Speeding Along Now

  • Members
  • PipPipPipPipPip
  • 432 posts
  • Location: Edinburgh

Posted 16 January 2018 - 09:34 PM

Heavy snow fall at home today, so an unexpected free night, so out to the garage for a wee while. Little bit more on the passenger door to clean up the frame drain inserts, and some pondering on the bracing in the cab.

I seem to spend too long pouring over photos of restored pups, and noticed that mine didn't have a visible join of the rear light panel to the side panel. Thought the smoothing with filler was at the front for the de seaming, plus round the bodkit. Wrong! Dig about and it's loaded with filler too which I shouldn't really have been surprised at. The lower section is rotten. Probed a bit further and the arches are the same. Again, I'd thought these were saveable. Finally, while the bottom section of the sides are shot, I thought I'd be able to replace just the lower portion. Again, checking further, this doesn't look to be possible as they've been cut short too at the door end due to the later door frames.

With the front bulkhead out I can now also see that the top of the floor crossmember has also been replaced.

So, where does this leave me? Well, I'm not entirely sure. The bulkhead of course needs to be replaced, but, I can't feel sure that everything that's there now is square. Today's plan is to take the back end off after some extra bracing in the cab, and now look to get the floor and load tray complete sections, bulkhead on, then cab lowered on, and work from there. Huge undertaking, and an expensive one too.

Two major issues really for this pup are 1) the de seaming, and 2) the conversion to later doors. Literally everything is needing replaced, with the exception of the rear window frame, and hopefully the cab rear bulkhead.

I've got the passenger door to finish off, plus the drivers side too. I also need to get the subframes stripped and cleaned up / painted. That, plus get all my spares dug out and advertised for sale to raise some much needed funds for the parts.


Attached File  image.jpeg   45.94K   3 downloads

Attached File  image.jpeg   93.62K   2 downloads

Attached File  image.jpeg   102.83K   1 downloads

Edited by g111mds, 16 January 2018 - 09:37 PM.


#113 FlyingScot

FlyingScot

    Up Into Fourth

  • TMF Team
  • PipPipPipPipPipPipPipPipPip
  • 2,660 posts
  • Location: Inverclyde Scotland
  • Local Club: Mini Cooper Register

Posted 16 January 2018 - 09:45 PM

Ooft sorry to hear that pal, more work.... still better to know now.
I’m rebuilding mine from the floor up for similar (rot) reasons.

FS

#114 FlyingScot

FlyingScot

    Up Into Fourth

  • TMF Team
  • PipPipPipPipPipPipPipPipPip
  • 2,660 posts
  • Location: Inverclyde Scotland
  • Local Club: Mini Cooper Register

Posted 16 January 2018 - 09:49 PM

Attached File  0C6B68C6-3086-4867-8FF2-52A2CBDE8D65.jpeg   67.3K   15 downloads
Like this plus
Attached File  4ED8164C-9725-4E38-ACF5-DA75B107BB7F.jpeg   63.76K   4 downloads
And
Attached File  0D64900B-9B0A-4667-9E1F-C57A816B052D.jpeg   58.14K   1 downloads

FS

#115 g111mds

g111mds

    Speeding Along Now

  • Members
  • PipPipPipPipPip
  • 432 posts
  • Location: Edinburgh

Posted 16 January 2018 - 10:01 PM

Goodness, now that's a build FS!!! That jig looks just the thing for the build too - homemade?

#116 FlyingScot

FlyingScot

    Up Into Fourth

  • TMF Team
  • PipPipPipPipPipPipPipPipPip
  • 2,660 posts
  • Location: Inverclyde Scotland
  • Local Club: Mini Cooper Register

Posted 16 January 2018 - 10:07 PM

I was worried about the squareness once I had taken all the bodges off. The shell looked pretty good until like you I started to poke a bit more. It was media blasted previously to remove the filler. The chassis jig is substantial and is made to mimic the m-machine one, its 80mm box section steel with levelling castors, its homemade but by someone with better heavy fabrication skills than me.
I reckoned it was worth having as I have more than one rebuild planned....
The floor and load bay are m-machine with heritage bulkhead scuttle and inner wings.
FS

Edited by FlyingScot, 16 January 2018 - 10:09 PM.


#117 g111mds

g111mds

    Speeding Along Now

  • Members
  • PipPipPipPipPip
  • 432 posts
  • Location: Edinburgh

Posted 16 January 2018 - 10:24 PM

I was worried about the squareness once I had taken all the bodges off. The shell looked pretty good until like you I started to poke a bit more. It was media blasted previously to remove the filler. The chassis jig is substantial and is made to mimic the m-machine one, its 80mm box section steel with levelling castors, its homemade but by someone with better heavy fabrication skills than me.
I reckoned it was worth having as I have more than one rebuild planned....
The floor and load bay are m-machine with heritage bulkhead scuttle and inner wings.
FS


Thanks FS. It would be a mixture of heritage plus m-machine for me too. Already have the passenger side heritage inner wing, and the bulkhead would be a heritage one too.

One of the key reasons for me buying a restoration project was to make sure that it was all done to the best of my abilities and I'd know what was under the paint rather than buying one that looks pretty at a high price and then running the risk of it all not all being what it seemed. I'm hoping some parts will be salvageable. We'll see :)

#118 carthorse

carthorse

    Mini Mad

  • Members
  • PipPipPipPip
  • 256 posts
  • Location: Cheshire

Posted 16 January 2018 - 10:24 PM

Your having exactly the same problem I’m struggling with. The shell you started with is so rotten and full of bodges it’s hard to find any sort of datum your confident to take measurements of. After spending all day on and off trying to get the front end of mine to meet up I’ve come to the conclusion the bulkhead I’ve just welded in is about 5mm out of square which is enough to throw all the front end alignment off.
Annoyingly I positioned the bulkhead using the bracing I’d fabricated off the old toeboard using the steering rack mounts and the lower dash rail. Now is suspect due to previous crap repairs and possibly some accident damage the original bulkhead was probably wonky.
If I was doing it again I’d try and fab up a jig like Flying Scots.
Good luck!

#119 g111mds

g111mds

    Speeding Along Now

  • Members
  • PipPipPipPipPip
  • 432 posts
  • Location: Edinburgh

Posted 16 January 2018 - 10:47 PM

Your having exactly the same problem Im struggling with. The shell you started with is so rotten and full of bodges its hard to find any sort of datum your confident to take measurements of. After spending all day on and off trying to get the front end of mine to meet up Ive come to the conclusion the bulkhead Ive just welded in is about 5mm out of square which is enough to throw all the front end alignment off.
Annoyingly I positioned the bulkhead using the bracing Id fabricated off the old toeboard using the steering rack mounts and the lower dash rail. Now is suspect due to previous crap repairs and possibly some accident damage the original bulkhead was probably wonky.
If I was doing it again Id try and fab up a jig like Flying Scots.
Good luck!


Indeed.

It was your thread I was thinking off actually when I started to realise about the back end needing to come off. Seems such a drastic move, but then there's a dawning realisation that that's really the only way.

Sorry to hear about the alignment issues. What's your plans for next steps?

#120 wagon_rider

wagon_rider

    Passed Test

  • Noobies
  • PipPip
  • 30 posts
  • Location: Bafgate

Posted 19 January 2018 - 02:25 PM

Oooh some of that rot is a bit feisty!!  :nuke:


Loving this. I have this image in my head of digging out a mini i have had in storage for 18 years to rebuild. I wonder if it'll be like this too :D


1 user(s) are reading this topic

0 members, 1 guests, 0 anonymous users