Jump to content


Photo
- - - - -

1979 Mini 1000


  • Please log in to reply
51 replies to this topic

#31 Ghostrider

Ghostrider

    Stage One Kit Fitted

  • Noobies
  • PipPipPip
  • 68 posts
  • Location: Basingstoke, London and Peterborough
  • Local Club: Basingstoke Mini Club

Posted 14 November 2017 - 04:30 PM

So its update time! 

Although I'm at uni, I've been going back home when I can on weekends to get a few bits and pieces done, even bringing some bits back to work on in my uni room!


so the main bit, brake and fuel lines put on;

IMG_0119_zpshqyptpxq.jpg


And the cars been flipped onto its rear sub;

IMG_0120_zpsvwzp7nsf.jpg


This is primarily because the underside is done with the exception of the sills and door step of which I'll do with the car this way up. I know its easier to do them upside down but the car needed to go back the right way up and onto its wheels for winter, where It'll live in the garage for the next few months.


I have to say, the underside does look pretty good;

IMG_0121_zpsh8rxjn1l.jpg


Some smaller bits, I originally wanted those nice black vinyl seats you get in the mk3, the car came with none and I hate those horrible fabric ones BL changed to on the mk4 onwards.


So I got a hold of a set of front seats out of a clubman estate for £5 on ebay, a disgusting brown colour. They needed a special kind of treatment;

20171029_133541_zpswd8htut6.jpg


20171029_133544_zpskne86iqu.jpg

Once stripped and cleaned up a bit, I got myself a couple of cans of Halfords Black vinyl spray paint and this resulted;

20171103_163326_zpsx3ywibuu.jpg


20171103_163410_zpstgbdxt68.jpg


I was very happy with the result, but for getting as close to what I originally wanted for around 25 quid all in, really isn't that bad. The one on the left still needs to be done, when i get the time!


I've just got hold of a new front sub frame in really good nic, came with brand new rubber bushes for nearly every part on it too! So that's the next priority, go over it with my wire brush on the grinder, wipe and coat with POR 15. 


#32 mini_matt_106

mini_matt_106

    Super Mini Mad

  • Members
  • PipPipPipPipPipPip
  • 591 posts
  • Location: Andover

Posted 16 November 2017 - 11:39 AM

Excellent work on the floor there buddy! How did you flip it over? I need to clean and repaint my floor but nervous to try and turn it over!

#33 Steve8274

Steve8274

    Super Mini Mad

  • Members
  • PipPipPipPipPipPip
  • 580 posts
  • Location: Wigan (north west)

Posted 16 November 2017 - 01:17 PM

Looks great. I need to spray my top dash rail so interesting to see that the paint seems to work ok.
What size copper pipe did you use for fuel hose and have you put it through the floor or are you going to join it underneath? Do you need to put a flare on end to keep rubber fuel hose attached?
Thanks

#34 Ghostrider

Ghostrider

    Stage One Kit Fitted

  • Noobies
  • PipPipPip
  • 68 posts
  • Location: Basingstoke, London and Peterborough
  • Local Club: Basingstoke Mini Club

Posted 19 November 2017 - 03:23 PM

Excellent work on the floor there buddy! How did you flip it over? I need to clean and repaint my floor but nervous to try and turn it over!

Thanks, once you get it down to a bare shell it really does not weigh that much. I asked a couple of mates to give me a hand, we lifted it, rested it on its side against a couple of tyres to stop the tarmac damaging the body, then flipped it onto the rear sub frame. with about 3 people its pretty easy but i suppose you could do it by yourself, you just might damage that freshly repaired bodywork!


#35 Ghostrider

Ghostrider

    Stage One Kit Fitted

  • Noobies
  • PipPipPip
  • 68 posts
  • Location: Basingstoke, London and Peterborough
  • Local Club: Basingstoke Mini Club

Posted 19 November 2017 - 03:30 PM

Looks great. I need to spray my top dash rail so interesting to see that the paint seems to work ok.
What size copper pipe did you use for fuel hose and have you put it through the floor or are you going to join it underneath? Do you need to put a flare on end to keep rubber fuel hose attached?
Thanks

Thanks, yeah that paint works an absolute treat, i was a bit sceptical but so long as the prep is good , then it should turn out really good. Not sure on the fuel line as its the original one, the brake line however was one i got from minispares that came in a spool.

With the rubber hose on the main copper fuel line, there held on with a couple of jubilee clips at either end, the copper runs under the car then the rubber hose flexes it up into the boot and the fuel pump at the front. I think if you put a flare on, youll never get the rubber hose onto the line, a jubilee clip will do the job if the rubber line is still a tight fit onto the copper line, that way you'll have a good seal and the clip simply retains the two together.


#36 Steve8274

Steve8274

    Super Mini Mad

  • Members
  • PipPipPipPipPipPip
  • 580 posts
  • Location: Wigan (north west)

Posted 19 November 2017 - 04:30 PM


Looks great. I need to spray my top dash rail so interesting to see that the paint seems to work ok.
What size copper pipe did you use for fuel hose and have you put it through the floor or are you going to join it underneath? Do you need to put a flare on end to keep rubber fuel hose attached?
Thanks

Thanks, yeah that paint works an absolute treat, i was a bit sceptical but so long as the prep is good , then it should turn out really good. Not sure on the fuel line as its the original one, the brake line however was one i got from minispares that came in a spool.
With the rubber hose on the main copper fuel line, there held on with a couple of jubilee clips at either end, the copper runs under the car then the rubber hose flexes it up into the boot and the fuel pump at the front. I think if you put a flare on, youll never get the rubber hose onto the line, a jubilee clip will do the job if the rubber line is still a tight fit onto the copper line, that way you'll have a good seal and the clip simply retains the two together.

Thanks for the info 👍

#37 Ghostrider

Ghostrider

    Stage One Kit Fitted

  • Noobies
  • PipPipPip
  • 68 posts
  • Location: Basingstoke, London and Peterborough
  • Local Club: Basingstoke Mini Club

Posted 27 July 2018 - 04:44 PM

So its been a while.

But were back!

I have to admit work on the mini has only really resumed at the start of June, once I'd gotten all of my pesky university exams out of the way.

Sadly a large proportion of photos where lost from my phone due to err, a technical error. However i have a few to pick up the story from where it was last left, soo;


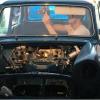
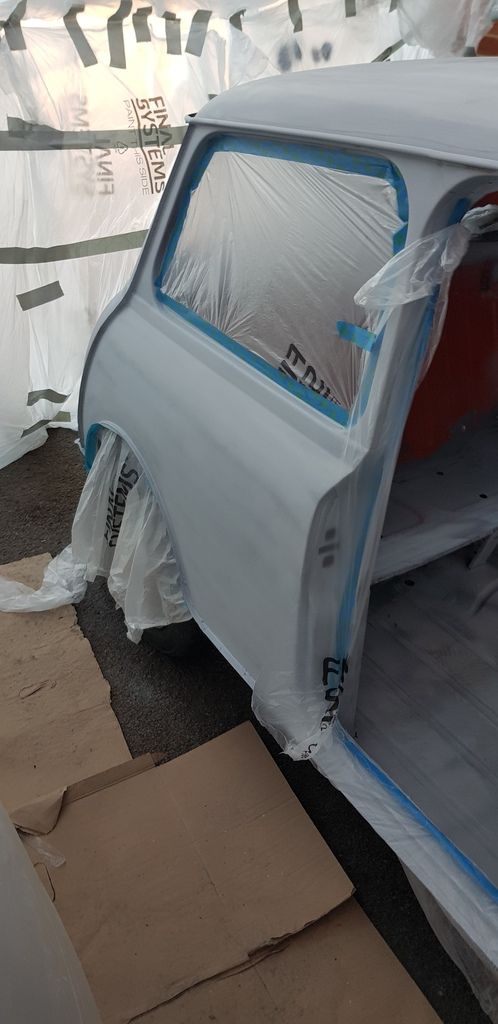
A bit of background first, I purchased a pair of refurb doors to replace the other rotten ones. However once they where at home I decided to test fit both of them. this is pretty much where the horrors started. Drivers door seemed to fit no problem, may need a couple of shims but nothing serious. The passenger door however, a f*****g nightmare, the panel gap was enormous. so after trying to find a solution for a few hours I stumbled across a pure magical thread on here by one of the mini magicians giving me a solution to said problem:


20180606_172738_zpssiaii0d3.jpg


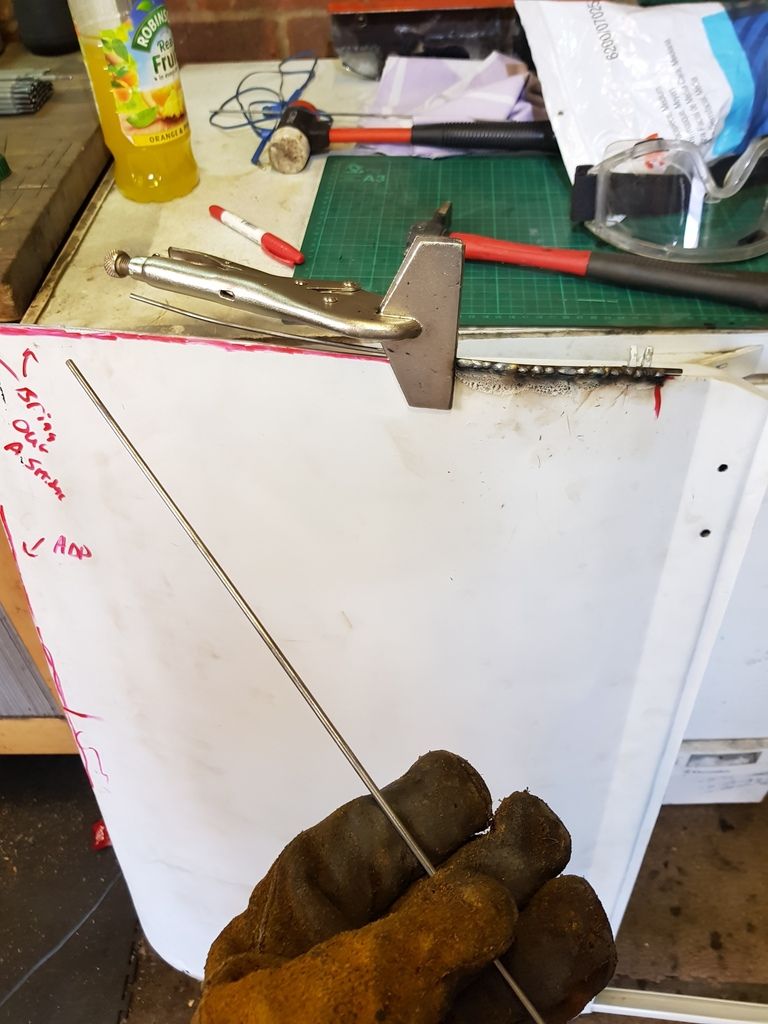
By adding these welding rods to the door skin it essentially extended the skin enough to produce a small enough panel gap. 

Doors then got rubbed down, filled, primered, filled, sanded etc you get the picture.


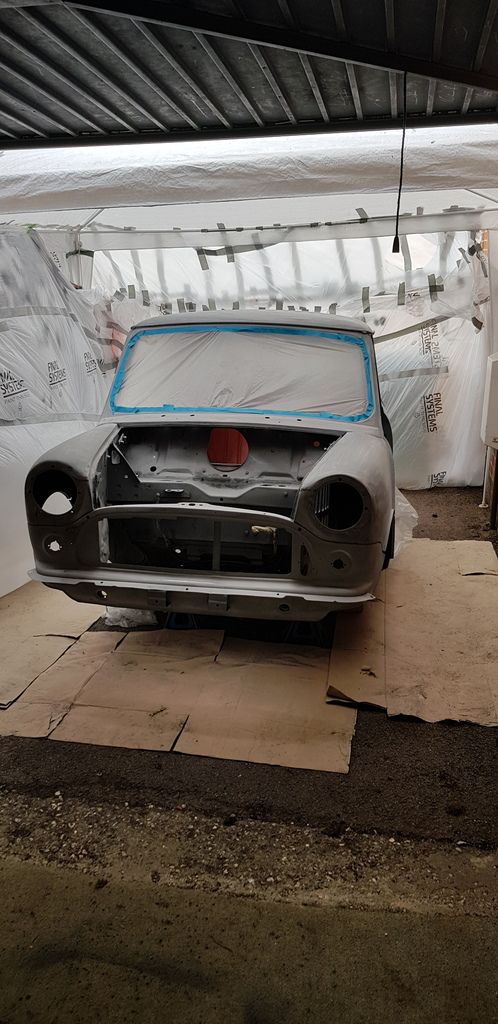
Next we move onto the car itself, the large proportion of photos as I mentioned earlier where my welding repairs, which is unfortunate as some of them where pure perfection, but never mind.

The main aim was to get that nasty blue paint on the top off and down to the nice stable red paint, this was done with many many days, many sheets of sandpaper and a lot of swearing.


20180612_212544_zpsnqnjby6t.jpg

20180612_212600_zpskrkkt7v1.jpg

20180612_212618_zps0grmevjv.jpg

20180612_212608_zps95hyjygn.jpg


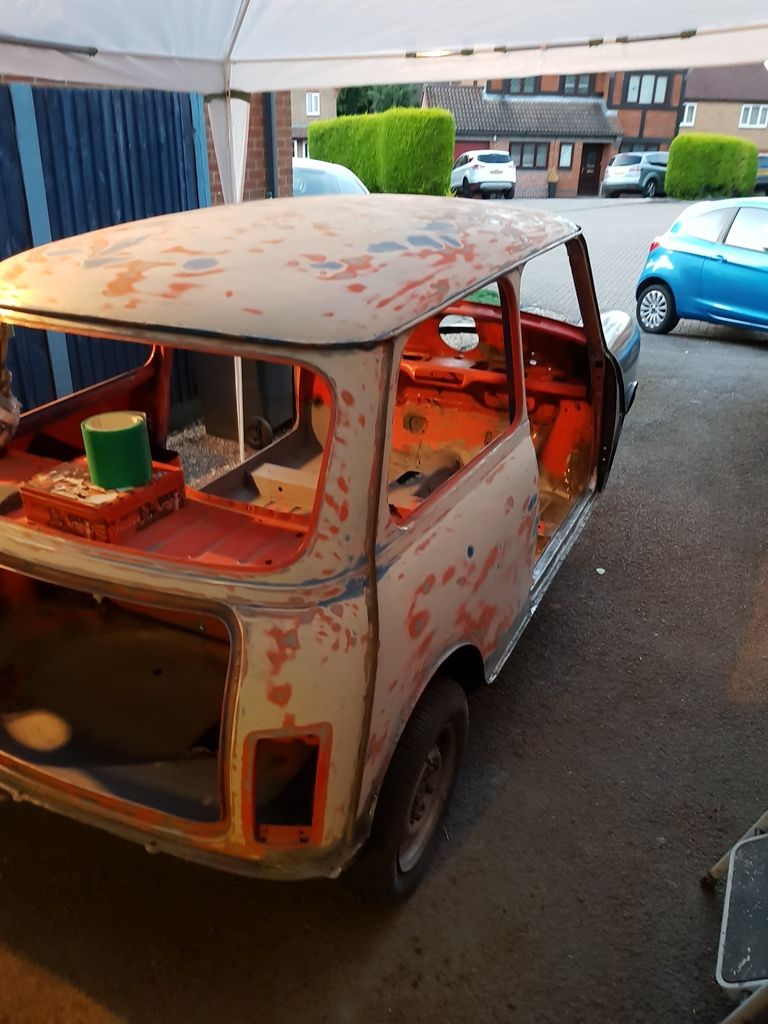
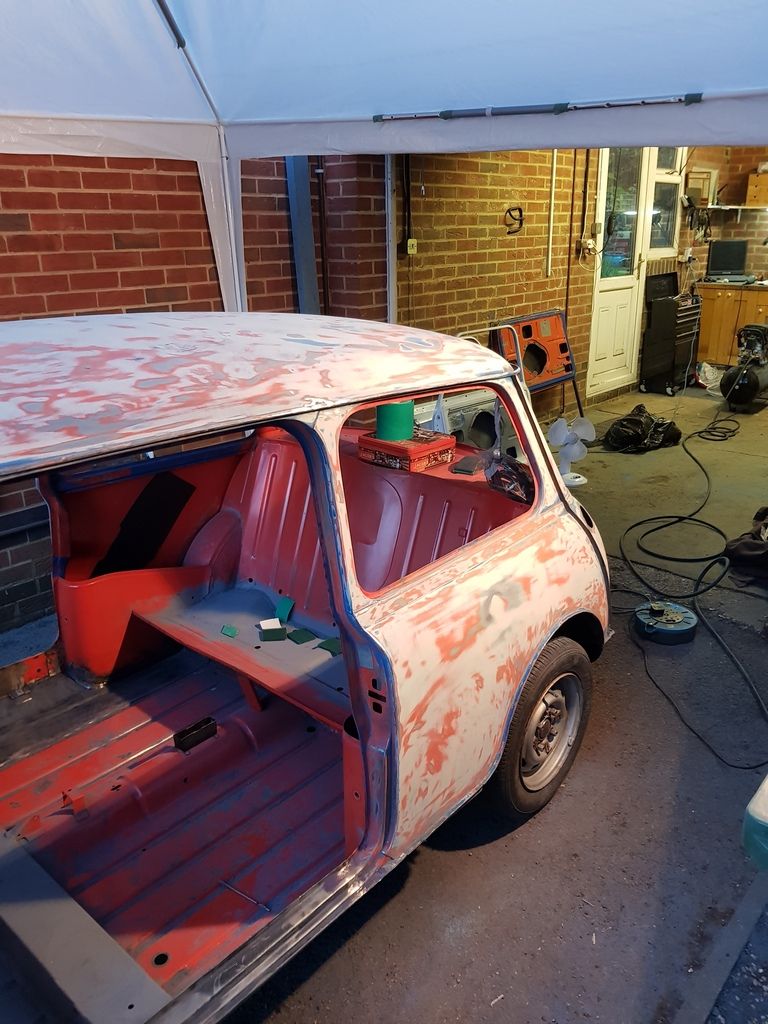
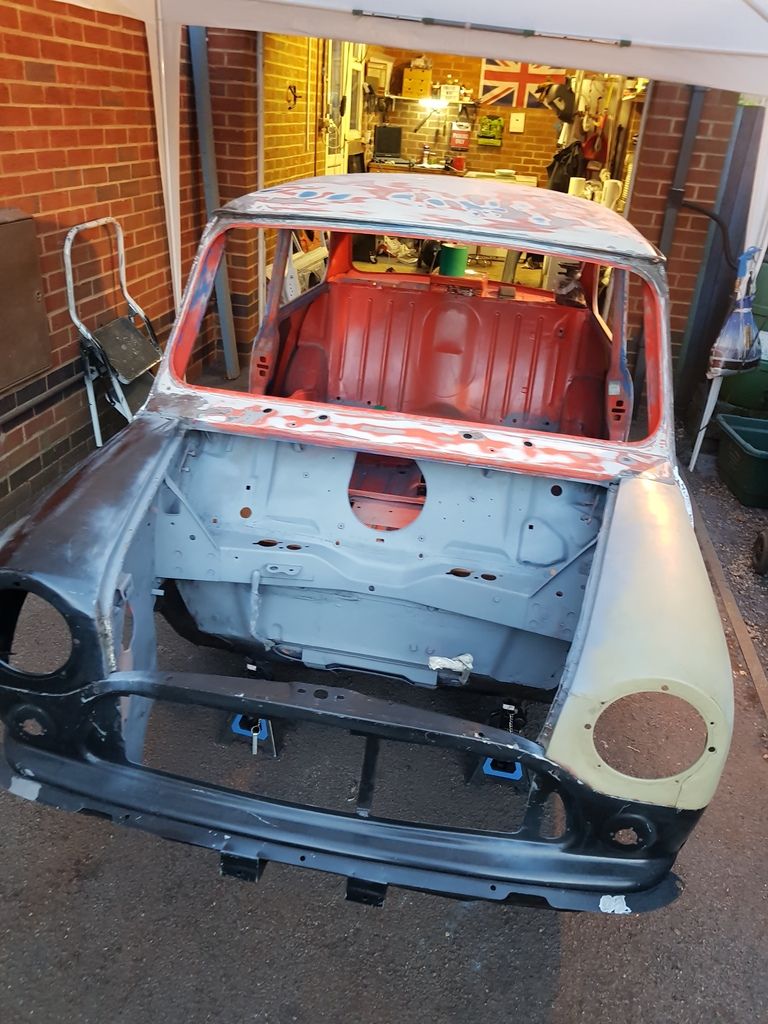
Sanding that down was very time consuming, but it barely needed any filler, most of it went on the roof and over my repairs, other than that I was well chuffed.


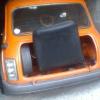
In the background/ evenings when the power tools have to be shut down otherwise the neibours will be banging at my door, time was spent putting any mechanical pieces together, front subby is now all together, but the photo is a little bit before it was all together.


20180606_221834_zpsdfr5fydn.jpg

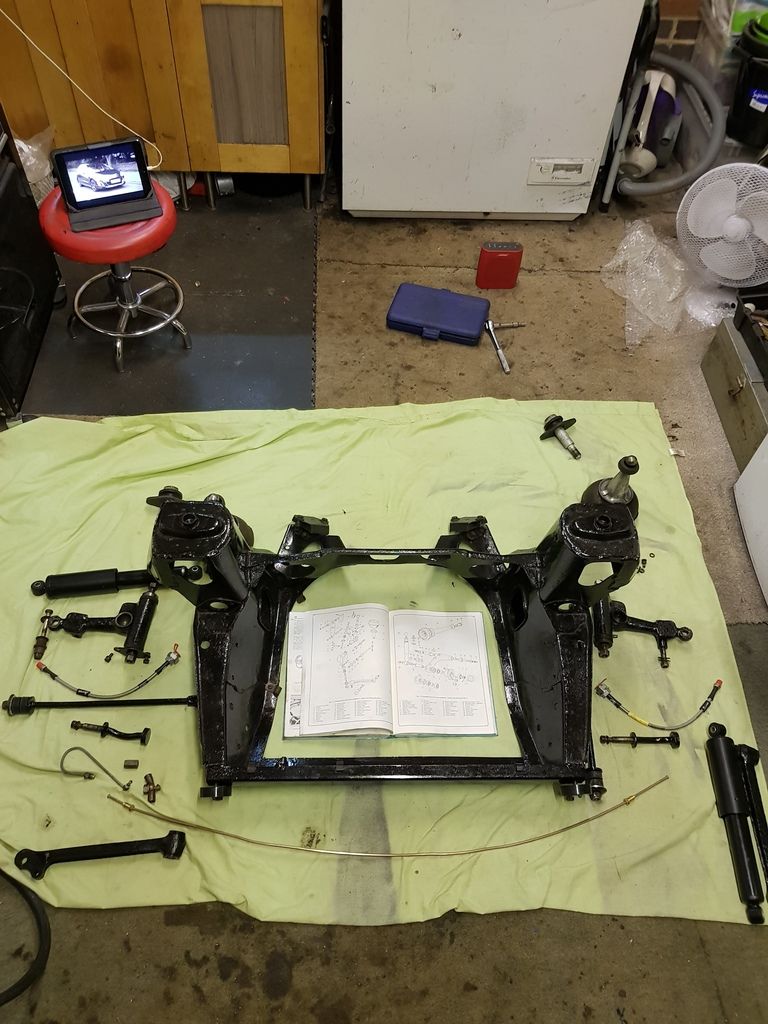
Swithced the rbber flexies to nice braided lines and have switched the drums to 7.5" discs.


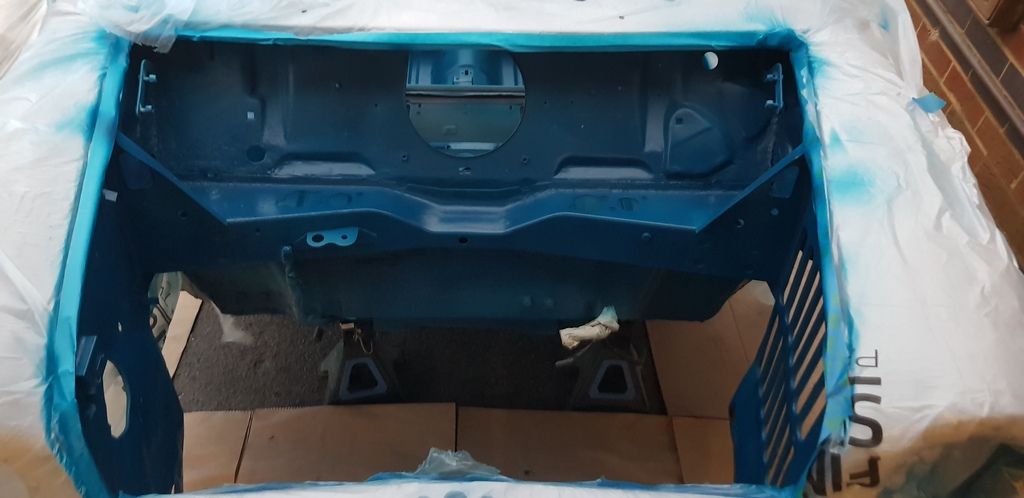
Now a lot happened between the last post clearly and this one but I guess you could call these the highlights. Jumping ahead to about a week ago, the car got its primer coat, sanded down and re primered in the makeshift spray booth I constructed on the driveway.


20180714_165207_zpsv6xjk4pm.jpg

20180720_183122_zpsqxkaooya.jpg

20180723_190759_zps2jialqun.jpg


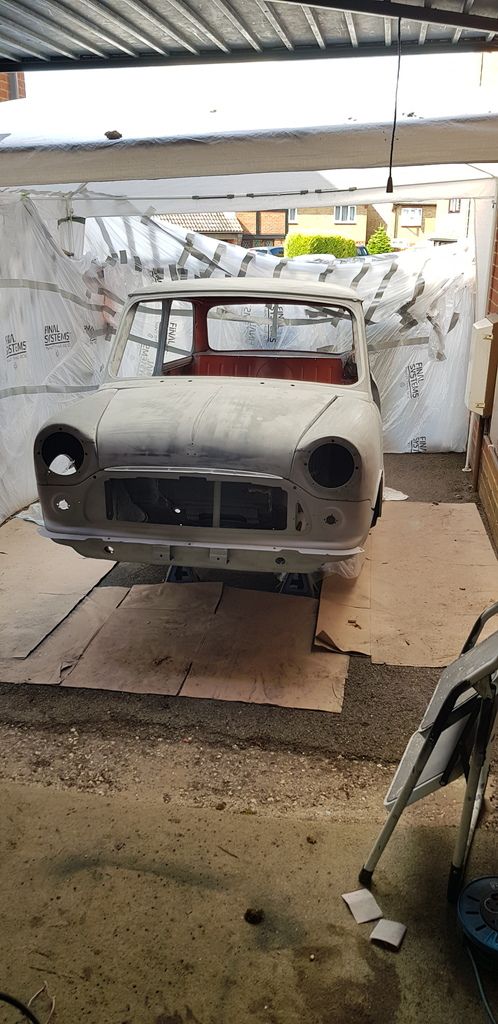
Then it was time to get a lick of pain on the inside;


20180723_204931_zps903s8xdn.jpg

20180723_204947_zpst1lkweit.jpg

20180723_204952_zpsoims5czr.jpg


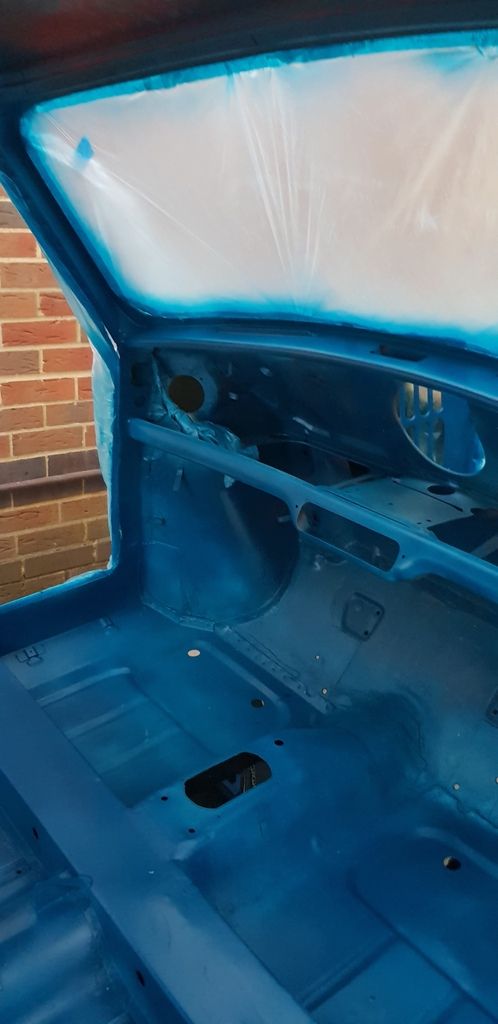
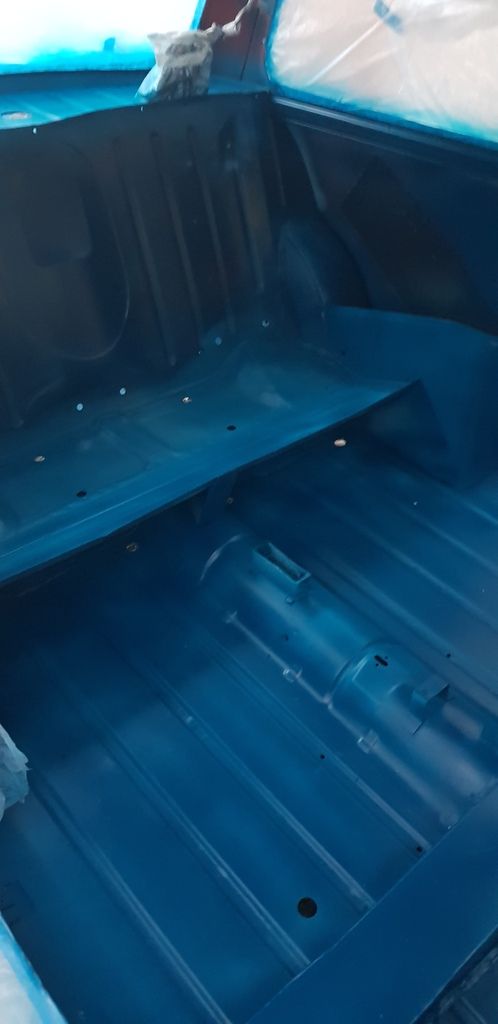
I know its not overly consistent on the floors but its going to be covered by carpet at the end of the day so I wasn't really too bothered. The gun setup I've got isn't great either, running a 50l tank with a lvlp gun which is quite wasteful but most of the hvlp guns had cfm requirements far larger than the one my compressor had so I had to make the most of what I've got.


The outside will shortly be painted once the weather makes its mind up whether it wants to be 30 degrees or rain, then it'll be lacquer followed by cutting and polishing. I know it wont be a showroom condition car by far but so long as its passable then I really don't mind as at the end of the day, Ive done absolutely everything on this car myself, a lot of its the first time too. I didn't know how to weld or paint or do most of the things I've done with this car but at least now I've got a huge knowledge bank of information to unleash should I do another mini or the dream project(Triumph GT6 MK3).


The car should be going back together towards the end of next week, depends on the weather really and if I can keep to my plan. But the car is without an engine at the moment, the block is trash and I cant afford the machining work. So if anyone has got a pre a plus 998 short or full engine in good condition knocking around then ill take it off your hands  :shifty: .


I suppose i better get back to it then, thanks.


Jacob


#38 Psycho-biker

Psycho-biker

    Stage One Kit Fitted

  • TMF+ Member
  • PipPipPip
  • 90 posts

Posted 28 July 2018 - 08:10 PM

Oh wow!!  that has come a long way in a year!! i remember how it was when you bought it! Mine got its 1st mot in 21 years a few weeks ago! keep going chap!!


#39 Ghostrider

Ghostrider

    Stage One Kit Fitted

  • Noobies
  • PipPipPip
  • 68 posts
  • Location: Basingstoke, London and Peterborough
  • Local Club: Basingstoke Mini Club

Posted 30 July 2018 - 11:52 PM

Oh wow!!  that has come a long way in a year!! i remember how it was when you bought it! Mine got its 1st mot in 21 years a few weeks ago! keep going chap!!

Aha yeah thanks! Its been hard work but its nearly there! Last time I saw your mini when I came to buy this one, yours has come a long way too, looks fantastic from the photos, enjoy it mate :D


#40 Ghostrider

Ghostrider

    Stage One Kit Fitted

  • Noobies
  • PipPipPip
  • 68 posts
  • Location: Basingstoke, London and Peterborough
  • Local Club: Basingstoke Mini Club

Posted 31 July 2018 - 12:13 AM

So a quick update, picked up a new short engine to replace the dead one. Had to drive 4 hours each way to "the north" to get it but it was worth it. It had done around 37k and had been left well oiled, so cylinders where perfect and no rust! Checked it over once I got home by the haynes manuel and concluded it was perfect therefore there was no need for me to strip it to a bare block. Just clean the outside, the water jacket, and add a lick of paint.

Here's the block from when I bought it:


20180731_005326_zpses41mats.jpg

20180731_005416_zpsuscofcil.jpg


and within 24 hours and a lot of hard work:


20180730_164647_zpssj47c0yb.jpg

20180730_164653_zpsnsivuohm.jpg


So as the weather has been rubbish that's all I could manage. However as were getting summer back tomorrow, its near perfect painting weather so the final coat of paint will be going on followed by lacquer a day or two later. So hopefully the car should be going back together by Friday!


#41 Ghostrider

Ghostrider

    Stage One Kit Fitted

  • Noobies
  • PipPipPip
  • 68 posts
  • Location: Basingstoke, London and Peterborough
  • Local Club: Basingstoke Mini Club

Posted 29 August 2018 - 10:24 AM

We're back! I'll admit Im really bad at keeping my thread up to date but the work hasn't stopped. The respray was completed about 3 weeks ago now and its been a long semi stress free rebuild with only a few minor issues.


So here's the car after paint in my makeshift booth;

20180804_122721_zpstxize6wr.jpg


20180804_122723_zpsbrz4vg1j.jpg


Considering its the first time I've ever done anything like this I'm rather pleased with how it turned out, the paint was very flat but seemed to come back relatively crap after cutting and polishing;

20180805_000558_zpshcwkmamt.jpg

20180810_194522_zpstjgeysx2.jpg


As soon as I could, I started to get the car all back together;

20180817_174355_zpsqy7xsjkf.jpg

20180810_194556_001_zps3vjz62p4.jpg

20180810_194542_zpsx6qul3sj.jpg


There where so many issues with the front drums being so far gone on this car which meant i either had to replace a large quantity of it or swap it out for 7.5" cooper s brakes. Guess which one I chose;

20180819_132718_zpsmqeh47vm.jpg


I only painted the calipers to give them a bit of anti rust protection, I wanted a slightly darker shade of red but I has to work with what I had. However nobody's ever going to see them with 10" steels on unless they're looking under the car.

At nighttime when I cant work on the car due to light, I work on the engine instead and well here it is;

20180819_214027_zpsdouk5zxv.jpg

As much as I wanted to change the cam and lighten the flywheel, I just couldn't afford it. Next year I'll hopefully be able to get a nice light flywheel, sw5 cam and a 12g295 head ported and flowed. But its otherwise standard apart from a lightened clutch back plate and a super water pump that's it really.


With the help of a friend, we got the engine in, its ever so easy;

20180825_124429_zpseqxvszra.jpg


The rest really was just me furiously trying to get the car together and testing it all;

20180825_194743_zpspwkeslwl.jpg

20180827_211421_zpsz6ymr22r.jpg


Filled it up with oil last night and mixed my coolant up too. poured the coolant in and it slowly came back out again. F**k. Lesson learned, test the rad again before putting it in. It was a second hand radiator that I bought last year and had been stored in the house for the past 10 months or so. Must have been damaged by me moving it around as I tested the bloody thing when it came. Anyway its a fast paced drip that's leaking from the matrix, going to try some radweld in it so see if it'll seal it as I cant really afford a new rad.

Aside from that the voltage stabiliser in the 3 clock centre speedo is duff, ordered a new one, that one was duff too so waiting on a replacement in the post today so I can get the fuel and temp gauges working, and hopefully fire it up.

Inside the car ill try and get a few pics, I've installed a gps tracker as well to allow me to track down any one who steals it like Liam neeson, cost 12 quid + another 10 for a giffgaff sim, works a treat, draws a tiny amount of current. When you call it it hangs up then sends you a message with long, lat, speed, time and a link to its location on google maps, absolutely brilliant.


So let us pray that this leak gets plumbed and she fires up today.

We'll soon see.


Jacob


#42 Vinay-RS

Vinay-RS

    Put's foolish ideas in peoples heads

  • Members
  • PipPipPipPipPipPipPipPipPip
  • 2,093 posts
  • Location: Cape Town

Posted 29 August 2018 - 11:17 AM

Nice job on the rebuild. It looks good with the freshly painted motor and body. 


#43 Psycho-biker

Psycho-biker

    Stage One Kit Fitted

  • TMF+ Member
  • PipPipPip
  • 90 posts

Posted 02 September 2018 - 02:16 PM

awesome progress!!!   from what it came from its amazing!!


where did the tracker come from? got a link at all?


#44 johnR

johnR

    Up Into Fourth

  • Members
  • PipPipPipPipPipPipPipPipPip
  • 2,244 posts
  • Location: Dorset

Posted 02 September 2018 - 04:58 PM

Not sure if anyone's suggested using Imgur to host your pictures so they show? Most people have ditched Photobucket.

Good job with the build - nearly there! 


#45 Ghostrider

Ghostrider

    Stage One Kit Fitted

  • Noobies
  • PipPipPip
  • 68 posts
  • Location: Basingstoke, London and Peterborough
  • Local Club: Basingstoke Mini Club

Posted 23 October 2018 - 07:38 PM

awesome progress!!!   from what it came from its amazing!!


where did the tracker come from? got a link at all?

thanks, I still cant believe its the same car! Tracker came off ebay https://www.ebay.co....3.c100508.m3226


you just call the number that the sim inside the tracker is set to, then you can lock it so only you can talk to it. it'll ping you a message instantly after you call it with lat, long, speed, time and a google maps location. permanently wired it to the fuse box as it draws very little current so will take years to flatten the battery.


0 user(s) are reading this topic

0 members, 0 guests, 0 anonymous users