Jump to content


Photo
- - - - -

1969 Mk2 Cooper


  • Please log in to reply
101 replies to this topic

#61 Quinlan minor

Quinlan minor

    One Carb Or Two?

  • TMF+ Member
  • PipPipPipPipPipPipPip
  • 988 posts
  • Location: London
  • Local Club: LSMOC

Posted 14 April 2020 - 06:38 AM

"The master cylinders after a rub down and Autosol."


An old toothbrush is very good for getting the Solvol in and around the lettering.


#62 blacktulip

blacktulip

    Crazy About Mini's

  • TMF+ Member
  • PipPipPipPipPipPipPipPipPipPip
  • 6,221 posts
  • Location: Braintree

Posted 15 April 2020 - 09:58 PM

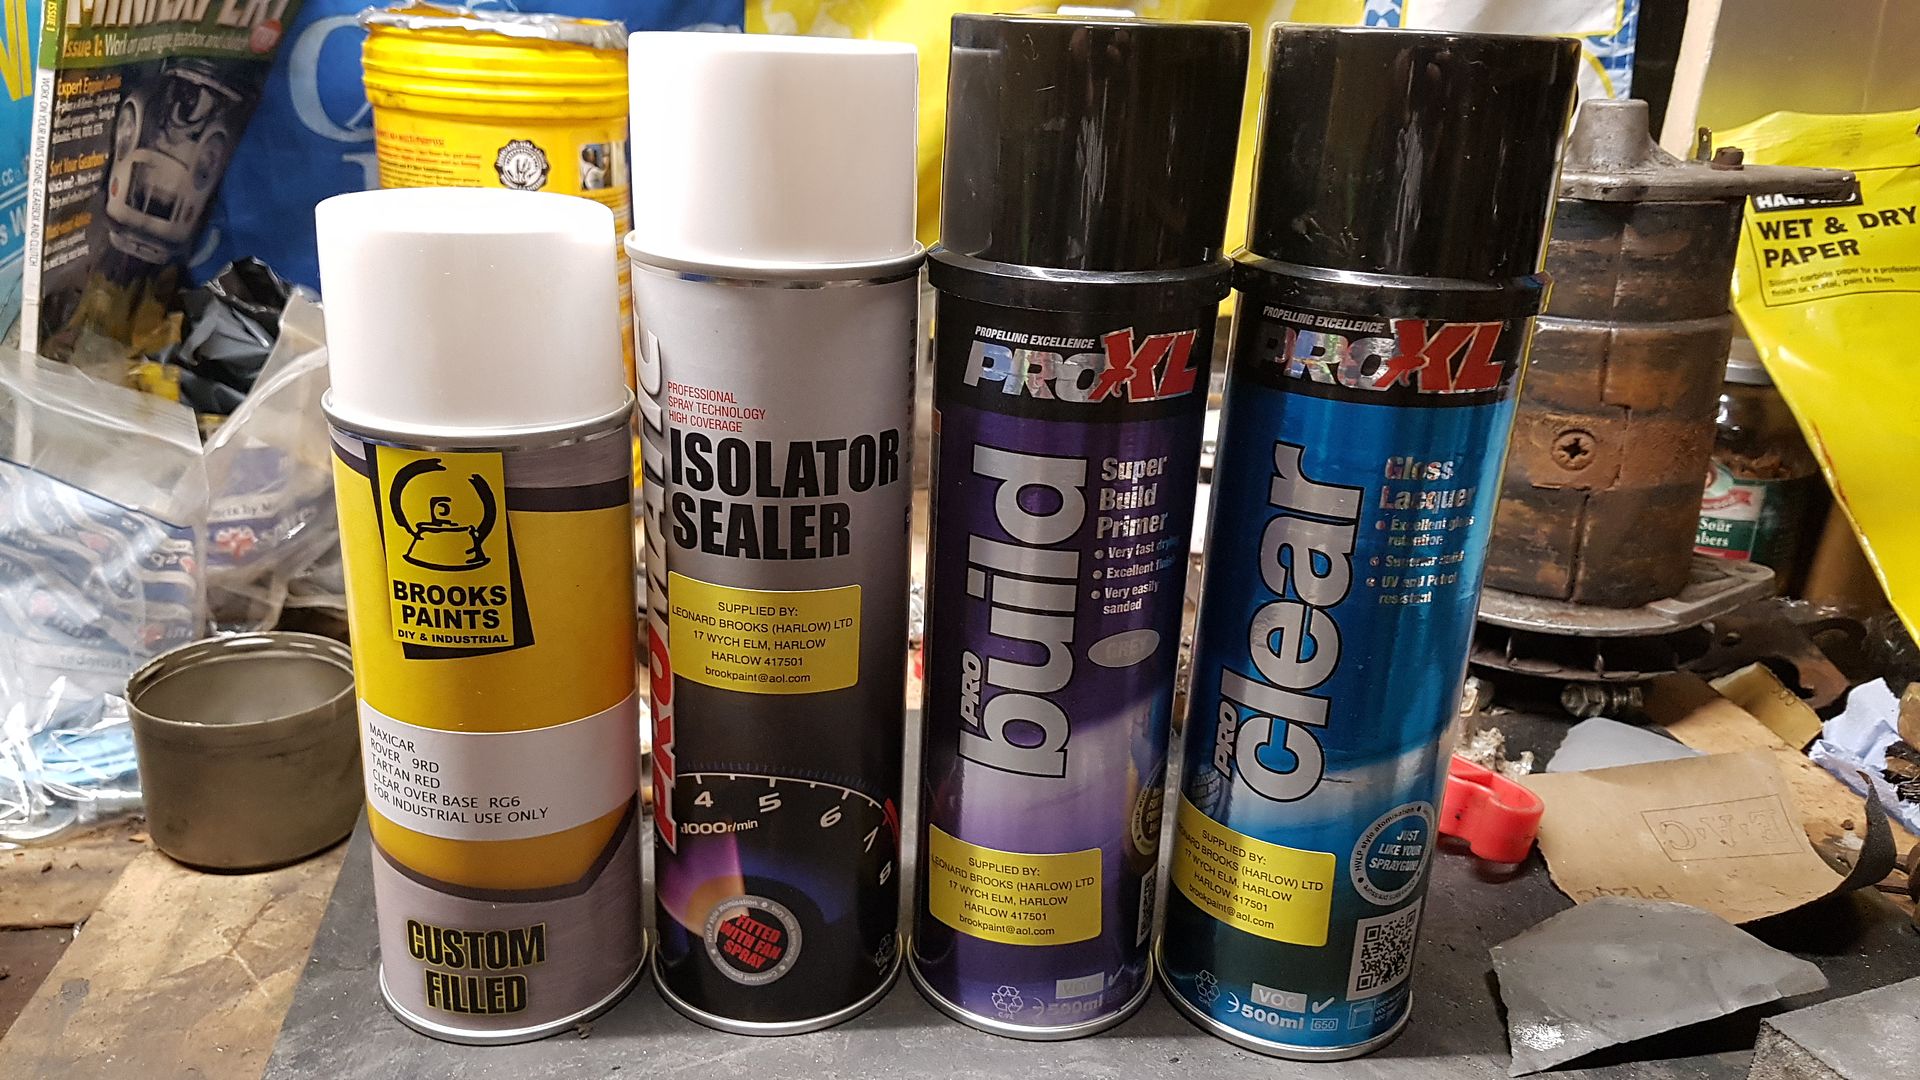
Paint arrived today from a place called Leonard Brooks paints. I used them years ago when I got some paint for Blacktulip. Got some isolator so I don't have a reaction from going from the old to new paint, high build filler primer, RD9 tartan red base coat and some clear coat to finish.
20200415_223815_zps0xmf4b1z.jpg

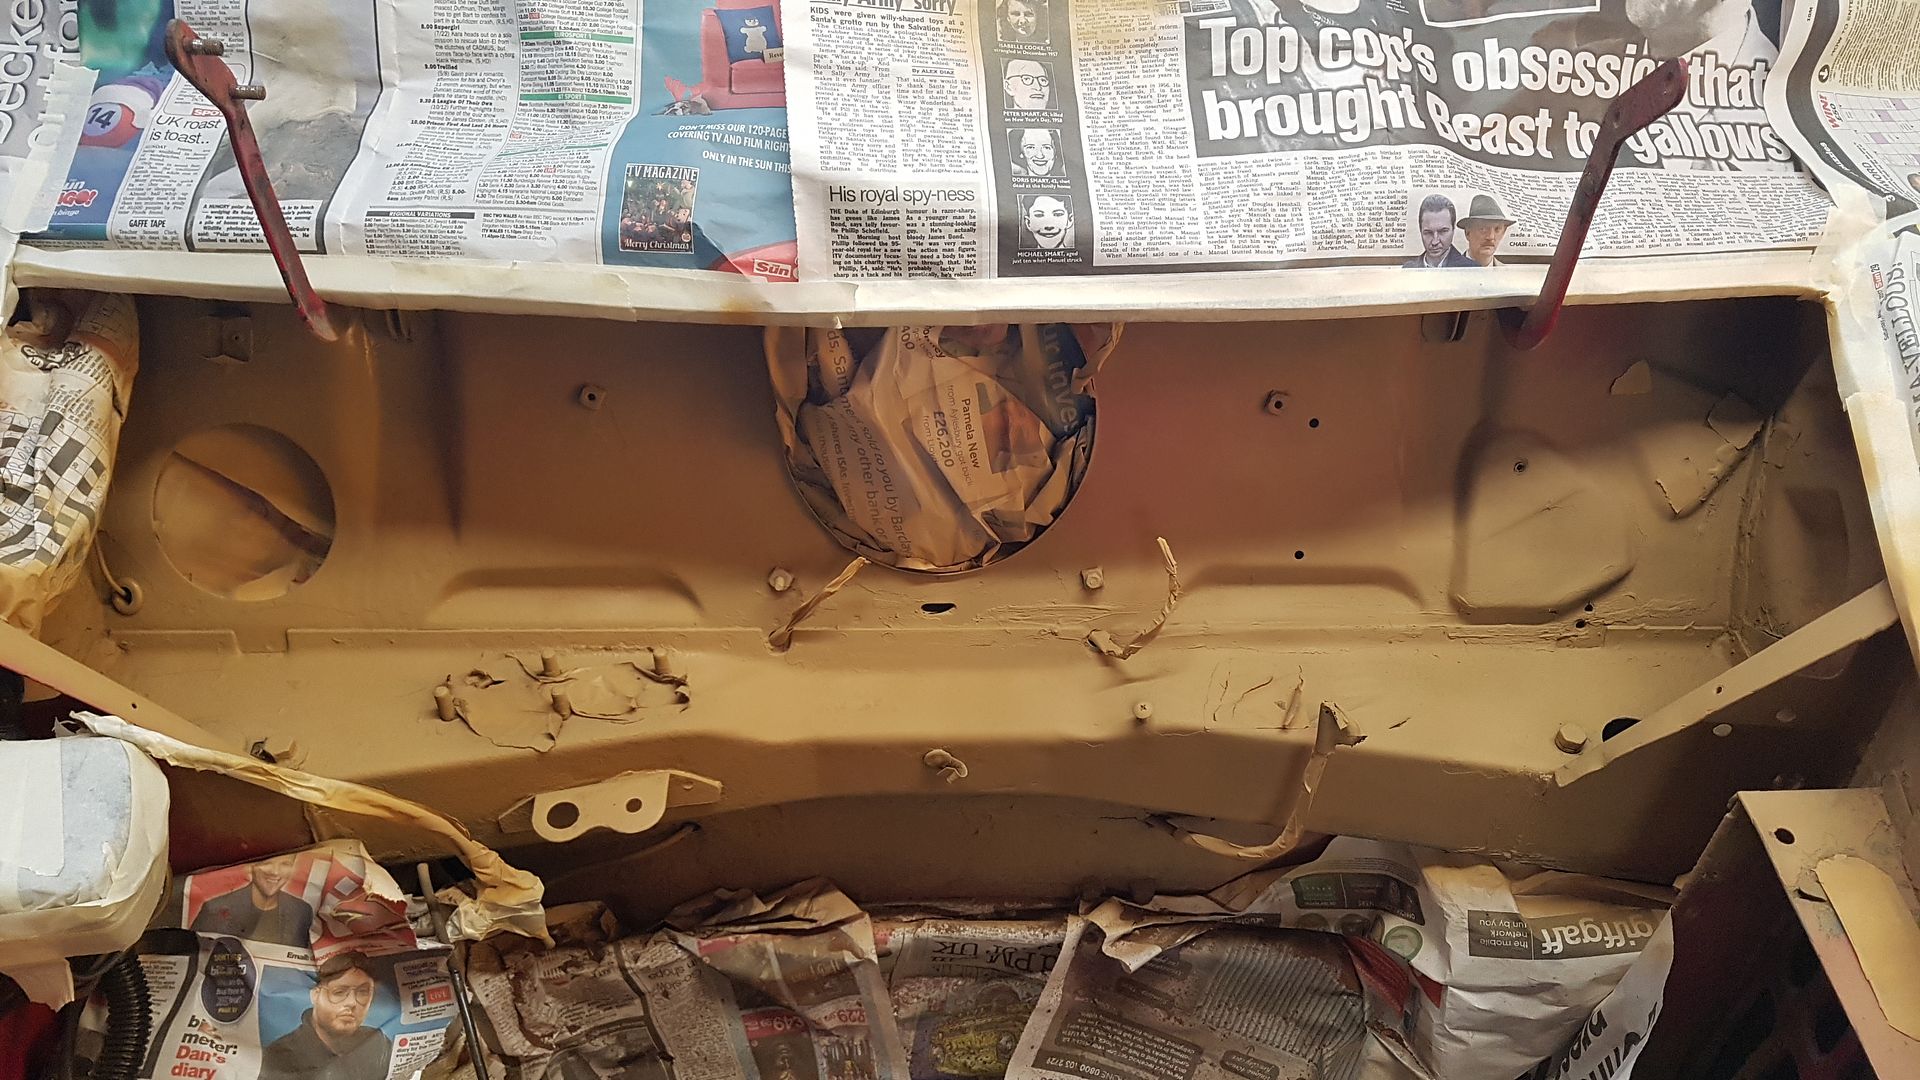
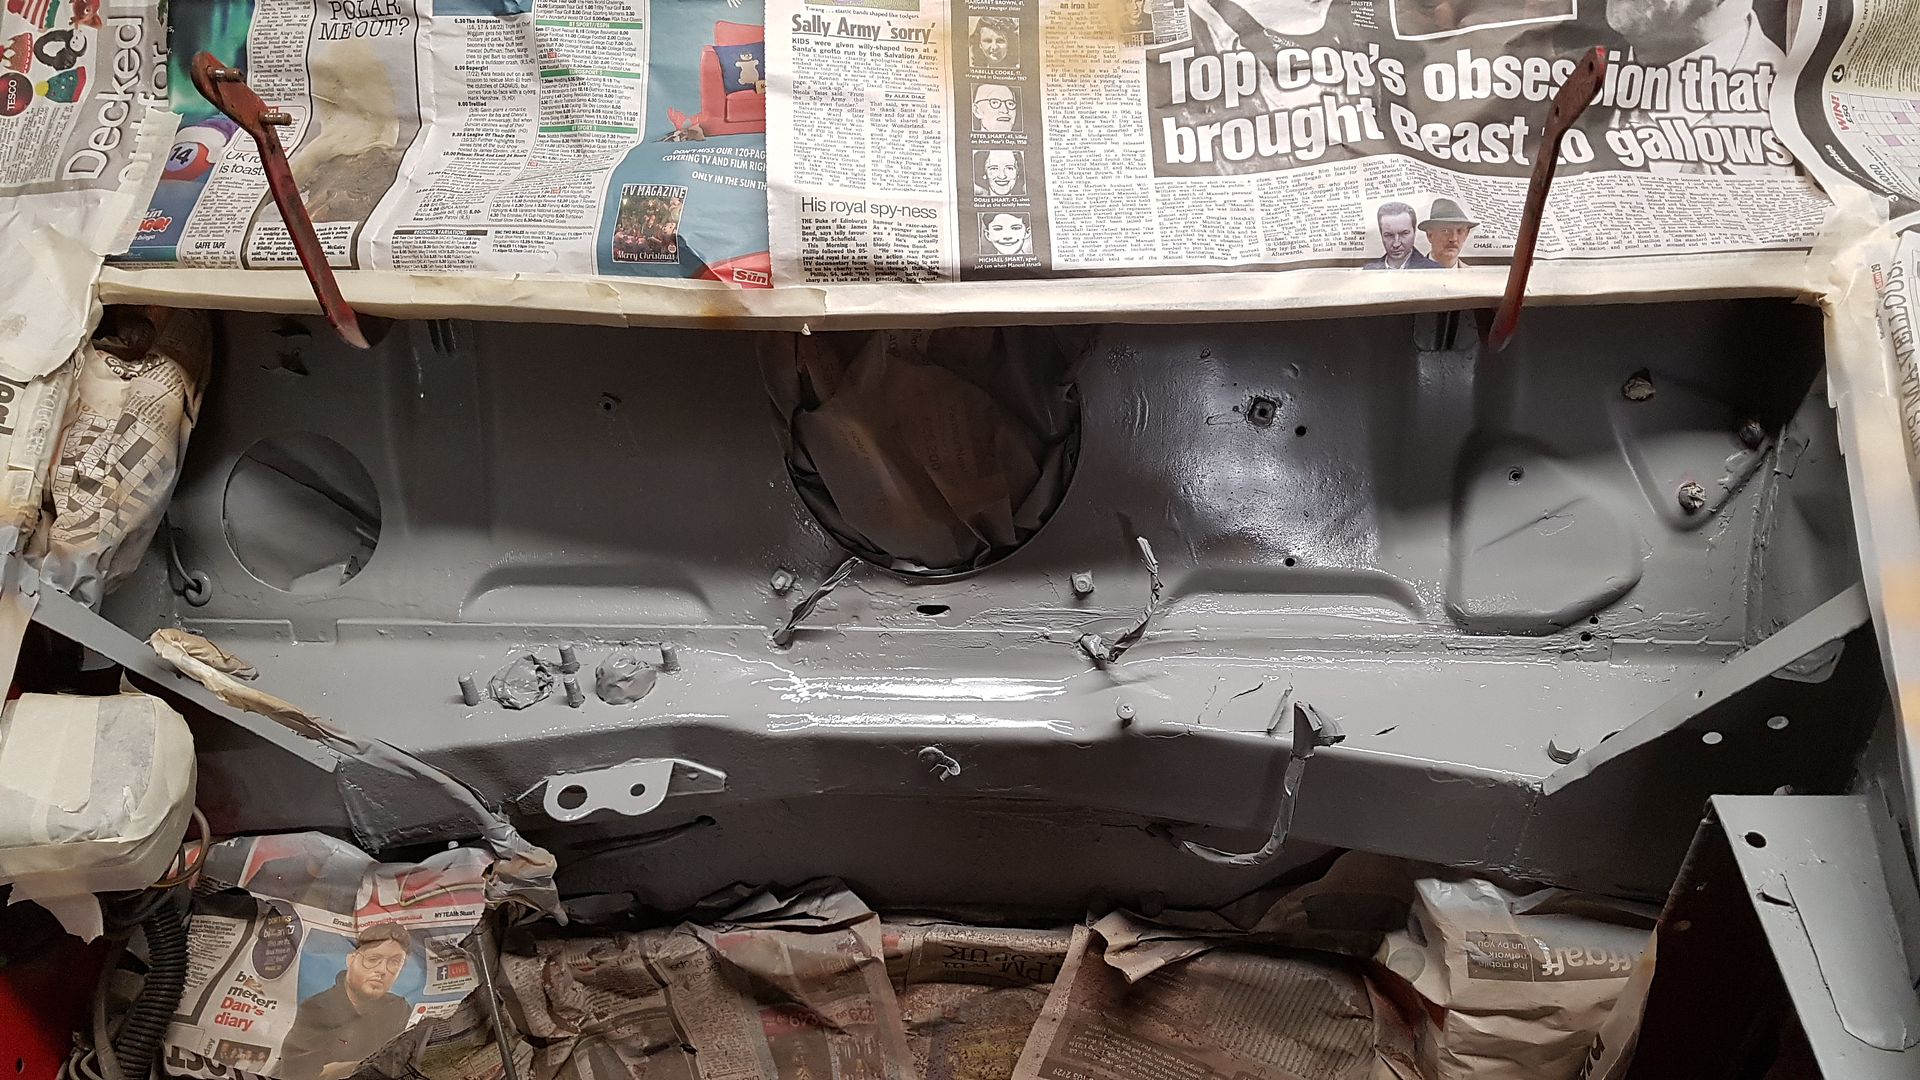
After some issues with rubbish masking tape I eventually got everything masked off. The isolator and primer have gone down really well. I had to order up some 400 and 600 wet and dry so got to wait for that to arrive. In the meantime I have a parcel due from minispares with my new ring gear plus a few little extra bits I need. I'm going to try the cooker/freezer method to get the ring gear on.

20200415_152518_zpsahkhagrb.jpg

20200415_221112_zpscaxqgp4t.jpg

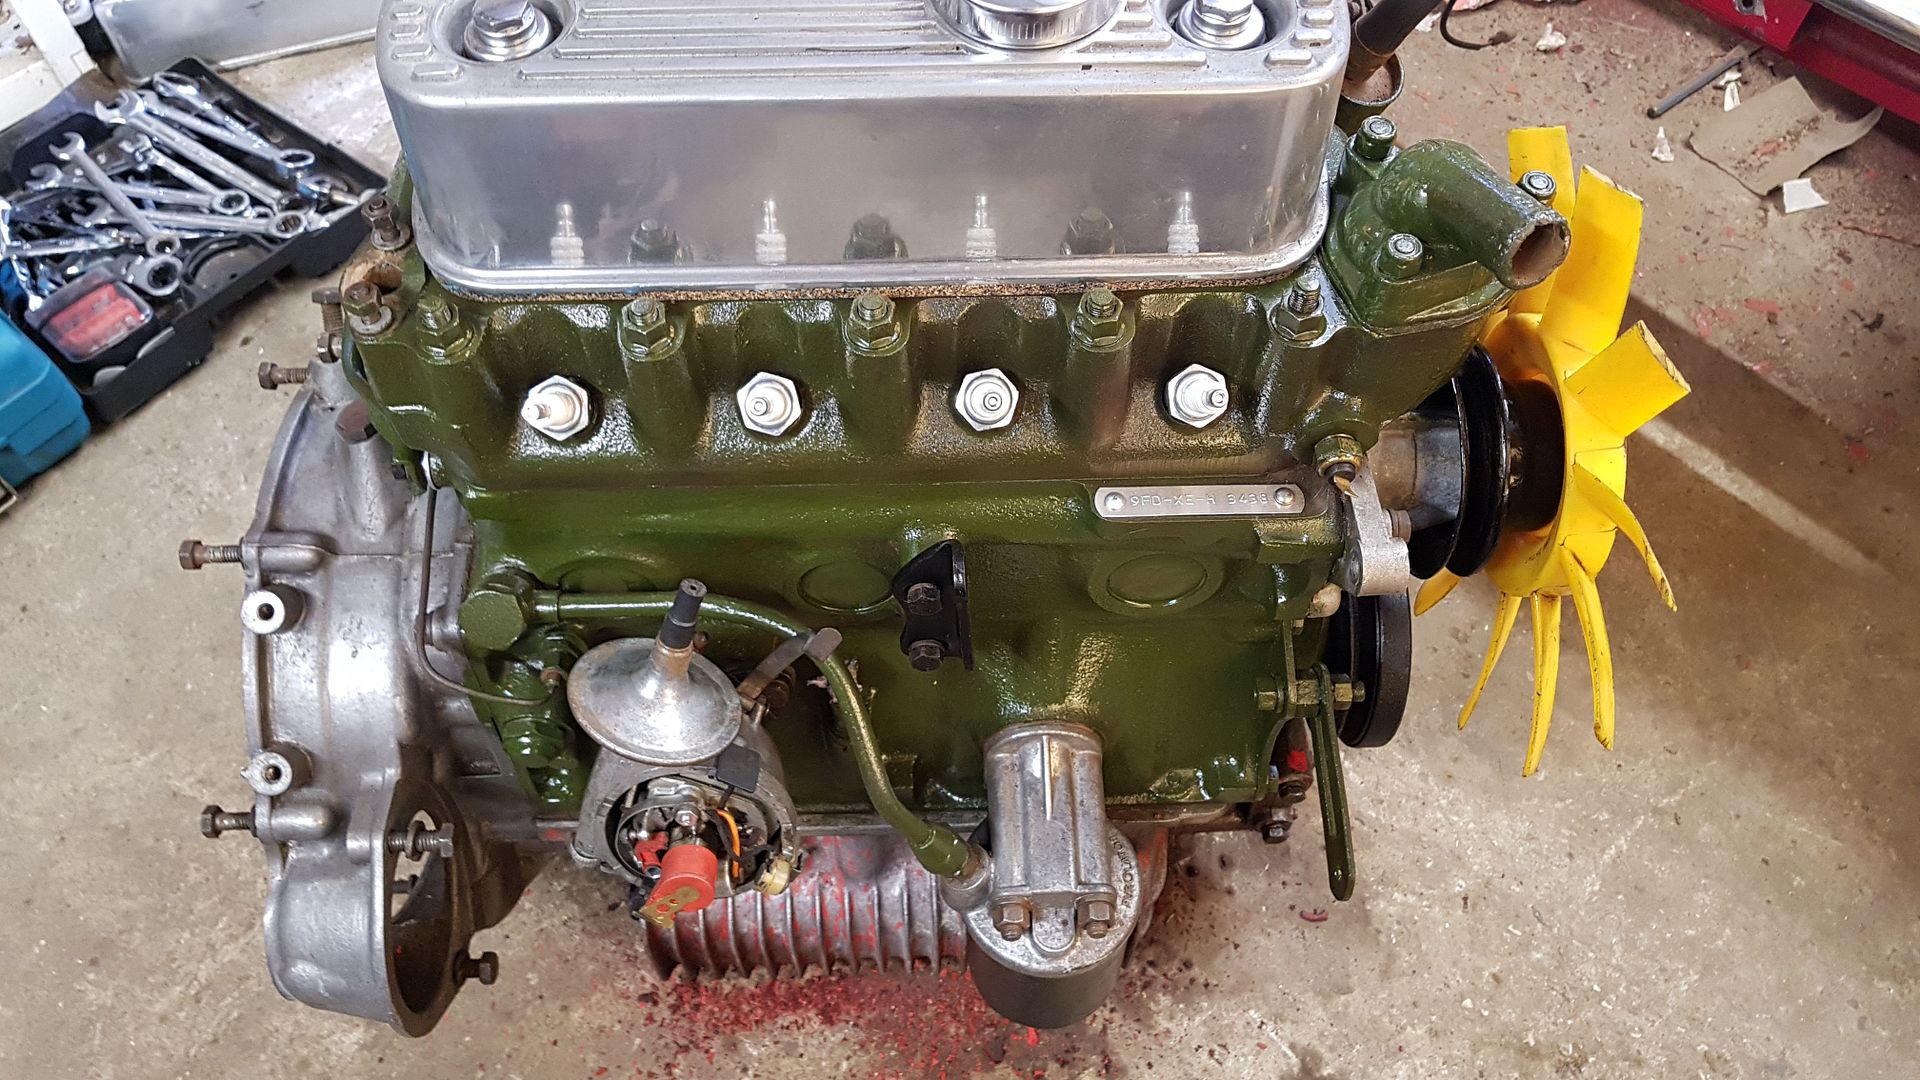
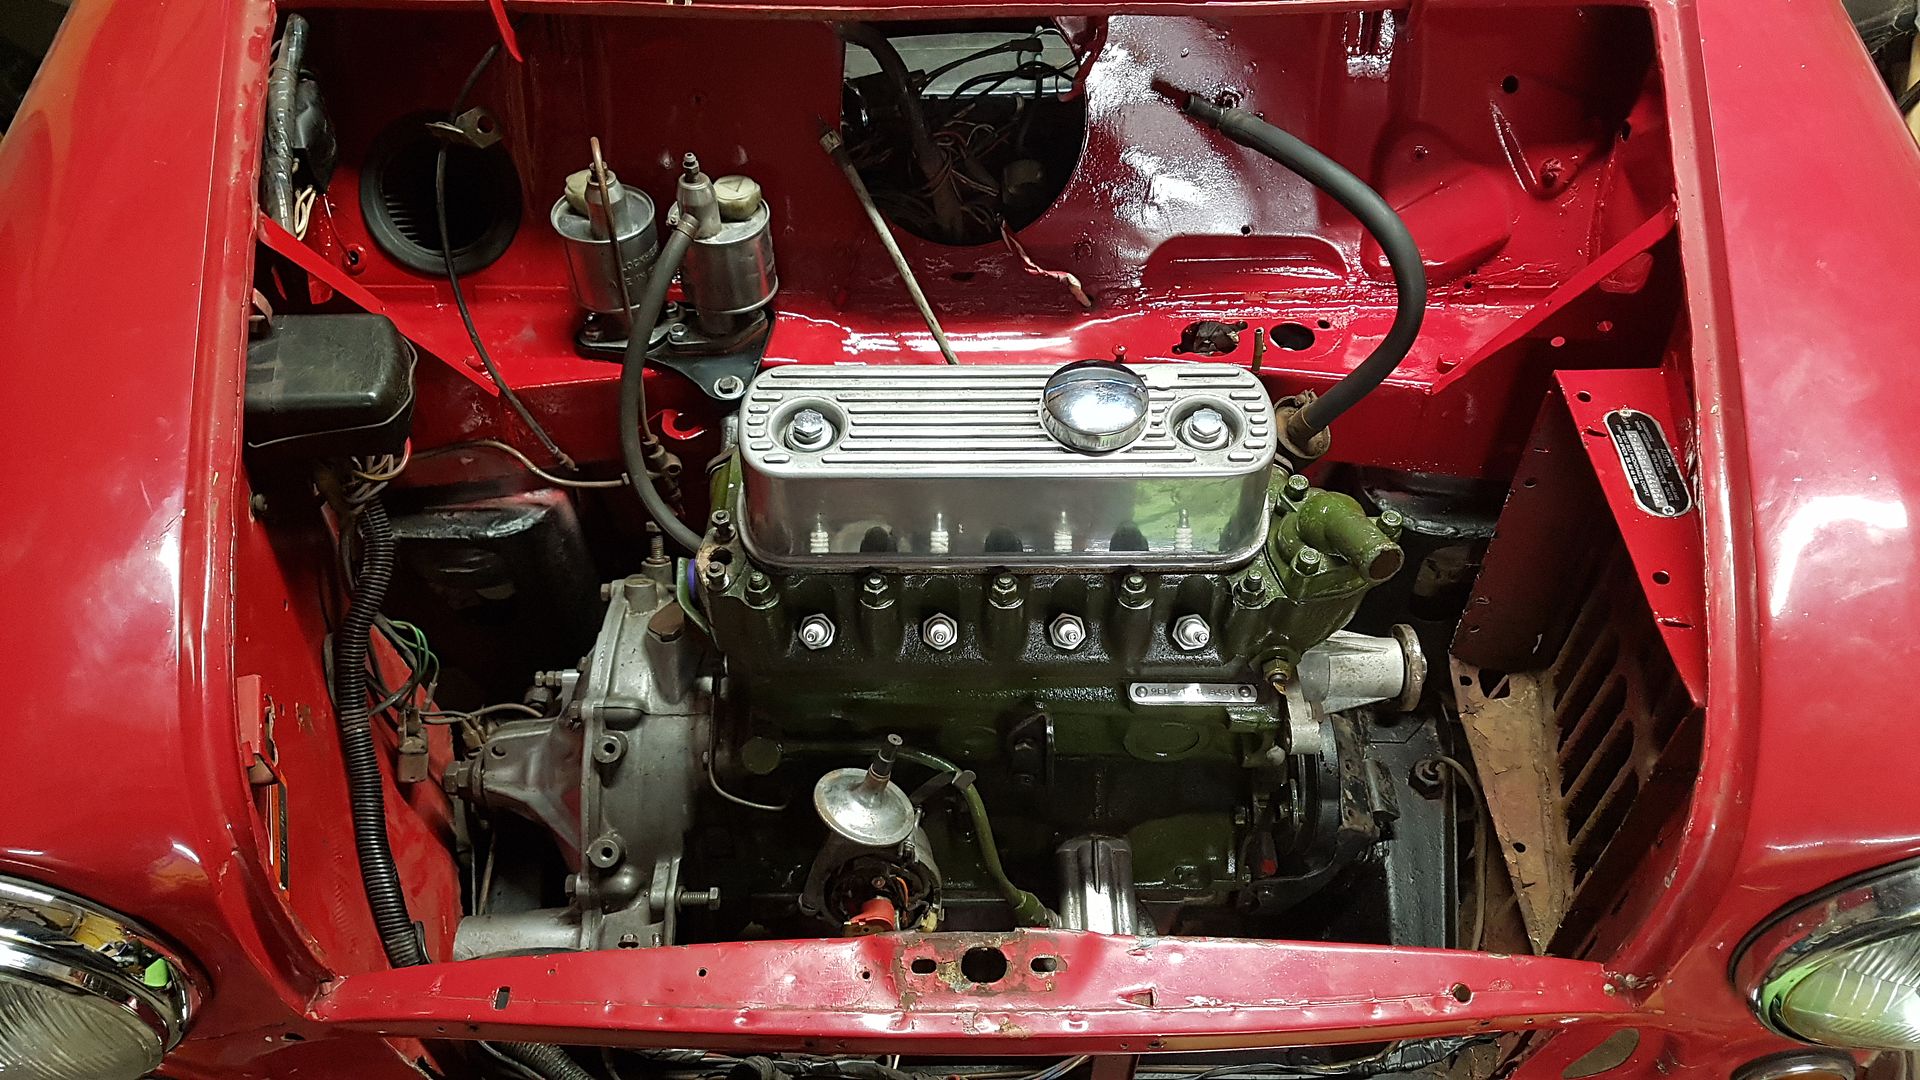
Here's the engine... It's getting there!
IMG-20200415-WA0036_zpsjnecqgmm.jpeg

Edited by blacktulip, 15 April 2020 - 10:34 PM.


#63 Daz1968

Daz1968

    Up Into Fourth

  • Members
  • PipPipPipPipPipPipPipPipPip
  • 2,058 posts
  • Location: Dudley

Posted 16 April 2020 - 11:23 PM

The way you are going it will be ready when the lockdown is lifted, looking good so far. On my master cylinders I blasted them and painted with cold galvanising spray, about 3 coats then after dry rubbed them a little with dirty hands to get the shine off. Not exactly same as original finish but came out better than the new bright zinc ones. 


#64 blacktulip

blacktulip

    Crazy About Mini's

  • TMF+ Member
  • PipPipPipPipPipPipPipPipPipPip
  • 6,221 posts
  • Location: Braintree

Posted 17 April 2020 - 10:12 AM

The way you are going it will be ready when the lockdown is lifted, looking good so far. On my master cylinders I blasted them and painted with cold galvanising spray, about 3 coats then after dry rubbed them a little with dirty hands to get the shine off. Not exactly same as original finish but came out better than the new bright zinc ones.

I wish I had a blast cabinet, that would turn hours of cleaning into 10 mins ?

Looks like I may be off another 3 weeks after the government announcement last night so it may happen. Still need to find the rear opening side windows in clear glass though.

Once my sand paper arrives I really want to get a good finish before applying the red so I think it will take time to get the imperfections right.

#65 blacktulip

blacktulip

    Crazy About Mini's

  • TMF+ Member
  • PipPipPipPipPipPipPipPipPipPip
  • 6,221 posts
  • Location: Braintree

Posted 19 April 2020 - 04:07 PM

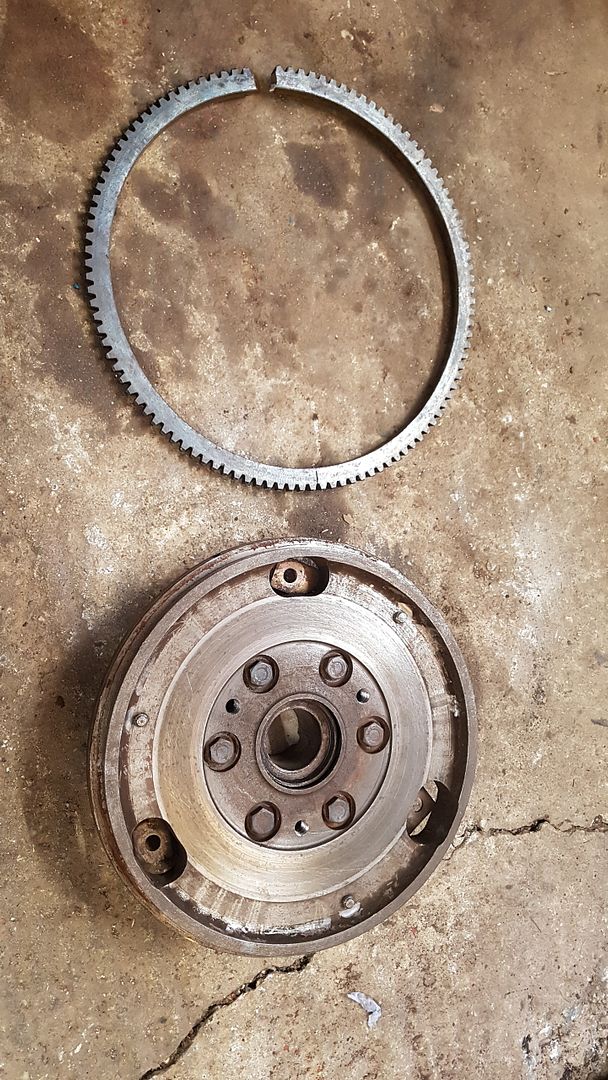
Finally got the ring gear off of the flywheel, I cut two slots into the ring but being very careful not to cut the main flywheel then it came off very easily.

20200419_155339_zpsngdtnw1x.jpg

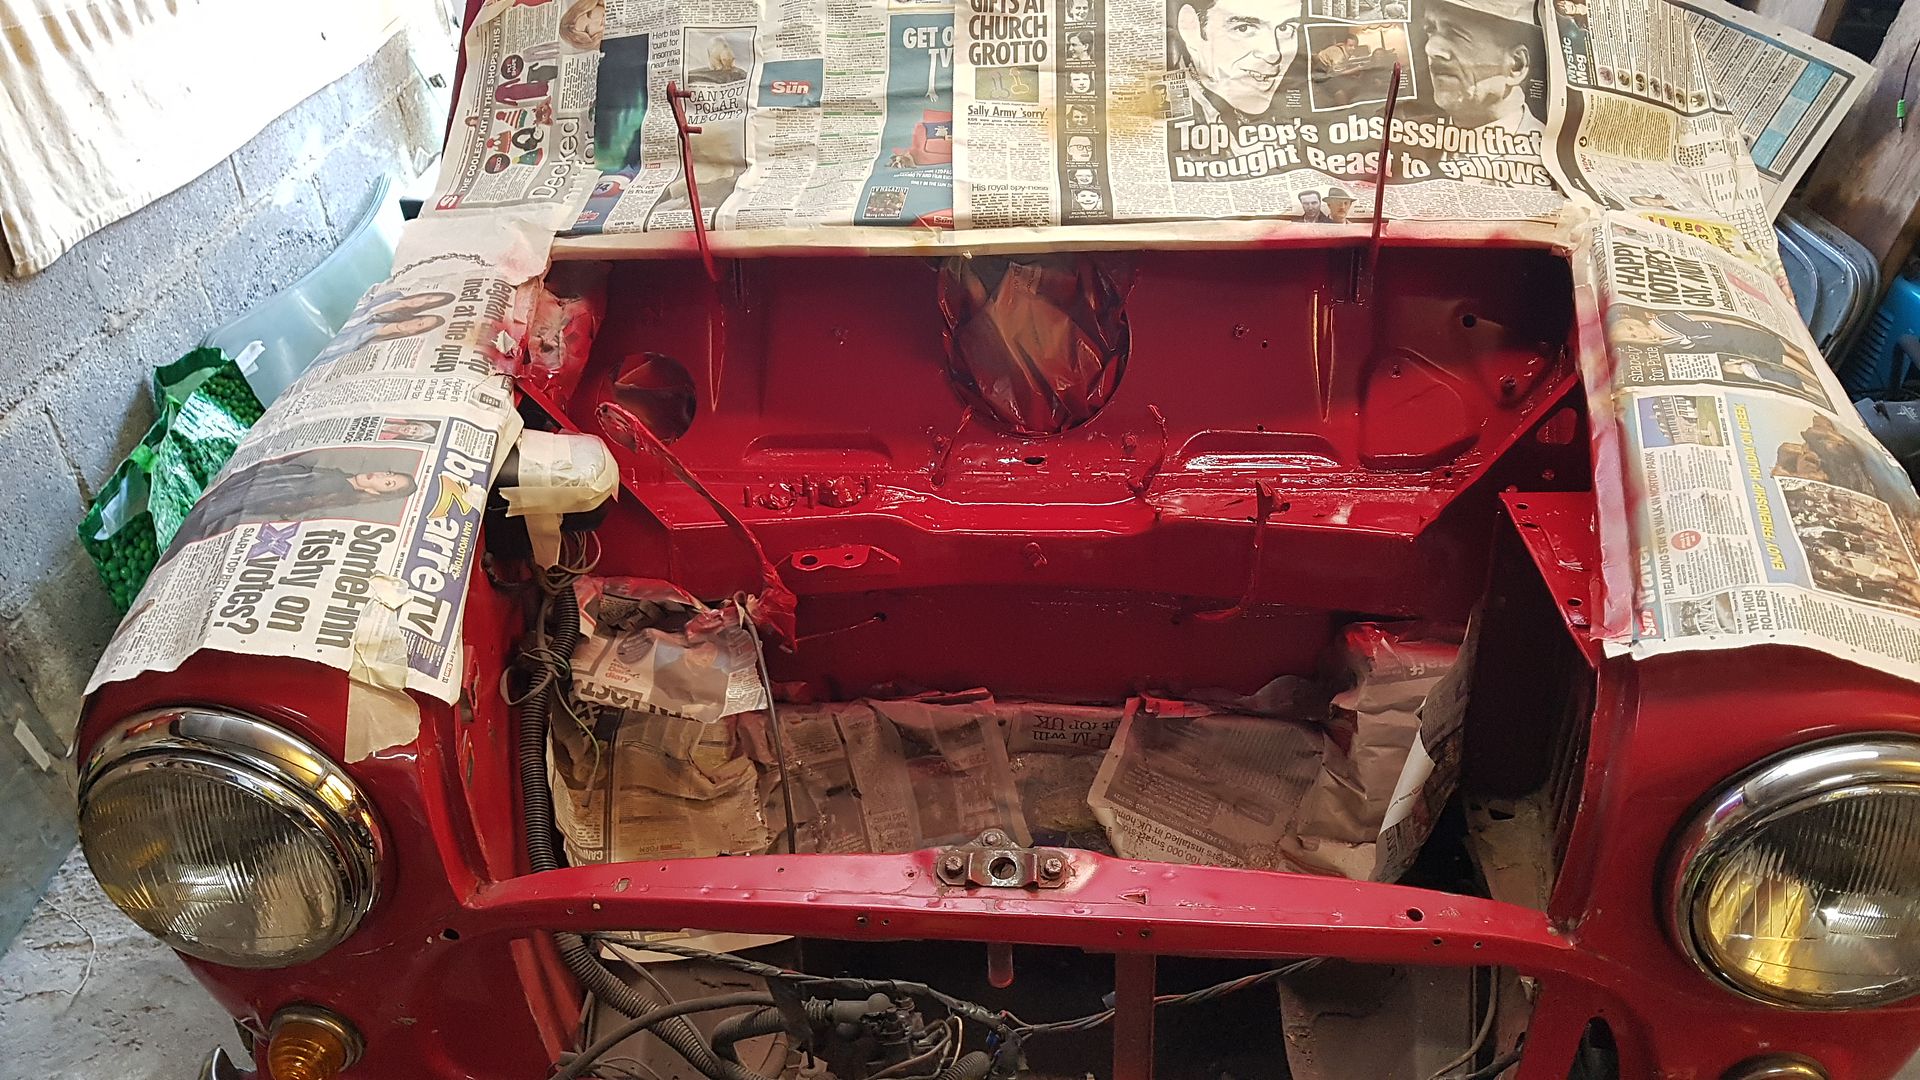
The paint is down now and it seems a tad brighter than the rest of the car. Might be better once I machine the car over. Not sure if I should bother flatting off the clear coat as it's not turned out too bad.

20200419_153209_zpsmoxv8kry.jpg

#66 johnR

johnR

    Up Into Fourth

  • Members
  • PipPipPipPipPipPipPipPipPip
  • 2,244 posts
  • Location: Dorset

Posted 19 April 2020 - 07:31 PM

That looks better!


#67 blacktulip

blacktulip

    Crazy About Mini's

  • TMF+ Member
  • PipPipPipPipPipPipPipPipPipPip
  • 6,221 posts
  • Location: Braintree

Posted 24 April 2020 - 06:12 PM

Whilst I'm waiting on some parts I thought I would treat my son's balance bike to a new tartan red paint job so he can roll like daddy!

20200424_185925_zps7xctp3pz.jpg

#68 blacktulip

blacktulip

    Crazy About Mini's

  • TMF+ Member
  • PipPipPipPipPipPipPipPipPipPip
  • 6,221 posts
  • Location: Braintree

Posted 02 May 2020 - 12:21 PM

Been a little bit quiet last week, mainly due to waiting for some bits plus the garage sprung a leak with the heavy rain we had. The clutch is fitted now. I went and treated myself to a new minispares steel road flywheel in the end. I will keep the original as a spare and tuck it away. The engine is back in the shell now, I had to take the bonnet bracket off of the slam panel to get the clearance on the remote housing at the back of the subframe. Its funny how it just fits. I'm very pleased on how it's looking now.

20200502_010942_zpsbln96abz.jpg

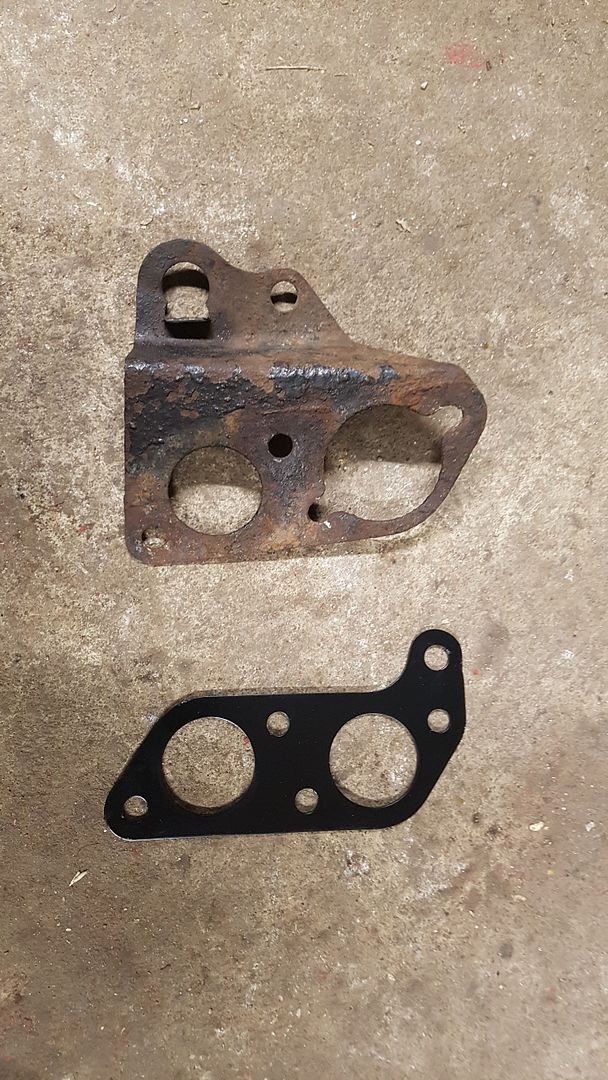
Next decision is whether to fit this aftermarket hose bracket (bottom one) or rub down the original one above?

20200502_010910_zpsd9vxwiky.jpg

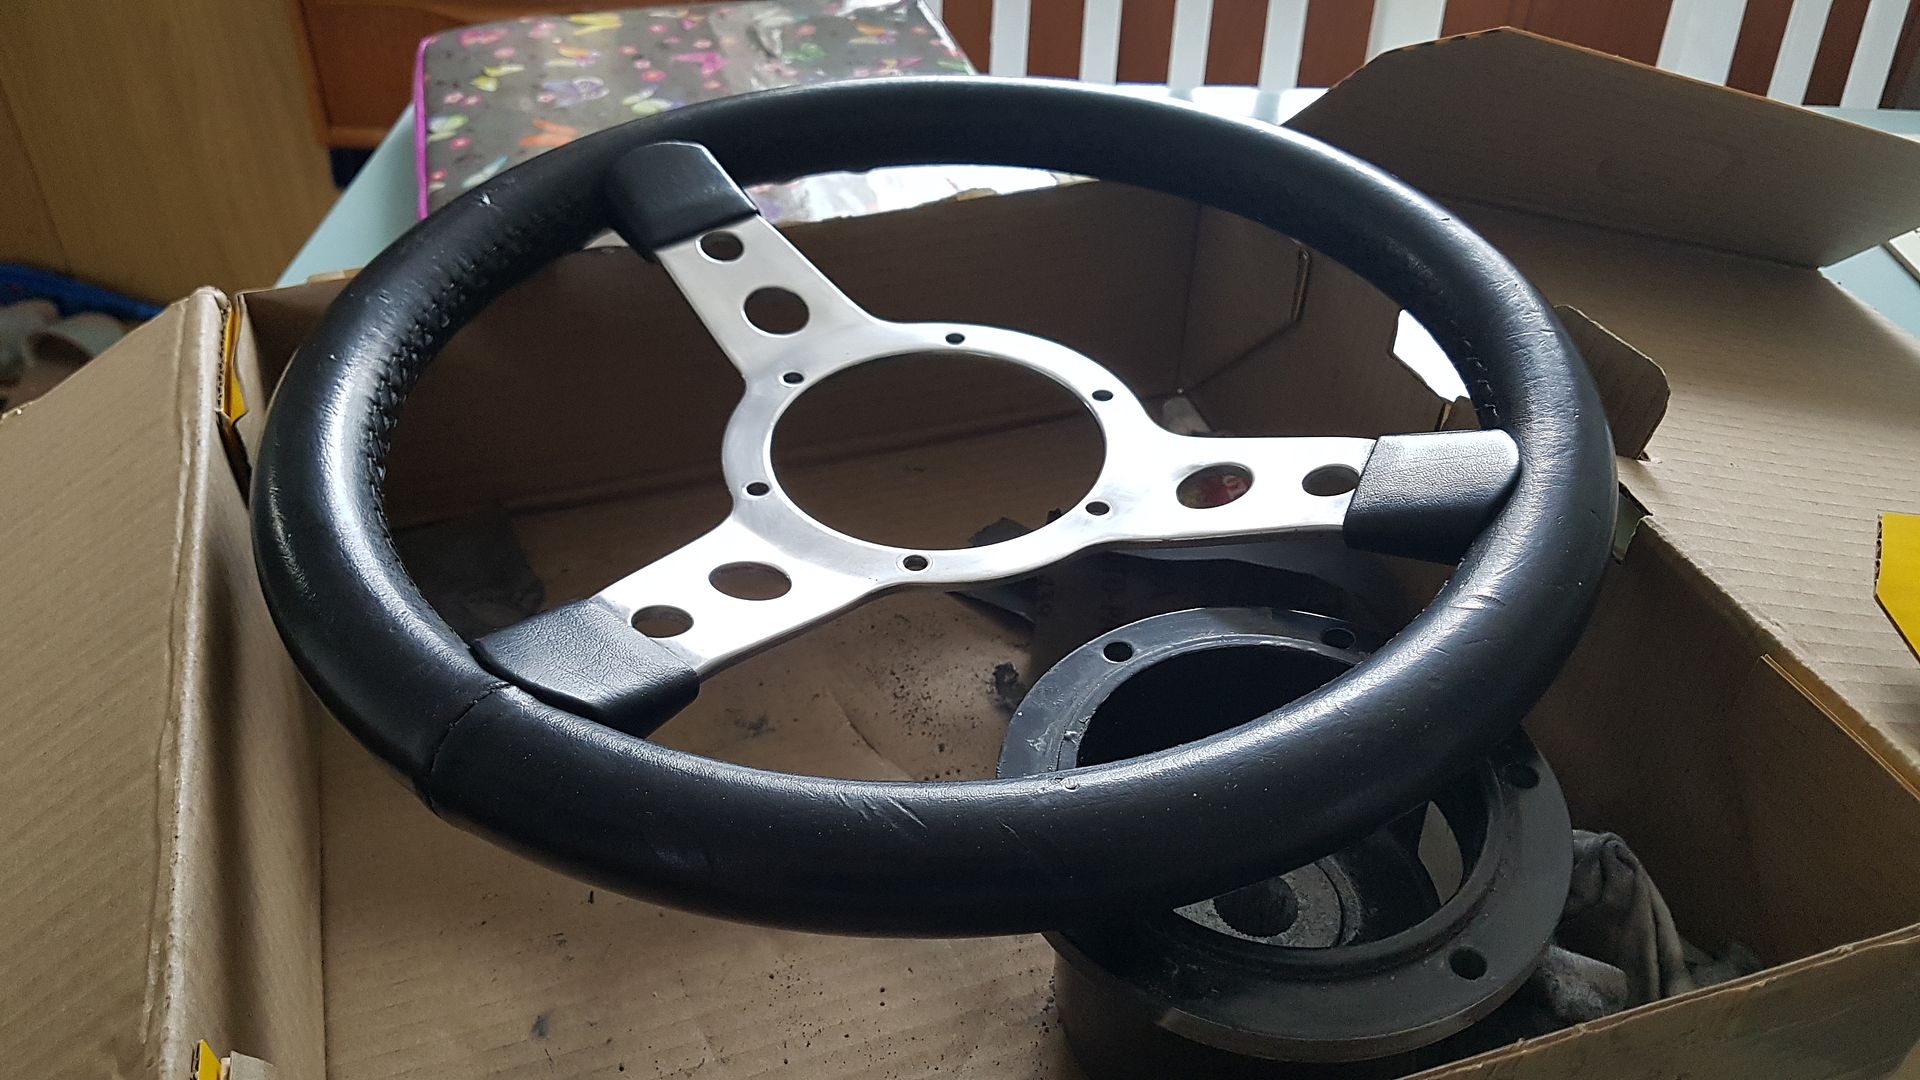
On to other little jobs, I'm tidying up a traditional sports steering wheel. I'm trying to get the finish clean but not ultra clean to keep the interior looking in date.

20200502_130418_zps9cajlzur.jpg

#69 Daz1968

Daz1968

    Up Into Fourth

  • Members
  • PipPipPipPipPipPipPipPipPip
  • 2,058 posts
  • Location: Dudley

Posted 02 May 2020 - 05:02 PM

I would fit the original bracket, steering wheel looks good

keep up the good work these mk2s need to be looked after


#70 blacktulip

blacktulip

    Crazy About Mini's

  • TMF+ Member
  • PipPipPipPipPipPipPipPipPipPip
  • 6,221 posts
  • Location: Braintree

Posted 02 May 2020 - 11:29 PM

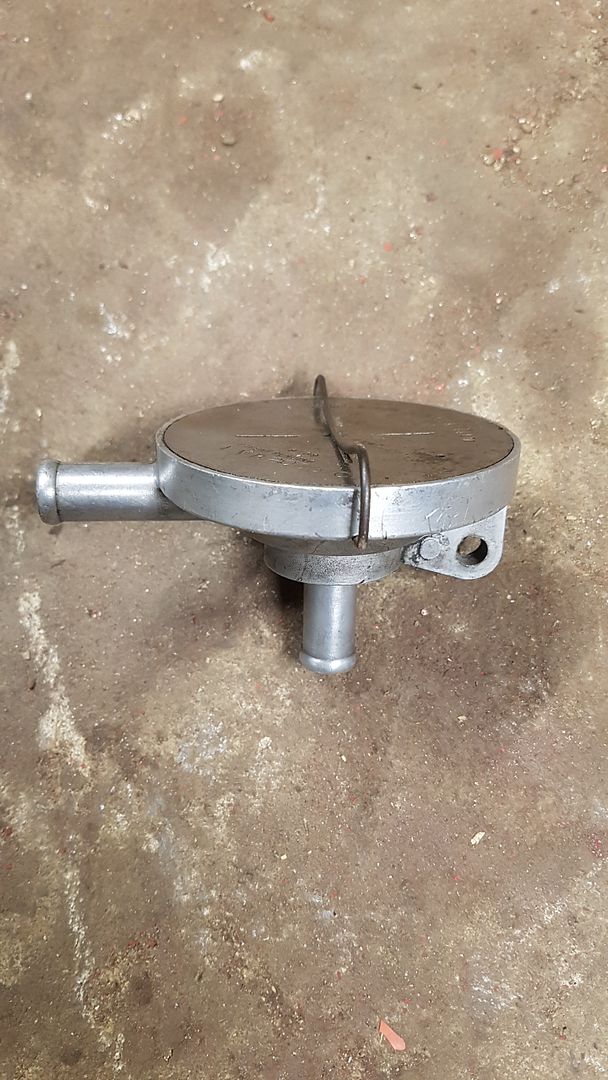
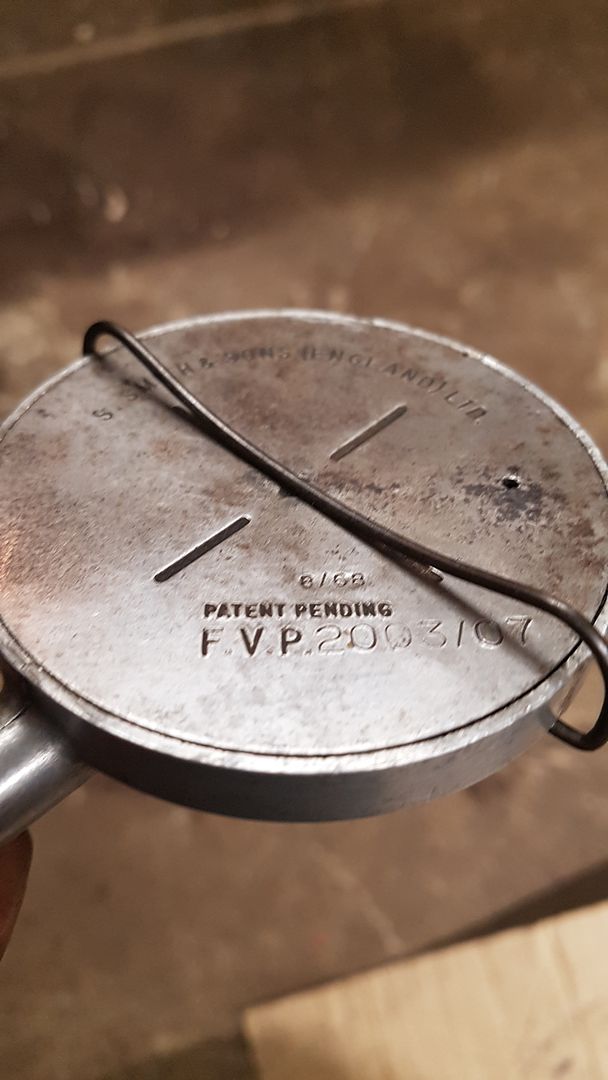
Finally found a good pcv valve. The right date for the car as well as it was built in Jan 69.

20200502_235433_zpsu2hs9osi.jpg
20200502_235459_zpsl9doulps.jpg

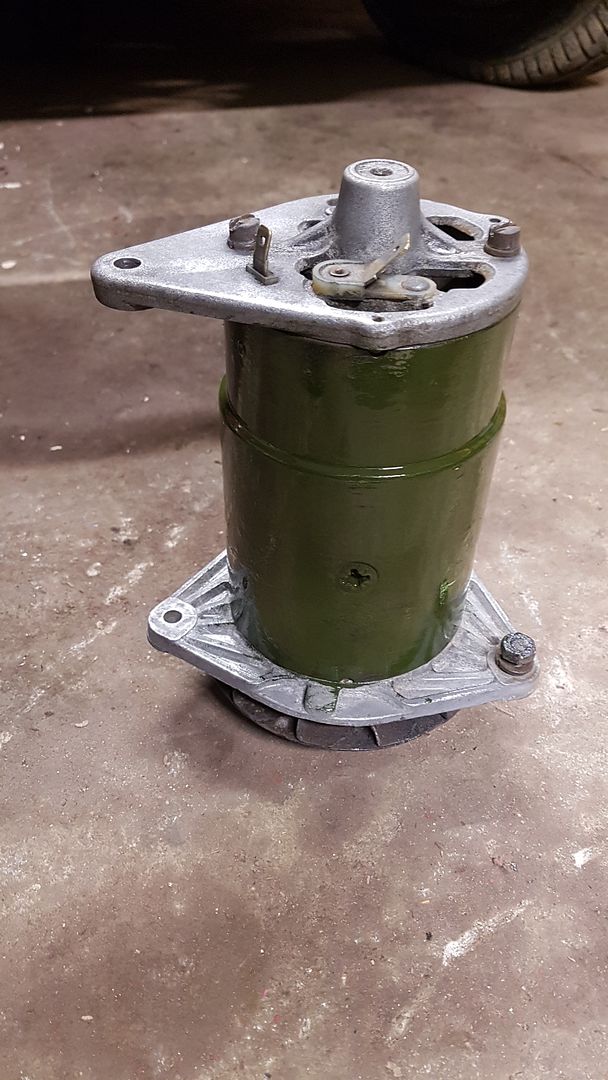
I started on the dynamo tonight. Gave it's first coat of paint.
20200502_235545_zpseud73ayt.jpg

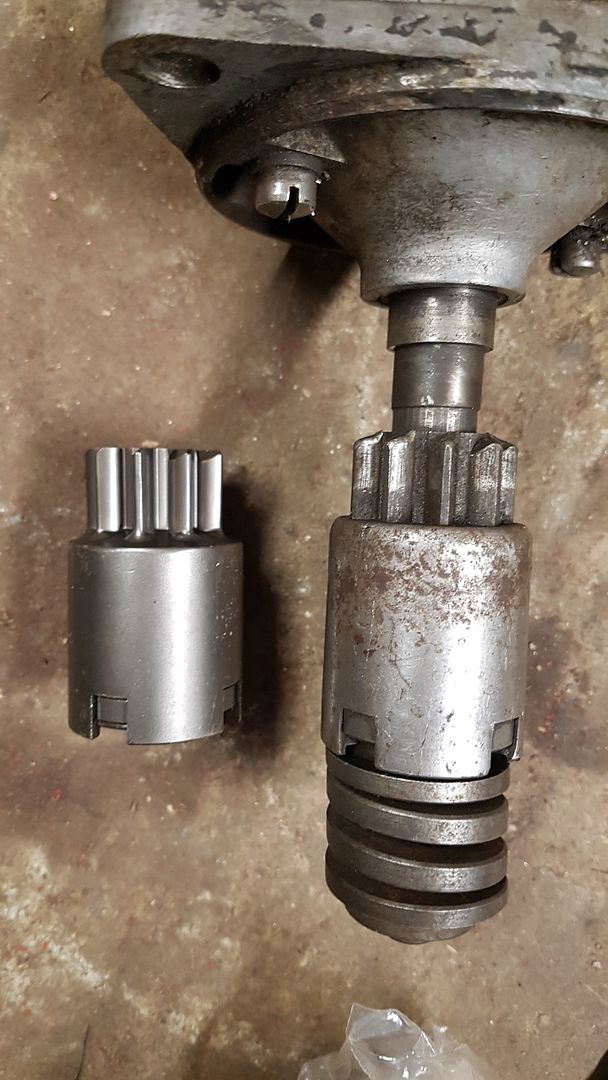
Also bought a new bendix for the starter motor so I don't trash my new ring gear on the flywheel. Does it look worn?
20200503_000215_zps4vl5fybt.jpg

Edited by blacktulip, 02 May 2020 - 11:29 PM.


#71 Daz1968

Daz1968

    Up Into Fourth

  • Members
  • PipPipPipPipPipPipPipPipPip
  • 2,058 posts
  • Location: Dudley

Posted 02 May 2020 - 11:58 PM

If you need a bracket for the pcv valve somerford sell them, I couldn’t find one anywhere else. Keep up the good work


#72 blacktulip

blacktulip

    Crazy About Mini's

  • TMF+ Member
  • PipPipPipPipPipPipPipPipPipPip
  • 6,221 posts
  • Location: Braintree

Posted 05 May 2020 - 09:45 AM

A bit more progress last night. Not sure if im going to keep the thermostat cover green. I think it will look better in alloy plus I will give the rad surround and bracket a coat of paint when it turns up.
20200505_003955_zpswc7niojg.jpg

Edited by blacktulip, 05 May 2020 - 09:50 AM.


#73 blacktulip

blacktulip

    Crazy About Mini's

  • TMF+ Member
  • PipPipPipPipPipPipPipPipPipPip
  • 6,221 posts
  • Location: Braintree

Posted 05 May 2020 - 10:05 PM

20200505_213251_zpsb5yyijsy.jpg

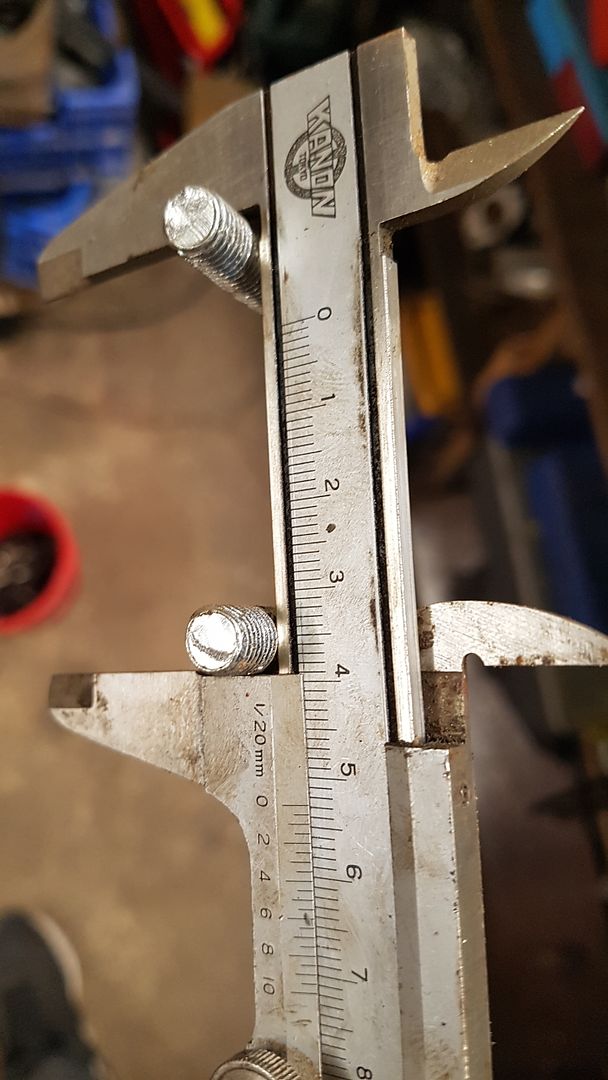
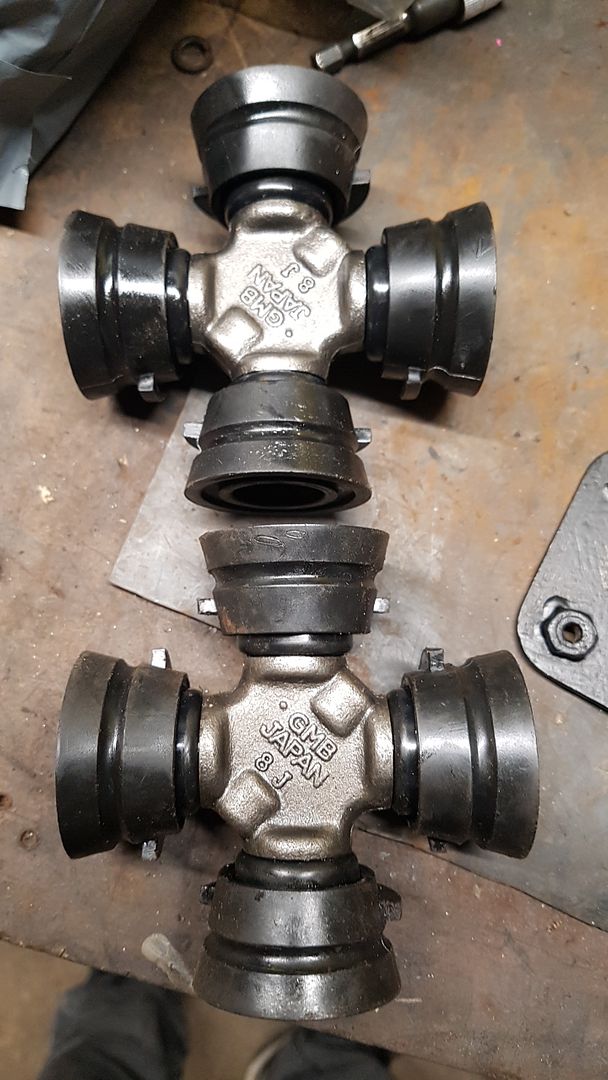
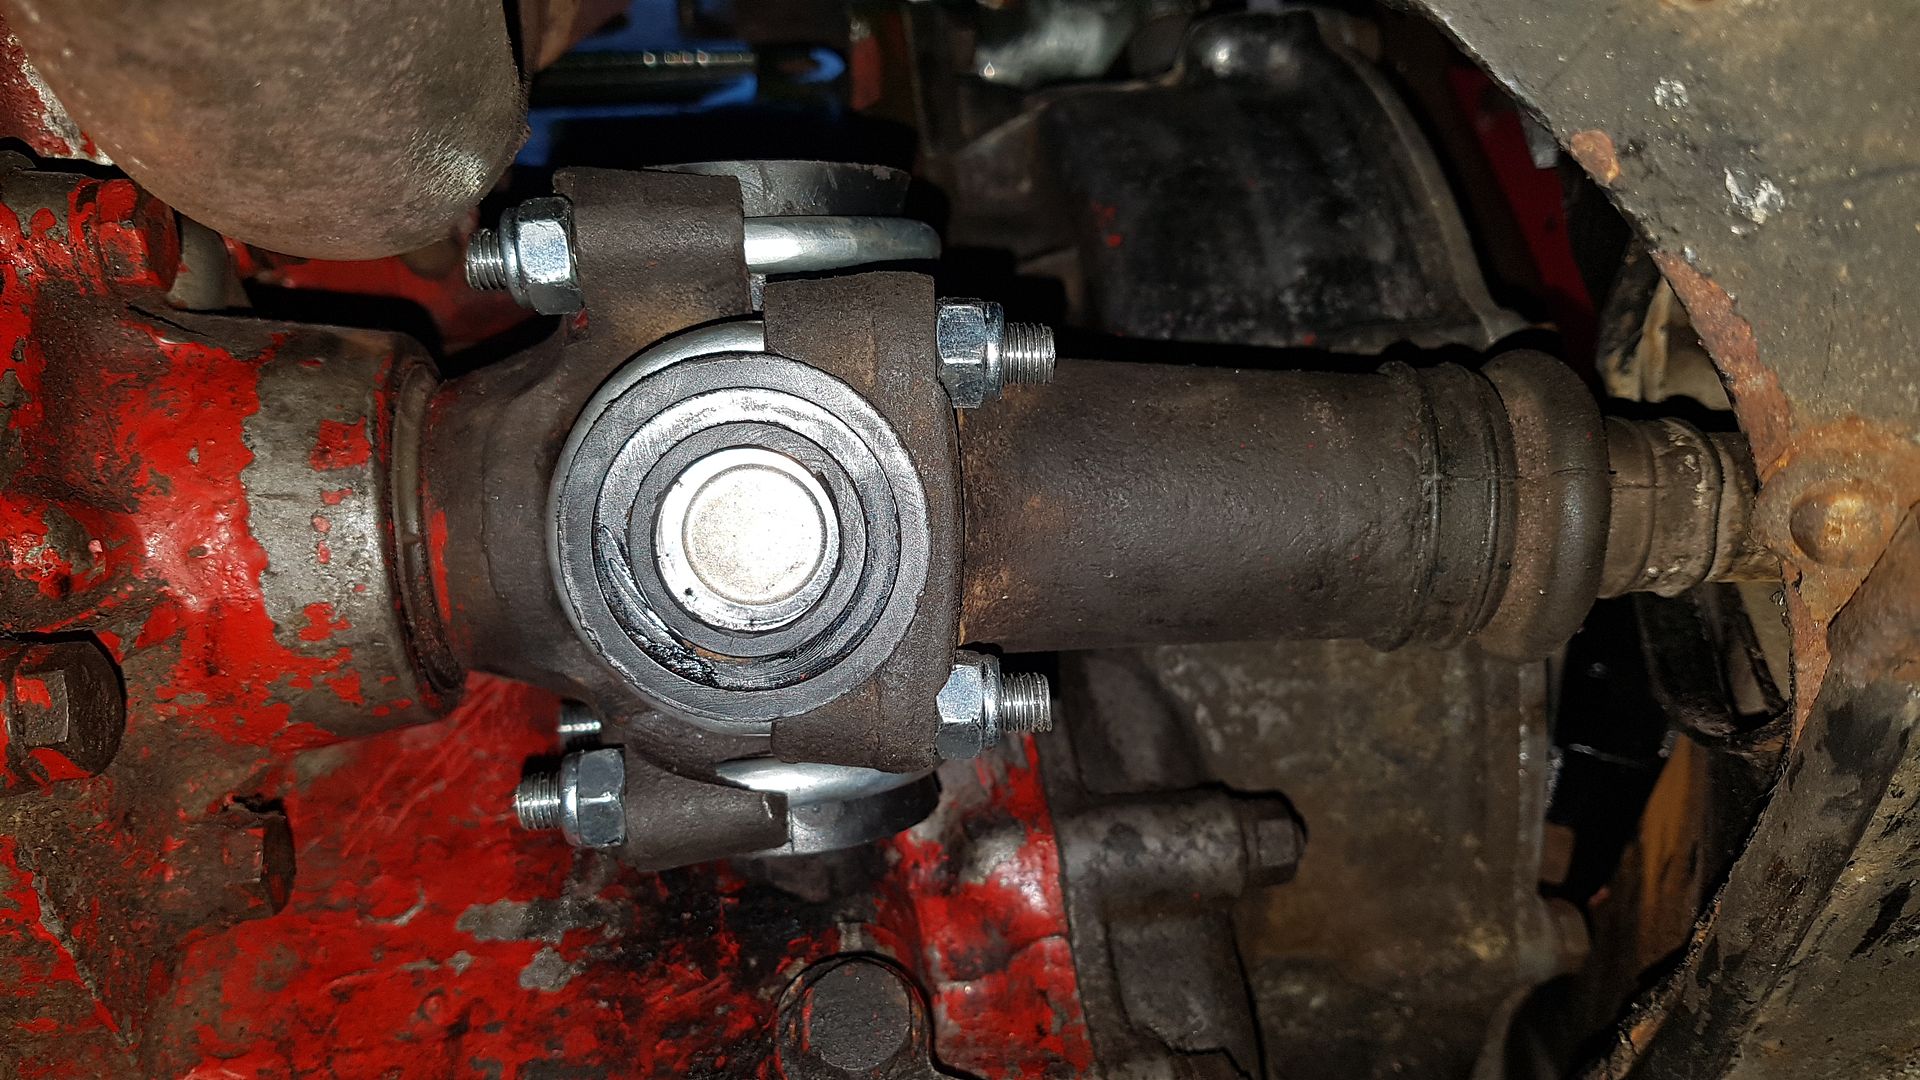
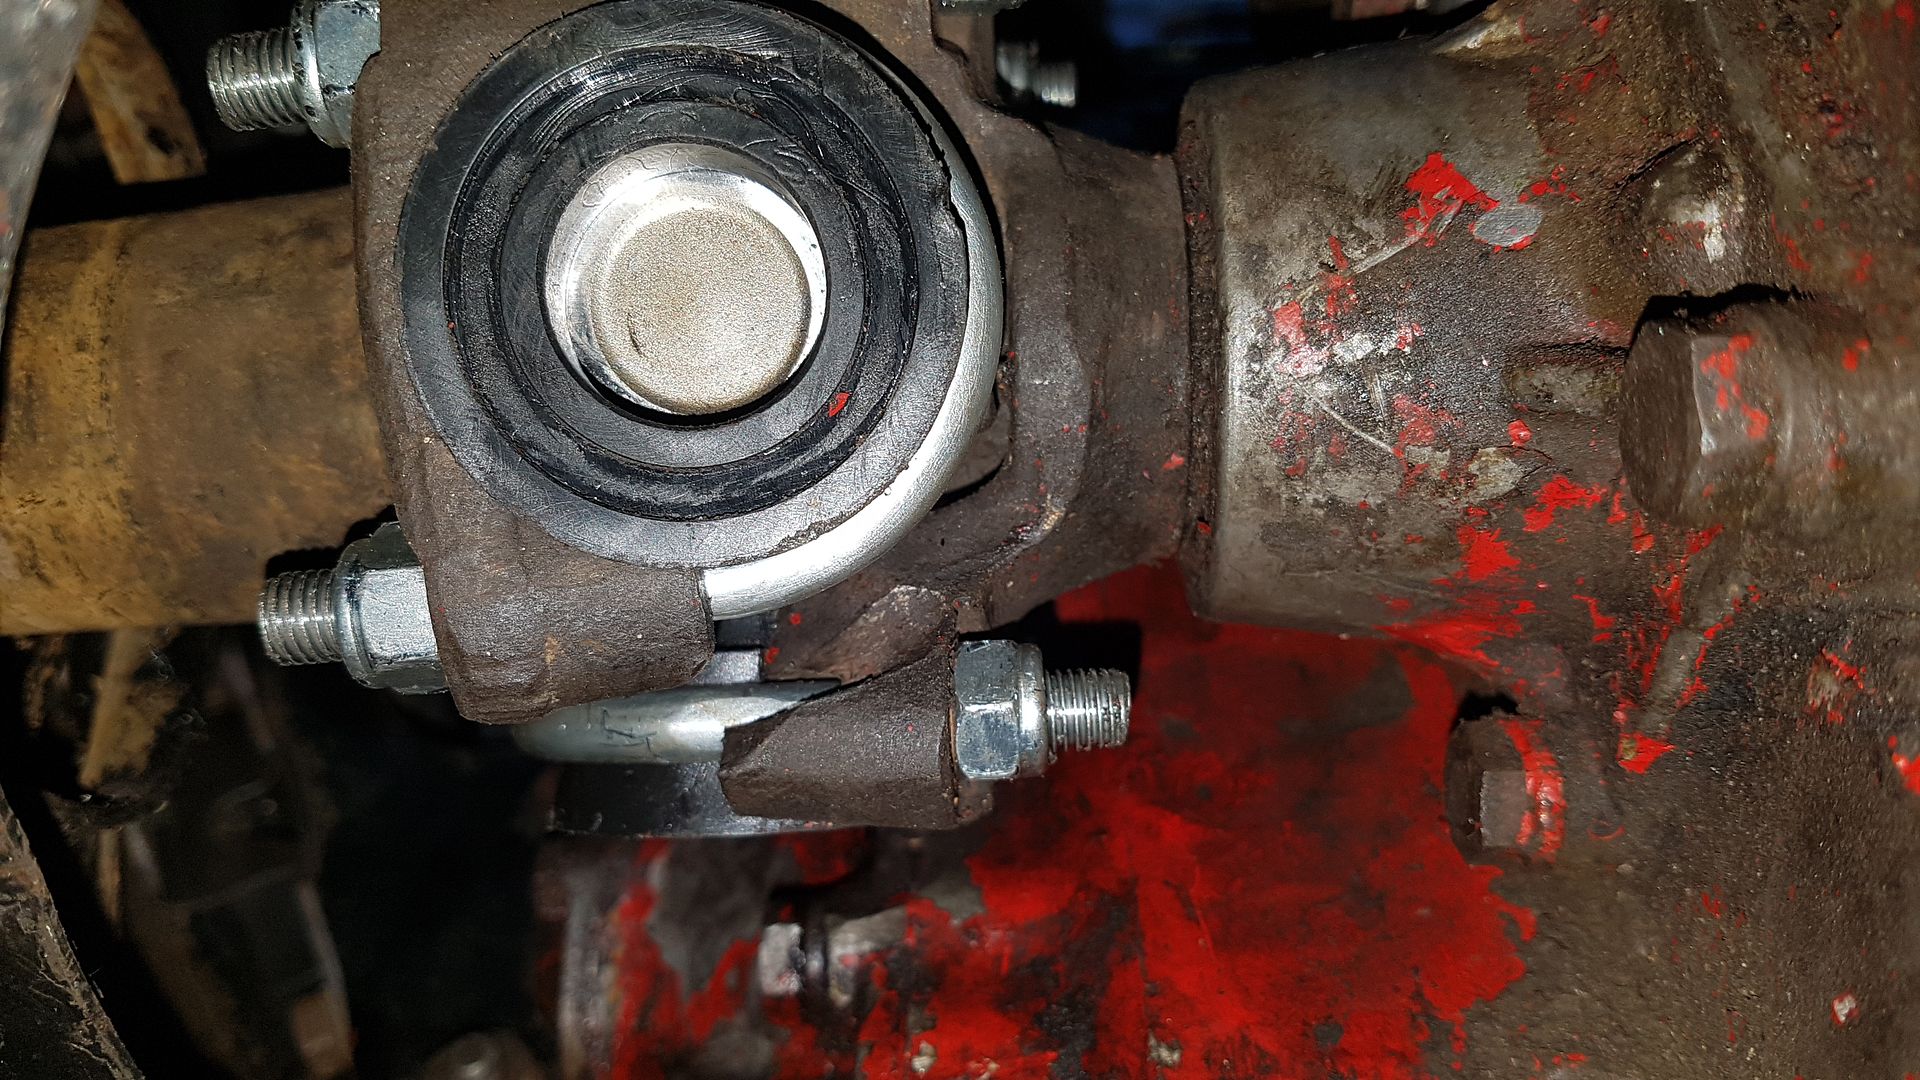
Here is the set up tonight... I got the exhaust connected with proper sealer and fitted a new half moon seal on the remote linkage after cleaning and new grease. Got to fitting the new drive couplings and.......The U bolts are too wide for the holes. I fiddled for ages and a few F words before I worked it out. I measured across the U bolt and it's 52mm. I need to get it rectified but that can wait. They are the minispares Q5000 alternatives. I wonder if I'm the only one with this issue. I did have this problem before when I bought some cheap ones for project Blacktulip ages ago.

20200505_222009_zpslqqiwz7e.jpg

20200505_222036_zpslbwnab3r.jpg

So I've just had an early one tonight. I still have a list of jobs to do so plenty to get on with. I might connect and bleed up the master cylinders tomorrow.

Edited by blacktulip, 06 May 2020 - 12:58 PM.


#74 Daz1968

Daz1968

    Up Into Fourth

  • Members
  • PipPipPipPipPipPipPipPipPip
  • 2,058 posts
  • Location: Dudley

Posted 05 May 2020 - 10:12 PM

Pretty common with u bolts, I usually pinch them in the vice to correct width. The needle roller replacements are very good though I always use them, just don’t over tighten them.


#75 blacktulip

blacktulip

    Crazy About Mini's

  • TMF+ Member
  • PipPipPipPipPipPipPipPipPipPip
  • 6,221 posts
  • Location: Braintree

Posted 08 May 2020 - 05:58 PM

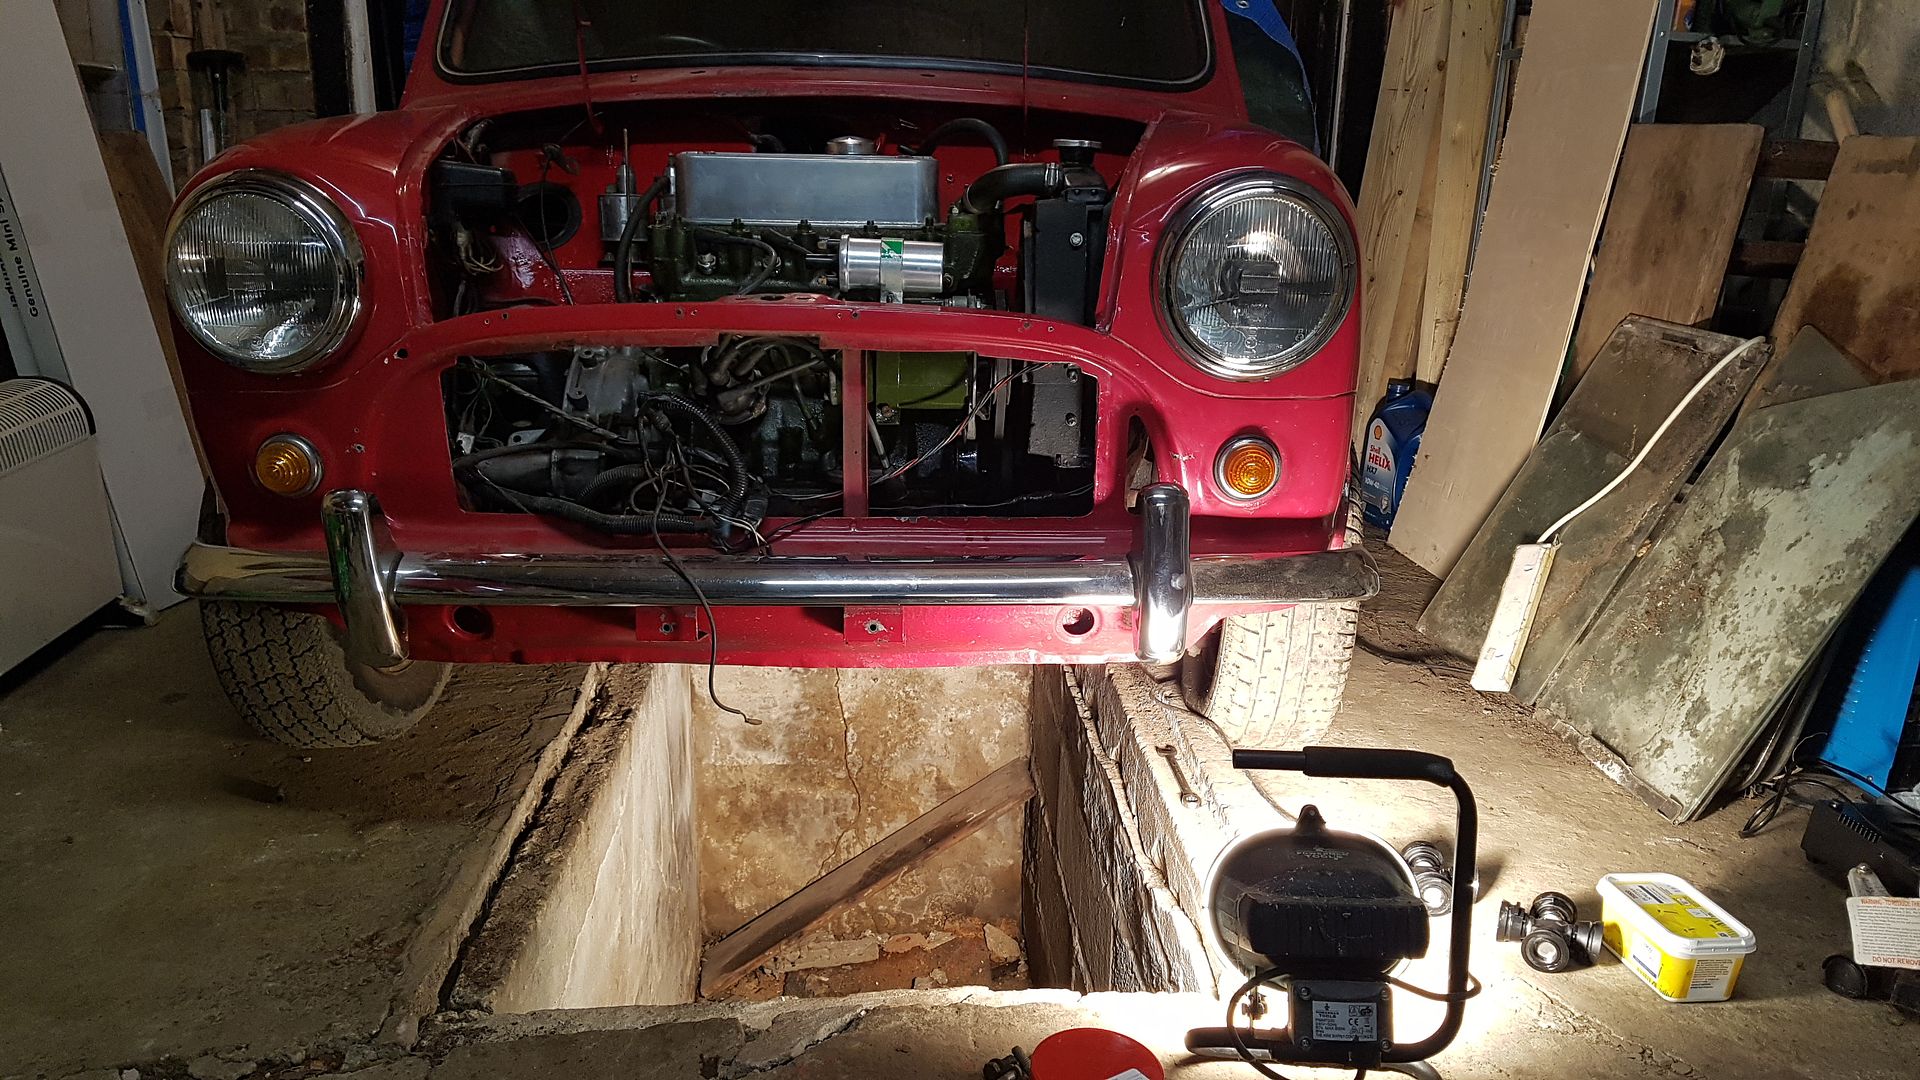
All fitted up now. So that's the work done underneath for now. Although i think I will give the gearbox a good clean and get all that red paint off.

20200508_164800_zpswppuji5i.jpg

20200508_164809_zpstqbpyhqn.jpg

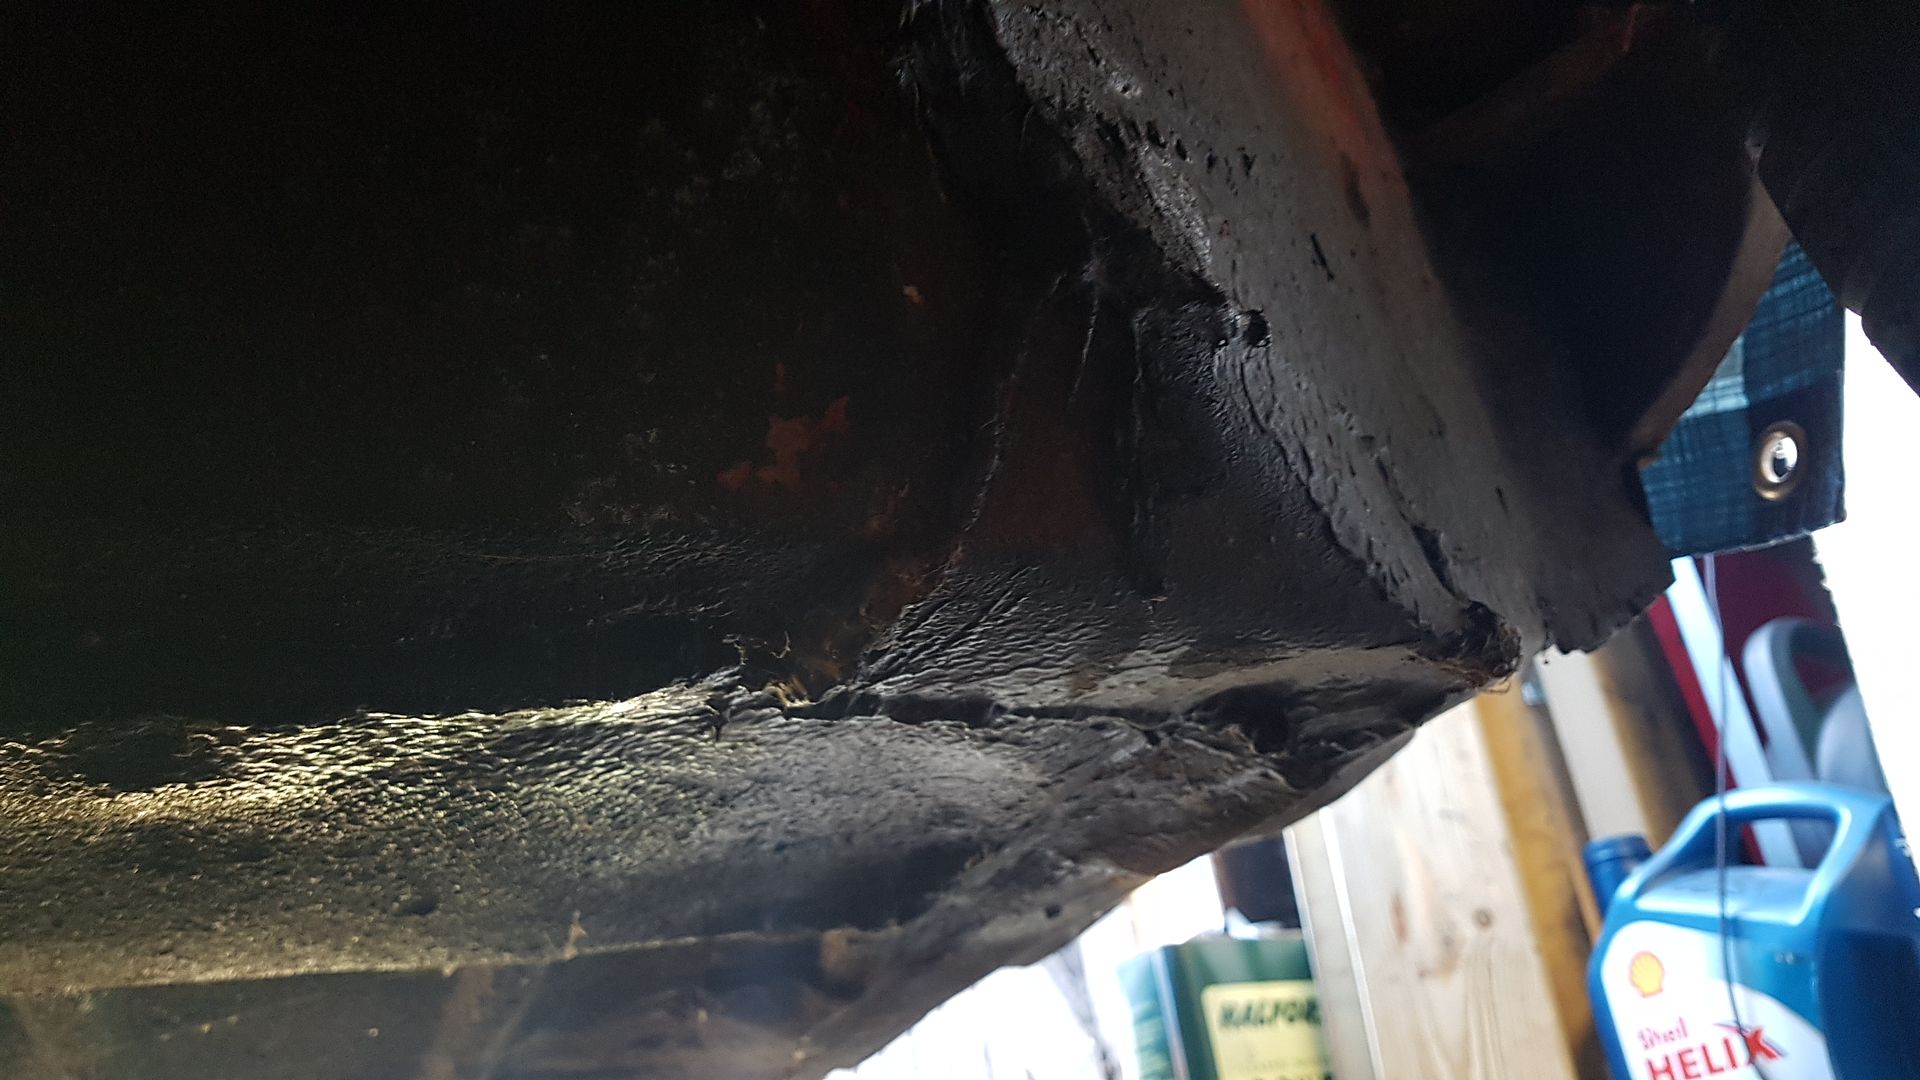
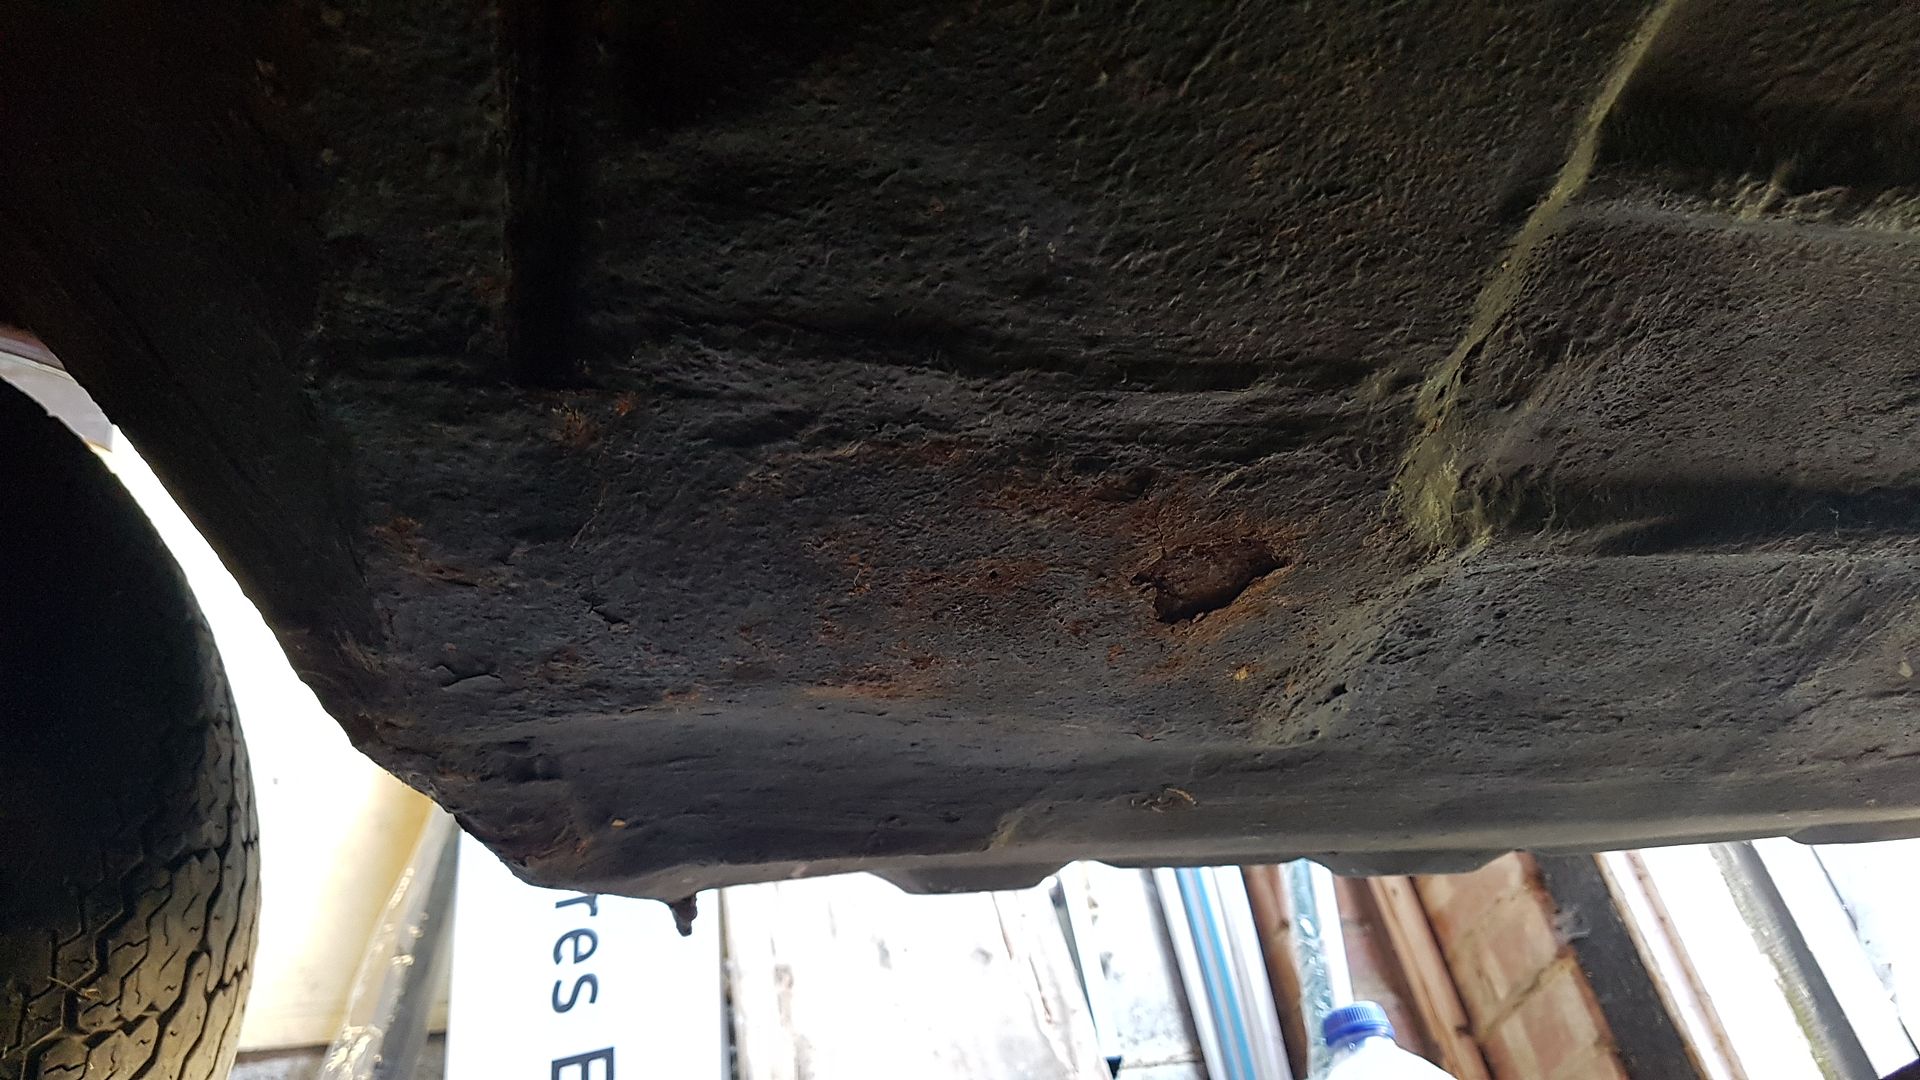
Whilst under there here are some pictures of the horrible repair job on the floors. Strong for now but definitely being changed in the future.

20200508_164827_zpsqzvqwfpg.jpg

20200508_164916_zps269pfnye.jpg

Now i can start fixing the bits above back together and hopefully move towards a start up...

Edited by blacktulip, 08 May 2020 - 06:35 PM.


0 user(s) are reading this topic

0 members, 0 guests, 0 anonymous users