

Coming along sterling fashion, matey!!


1988 Mayfair Rebuild (998)
Started by
stuart bowes
, Feb 10 2022 10:53 PM
432 replies to this topic
#422

stuart bowes
-
- Members
-

- 2,624 posts
Up Into Fourth
- Location: Dagenham
Posted 11 October 2025 - 03:51 PM
well it ended up being a bit more than 2 months due to various daily life occurrences but finally got the floor and bulkhead areas prepped for paint
not much to add beyond here are pics of it happening, all pretty straight forward just really time consuming
I was focusing mostly on seams and joins for obvious reasons, nothing untoward found (I did actually strip all paint everywhere despite what the pics show, there would have been 10x more pics otherwise and that just seemed unnecessary)
stripped, kurusted just for the hell of it, seam-sealed and red-oxide primed:


Also done same inside rear bins.
The plan is, everywhere that has sound deadening and/or carpet, that's getting hand painted black, for three reasons really - one I have loads of black paint, two you will never see it so the finish is irrelevant, and three I find it easier to paint awkward areas like the bulkhead with a brush, you can really make sure you're getting it right in to all the gaps and tight areas as much as possible with no messy over spray
the bits that will be visible (pillars / dash rail / back seat / outer sides of rear bins / around windows etc) will be sprayed, but in another colour to match the seats and trim (probably a light-ish brown / leathery sort of colour... tbc)
Edited by stuart bowes, 10 November 2025 - 05:50 PM.
#423
stuart bowes
-
- Members
-
- 2,624 posts
Up Into Fourth
- Location: Dagenham
Posted 11 October 2025 - 04:01 PM
also, I have got around to the engine strip down and have just started the long process of getting the parts cleaned up and inspected, bolts all labelled and bagged up, etc
flywheel put up a fight with a cheaper flywheel tool, so that got binned and replaced by the Draper one, which does work (https://www.minispar...-mini-act19862/)

some alloy parts all washed down, sonic cleaned and inspected, nothing wrong here. Also gave pot joints a good deep clean and after this pic they got a lick of black paint

and the block, which needs a bit of work to clean up, I think we'll be getting away with just a DIY honing (but we'll see how that goes..)

waterways look alright to be honest, I've run a load of high-strength white vinegar through it and a lot of brown came out, will do some more on that with toothbrushes etc


the bores looked like this, some minor ridges at the top where the rings went up to (as you'd expect) but no gouges or anything that I can see (will see more when honing)


they look worse than they really are to be honest, a lot of it just wiped out and then a quick play with the honing tool (just to try it out a bit) made them like 98% all smooth and shiny with only one or two bits to look closer at . more on that later
Edited by stuart bowes, 11 October 2025 - 06:48 PM.
#424
Designer
-

- TMF+ Member
-
- 760 posts
One Carb Or Two?
- Location: Surrey
- Local Club: LSMOC
Posted 12 October 2025 - 06:24 AM
Hi Stuart,
Being my suggestion I am pleased to see that the Draper puller worked.
I have never had any major problems using it.
Paddy
#425
stuart bowes
-
- Members
-
- 2,624 posts
Up Into Fourth
- Location: Dagenham
Posted 12 October 2025 - 10:48 AM
Yep you were spot on with that! Thanks again :)
#426
Retro_10s
-

- Members
-
- 10,187 posts
Moderator
- Location: Worcs
Posted 12 October 2025 - 12:30 PM
Looking good Stu, always feels good to see a a repaired section receiving a uniform layer of paint afterwards! Looking forward to the engine refresh 
#427
stuart bowes
-
- Members
-
- 2,624 posts
Up Into Fourth
- Location: Dagenham
Posted 18 October 2025 - 09:41 PM
Sorting out the rear seat base, had to get all that sound deadening off first of course, gave all the seams a good wire-brushing out as usual, kurust for luck, new seam sealer and primer


kicking myself a bit now having just realised there's 4 more bung plugs in the seat base and I can't now weld them up having the underside already done and painted (not to mention rear subframe in way of the front two). Will just have to replace the bungs with a decent bit of sealant I guess
Eagle eyed viewers may notice I've wedged some newspaper between subframe and holes as a bit of protection
Edited by stuart bowes, 25 October 2025 - 10:14 AM.
#428
stuart bowes
-
- Members
-
- 2,624 posts
Up Into Fourth
- Location: Dagenham
Posted 03 November 2025 - 07:00 PM
finished the seat / rear shelf area

not massively interesting, but done
#429
stuart bowes
-
- Members
-
- 2,624 posts
Up Into Fourth
- Location: Dagenham
Posted 10 November 2025 - 05:45 PM
pillars and inner roof rails (? whatever they're called)


just the roof to do now (as best as I can given restricted access at the edges) and then onto the boot
Edited by stuart bowes, 10 November 2025 - 05:46 PM.
#430
stuart bowes
-
- Members
-
- 2,624 posts
Up Into Fourth
- Location: Dagenham
Posted 23 November 2025 - 08:13 PM
roof sorted, zero rust not even surface spots.. lots of sticky gunk from where they glued on the felt stuff, a bit of a rub down with acetone took the worst off, not over concerned with that, just painted over whatever was left


Edited by stuart bowes, 24 November 2025 - 12:38 PM.
#431
stuart bowes
-
- Members
-
- 2,624 posts
Up Into Fourth
- Location: Dagenham
Posted 16 December 2025 - 12:19 AM
have been working on the doors, firstly make sure the modifications that I've done on the driver side are the same on the passenger side (slightly enlarged access holes and a pivot point for the lock actuator)
now that's all done I can strip all to bare metal, and for the inner carcasses I am still sticking with the red oxide. the outer door skin and the visible parts of the window frame will be prepped and painted in the normal 'paint job' way but the insides are irrelevant obviously anyway and most of the rest has a door card over it (it'll still get a good rub down as smooth as I can but I won't be losing sleep over it)
anyway some pics of that happening:


the passenger side door did need a bit of repair at the bottom I now remember, that needed a bit of dressing down
a bit of linishing and a bit of gentle hammering onto that bit of flat bar you see underneath to flatten it out a bit. I straightened out that edge a bit as well after the pic (against the thin edge of the flat bar)


it'll need a skim of filler but I've left that one there for now as it needs a quick weld, one of the captive nuts for the window mech came out

as you can see I worked out the thread size, I didn't have that in imperial but I did have an M6 one
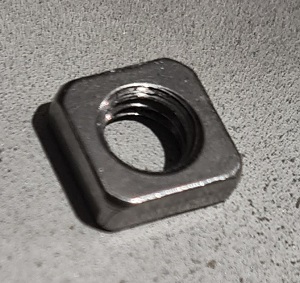
which tapped out quite easily to 1/4" and seems to thread onto the original bolt(screw?) nice and snugly, it also fits in that square hole perfectly, so I'll weld that in tomorrow
later I'll put a normal hex 1/4" nut on the back and tack that on as well I think, that way I have the right square look on the outside and a good strong fixing behind it
Edited by stuart bowes, 15 April 2026 - 03:31 PM.
#432
stuart bowes
-
- Members
-
- 2,624 posts
Up Into Fourth
- Location: Dagenham
Posted 17 September 2026 - 06:26 PM
woohoo finally another update .. I have actually been doing a few bits here and there but I'm just collecting pictures as I go so I can do updates in batches to see each thing start to finish rather than going back and forth on stuff
I was painting the inside floor wherever sound deadening and carpet is going, that's all just black because why not, I had a tin to hand and no-ones ever going to see it, sue me.. but I stopped when I remembered I hadn't sorted out the rear/lower front subframe mounts yet, so that's what this update is about
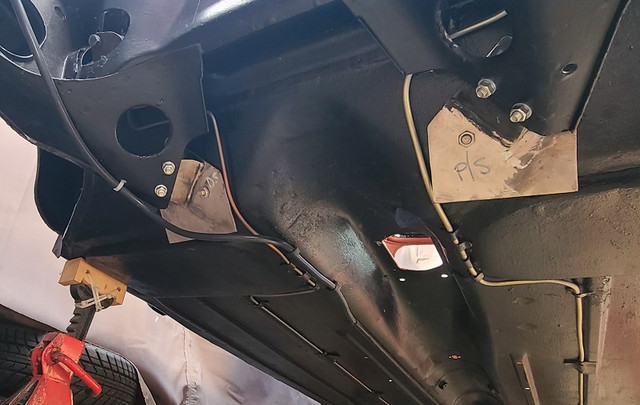
because this is all solid mount and there's the well-known issue of damage to the lower bulkhead I basically copied what I saw on someone elses project (apologies, can't remember who now!)
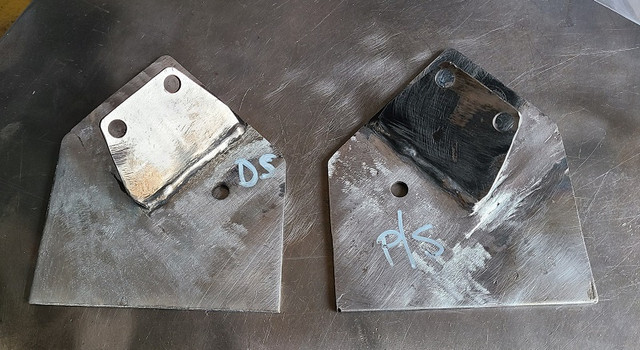
took off the mounts, measured up, ordered some 3mm plate, cut to size:
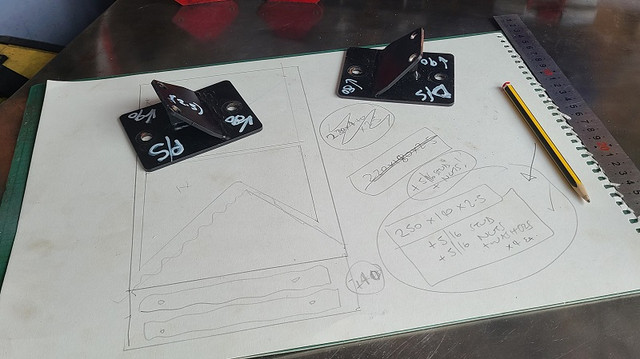
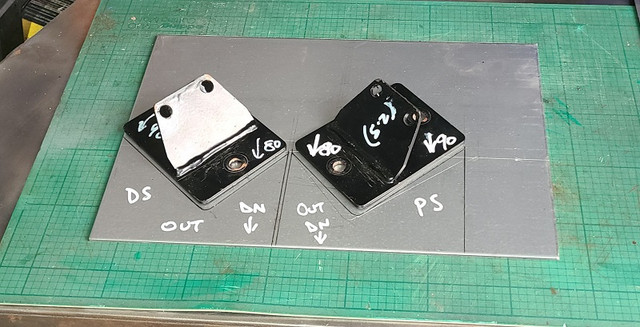
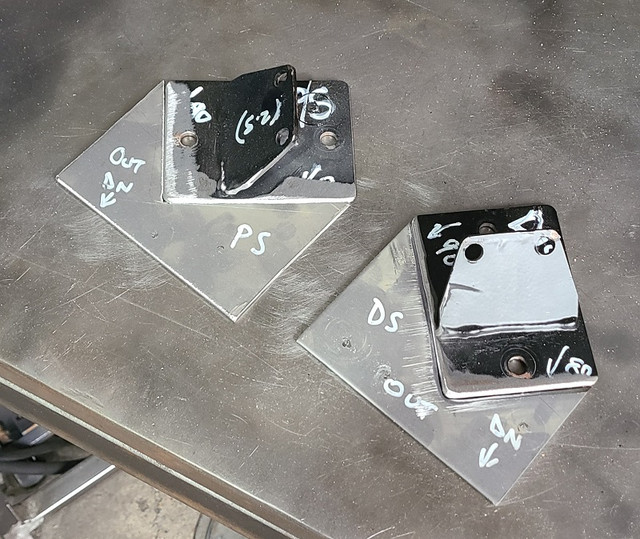
bevelled the edges off and tacked on the back
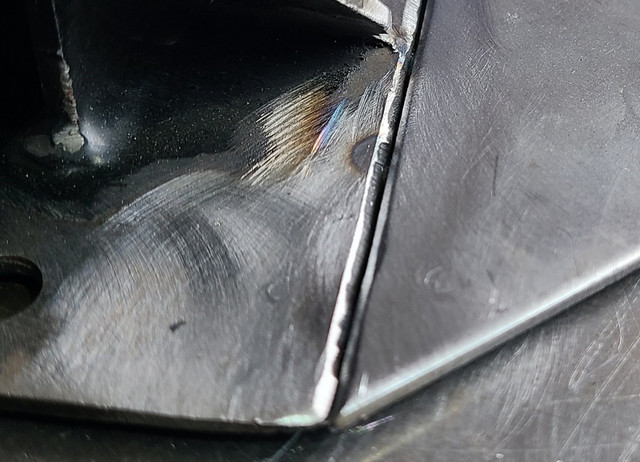
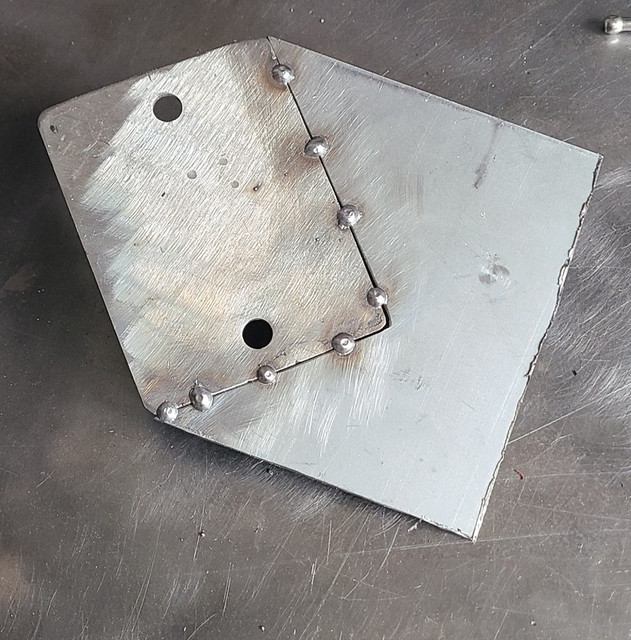
welded up and linished smooth
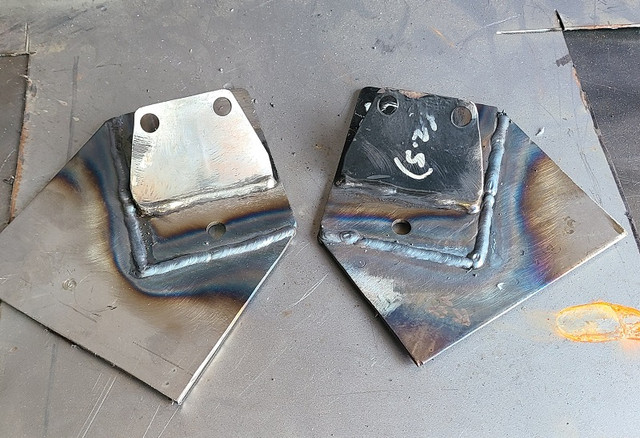
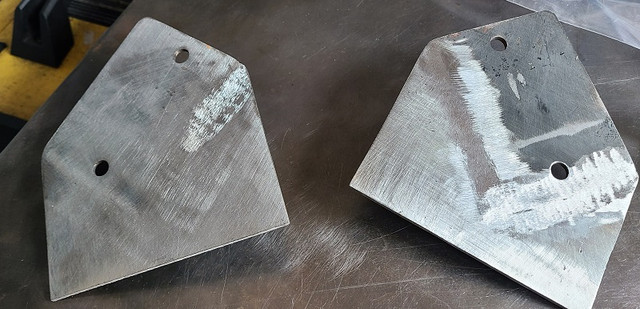
fitted back on the car and worked out where the angle needs to be
part cut, bent and welded back up, linished smooth again
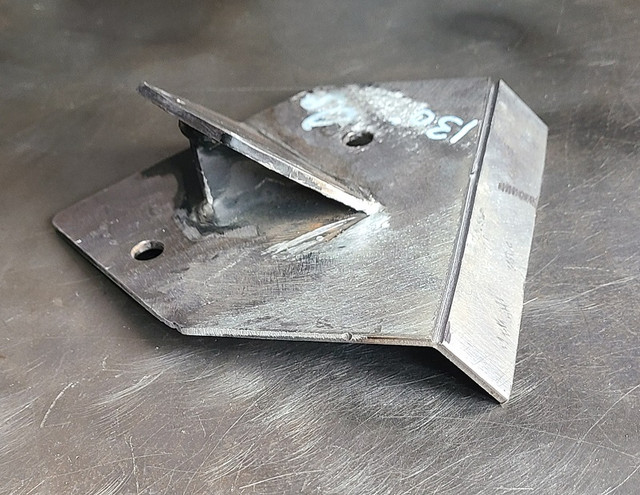
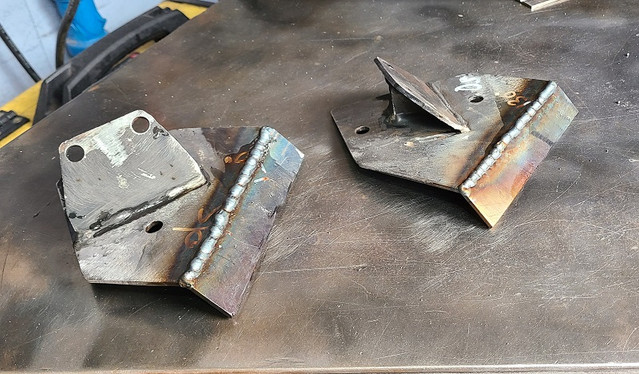
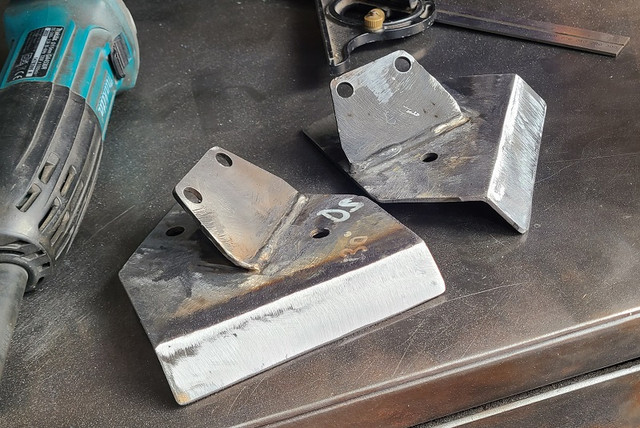
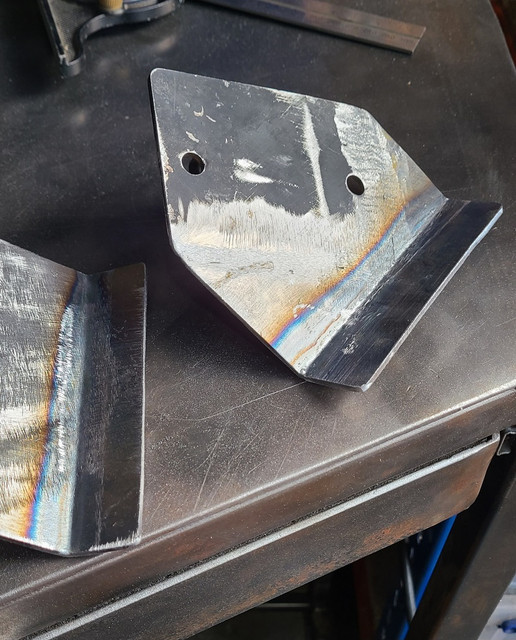
drilled the underneath fixing holes and did a test fit, fits as intended
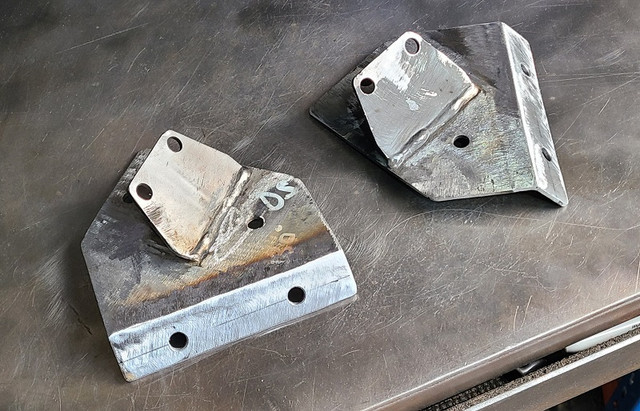
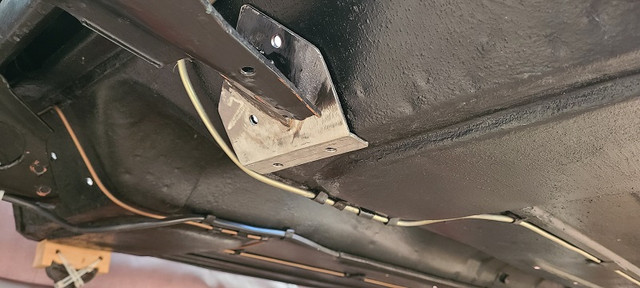
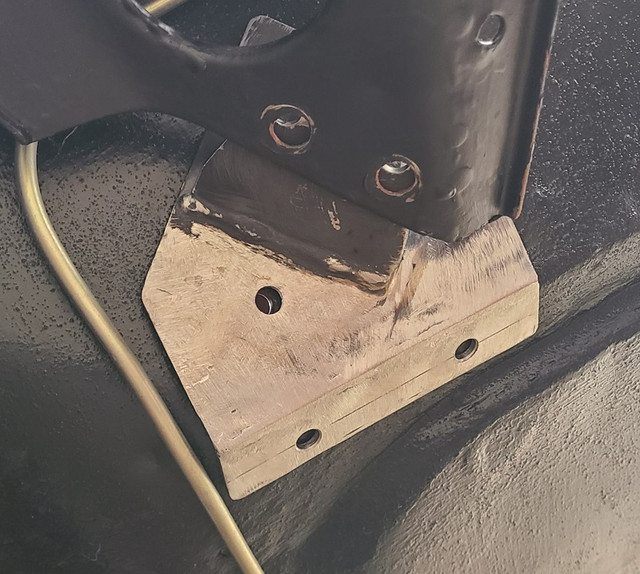
a bit close to the tunnel for my liking, so I trimmed down a little before etch priming and spraying black
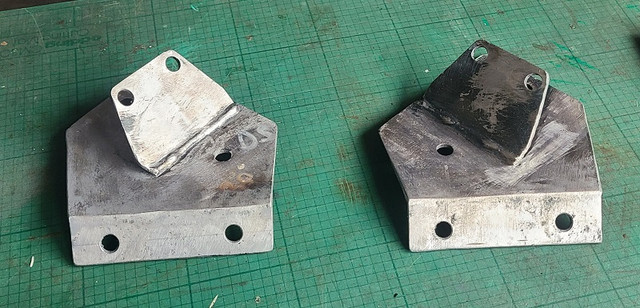
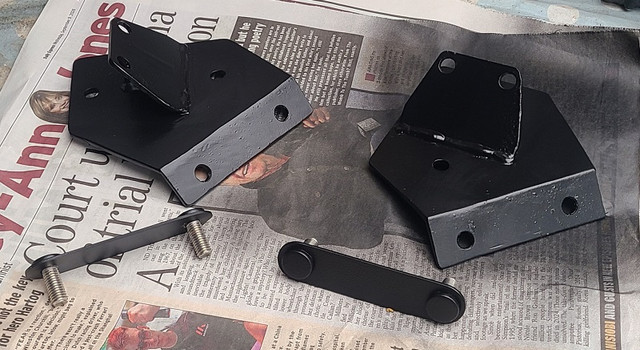
bolted back on (that's always fun! jiggery pokery, but got there in the end)
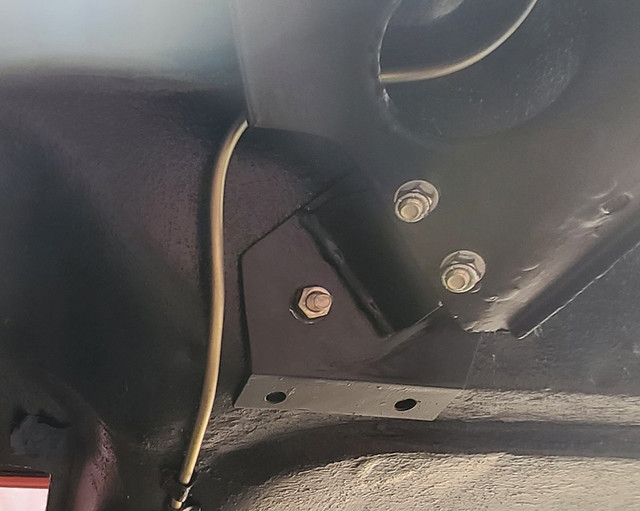
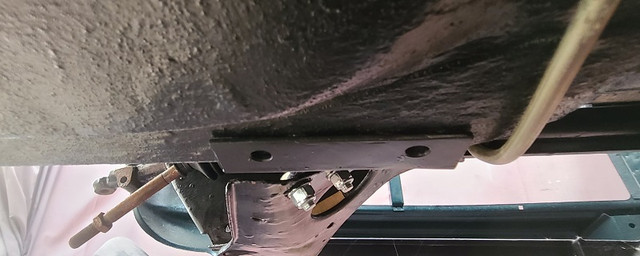
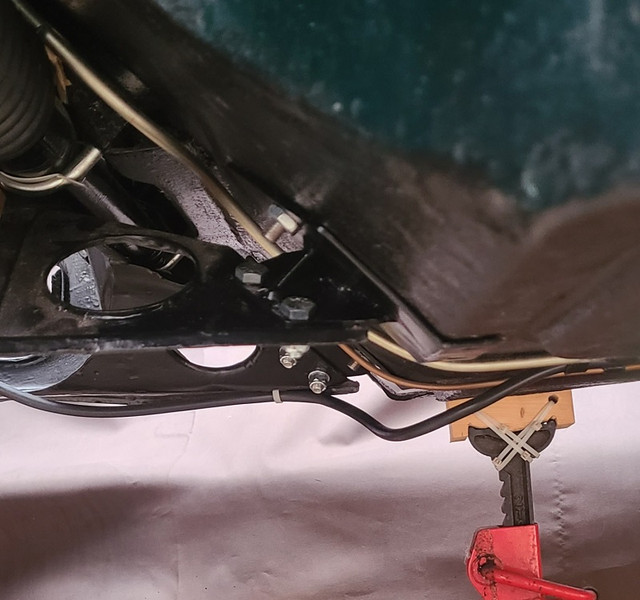
then drilled upwards and cleaned up inside (got some paint back in the holes after that, and repainted top side)
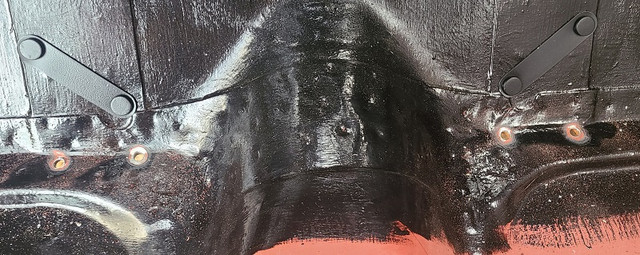
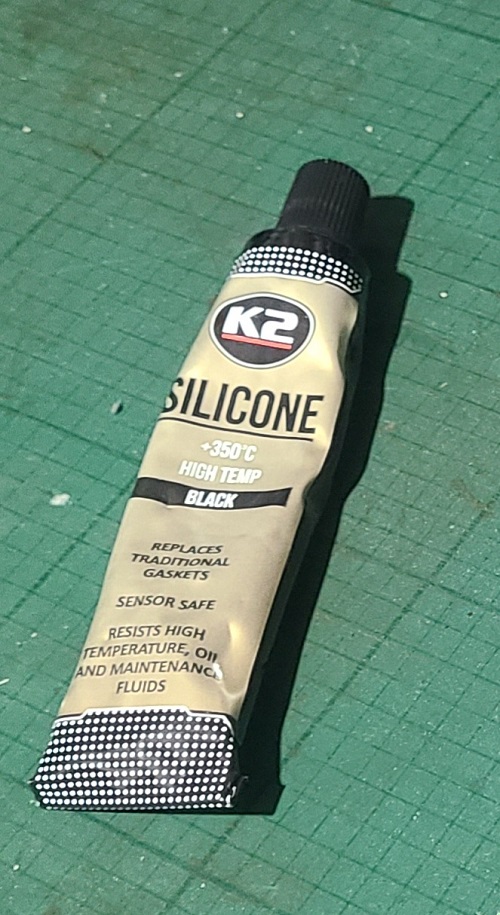
used some of this to seal around edges of plate to try and stop water sitting behind it and causing rot, now it's staying on there, chose it because its black but also heat resistant, being right next to the exhaust and in the engine bay,
also put some under the bolt head / nut in the floor, trying to stop any water getting in that way as well
So now it looks like this
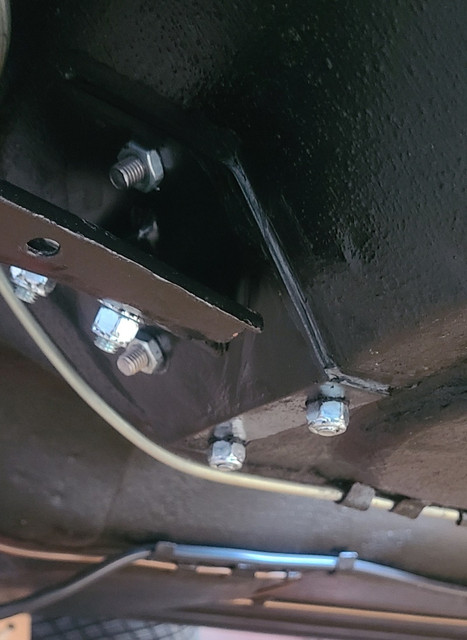
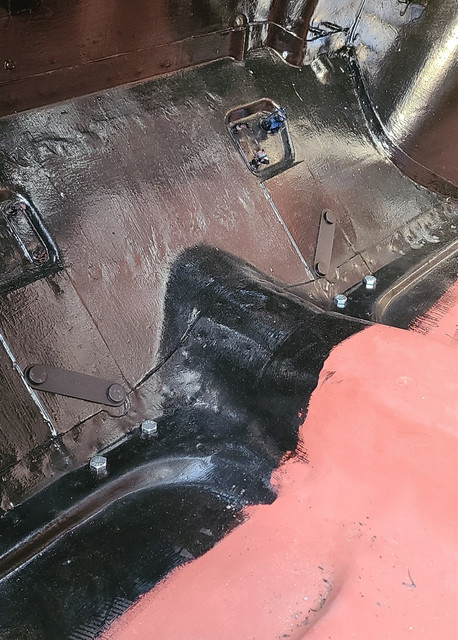
I'll cut the sound deadening around the bolt heads and with the carpet over the top I'm pretty sure there won't be any noticeable 'lumps'
new bolts added are all 5/16" UNF in keeping with other existing bolts to subframe, figured I might as well stay imperial and make sure they're not some confusing mixture of nuts and bolts. also took opportunity to change the nuts to nylok which isn't what was supplied in the kit originally, a bit of peace of mind none of it will jiggle free (still got to change the ones you can see which aren't done yet.. they're on order)
not really sure if any of this will make much difference strength-wise, but it can't hurt anyway, has to be at least slightly better than standard, and I didn't want to get into welding massive plates inside. It's not going racing or anything anyway, just general road use
now I can get on with finishing the black paint inside, that'll be the next update
Edited by stuart bowes, 18 September 2026 - 08:45 AM.
#433
sc-em
-

- Members
-
- 209 posts
Mini Mad
- Location: Cannock
Posted Today, 11:31 AM
That's a brilliant job, Stuart. Thanks for taking the time to add the detail and photos. You have really engineered a great bracket to improve on the original. It is just the sort of thing my mate would do, but is probably more belt and braces than I need to do at the moment.
The main reason being the floors on mine are nowhere near as decent as yours, so that bottom folded brace would be largley ineffective. The problem with mine is largely due to the fact that the previous idiot owner tried to fit a pre 76 subframe, so just literally drilled the holes in the floor, which were quite close, but also whopping holes in the bulkhead to fit the two mounting bolts on each side. The first stage has been to fill those holes with washers and a skim of filler to make good. Then to tackle the floor, albeit it in a temporary manner. We are hoping to move house, so the car needs to be drivable.
Attached Files
-
 IMG_1161.jpg 114.52K
1 downloads
IMG_1161.jpg 114.52K
1 downloads
-
IMG_1160.jpg 130.92K
0 downloads
-
IMG_0878.jpg 125.76K
0 downloads


1 user(s) are reading this topic
0 members, 1 guests, 0 anonymous users


