Jump to content


Photo
- - - - -

Rear Sub Frame Captivated Nut Broken


Best Answer Cooperman , 25 March 2022 - 01:25 PM

I have done a lot of these over the years.


Yes, you can do a 'bit of a bodge job', or you can do a proper repair.


To do a proper repair requires an angle grinder, a thin 1 mm cutting disc and a MIG welder. Cut a rectangular hole about 4 mm x 5 mm in the sill with a disc cutter. Drill out the existing nut to 8 mm dia and using a 5/16" UNF bolt to locate it, fit a new 5/16" nut inside and against the old, now drilled-out nut. Tack weld the new nut onto the old one. Put a bit of primer on the new nut and all around the inside. 

Weld the rectangular piece of sill back in place, linish back the weld, prime and paint.

Remove the temporary bolt and spray Waxoyl or similar through the bolt hole to protect the new nut.

You are now ready to re-fit the sub-frame.


With the kit ready, it is about an hour's work and it's a permanent fix with full original strength.

Go to the full post


  • Please log in to reply
6 replies to this topic

#1 kenyon

kenyon

    Learner Driver

  • TMF+ Member
  • PipPip
  • 17 posts
  • Location: Hereford

Posted 25 March 2022 - 08:07 AM

Hi All,


Looking for advice.

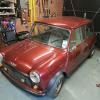
I took the rear subframe off my 1984 mini last night and I ended up chopping off one of the bolts as the captivated nut sheered off inside the chassis.

Is there an easy fix for this, I know it is part of the vertical panel that is under the rear seats but I was hoping I don't have to cut that whole panel out and replace.


Its one of the front subframe mounts that bolt in on the rear of the sill.


Thanks all


#2 neilw

neilw

    Stage One Kit Fitted

  • Noobies
  • PipPipPip
  • 51 posts
  • Location: Shaftesbury, Dorset

Posted 25 March 2022 - 08:22 AM

Unfortunately there is no easy fix for this. The only way I can see that you're going to be to get to that captive nut is by cutting away some of the rear sill. For future reference, spend a good few days beforehand spraying the nut with penetrating fluid as this a job nobody wants to have to do.


#3 kenyon

kenyon

    Learner Driver

  • TMF+ Member
  • PipPip
  • 17 posts
  • Location: Hereford

Posted 25 March 2022 - 08:48 AM

Unfortunately there is no easy fix for this. The only way I can see that you're going to be to get to that captive nut is by cutting away some of the rear sill. For future reference, spend a good few days beforehand spraying the nut with penetrating fluid as this a job nobody wants to have to do.

Thanks for the advice, to be honest it really wasn't that tight and all the others came out no problem, but yes I get where you are coming from.  Looks like some cutting and welding to do. :-(


#4 mab01uk

mab01uk

    Moved Into The Garage

  • Members
  • PipPipPipPipPipPipPipPipPipPipPip
  • 11,850 posts
  • Local Club: Mini Cooper Register

Posted 25 March 2022 - 08:48 AM

This was a common problem for garages when replacing rusty Mini rear subframes for MOT repairs....

Cut a small access hole in the side of the rear sill, this allows you to put a spanner inside to hold a nut when refitting the rear subframe. Obviously this would be a problem again if you ever have to remove the subframe in the future....however if you don't intend to have to replace it again then it is no problem (or a future owners problem !). Alternatively you could captivate the new nut by carefully tack welding it in position before you repair the side of the outer sill by welding a plate over the hole you cut for access....


Edited by mab01uk, 25 March 2022 - 08:51 AM.


#5 Homersimpson

Homersimpson

    One Carb Or Two?

  • Members
  • PipPipPipPipPipPipPip
  • 807 posts
  • Location: Redditch

Posted 25 March 2022 - 11:59 AM

The easiest way to repair (if you can weld) is to use a punch and hammer the nut through and then drill the hole in the heel board out so you can tap a new nut in from the outside.


Then weld it all the way around and grind it flat, this avoids having to cut a hole in the sill.


#6 sonscar

sonscar

    Up Into Fourth

  • Members
  • PipPipPipPipPipPipPipPipPip
  • 2,740 posts
  • Location: crowle
  • Local Club: none

Posted 25 March 2022 - 01:15 PM

You are probably wasting your effort with penetrating fluid as the exposed threads are inch or so long and have ample time to get crusty.
Spoiled by having a welder etc I just lean on the bolts and hope they undo,or break off flush.With the tools it is easier to snap them off and reweld a repair in.Using this method means you may have to not see too many other things.Have fun,Steve..

#7 Cooperman

Cooperman

    Uncle Cooperman, Voted Mr TMF 2011

  • TMF+ Member
  • PipPipPipPipPipPipPipPipPipPipPip
  • 23,051 posts
  • Location: Cambs.
  • Local Club: MCR, HAMOC, Chelmsford M.C.

Posted 25 March 2022 - 01:25 PM   Best Answer

I have done a lot of these over the years.


Yes, you can do a 'bit of a bodge job', or you can do a proper repair.


To do a proper repair requires an angle grinder, a thin 1 mm cutting disc and a MIG welder. Cut a rectangular hole about 4 mm x 5 mm in the sill with a disc cutter. Drill out the existing nut to 8 mm dia and using a 5/16" UNF bolt to locate it, fit a new 5/16" nut inside and against the old, now drilled-out nut. Tack weld the new nut onto the old one. Put a bit of primer on the new nut and all around the inside. 

Weld the rectangular piece of sill back in place, linish back the weld, prime and paint.

Remove the temporary bolt and spray Waxoyl or similar through the bolt hole to protect the new nut.

You are now ready to re-fit the sub-frame.


With the kit ready, it is about an hour's work and it's a permanent fix with full original strength.


1 user(s) are reading this topic

0 members, 1 guests, 0 anonymous users