I would prime it up, Then stone chip it, then paint it your colour of choice. Stone chip is easier to work with than Waxoil and isn't such a pain to get off should you need to do repairs ever etc.

1984 Mayfair rebuild
Started by
gavfoz
, Dec 29 2006 04:53 PM
135 replies to this topic
#91

Retro_10s
-

- Members
-

- 10,139 posts
Moderator
- Location: Bromsgrove
Posted 24 September 2007 - 10:01 PM
#92
Dexy
-
- Noobies
-
- 140 posts
Mini Mad
Posted 24 September 2007 - 11:13 PM
Well its taken best part of a night (during coursework breaks  ) to read this, and i must say man you have had alot of set backs. If i was you i would have gone mental keep on finding rust. Keep us up to date with the pictures. Can wait to start my project
Jai
) to read this, and i must say man you have had alot of set backs. If i was you i would have gone mental keep on finding rust. Keep us up to date with the pictures. Can wait to start my project Jai
#93
nathansminis
-
- Members
-
- 584 posts
Super Mini Mad
Posted 27 September 2007 - 07:21 PM
this project is awsome. feeling your pain keep finding all the rust though, making me think of mine....
what website did you do your paint design on? im sure ive been on it before but i cant remember it.
good luck with the mini. keep going. then you can paint it!!
cheers
what website did you do your paint design on? im sure ive been on it before but i cant remember it.
good luck with the mini. keep going. then you can paint it!!
cheers
#94
minivanman
-
- TMF+ Member
-
- 3,454 posts
Up Into Fourth
- Local Club: Backstreet Minis
Posted 27 September 2007 - 09:21 PM
for the underside, seam seal, red oxide, stonechip, paint. Should keep it solid for a while.
#95
gavfoz
-
- Members
-
- 362 posts
Speeding Along Now
Posted 02 October 2007 - 12:52 PM
what website did you do your paint design on? im sure ive been on it before but i cant remember it.
Can't remember at the min. I got the line drawing from that Mini design site and just used MS paint to change the colours.
. . . Should keep it solid for a while.
FOR A WHILE! You mean I will have to do this again

Thanks for the advice folks. . .
Edited by gavfoz, 04 October 2007 - 07:42 PM.
#96
minivanman
-
- TMF+ Member
-
- 3,454 posts
Up Into Fourth
- Local Club: Backstreet Minis
Posted 02 October 2007 - 08:45 PM
Its a mini - what else do you expect?FOR A WHILE! You mean I will have to this again

#97
gavfoz
-
- Members
-
- 362 posts
Speeding Along Now
Posted 07 October 2007 - 03:05 PM
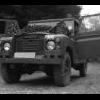
Now then. Had an interesting day really. Couldn't really get on with welding as the shell is full of Mini as my mobile storage unit (AKA Land Rover) is required in the next few weeks
Moving on. I decided to remove the engine from the subframe. Being on my own I need to remove enough kit so I could lift it on my own.
So:


Sadly I can feel a little lip at the top of the piston throw. by the way, a complete Mini engine novice here, should the cylinders not be completely round?

CAM4180 (whatever that means) head. The valves are so titchy tiny! Milk bottle tops are bigger!


Jobs a good 'un. Only took three hours, no bolts sheered and I only needed about three different socket sizes. The roll pin in the gear linkage was a fag but other than that an easy job.
Moving on. I decided to remove the engine from the subframe. Being on my own I need to remove enough kit so I could lift it on my own.
So:
Sadly I can feel a little lip at the top of the piston throw. by the way, a complete Mini engine novice here, should the cylinders not be completely round?
CAM4180 (whatever that means) head. The valves are so titchy tiny! Milk bottle tops are bigger!
Jobs a good 'un. Only took three hours, no bolts sheered and I only needed about three different socket sizes. The roll pin in the gear linkage was a fag but other than that an easy job.
Edited by gavfoz, 21 December 2007 - 04:23 PM.
#98
gavfoz
-
- Members
-
- 362 posts
Speeding Along Now
Posted 07 October 2007 - 09:14 PM
I have found that Cam4180 is an unleaded head. Thats a bit of a bonus really. I don't think unleaded was even though off in 1984. Trying to think back now. My parents 1989 F-plate Sierra was retro-converted so I guess my Mini was not unleaded originally. Still not sure on the bore shape at the top of the cylinder. I looked at a few photos of head gaskets and blocks and some have it and others not. I wonder if its an A+ trait. I suppose nothing is stopping this from being a later A+ unit retro fitted to gain the unleadedness. Still, its all coming apart and being rebuilt so it doesn't really matter.
Gav
Gav
#99
gavfoz
-
- Members
-
- 362 posts
Speeding Along Now
Posted 11 October 2007 - 05:54 PM
Was going to split the block from the gearbox today. Took the clutch cover off only to find a 30mm or inch and 3/16ths nut that I don't have a socket for. Can't remember its size now. Anyway, it holds the clutch plate on. Bummer. . .
#100
gavfoz
-
- Members
-
- 362 posts
Speeding Along Now
Posted 16 October 2007 - 03:41 PM
More stripper pictures

Clutch and flywheel removed. Took some force that and it weights a ton.

One side cover removed. Everything looks pretty oil stained. At this point I tipped the engine forward again only to find out I had never drained the oil when I removed the lump all those months ago. D'oh. Good job I used a drip tray!

Timing cover removed. Plenty of slack in the chain.

At this point I realised to remove the timing gears you need to stop the crank spinning by putting a screw driver through the starter hole into the flywheel. Perhaps I should at least read the Haynes and not just look at the exploded diagrams. Chain, gears and tensioner removed.

Afew 3/8ths bolts later (one had to have a slot cut in the head and impact driven to loosen) and the two parts fell away from each other.

Crank is very hard to rotate by hand. A fair bit of play in the botom of the con-rods. Cam looks nice, shiny and worn though.

Gearbox looks plenty nice enough though. A few cogs are marked and missing a few tiny bits but not so bad as I was expecting. Speedo drive is busted as it does not spin the cable
Plenty of work to do then. . .
Clutch and flywheel removed. Took some force that and it weights a ton.
One side cover removed. Everything looks pretty oil stained. At this point I tipped the engine forward again only to find out I had never drained the oil when I removed the lump all those months ago. D'oh. Good job I used a drip tray!
Timing cover removed. Plenty of slack in the chain.
At this point I realised to remove the timing gears you need to stop the crank spinning by putting a screw driver through the starter hole into the flywheel. Perhaps I should at least read the Haynes and not just look at the exploded diagrams.
Chain, gears and tensioner removed.Afew 3/8ths bolts later (one had to have a slot cut in the head and impact driven to loosen) and the two parts fell away from each other.
Crank is very hard to rotate by hand. A fair bit of play in the botom of the con-rods. Cam looks nice, shiny and worn though.
Gearbox looks plenty nice enough though. A few cogs are marked and missing a few tiny bits but not so bad as I was expecting. Speedo drive is busted as it does not spin the cable
Plenty of work to do then. . .
#101
gavfoz
-
- Members
-
- 362 posts
Speeding Along Now
Posted 19 October 2007 - 08:05 PM
Pure porn:

We are going low chaps. . .thanks to Custom Minis Ltd for these
We are going low chaps. . .thanks to Custom Minis Ltd for these
Edited by gavfoz, 27 October 2007 - 12:51 PM.
#102
gavfoz
-
- Members
-
- 362 posts
Speeding Along Now
Posted 19 October 2007 - 08:06 PM
Aye? I didn't press that button!
Anyway, I also got a pair of works dashboard pieces that I think I will get flocked or air brushed. . .
Anyway, I also got a pair of works dashboard pieces that I think I will get flocked or air brushed. . .
Edited by gavfoz, 19 October 2007 - 08:07 PM.
#103
miniallsort
-

- Members
-
- 4,723 posts
Up Into Fourth
Posted 20 October 2007 - 12:02 PM
looking good mate
#104
GiroUnit
-

- Members
-
- 437 posts
Speeding Along Now
- Local Club: Standlake!
Posted 20 October 2007 - 04:20 PM
top work bud 
#105
gavfoz
-
- Members
-
- 362 posts
Speeding Along Now
Posted 22 October 2007 - 07:03 PM
Just won a bargain Megajolt set-up off ebay! All I need now is a trigger wheel set-up and we can kiss that sorry ass dizzy good bye! Muwhahahaha! Kad or specialist components? Decisions decisions. . . .
Ordered some more C**p from Mini Spares last night. Most of the stuff is hub related. It seems silly to me to do a bare shell rebuild and not replace relatively cheap consumable items such as swivel pins, gaiters, grease nipples and the like. It will be much more hassle in the future to replace them than now whilst the thing is scattered across the garage block.
Also ordered some special brake lines for Fiesta caliper/Mini subframe conversion I am doing from a forum member. I also bought a dizzy blanking plug and some machined down discs to fit my new brake set-up from MRA minis. If I could just get the bloody big nut off the end of those CV's I would be well away and could probably build up both subframes next weekend. Not even the usually triumphant combination of blow lamp/impact driver/large lump hammer has worked. I can sense the manky chisel and mallet or the Dremel coming into play yet. . .
So, adjustable GAZ dampers, Hi-Los on new doughnuts all round, adjustable tie-bars, negative camber rear brackets, fixed negative camber bottom arms, Cooper S spec rear drums and with the Fiesta Mk2 disc's up front thats "stopping" and "bouncing" catered for. Just got "go", "weather protection" and "shinny" to go.
"Go" is easy enough and is one thing I quiet enjoy - messing about with oily bits. I guess I should of took Automotive and not Civil Engineering. . .
"Weather protection" is slightly harder. Cutting more holes and welding in real metal. It's a tedious monster of a job. Dare I say it but I may start looking for another donor vehicle with a good shell. Winter's coming = less outdoor working hours.
"Shinny" - That'll be another order to Mini Spares then
TTFN!
Gav


1 user(s) are reading this topic
0 members, 1 guests, 0 anonymous users


