I did a search and had already seen the video on removing the race.
That one came right out.
But is there an easy way to remove the needle bearing?


Transfer case bearings
Started by
Bill USN-1
, Jan 05 2007 08:42 PM
7 replies to this topic
#2

Retro_10s
-

- Members
-

- 10,129 posts
Moderator
- Location: Bromsgrove
Posted 05 January 2007 - 09:24 PM
Tried a BFH? (big f*cking hammer) 
#3
Bill USN-1
-
- Members
-
- 260 posts
Mini Mad
Posted 05 January 2007 - 09:40 PM
Tried a BFH? (big f*cking hammer)
Well sort of.
I did fill the hole with grease then stuck the shaft in the hole and hit it with a rubber mallet.
Hoping the grease would force the bearing out.....
hmmm
nope.
#4
Sprocket
-
- Members
-
- 7,266 posts
Great on Injection faults
- Location: Warrington
- Local Club: Manchester Minis
Posted 06 January 2007 - 12:08 AM
I took mine to a transmission center and asked them to pull it out with their blind bearing pullers 
I suspect how ever that this is a difficult option for you i will suggest another way. Use a dremmel, die grinder or similar and cut slots in the races fron the inside, should just fall out. oh dont forget to remove the retaining clip on the input gear suport bearing, it will never come out otherwise.
Guess Works uses another method, but its a bit brutal. Heat the back of the housing in the area of the bearing untill the ally is water sizzling hot, not boiling. Then with some gloves, pick up the whole case, bearings pointing down ward, and whack the whole thing on a chunk of wood. It should just drop out. Its in the FAQ section.
Either way is not ideal but gats the job done. Personaly as long as the transmission center charges me a fiver for removing them with the propper puller and throw in a full transmission gasket set as well, im not going to do it any other way
#5
Bill USN-1
-
- Members
-
- 260 posts
Mini Mad
Posted 06 January 2007 - 11:51 AM
The race was no problem it had come out first try using Guess works method. The problem was the needle bearing.
I finally got tired of at 2am and just broke the cage out of it and removed the needles.
Then I grabbed my air die grinder and a good HS carbide bit. Any idea how hard those bearing races are!!!
I just ground a line down the race to create a weak spot. Took it as close to the housing as I felt safe.
Then used a punch and a hammer on the top lip where the housing dips next to the drain hole.
Gave a couple pops with a hammer and she cracked.
Gave just enough to tap(prise) her right out of there.
So I went to bed happy at 3am.
#6
fikus01
-

- Members
-
- 1,910 posts
Camshaft & Stage Two Head
- Local Club: SMAG - Southend Mini Action Group
Posted 06 January 2007 - 12:08 PM
i like your style, IT WILL COME OUT then sleep being happy
#7
Bill USN-1
-
- Members
-
- 260 posts
Mini Mad
Posted 06 January 2007 - 06:47 PM
Figured I would update this since I am awake now.
As mentioned I followed the FAQ for removing the nose bearing race following this video.
It worked fine and the race fell right out.
But I could not get the idler shaft needle bearing out even trying the grease in the hole trick.
So I got mad and tired and just pryed the cage out around the bearings and remove the whole thing.
Then I used my die grinder a ground a slot in the race, but not all the way through. I didn't want to damage the housing.
I ground the slot right where one of the detents are at in the case.
Then I simply hit the race with a punch and it cracked right on the line.


Once they were out I cleaned everything up.

Then I stuck the bearings in the freezer to shrink them.
Frosty!!

And used my heat gun on the housing.

Then I used my seal driver to tap them into place.


When done I installed the housing on the motor..finally!!!
Be very carefull not to damage the new seal.
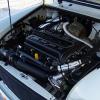
See the rolls of tape laying there.
I used the duct tape to cover the splines and bridge the slot in the crank.

Then came the flywheel.
I decided that since I was installing a pre-verto diaphram clutch on my MPI block I better lap in the flywheel.
So I grabbed my fine valve lapping compound.

Put a little on the crank, and set the flywheel on it.
Then I spun it in both directions while holding light pressure on it.
After a couple minutes i removed the flywheel and cleand it all up.


All done and ready for the new clutch!!!
HTH someone else at 2am!!!
As mentioned I followed the FAQ for removing the nose bearing race following this video.
It worked fine and the race fell right out.
But I could not get the idler shaft needle bearing out even trying the grease in the hole trick.
So I got mad and tired and just pryed the cage out around the bearings and remove the whole thing.
Then I used my die grinder a ground a slot in the race, but not all the way through. I didn't want to damage the housing.
I ground the slot right where one of the detents are at in the case.
Then I simply hit the race with a punch and it cracked right on the line.
Once they were out I cleaned everything up.
Then I stuck the bearings in the freezer to shrink them.
Frosty!!
And used my heat gun on the housing.
Then I used my seal driver to tap them into place.
When done I installed the housing on the motor..finally!!!
Be very carefull not to damage the new seal.
See the rolls of tape laying there.
I used the duct tape to cover the splines and bridge the slot in the crank.
Then came the flywheel.
I decided that since I was installing a pre-verto diaphram clutch on my MPI block I better lap in the flywheel.
So I grabbed my fine valve lapping compound.
Put a little on the crank, and set the flywheel on it.
Then I spun it in both directions while holding light pressure on it.
After a couple minutes i removed the flywheel and cleand it all up.
All done and ready for the new clutch!!!
HTH someone else at 2am!!!
Edited by Bill USN-1, 06 January 2007 - 06:51 PM.
#8
Bill USN-1
-
- Members
-
- 260 posts
Mini Mad
Posted 07 January 2007 - 02:01 AM
Decided to throw the starter on and crank it over.
Got oil all the way to the rockers but forgot to install some pot joints in the diff!!
DOH.
Need more oil!
I didn't think the level would be that high.
Got oil all the way to the rockers but forgot to install some pot joints in the diff!!
DOH.
Need more oil!
I didn't think the level would be that high.


0 user(s) are reading this topic
0 members, 0 guests, 0 anonymous users


