ooooooooooh.... one more day to go!
My V12 Cooper
#136
Posted 13 July 2008 - 08:25 AM
ooooooooooh.... one more day to go!
#137
Posted 13 July 2008 - 08:57 AM
Shame I couldn't be there to take the *yellow human water*
#138
Posted 15 July 2008 - 09:16 PM
Hehe, and this time tomorrow - I should have started taking major bits off the jag!
Also, done a quick chop of the mini with the wheels from the jag - and they're really growing on me I have to admit!

The scale of the car as a whole, should be virtually spot-on - but I redone it WITHOUT a roof-chop to see what it would look like

Still looks awesome (I think anyway) but... it doesn't look as "streamlined" as my sis put it, so I still really want a roof-chop as part of the final design
#139
Posted 15 July 2008 - 09:21 PM
cheers,
ash,
#140
Posted 15 July 2008 - 09:27 PM
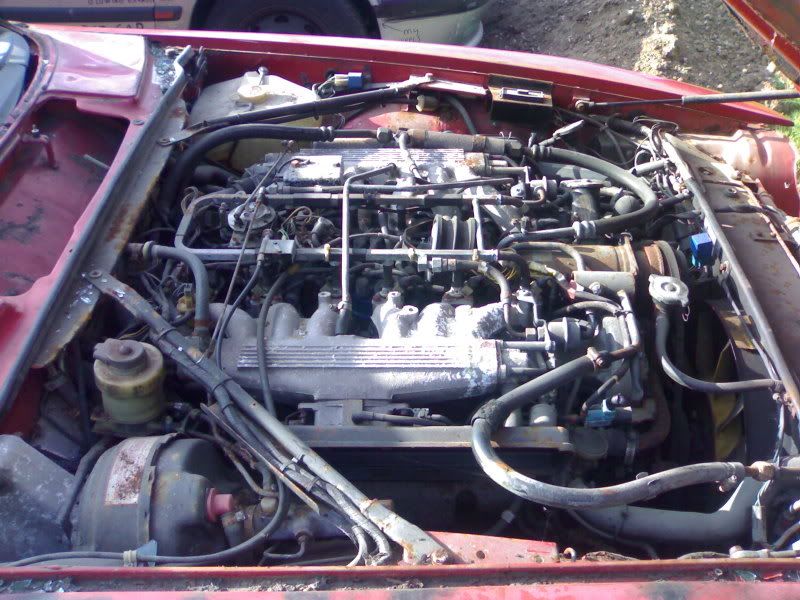
#141
Posted 16 July 2008 - 08:00 AM
will see you later hehe.. oh, we are going to forklift it.. so you may find some massive holes in the doors... hehe
#142
Posted 16 July 2008 - 05:20 PM
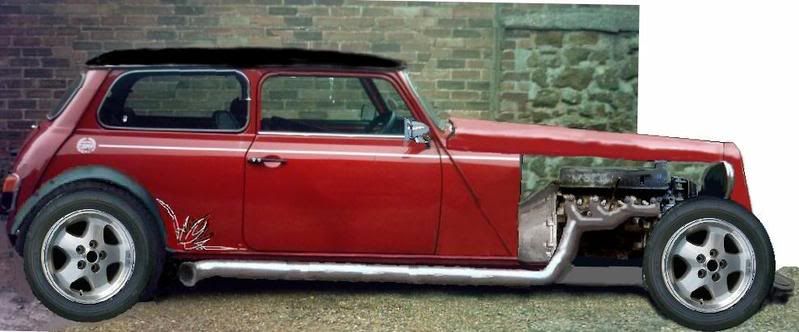


enjoy
#143
Posted 16 July 2008 - 10:53 PM
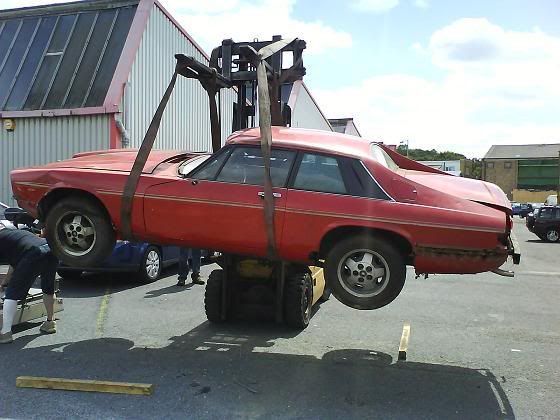
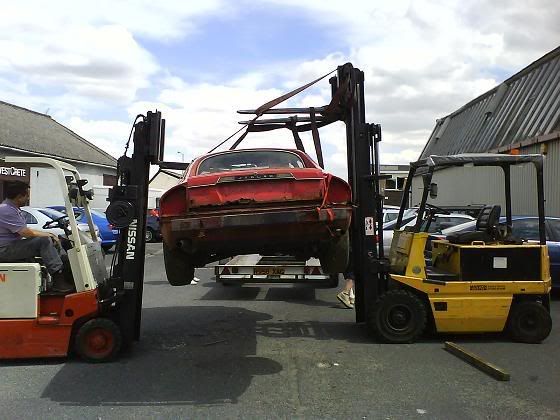
Ah well - here's a pic of the beast in its new (VERY temporary!) home, next to the dailly rat

And one more shot of that HUGE engine - for scale, the brown cylindrical thing on the right hand side, between the two banks, is about the size of a 2L bottle of pop!

It's gonna be a right royal PITA to get that out of there! So many bloody hoses, wires, and pipes all to get out of the way before I can even get CLOSE to the engine mounts!
#144
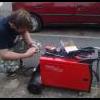
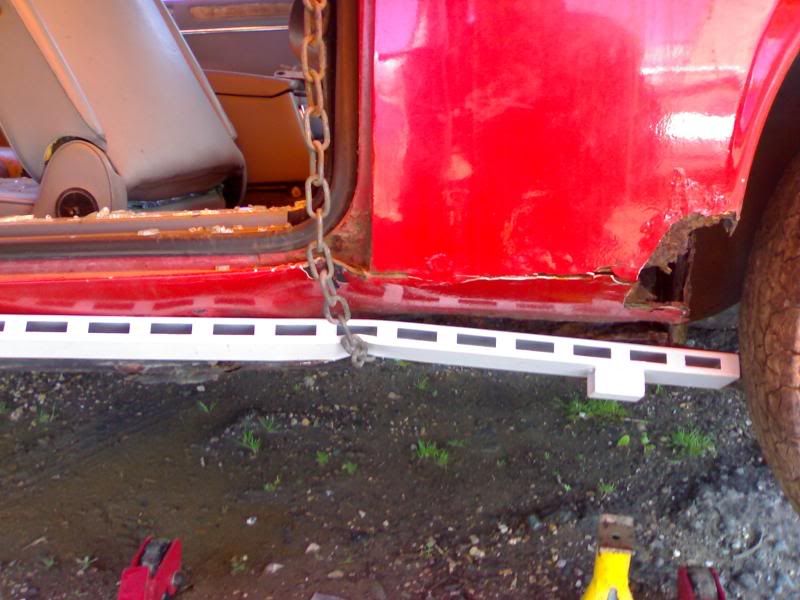
Posted 18 July 2008 - 09:11 AM
All this information + pics were taken from http://www.bernardem...m/xjs/index.htm
The front subframe is held on by two HUGE bolts either side, which act as a hinge for the whole subframe, and is then held on at the back, by 2 relatively small bolts - then it's only really the sway bar, steering rack, and brake lines attatching it to the car!

The engine is held in place by two engine mounts (which are on the front subframe!) and then a singular mount on the back of the gearbox. The gearbox mount however, is apparently an ARSE to remove, as instead of the usual blocks of rubber to hold it in place, it's held there by a spring, which is uder quite a lot of compression - that'll be fun to remove! (just visible as the reddish bit in the picture) 4 bolts remove that
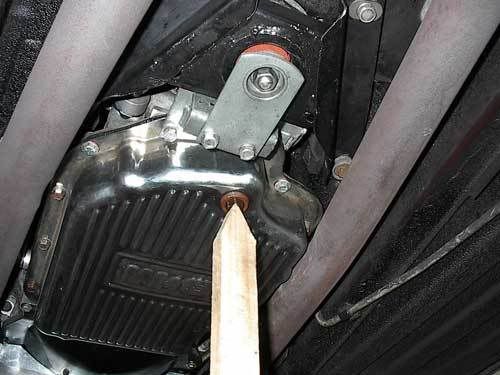
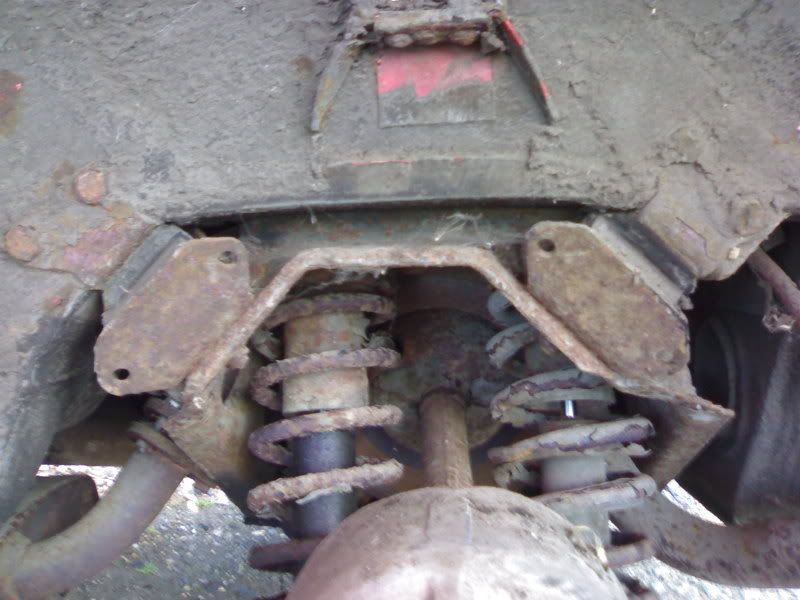
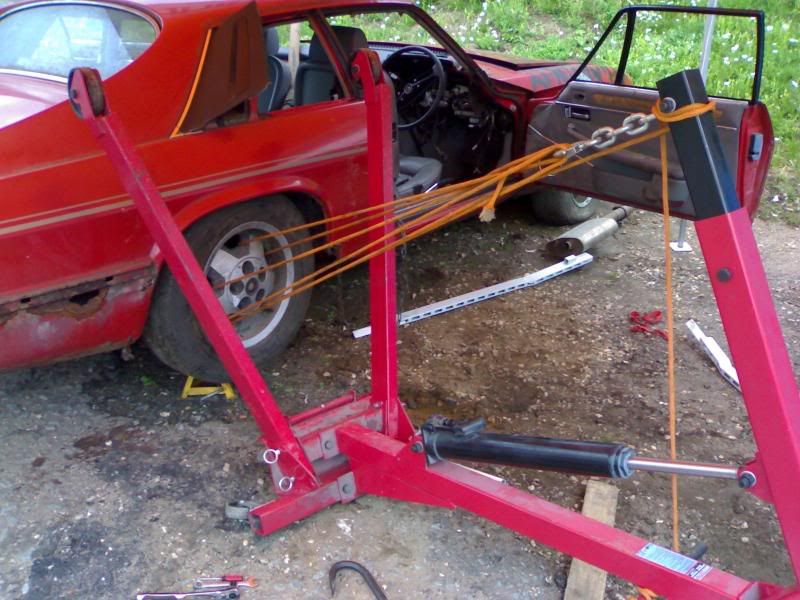
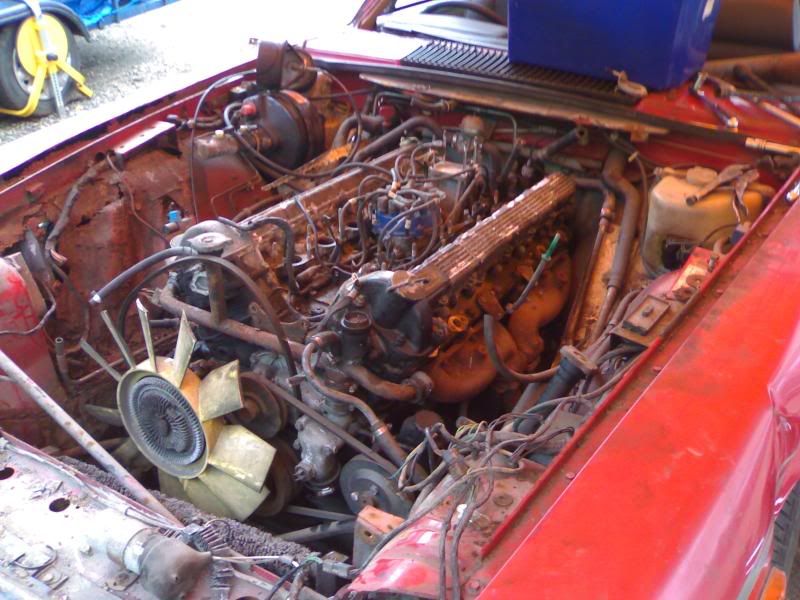
The biggest problem with the Jaguar XJ-S transmission mount however, is not it's design or devilish complexity, its removing it.
If not removed properly the damm thing could kill you. The spring is under compression, and the uninitiated might be tempted to just remove the bottom screws. WRONG. The entire assemble needs to be supported (spring compressed) before ANY bolt is removed.
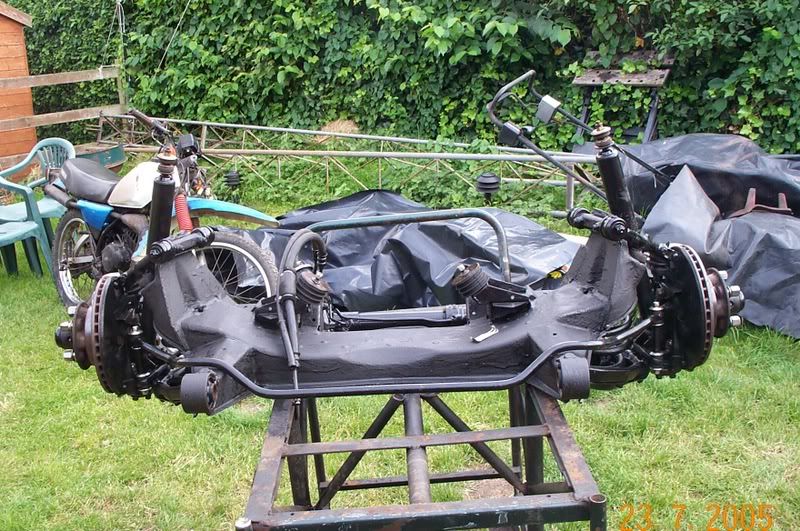
Rear subframe is held in place by the propshaft (4 nuts+bolts) 4 rubber mounts (cut the rubber!) the swing-arms (one bolt each) and then the brake line and handbrake cable - the exhaust also runs through it, but that should be easy to remove

Only bit I'm not 100% sure about, is the centre bearing on the prop, as I couldn't find a single picture showing what it looks like, only a very badly written explanation of how to renew one - which was as clear as mud!
so, picking up the other half tonight after work, and starting first thing tomorrow, to disconnect the propshaft. Next step, will be to hammer a couple of holes in the floorpan, either side of the tranny, then tie a bit of rope through the floor, around the gearbox. That way, when I undo the gearbox mount, it's not gonna fall around, and break things!
Not gonna lift the engine out, as after taking off the intake manifolds (which means taking apart loads of other bits to get to the bolts for them) the engine *should* be able to slip downwards through the gap in the bodywork, attatched to the front subframe - at least it means I should be able to wheel it around on the subframe, as I dont think the engine crane's gonna like being made to carry 300+kg through mud and VERY uneven concrete
#145
Posted 20 July 2008 - 08:26 AM
#intake manifolds removed (fapping hoooooge)
#exhausts removed
#planned out how to remove rear subby
# underbody heatsheilds removed
Don't have access to any ramps... So I used an engine crane instead


Sills were so rotten, you can see DAYLIGHT through them!

Turned my other crane into a quickshift wheel remover!

Halfords fitting tents make good makeshift workshops!

ah.... that rust *may* cause some problems!
#146
Posted 20 July 2008 - 05:17 PM
Rear subframe is now OFF! And the engine's been dismantled a bit more. Really not looking forward to getting the engine and front subby out though - mainly because I've just realised that there's nowhere for the crane to lift from, as I've rammed the car face-first into the side of a rather muddy slope!
Firstly, had to get the rear wheel off. The passenger side one was stuck on, this one however, felt like it was WELDED on! Took about an hour to remove it!

After a close look at the trailing arms, I decided NOT to keep them - they were rotten through, so to save time, I just cut them off!

suprisingly, the bolts that held the subby's main bolts on, came off fairly easily

hmmm.... nope, the rear bumper *cant* support the weight of the car!

Eventually got it manouvered into the container! Tis be damned heavy, approx 100kg!

yum-yum-yum.... you're NEXT!

PS: the air-con pump itself weighs about 15kg - nothing on this car's lightweight!
#147
Posted 20 July 2008 - 05:25 PM
#148
Posted 20 July 2008 - 05:43 PM
#149
Posted 20 July 2008 - 06:07 PM
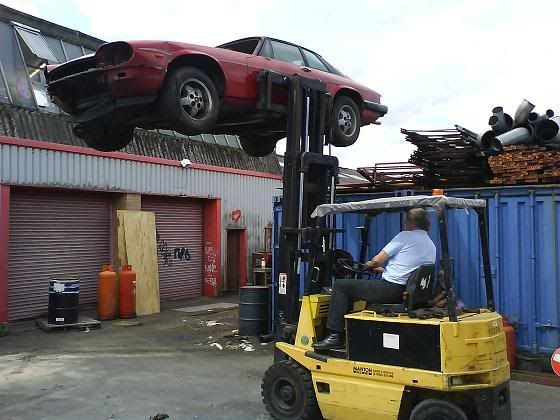
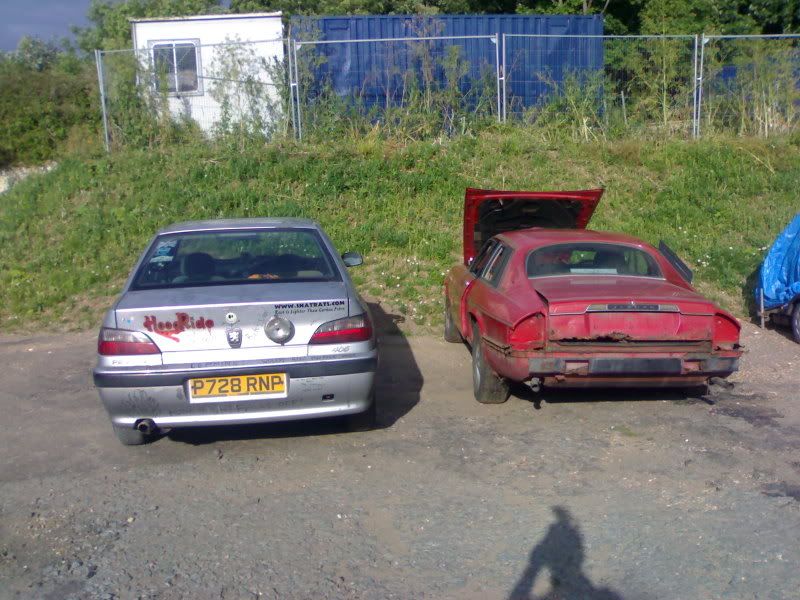
#150
Posted 23 July 2008 - 11:40 PM
And just for the sake of it - here's a piccy of the jags intakes, next to an alloy mini intake

Kinds brings home, just how huge it is dont it?
also, took off the jags master cylinder, servo, and pedal box tonight (scarily enough, 4 bolts is all that holds it all in place!) and compared it to the minis servo'd master cylinder. Whilst I wont be able to do a straight swap between the master cylinders like I originally thought, it turns out it won't be too much hassle to modify the minis mounting frame thingy, to accept the jag's servo and master cylinder - just need to shorten it by around 2", and weld on some tabs to bolt the jag's servo, the clevis pin should then fit straight onto the minis one. This way, I can keep the jags entire braking system, making my job a hell of a lot simpler!
Next job, will be to try to drag the jag away from the hill, so I can get the crane in front of it to lift the whole car up to get underneath it!
1 user(s) are reading this topic
0 members, 1 guests, 0 anonymous users


This topic is locked


