Jump to content


Photo
- - - - -

Lets Get It Right The Second Time Round....


  • Please log in to reply
166 replies to this topic

#1 Southy

Southy

    Camshaft & Stage Two Head

  • Members
  • PipPipPipPipPipPipPipPip
  • 1,579 posts
  • Local Club: Oldham and Distrcit Mini Club

Posted 31 March 2008 - 11:48 PM

My car which is used as my everyday transport underwent a resto just over 7 years ago now, and granted the work wasnt perfect, it was afterall mine and my dads first ever attempt at doing a full restoration project. The car is now becoming a bit of a mess, the back end was fully rebuilt over xmas as some of you may know and a quick respray was done.

The time has come now for work to begin on the full restoration now, i have/will have access to another car for my daily transport needs so can take mine off the road for the work to begin.

The car is currently a 1980 austin mini 998 and i have numerous plans for the car these will go into more detail later but the major work to be done is:

  • Fully strip the shell of everything
  • Send the shell to be blasted to remove all the old paintwork and underseal
  • Fit a new front end including inner wings
  • Replace the door skins
  • Fit a complete new floor, sills and heal panels
  • Sand blast the subframes and have these powder coated
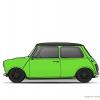
  • Repaint the car in Electic Orange with an Cosmos Black roof
  • Drop in a 1275 engine


The car is due to come off the road next weekend will get pics of the cars current condition then for you all to see the amount of work needed.

Some of the plans i have for the car are as follows

  • Fit new cones with adjusta rides with lowered spax shocks and adjustable negative camber brackets on back and 1.5 fixed on front
  • New brake and fuel lines throughout
  • Fit a set of 13x7 Anthracite split rim type wheels in yoko A539's
  • Fit a smoothed boot with relocated numberplate under rear bumper
  • Fit a new headlining and carpet
  • Fit a set of miliga carbon fibre arches showing weave
  • New chrome work all round with clear lenses all round

Have got a few more but dont want to spoil everything for you :)

I bought myself a complete engine off ebay the other week for £245 and i set about starting work stripping it down and seeing what work was needed for it.
After getting the engine home and having a look over it, it seemed like some work had been done to it in the past, and after removing the cylinder head i noticed the honed block.

Posted Image
The bore

I did complete strip of the engine and replaced all the bottom and fitted new shells but decided to leave the pistons alone due too the recent work looked too of been carried out.I decided to fit myself a new cam whilst the engine was out and chose the Mini sport CA2 cam kit which came with double springs and heavy duty followers. The cam bearings were also replaced at this time.

In all on saturday i spent £170 on a full gasket set with cooper head gasket, oil pump,Mini Sport CA2 cam kit, 2 idler bearings, set of big ends and mains, thrust washers, cam bearings and lightened duplex chain, money well spent in my eyes :) (Oh the perks of a staff discount :()

Posted Image
The new goodies

Both the engine and gearbox were vigerously cleaned with brake cleaner and scotch brite and in more stubborn areas a wire brush on a drill was used, i think the resulsts speak for themselves the block and 'box came up like new
Posted Image
The cleaned up gearbox

This work to the engine was carried out over the weekend and this evening i have just finished fitting the new lightened duplex chain and applied the second coat of red paint too the block.

Posted Image
The engine in its latest condition

Will update this as more work progresses, hopefully next weekend i shall be starting the strip down of the car all being well

Feel free to comment on the work carried out so far and on my plans and more pics are located HERE

EDITED the colour choices

Edited by Southy, 30 May 2008 - 11:56 PM.


#2 Southy

Southy

    Camshaft & Stage Two Head

  • Members
  • PipPipPipPipPipPipPipPip
  • 1,579 posts
  • Local Club: Oldham and Distrcit Mini Club

Posted 30 May 2008 - 11:42 PM

Right its been sometime since i updated this, had other things to sort out such as an engine swap at the begining of this month after the clubby threw a leg out of bed :lol: and needed a complete rebuild so ended up usuing mine whilst that was off road....There is a few changes to the original design, im now going to be painting it Electric Orange (otherwise known as ST orange) with BMW Cosmos Black roof with a smooth carbon fibre weave boot.

Well i got busy last weekend whilst it was nice and stripped all the interior out of the car, took me a while to get the top dash rail off with the window still in but i wouldnt be beaten by it. One evening this week i spent all evening stripping all the exterior parts such as the lights, numberplates and grill etc..

This evening once i came home from work i decided to get stuck in and get busy by making a start on the full strip down first of all i started at the back got the rear end jacked up and on a set of axle stands and the same with the front.I then set busy to stripping the fuel tank out and the boot lid off, battery out, cables out and make a start on dropping the rear subframe...I also added a few more bits to my engine as i had left it for a while, im still without my head as its had some machine work done on the CNC machine at work to the chambers and is awaiting some more 'mods' before fitted but in no rush as i aint got a car yet for it :lol:

Here are the pics of the latest work, feel free to let me know your thoughts....

Posted Image
Un-machined chambers
Posted Image
Chambers after modifying on CNC machine
Posted Image
Back end after removing the tank and boot lid and up on axle stands
Posted Image
Front end after being stipped of exterior parts
Posted Image
The rear subframe needs a lil clean up :lol:
Posted Image
The nearly completed engine minus the head
Posted Image
Start of the strip down of the twin carbs to be used

More pics HERE

#3 dan_up850

dan_up850

    Speeding Along Now

  • Members
  • PipPipPipPipPip
  • 441 posts

Posted 30 May 2008 - 11:58 PM

its all looking good mate, cant beat a spotless red engine! keep up the good work.

#4 Southy

Southy

    Camshaft & Stage Two Head

  • Members
  • PipPipPipPipPipPipPipPip
  • 1,579 posts
  • Local Club: Oldham and Distrcit Mini Club

Posted 31 May 2008 - 12:00 AM

Cheers for that fella, i dunno how long it will last like that tho :lol:

I said i wanted to change the colour of the block to orange now ive changed my mind on the body colour but i think its a bit late for it now and i cant be bothered with all the work again haha

#5 dan_up850

dan_up850

    Speeding Along Now

  • Members
  • PipPipPipPipPip
  • 441 posts

Posted 31 May 2008 - 12:03 AM

i know how you feel mate, i painted my engine black and put it back on the subframe and put it back to the car, i then stood back and thought, ahhhhhh dont like it, so i dropped it out and painted it red!! haha, orange on orange would look really good but as you said its the hassle of it all! lol.

#6 DazWood

DazWood

    Mini Mad

  • Members
  • PipPipPipPip
  • 182 posts
  • Local Club: North East Mini Club

Posted 31 May 2008 - 09:23 AM

Coming along well bud. Love the engine, looks fresh :lol:

#7 Southy

Southy

    Camshaft & Stage Two Head

  • Members
  • PipPipPipPipPipPipPipPip
  • 1,579 posts
  • Local Club: Oldham and Distrcit Mini Club

Posted 31 May 2008 - 03:01 PM

Right ive done a few hours work today I managed to drop the rear subframe from the car and took it into my garden where I worked in the sun stripping it down to a bare minimum. The subframe is in resonable nick really just minor surface rust and loads of dirt and underseal which has all been removed with the power wash.

The radius arms will be having new spindle kits fitted due to the wear in the spindles which can be seen in the pics below, as per usual with a mini one job is easier but the other is hard, hence why one of the rear hubs is still attached due to it not playing game and coming off :lol:

The are underneath the subframe is cleanish as work was done to this area at x-mas when i eplaced the subframe mounting plates and tidyied up the lips on the arches due to rot.

Posted Image
The complete subframe dropped off and rolled into back garden

Posted Image
One radius arm ready for stripping

Posted Image
The wear in radius arm spindle (note the lip about 1inch in from the left)

Posted Image
Recon they will go again :lol:

Posted Image
The parts stripped down ready for power washing

The plans for the subframe is to send it off to blasting with the shell and then take them to the powder coaters, the radius arms will be taken into work with me and put through the parts cleaner, blasted new bearings fitted and reamed then quick wash again before applying chassic black paint, the same will be done to the back plates.

#8 Southy

Southy

    Camshaft & Stage Two Head

  • Members
  • PipPipPipPipPipPipPipPip
  • 1,579 posts
  • Local Club: Oldham and Distrcit Mini Club

Posted 31 May 2008 - 04:19 PM

Oh i forgot to add also, my plans are (well not plans been given an ultimatum) that my car has to be done in 3 months from last weekend, so this works out ready for the MITP weekend.....wish me luck i see many a late nights coming up

Edited by Southy, 01 June 2008 - 12:14 AM.


#9 Southy

Southy

    Camshaft & Stage Two Head

  • Members
  • PipPipPipPipPipPipPipPip
  • 1,579 posts
  • Local Club: Oldham and Distrcit Mini Club

Posted 01 June 2008 - 02:06 PM

Right not really done a great deal today didnt feel right upto it so just got out the pressure washer and cleaned off the rear subframe and the radius arms, its amazing what a cyclone head does to clean things up :mrcool:
The clean subframe and radius arms
Posted Image

The nice clean radius arm close up, i swear they are a ton lighter without all that mud...
Posted Image

#10 Southy

Southy

    Camshaft & Stage Two Head

  • Members
  • PipPipPipPipPipPipPipPip
  • 1,579 posts
  • Local Club: Oldham and Distrcit Mini Club

Posted 22 July 2008 - 11:05 PM

Right its been a while since ive updated this thread, over a month infact, it seems to me like not a lot has gone on really but it has infact seen as ive had to totally rebuild my mates garage which we are working in on the car, build a load or racking, build ourselves a spray booth and re-organise the whole garage so we can do the cars properlly.

I had my subframes shot blasted by my local farmer and then the following day they were took to the powder coaters (pics are on my old phone need to find it)
Ive got all my suspension stuff, my ajustarides, shockers, polybushes etc etc these are sat waiting in my garage to go on all being well should be this sunday.

Ive been taking a lot of stuff into work recently and during my lunch break been shot blasting/rotablasting lots of parts ready to be painted in chassis black to be built back up to go on the car. These include the radius arms, top suspension arms, front steering hub, backplates and the rear hubs and the trinnion mountings.

I decided in the end, because my car needed so much welding to it and ive got such a short time span for the build ive bought off my mate a damn near perfect 2001 shell all that needs doing is 2 new A panels and a slight patch in floor otherwise its mint, i also bought a 6 point safteydevices cage off him for 200quid which i think is a good deal.

Ive collected some other parts including my wheels and seats (should be with me in a week or so) and im in the process of trying to speak to body_stylist on here regarding some carbon parts but no reply as of yet.

Not got all too many pics as ive been too busy and dirty to touch my phone to take some but here are the few i have, feel free to tell me what you think of the slow progress.

Posted Image
My new 2001 shell buried whilst we were re-arranging the garage.

Posted Image
My shell sat in what will be/is the spray booth

Posted Image
Shot blasted top suspension arms

Posted Image
Suspension arms with first coat of paint on

Posted Image
Radius arms after being put through the rotablaster

This evening i have been finishing stripping my shell, removing all the sound deadening from the inside of the car and been sand blasting any surface rust areas back to bare metal and treated them, this weekend i am starting to prep the car ready for paint.

#11 sweetser

sweetser

    Up Into Fourth

  • Members
  • PipPipPipPipPipPipPipPipPip
  • 3,995 posts

Posted 22 July 2008 - 11:59 PM

thats a nice big garage you got there :D who's pick up?
i was going to find this thread in a little bit to see how it was coming along
good luck mate :(

#12 Southy

Southy

    Camshaft & Stage Two Head

  • Members
  • PipPipPipPipPipPipPipPip
  • 1,579 posts
  • Local Club: Oldham and Distrcit Mini Club

Posted 23 July 2008 - 06:13 AM

The pick up is my mates which we are restoring at the same time as mine,should be going to shows with it next year hes got a few little surprises instore for you all with it :D

to be honest the pics dont make the garage look all that big there is a whole other half of the garage thats not in the pics, atm there is 4 cars parked on the floor with plenty of room to walk/work around them and then there is a shell stacked up on top of the mezanee floor waiting for some free time to start work on it

Shall keep this thread updated from now on so you all can see how the work is progressing

#13 Southy

Southy

    Camshaft & Stage Two Head

  • Members
  • PipPipPipPipPipPipPipPip
  • 1,579 posts
  • Local Club: Oldham and Distrcit Mini Club

Posted 26 July 2008 - 09:25 PM

Right its been a busy couple of days, we have managed to get the shell rolled onto its side and i set about the horrible task of stipping all the old underseal off, took a while but i got there in the end.We then cut out the old sill and welded a new extended sill on and welded up a couple of other small holes which appeard and strengthened some of the other seams mainly on the bulkhead and on the shocker mounts.

Whilst i were busy cleaning up all the welds my dad and mate went down the paintshop and spend 400quid on paint and bits and pieces for spraying my car, i decided in the end to go for the ST orange and im still decided what to do regarding the roof, its gonna be black but i want to do something else with it than just plain.

Here are some pics of the work this week and from today.

Posted Image
Drivers side floorpan after removing the underseal and welding new sill on

Posted Image
Cleaned up inner wing and new panel on the door hinge mounting area

Posted Image
Battery box needs a new bottom on it, thats being sorted tomorrow

Posted Image
The box of goodies from paint shop, includes masking tape, paint sieves, etch primer, white and a orange ground coat and Electric orange :angry:

The plans for tomorrow are to finish off the sill get it spot welded on and then turn the car over and do the over sill whilst i start to stripped my cage down and clean it up ready for recieving primer.
The whole bottom of the car then needs to be seam sealed again properlly this time and then stone chipped then painted.

Please feel free to post your thoughts

#14 Southy

Southy

    Camshaft & Stage Two Head

  • Members
  • PipPipPipPipPipPipPipPip
  • 1,579 posts
  • Local Club: Oldham and Distrcit Mini Club

Posted 04 August 2008 - 11:19 PM

Right it was a busy weekend that i had, we got a lot of work done this weekend and things are starting to move forward in the resto.
The sill and A panel on the opposite side were finished off and everything cleaned up and the air vents were plated up and welded.
We managed to get all the rollcage fitted properlly and drilled through the floor and plates welded onto the outside to strengthen where the cage goes in the car.

Posted Image
Rollcage fitted and bolted in correctly

Posted Image
The back seat of the car, the holes are going to be covered up

Once everything was welded in and bolted down we turned the shell onto its side and sat it on a set of axle stands and we started to prep all the underside to recieve acid etch primer.
Posted Image
Etch primer being applied.

Posted Image
The underneath after the acid etch was sprayed on

Once the etch primer had dried, we started to apply filler underneath to smooth out the welds on the sills to make it look continuous and clean, and we also applied filler to the edge of the cage plates and the thick plates which had replaced the jacking points to help smooth the edges out.

Posted Image
Filler being sanded down to a smooth finish underneath

Posted Image
Drivers side inner wing where the heater inlet and fresh air vents WERE

I also managed to get home during daylight and took some pics of my other bits and pieces ive got...
Posted Image
Rear subframe after powder coating and built up with adjustable camber and tracking brackets

Posted Image
Front powder coated subframe built up

Posted Image
Drilled and grooved disc's (done myself at work)

Posted Image
My sexual seat :dontgetit: love the colour of them matches perfect

Sorry for the amount of pics but like i say we got a lot done, there are more on my photobucket which is HERE

#15 sweetser

sweetser

    Up Into Fourth

  • Members
  • PipPipPipPipPipPipPipPipPip
  • 3,995 posts

Posted 04 August 2008 - 11:30 PM

looking very nice mate, going to be lovely when finnished


1 user(s) are reading this topic

0 members, 1 guests, 0 anonymous users