Jump to content


Photo

1978 Leyland Clubman Estate Restoration


  • Please log in to reply
14 replies to this topic

#1 rcbamm

rcbamm

    Mini Mad

  • Noobies
  • PipPipPipPip
  • 101 posts

Posted 07 September 2008 - 03:49 AM

EDIT: NEW PICS UPLOADED 11/03/08 Post #7, #8, #13, #14.


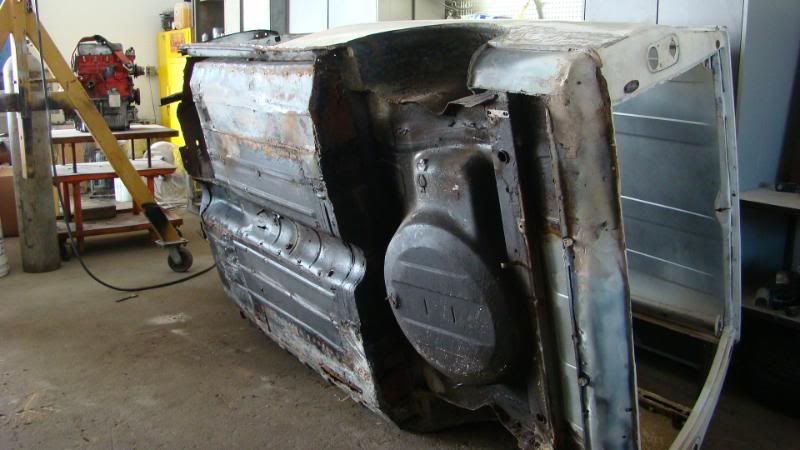
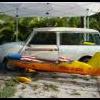
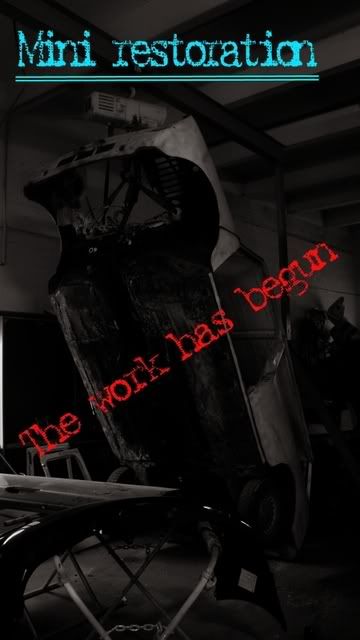
Well, here is what is what i'v done so far on restoring my Clubman Estate.

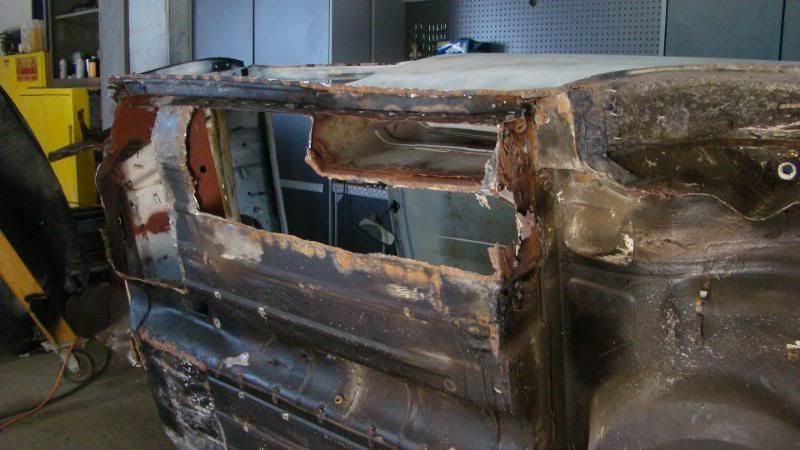
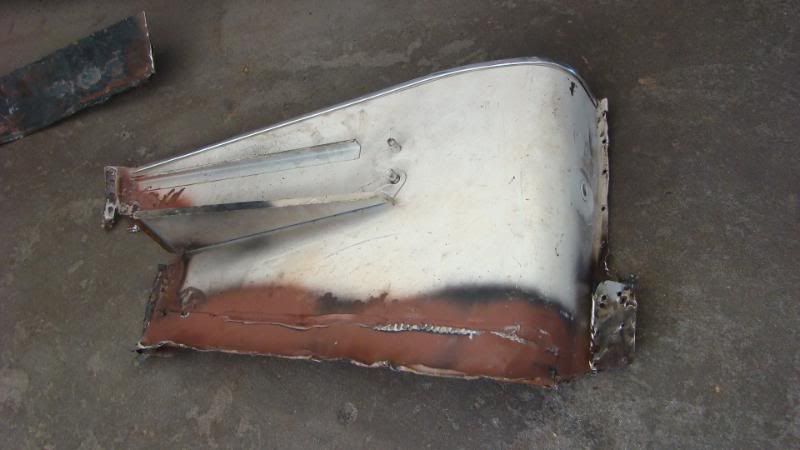
All panels that are rusted are going to be replaced. I have a Christmas list of panels from MiniMania that are waiting to be ordered but can't untill I earn some money :gimme: 
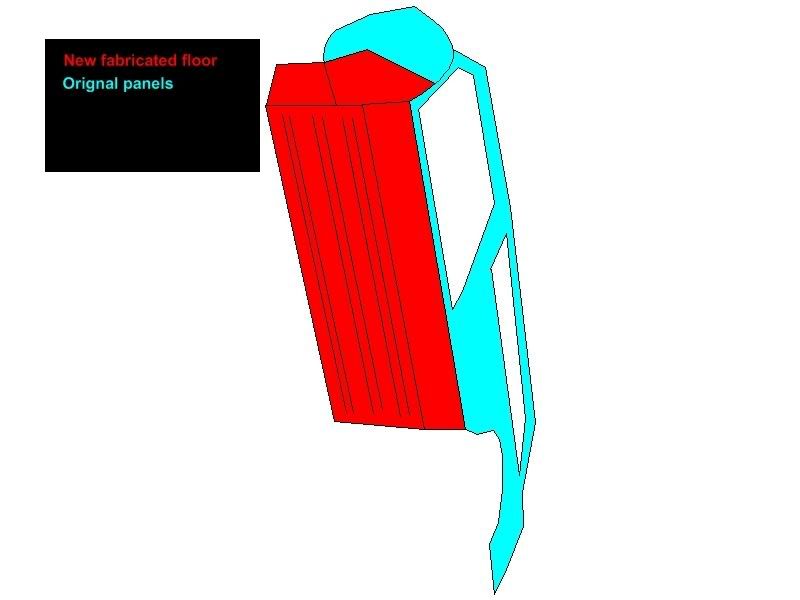
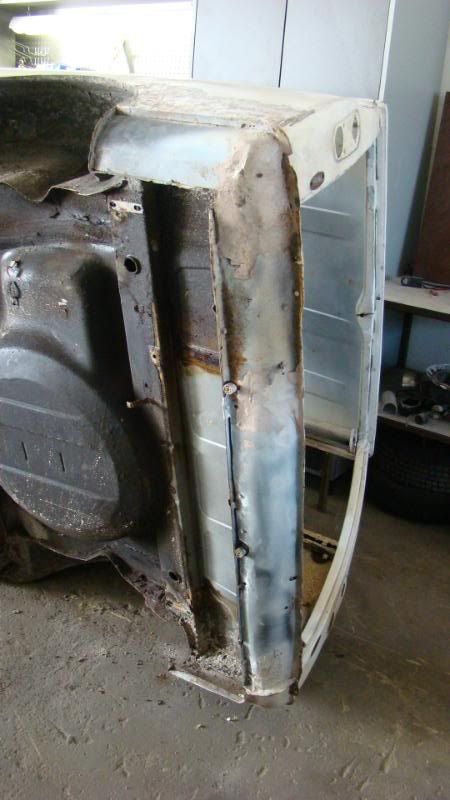
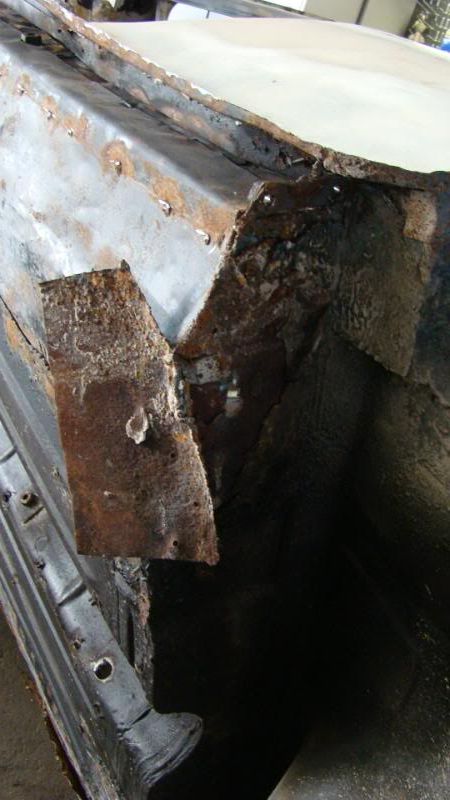
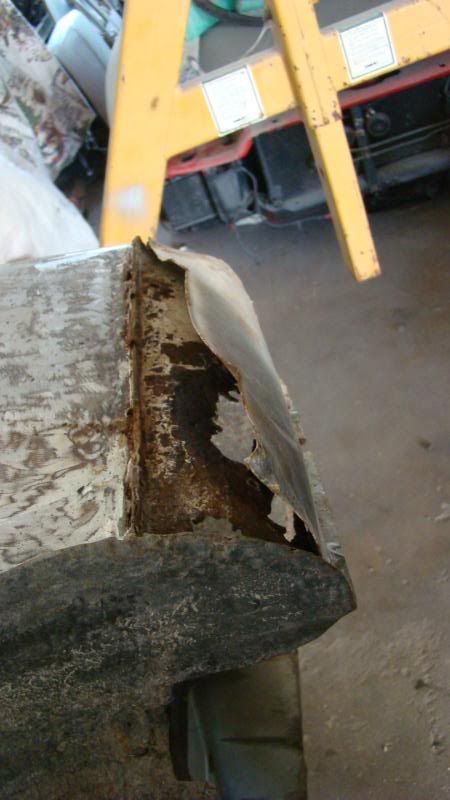
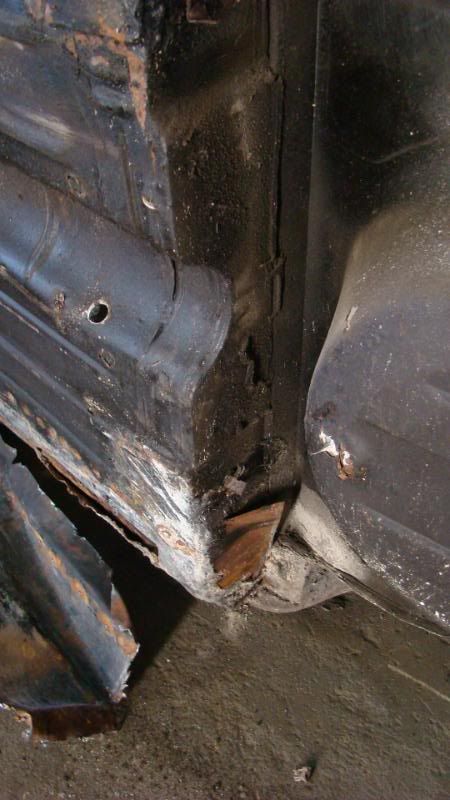
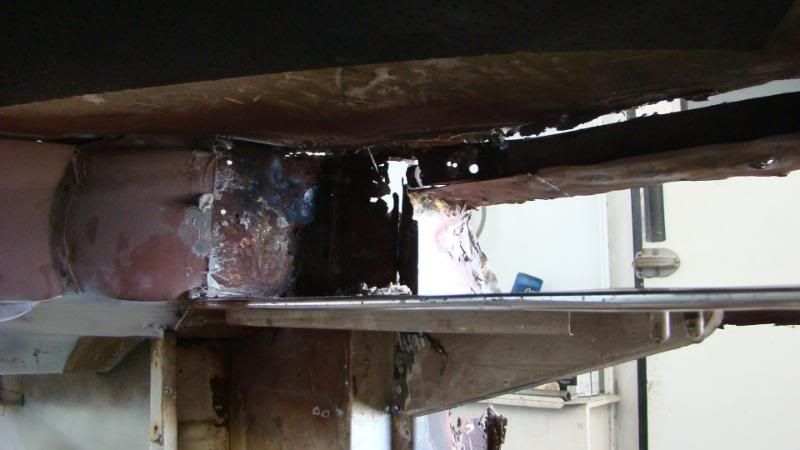
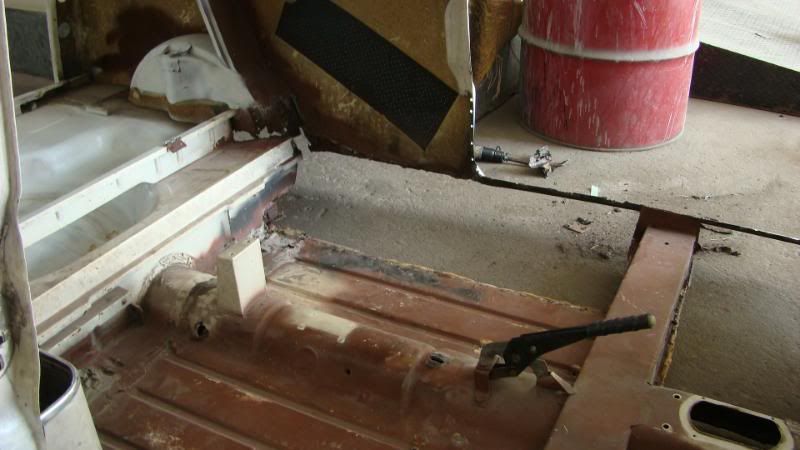
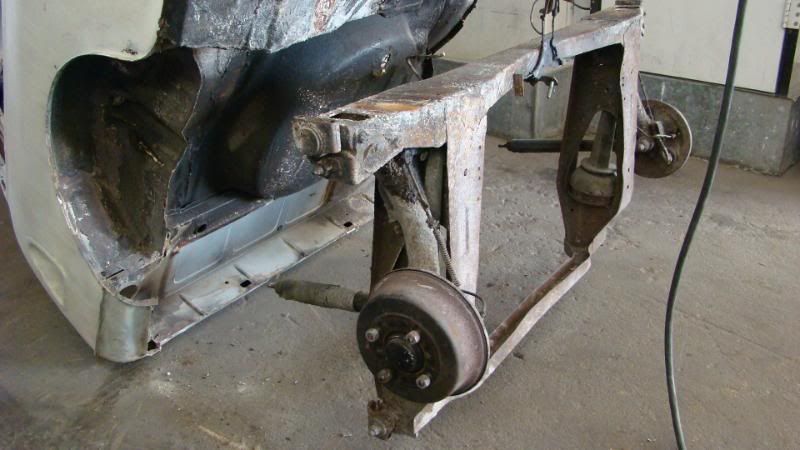
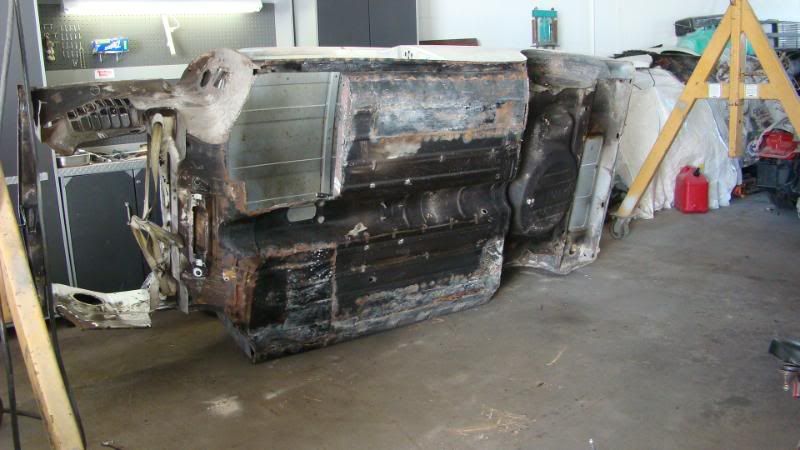
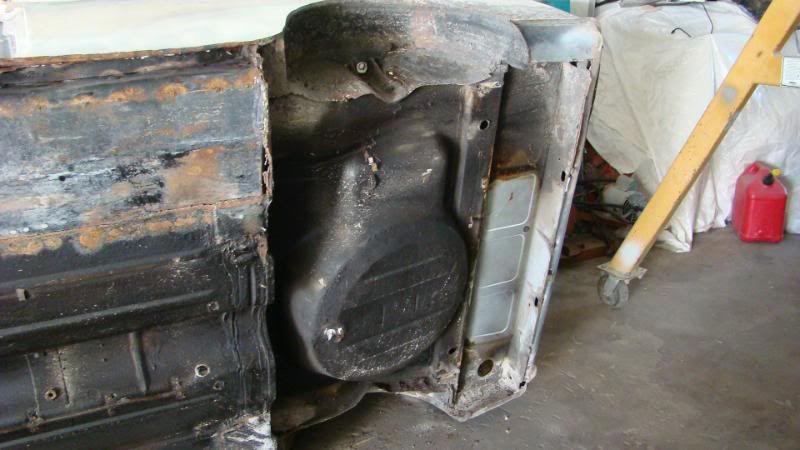
... The previous owner had "new" floor pans installed... who ever did it did A REALLY crappy job and made the floor pans from scratch! >;) 
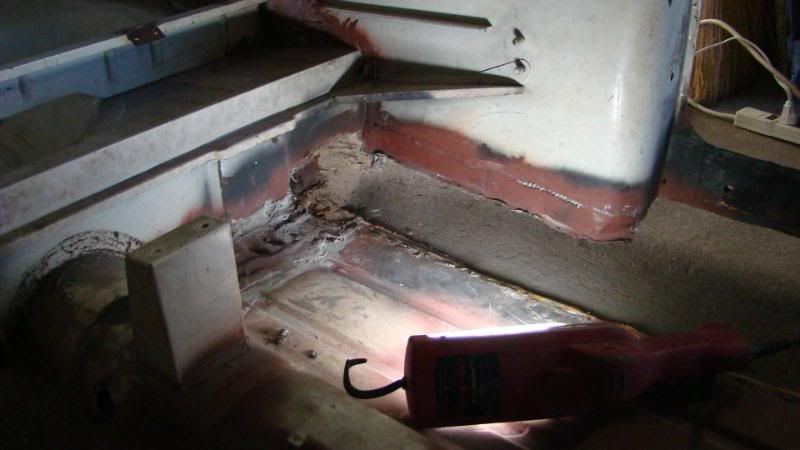
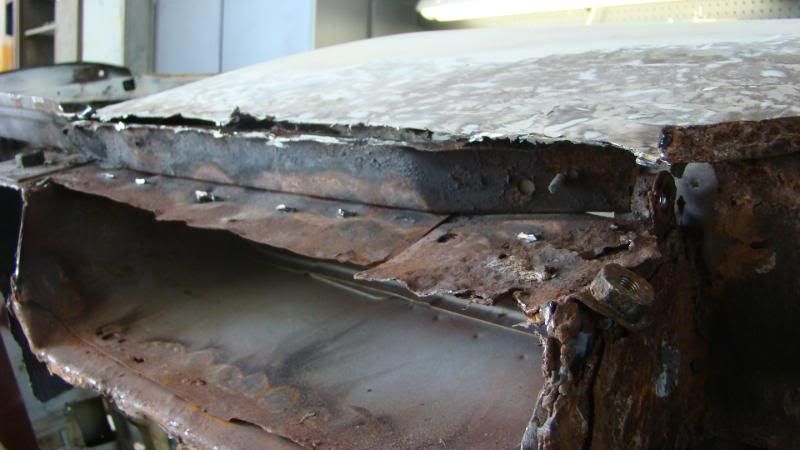
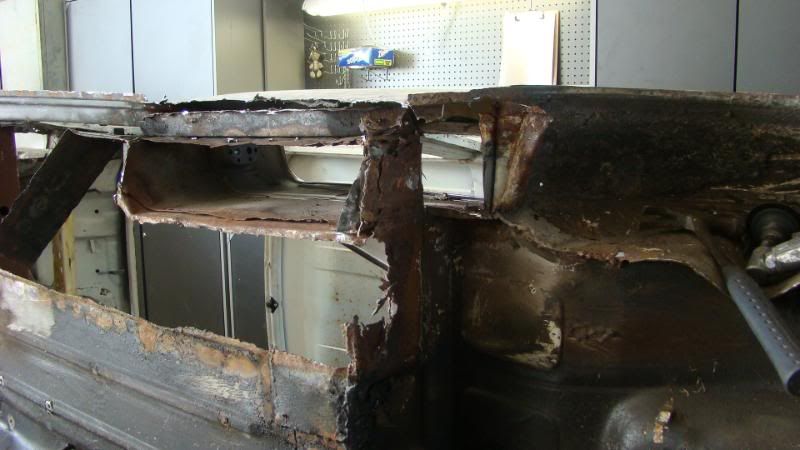
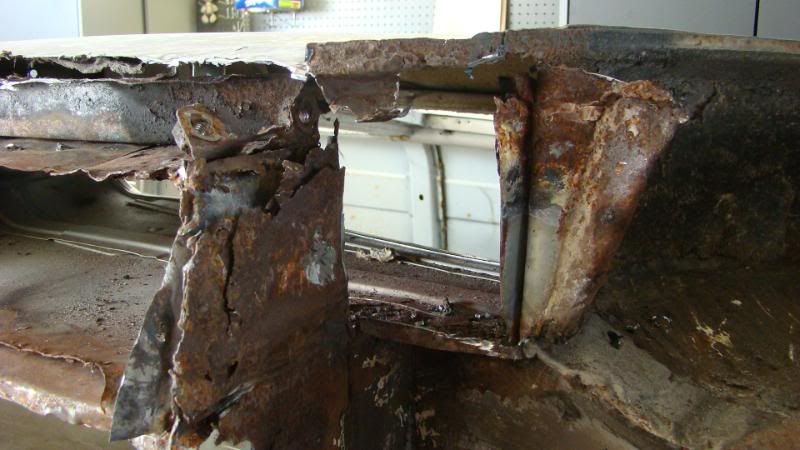
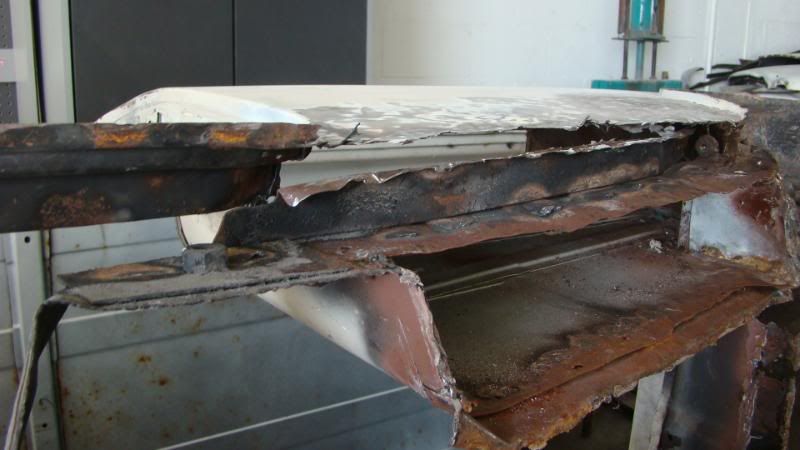
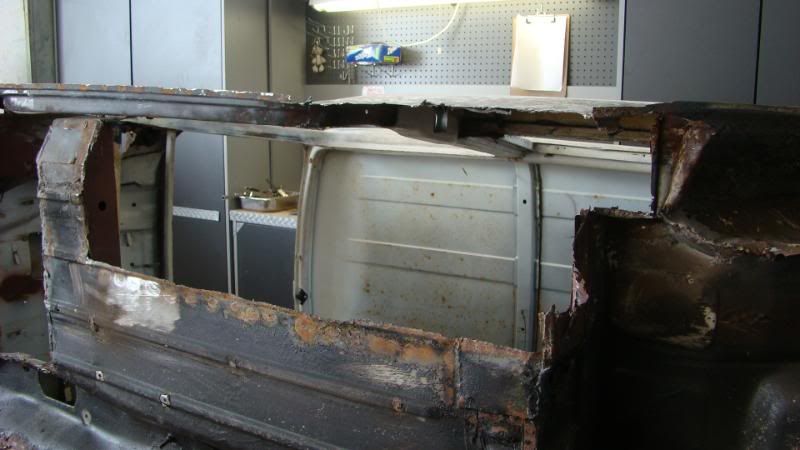
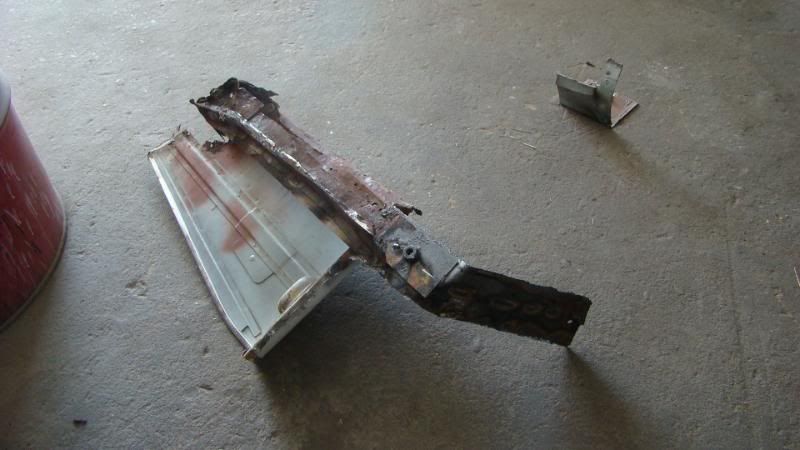
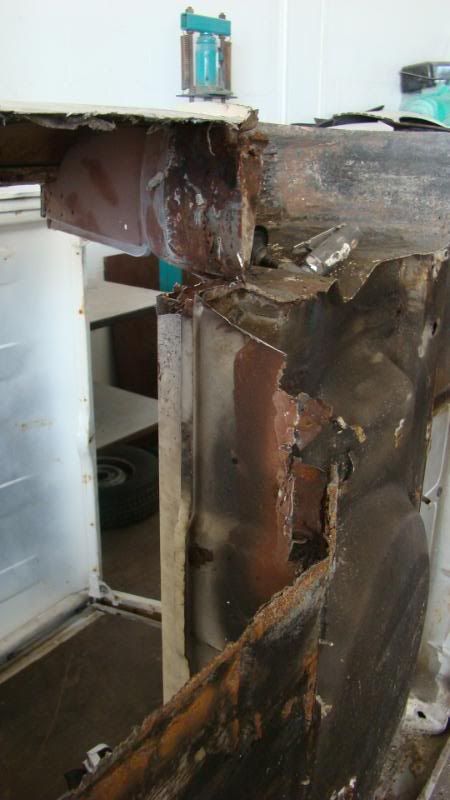
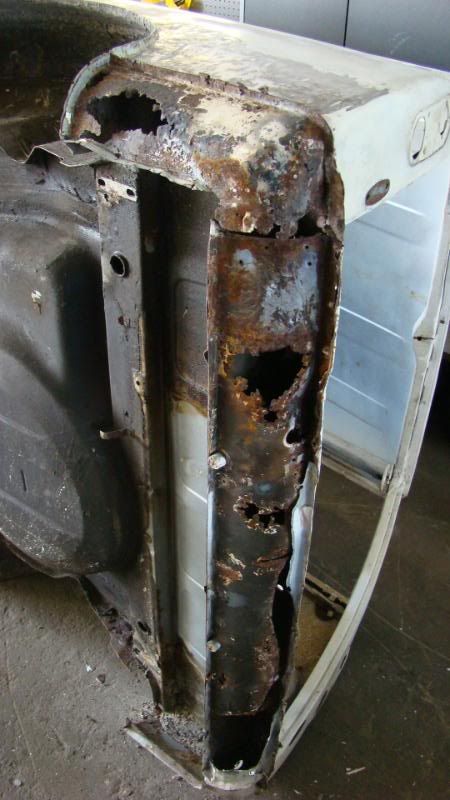
He wasted a bunch of time and money to get a half crack job and I CAN NOT live with it how it was. It was really bad as you can see in the pictures. so, pretty much, I'm gonna replace the whole entire floor along with the cross member. Also you can see how somebody had a welding frenzy on the crossmember that looks like they tried weld filling up a rust hole >:w00t: there are some more panels like the hinge scuttles and rear valances that need replacing also. To sum it all up, I have alotta work to do on the shell to get it ready for paint, but there is no rush so I want to make it as perfect as possible. I'm having a ball though! ;) 
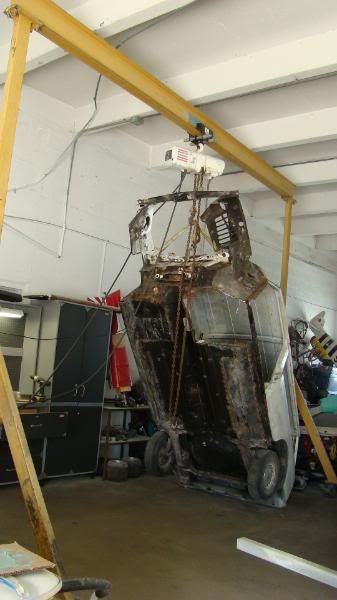
I'm lovin' how I'm learning how my CE was built and desgined and learning about all it's features and body lines and what not, stripping it down to the shell was alotta fun and now it's time for the grunt work of stripping old paint and bondo to make it all right. I say I probably have about 30 hours into it so far...


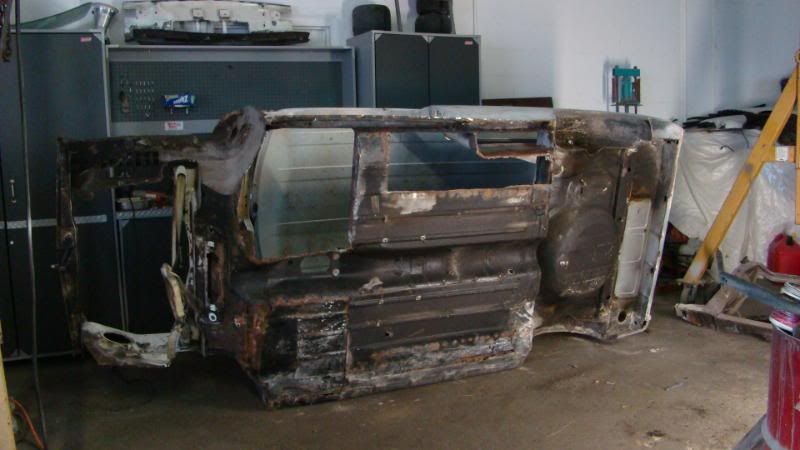
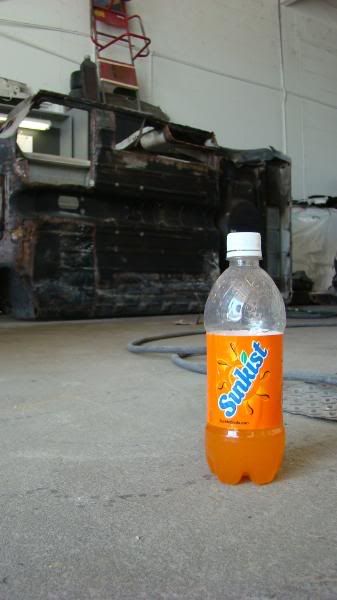
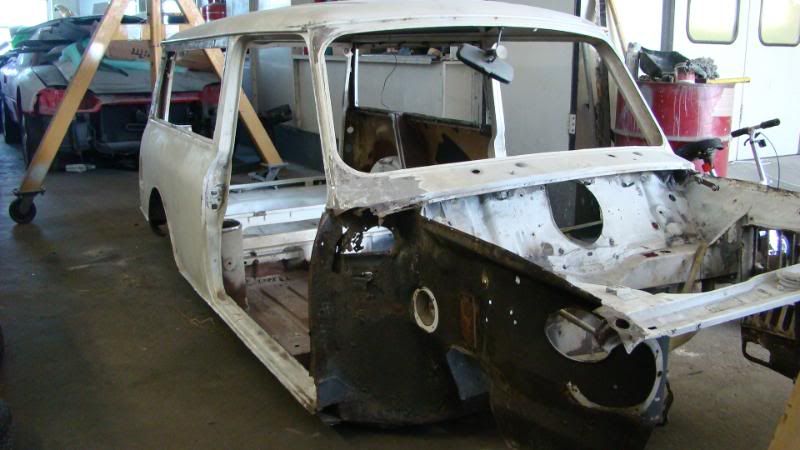
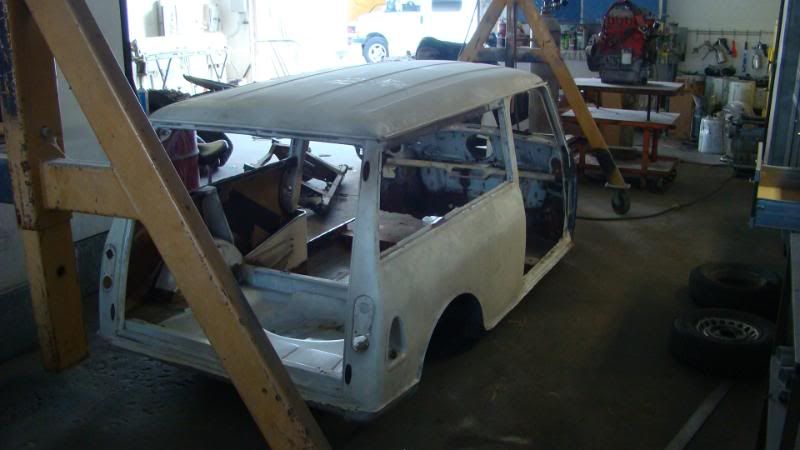
Here are alot of pics from the beginning of tearing it down to the shell. CLICK Here for pictures


From start to finished :gimme:

-Dan
Posted Image

Posted Image

Posted Image

Posted Image

Posted Image

Posted Image

Edited by rcbamm, 04 November 2008 - 12:04 AM.


#2 liam-ds

liam-ds

    Super Mini Mad

  • Traders
  • PipPipPipPipPipPip
  • 676 posts
  • Local Club: Barnsley mini club

Posted 07 September 2008 - 07:14 AM

good luck will keep an eye on this one

#3 rcbamm

rcbamm

    Mini Mad

  • Noobies
  • PipPipPipPip
  • 101 posts

Posted 10 September 2008 - 12:18 AM

Thanks!


Got some more accomplishments made today! I got the engine and suspension out of the subframe and powercleaned the subframe of any grease and oil. It's ready to be sand blasted and then painted black. I also got the left motor mount bracket paint stripped and then painted. That is the first fully restored part of the car! lol

TO bad my camera was dead! :thumbsup: will get more pictures soon as my is charged

Edited by rcbamm, 10 September 2008 - 12:26 AM.


#4 rcbamm

rcbamm

    Mini Mad

  • Noobies
  • PipPipPipPip
  • 101 posts

Posted 12 September 2008 - 04:50 PM

I was looking at my CE yesterday... with it's nose in the air and butt on the ground, I'm looking at the underside of the car, the floor. I'm gonna replace the whole floor except the center of the floor where the exhaust goes, basically the right floor and the left floor, is going to be completely replaced along with the right and left rocker panels or sills. so, I'm looking at it, studying it, and I think I'm just gonna make my own right and left floor. Everything is square and flat on the floor so it won't be hard. I'm gonna cutt out the whole enitre right and left floor, once that is done then I'm going to make some cardboard templates, then I'm going to the local sheet metal guy and gonna have him cutt my floors and then I will fabricate floors to the car. I am also gonna have him make me some like 2" wide U-channels like what is stamped into the orignal floor, sept I'm going to weld the U-channels to the bottom of the floor underneath the car. This will make it even stronger then the original floor and there will be just flatness all inside the car :thumbsup: it's going to be ALOT cheaper then buying the whole entire right and left floors that I'v found go for around $400 bucks a piece!

The pic may explain a bit better :)

Posted Image
Posted Image

Edited by rcbamm, 12 September 2008 - 04:55 PM.


#5 mk1leg

mk1leg

    Crazy About Mini's

  • Members
  • PipPipPipPipPipPipPipPipPipPip
  • 9,341 posts
  • Location: Jersey
  • Local Club: Mini Club Jersey, MCR

Posted 13 September 2008 - 12:25 PM

that may cost you more having them made and are they going to put flutes in,,,,,,I think your brave..............

Posted Image

this is from BMH.................. :o....the whole floor ass cost £500................... :dontgetit:

Edited by mk1leg, 13 September 2008 - 12:27 PM.


#6 rcbamm

rcbamm

    Mini Mad

  • Noobies
  • PipPipPipPip
  • 101 posts

Posted 13 October 2008 - 08:34 PM

that may cost you more having them made and are they going to put flutes in,,,,,,I think your brave..............

Posted Image

this is from BMH.................. :)....the whole floor ass cost £500................... :P


From my dad working next to a sheet metal shop for a few years, I know sheet metal isn't that expensive. I will only need them to bend it I believe twice along the length of each floor panel. Are flutes the little U-channels punched into the floor? if so, I'm gonna have three of those made to the length of the floor and probably 2-3 inches wide, and then tig weld them into place. This will make the floor even stronger and will also make the floor all smooth on the inside.

I'm sure I will only have $200-$400 into the whole floor being restored.

Edited by rcbamm, 13 October 2008 - 08:36 PM.


#7 rcbamm

rcbamm

    Mini Mad

  • Noobies
  • PipPipPipPip
  • 101 posts

Posted 17 October 2008 - 02:04 AM

More progress.


Posted Image


Posted Image


Posted Image

Posted Image


Posted Image


Posted Image


Posted Image


Posted Image


Posted Image


Posted Image

Posted Image


Posted Image

#8 rcbamm

rcbamm

    Mini Mad

  • Noobies
  • PipPipPipPip
  • 101 posts

Posted 17 October 2008 - 02:05 AM

All this wonderful metal and bondo work is DRIVING ME NUTS! :thumbsup: This is what you get when you try and pinch pennies at a backyard Miami body shop.


Posted Image


Posted Image


Posted Image


Posted Image


Posted Image


Posted Image

Posted Image


Posted Image


Posted Image

Edited by rcbamm, 17 October 2008 - 12:52 PM.


#9 Daveuk

Daveuk

    Speeding Along Now

  • Members
  • PipPipPipPipPip
  • 429 posts
  • Location: Lowestoft
  • Local Club: friendly with any mini people

Posted 19 October 2008 - 08:04 PM

i feel for you man! i had the same when i bought my mini with my heart and not head!

lets just say the whole floor has ended up being chopped out and a new piece going in!

good luck. i would say just sand all the rust down and prime to stop it from speading, if it look good to keep, keep it if not repair and replace!

Dave

#10 rcbamm

rcbamm

    Mini Mad

  • Noobies
  • PipPipPipPip
  • 101 posts

Posted 19 October 2008 - 09:16 PM

i feel for you man! i had the same when i bought my mini with my heart and not head!

lets just say the whole floor has ended up being chopped out and a new piece going in!

good luck. i would say just sand all the rust down and prime to stop it from speading, if it look good to keep, keep it if not repair and replace!

Dave


I am for sure replacing every panel that has rust going all the way through the panel.. well, not every single one, the panels that are $$ and hard to get, I am probably going to patch. For the panels that have surface rust, I am just gonna sand blast and prime. And yep, the whole floor is being replaced on mine. I'm just very glad that it is such a simple and square floor, that is why I am going to have my own floor pans made :shifty:

Edited by rcbamm, 19 October 2008 - 09:18 PM.


#11 mk1leg

mk1leg

    Crazy About Mini's

  • Members
  • PipPipPipPipPipPipPipPipPipPip
  • 9,341 posts
  • Location: Jersey
  • Local Club: Mini Club Jersey, MCR

Posted 19 October 2008 - 09:31 PM

I would put in some body stiffeners so not to distort shell just weld in 1" box tube from front rh door to back lh door and front lh door to back rh door and across diagnoally.......................

Edited by mk1leg, 19 October 2008 - 09:32 PM.


#12 rcbamm

rcbamm

    Mini Mad

  • Noobies
  • PipPipPipPip
  • 101 posts

Posted 31 October 2008 - 01:28 AM

I would put in some body stiffeners so not to distort shell just weld in 1" box tube from front rh door to back lh door and front lh door to back rh door and across diagnoally.......................


Yeah I will if I start to cutt more metal away. Right now the roof and bottom cross member are keeping it from twisting or bending. there are certain panels that are flexing on the floor but is not causing any twist or bending to the whole shell.. I'v noticed both door step panels have been replaced and I do not like how they did it. On the left side the whole door step and front of the quarter panel was bent in a 1/4" or so and this was due to the previous owner's body man welding in the home made floor pan and not making it straight. The whole lower quarter panel needs to be replaced with that replacement panel that goes infront of the wheel arch and has the door step already attached, and the lower quarter panel rear behind the arch needs a replacement panel aswell... Nothing I can't handle though :ph34r:

I'm picking up a fiber glass mini coop flip front end from a guy a few hours from me. WOHOO!!

#13 rcbamm

rcbamm

    Mini Mad

  • Noobies
  • PipPipPipPip
  • 101 posts

Posted 01 November 2008 - 10:54 PM

Picked up my FiberGlass mini front end today! The guy who had it was 3 hours away but it was a nice drive :D

The front is really nice and am really happy with it. It is very straight and I can't wait to test fit it to my CE.

Attached Files


#14 rcbamm

rcbamm

    Mini Mad

  • Noobies
  • PipPipPipPip
  • 101 posts

Posted 03 November 2008 - 11:59 PM

Got the FG mini front end pre-mounted to get an idea of how awesome it looks now ;)

can't wait to start putting metal back into the shell!

pics!

Attached Files


#15 edi57

edi57

    One Carb Or Two?

  • Members
  • PipPipPipPipPipPipPip
  • 821 posts

Posted 07 February 2009 - 09:11 PM

Any updates on your project?


0 user(s) are reading this topic

0 members, 0 guests, 0 anonymous users