Jump to content


Photo
- - - - -

mk2 rebuild


  • Please log in to reply
172 replies to this topic

#1 MINIMON

MINIMON

    Speeding Along Now

  • Members
  • PipPipPipPipPip
  • 454 posts

Posted 13 February 2007 - 07:53 PM

Posted Image


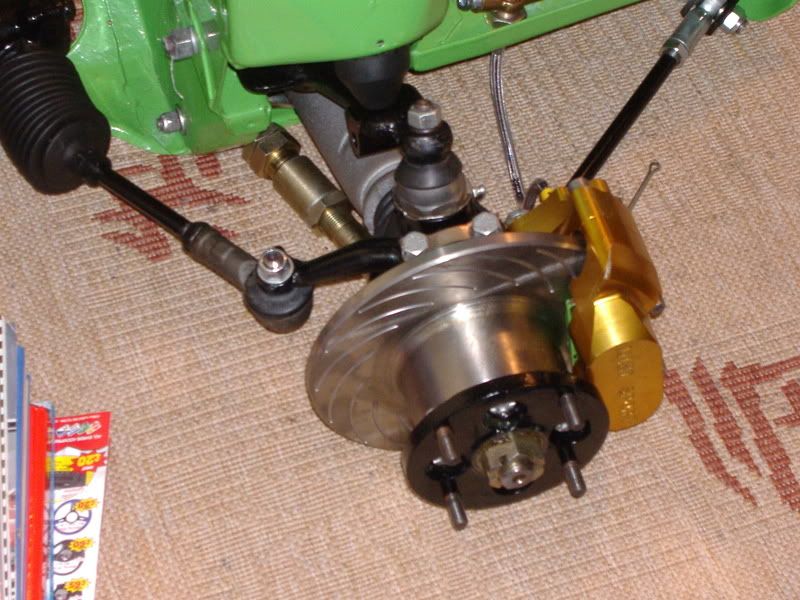
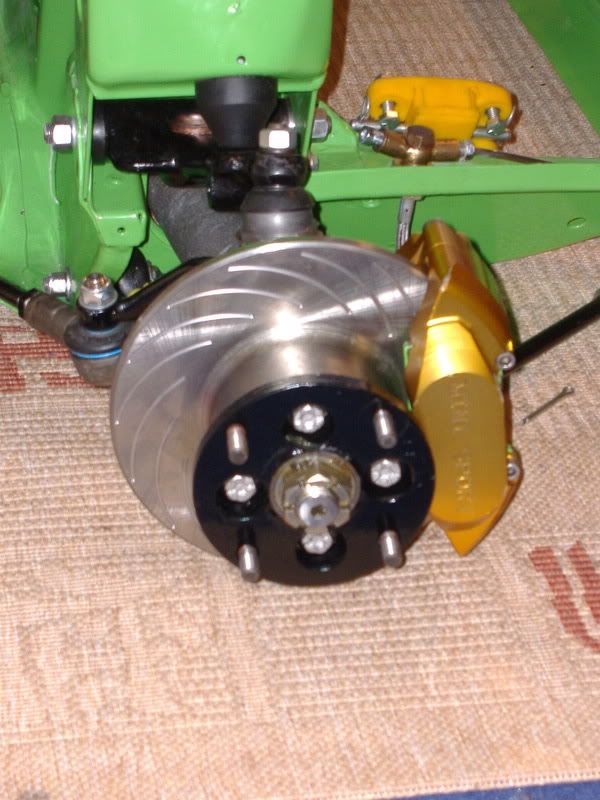
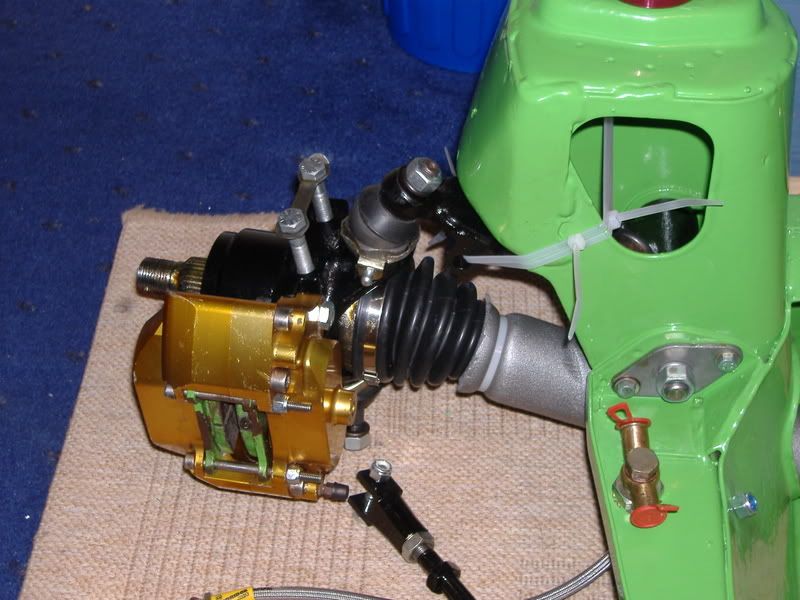
Hi all this is my first real entry in my journal im planning on getting it upto mint cond. over the next couple of weeks i will put up pics of what ive done so far, what ive got to do and what i need to do the first pic is really what ive done ive had the front subby powder coated green the hub driveshaft an drive flange powder coated black ive got MINISPORT non vented 7.9" callipers an discs green stuff pads flexy goodridge hoses all new bolts if its not new its restored, polished or cleaned all the things powder coated are what ive already had from the original car the callipers were also with the original which was a god send considering they are as dear as they are.

Posted Image

Posted Image

Posted Image

Posted Image

Posted Image

Posted Image


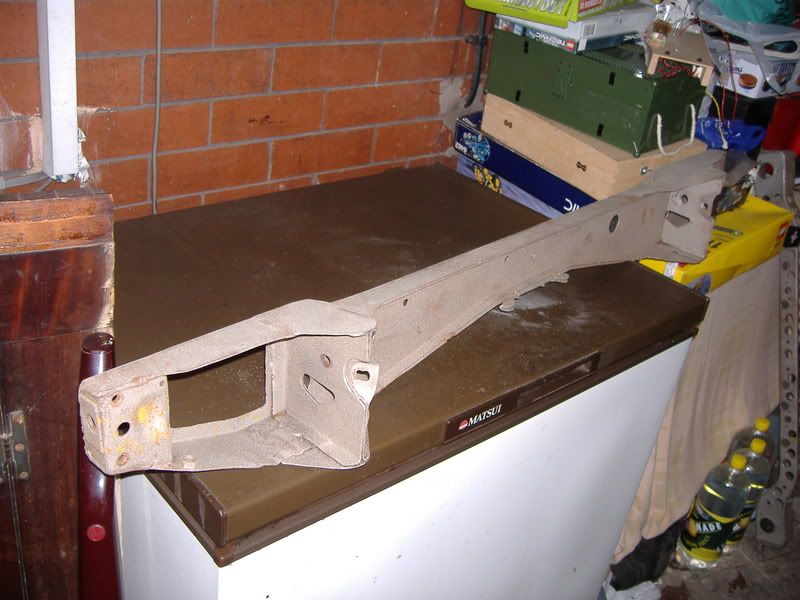
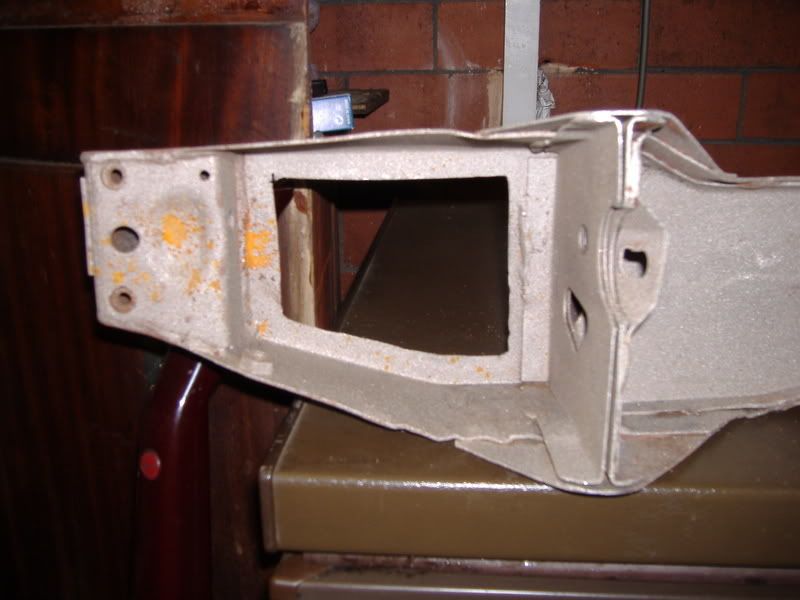
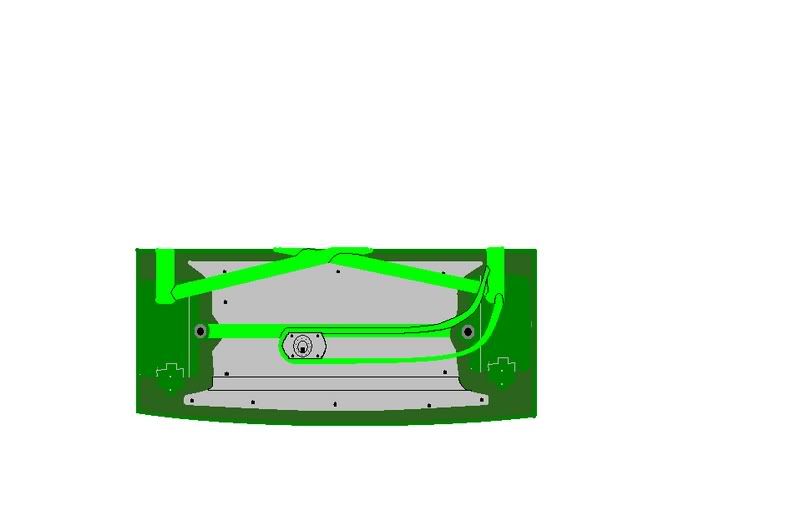
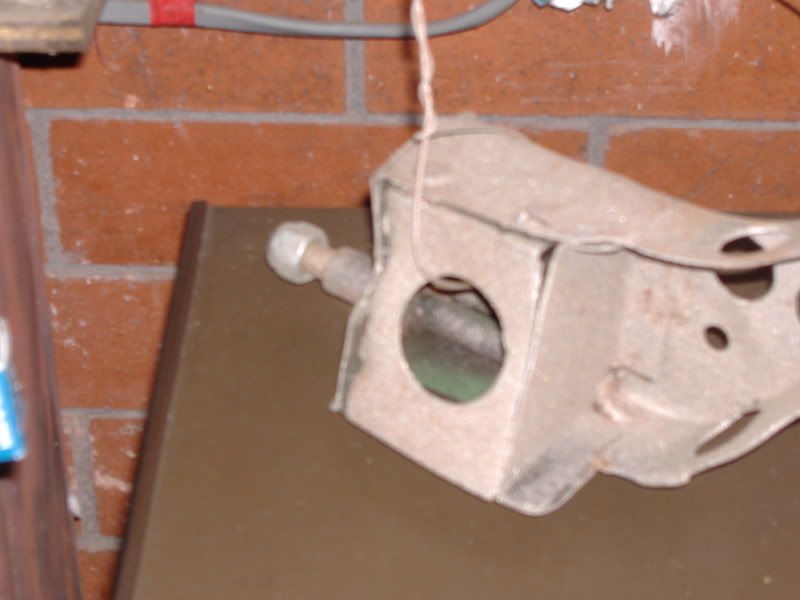
well thats about all i can think of for now really if i think of anything else i will add it an questions or specific pics i can help with just give me a pm or ask in the below post section these few pics of the rear subframe before i weld it an get it powder coated green also some pics were taken in the garage as it was raining when i took the pics these bits are so clean as they were shot blasted

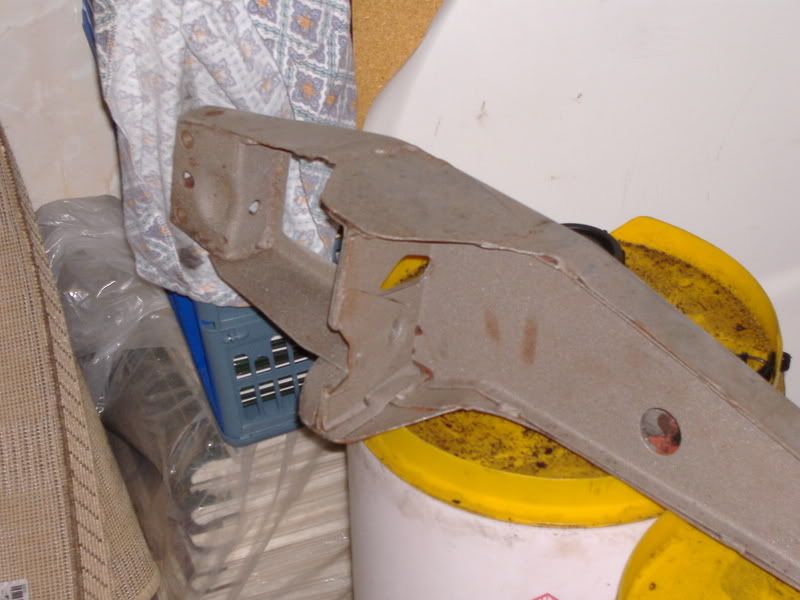
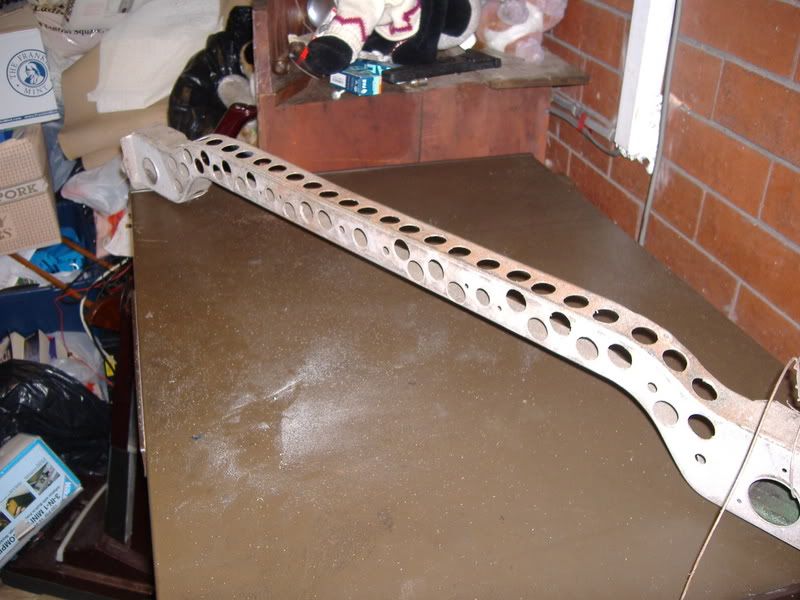
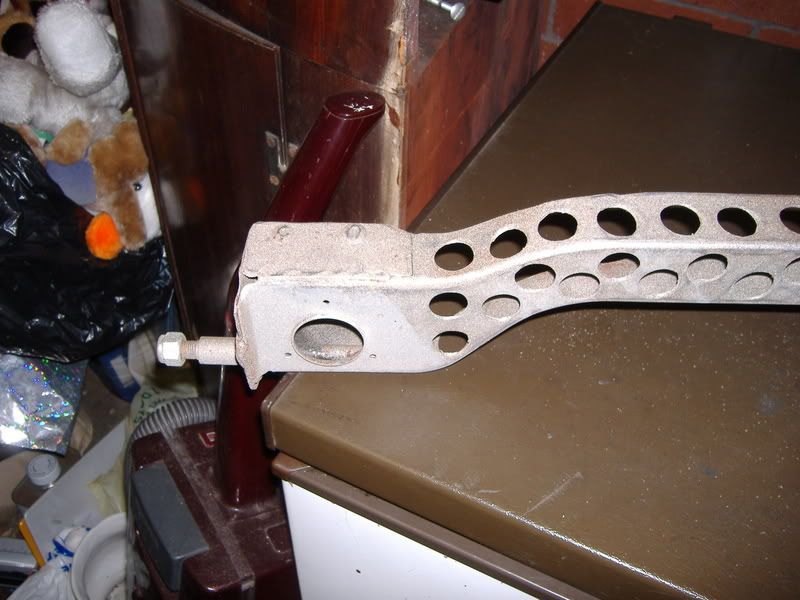
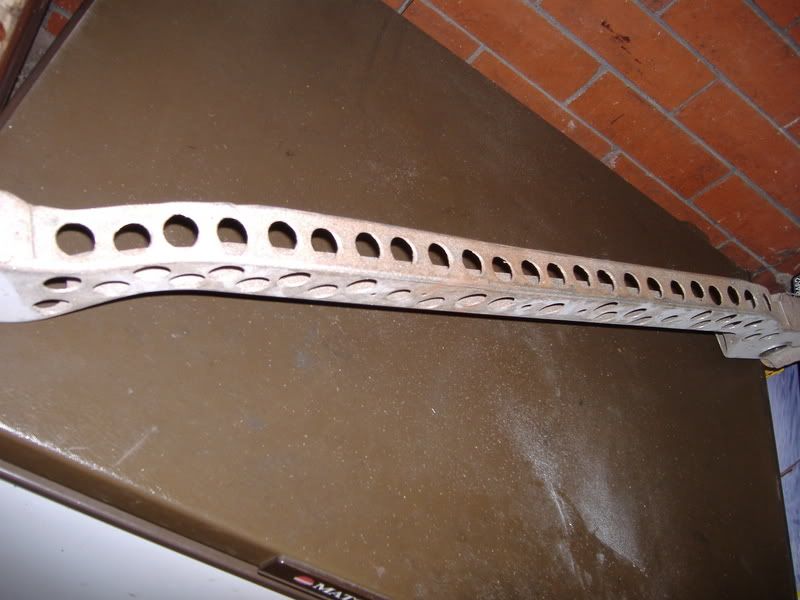
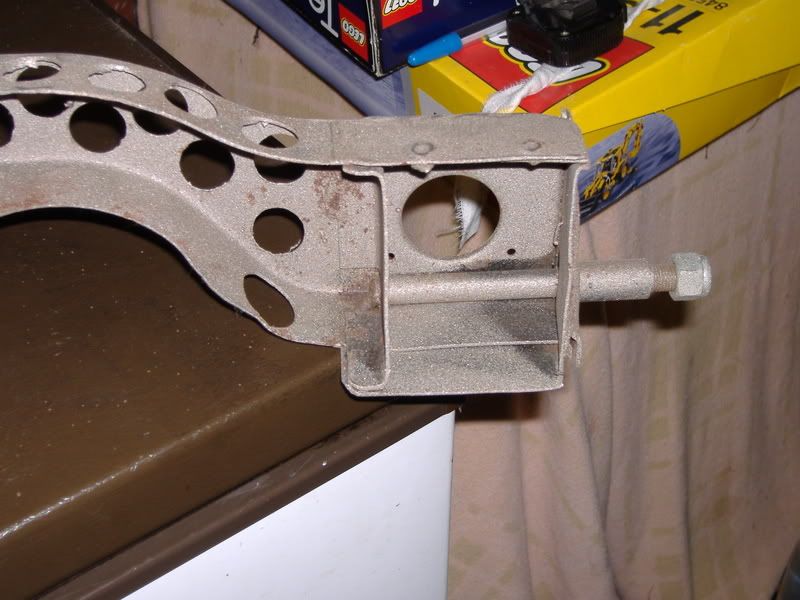
all the above pics are the rear subby that fastens to the heal bourd an the below pics are of the exhaust hanger there is so many holes in it as its only going to be holding the exhaust rear mount so isent under any real strain to be structual in any way

the next two pics showwhat needs to be done to the zorst hanger they both need their ends welding up

Posted Image

Posted Image

Edited by MINIMON, 13 February 2007 - 08:22 PM.


#2 MINIMON

MINIMON

    Speeding Along Now

  • Members
  • PipPipPipPipPip
  • 454 posts

Posted 13 February 2007 - 08:01 PM

Sorry iv not updated recently ive just been a bit busy buying a mini and im now the happy owner (hopefully) of a BRG mk2 that should be coming in the next few weeks ive not got the wheels that are on it but ive got some std 1100 special wheels ready to get split the car is on this forum an its ghetto_eddie that owns it

#3 MINIMON

MINIMON

    Speeding Along Now

  • Members
  • PipPipPipPipPip
  • 454 posts

Posted 13 February 2007 - 08:03 PM

been busy lately torqueing evrything up and now ive got to undo it all to fit it onto a single bolt front subframe which is a real ball ache but hay so is life

Posted Image

Posted Image

so far ive got :

fully adjustable bottom arms (rose jointed)
KAD tie rods fully adjustable (rose jointed)
reconditioned upper arms
solid mounts floor,top mounts,front mounts
all new bearings
polished top mounts(bolts)(no longer needed if i go the twin bolt route)
minisport 7.9" 4 pot calipers (came with the car so i didnt need to buy these
7.9"non vented disks
and new swivels
and this is how i am going to mount the rear subframe to the rollcage through the heal bourd

Posted Image

Edited by MINIMON, 15 September 2007 - 05:29 PM.


#4 MINIMON

MINIMON

    Speeding Along Now

  • Members
  • PipPipPipPipPip
  • 454 posts

Posted 13 February 2007 - 08:18 PM

Right well ive got a new shell of ghett_eddie on here and as ive not got the log book i can only guess this but its a 1967/8 mk2 its got a 1300 engine as ive just found out its got a hif44 its been FULLY deseamed and is in need of a few panels here are some pics of what it was like at ghetto eddies 56Kers turn back now lol

Posted Image

Posted Image

Posted Image

if you cant quite work out what this is its the boot floor looking down from the near side of the car

Posted Image

Posted Image

Posted Image

Posted Image

Posted Image

Posted Image

Posted Image

Posted Image

as you will be able to tell from the next pics i havent done much ive only chopped out one rear bin and the rear bench but i only got the car on the 3rd (saturday) if your reading this EDD thanks for delivery. and what a great safe jurney it was too lol all others reading this (the ratchet strap that was holding the mini on snapped)

Posted Image

The floor in the boot will probably be cut out so i can fit a curley bootfloor or an alloy panel i havent decided yet

Posted Image

Posted Image

Posted Image

this next pic isent what ive done before anyone panics

Posted Image

#5 MINIMON

MINIMON

    Speeding Along Now

  • Members
  • PipPipPipPipPip
  • 454 posts

Posted 13 February 2007 - 08:25 PM

and these next few are of the engine and the engine ancilleries

Posted Image

Posted Image

Posted Image

Posted Image

Posted Image

#6 $way

$way

    One Carb Or Two?

  • Members
  • PipPipPipPipPipPipPip
  • 720 posts
  • Location: Essex
  • Local Club: ...

Posted 13 February 2007 - 08:28 PM

alright geezer.

looks like youve got a bit of work to do on the mk2. shell good luck with it.

ill keep an eye on this thread because i want to see how you end up mounting the rear subframe.

been busy lately torqueing evrything up and now ive got to undo it all to fit it onto a single bolt front subframe which is a real football ache but hay so is life


youve got 2 years lol!

the rear half of the subframe looks a bit OTT for an exhaust hanger mate. youd save even more weight if you got rid of it and bolted a hook on a plate to the boot floor. this is what i intend to do.

J

#7 andywaller

andywaller

    Camshaft & Stage Two Head

  • Members
  • PipPipPipPipPipPipPipPip
  • 1,636 posts
  • Local Club: turbominis.co.uk

Posted 13 February 2007 - 08:34 PM

that front subframe looks mint.

and the shell looks like its going to be keeping you busy for a while!

i have to agree with $way that it would be better to fabricate some for of braket for the exhaust, although that bar looks well trick! i though i had light weighted mine but thats something else!

#8 MINIMON

MINIMON

    Speeding Along Now

  • Members
  • PipPipPipPipPip
  • 454 posts

Posted 13 February 2007 - 08:48 PM

Im planning on cutting the middle of the rear valance out like this

Posted Image

Posted Image

i will mount the rear mount (for the exhaust) upside down so i can get the exhaust higher and i dont think it will show as much i might also drill the front of the front subframe to look like the rear exhaust hanger and remove the panel in between the subframe mounts

The panels that need swopping are the:

passengers side floor welding in
Drivers side floor taking out and refitting (it was welded over the subframe bolts)
both ends of the heel bourd
rear of the drivers side sill inner/outer
passengers side rear sill inner and outer and front outer
little patches on the doors
little patch on the drivers side a-panel
Thats it really then i will modify
:gimme:

so i think it looks worse than what it is

Edited by MINIMON, 13 February 2007 - 09:05 PM.


#9 $way

$way

    One Carb Or Two?

  • Members
  • PipPipPipPipPipPipPip
  • 720 posts
  • Location: Essex
  • Local Club: ...

Posted 13 February 2007 - 09:18 PM

i will mount the rear mount (for the exhaust) upside down so i can get the exhaust higher and i dont think it will show as much


i dont think it will fit upside down. wont it fowl on the boot floor.

i wouldnt drill as much into the front or the subframe as you have in the rear, it will lose too much strength.

#10 MINIMON

MINIMON

    Speeding Along Now

  • Members
  • PipPipPipPipPip
  • 454 posts

Posted 14 February 2007 - 12:48 AM

This is what the alloy floor that i will be making will look like from a side view and as for the front subframe i will only drill and strenghten in the same places as MOWOG has on his subframe

Yet again another great picture produced by me (LOL LOL LOL)

Posted Image

#11 $way

$way

    One Carb Or Two?

  • Members
  • PipPipPipPipPipPipPip
  • 720 posts
  • Location: Essex
  • Local Club: ...

Posted 14 February 2007 - 12:22 PM

as for the front subframe i will only drill and strenghten in the same places as MOWOG has on his subframe


sorry i thought you were drilling the front of the rear subframe....

what are you going to do at the edges where the arches meet the floor?

J

#12 MINIMON

MINIMON

    Speeding Along Now

  • Members
  • PipPipPipPipPip
  • 454 posts

Posted 14 February 2007 - 08:40 PM

im guessing now your refering to the rear subframe that will stay std are you thinking im going to replace the whole floor with alloy ?

im not im cutting out a rough outline approx 5" from the outside of any object eg
im getting quite good at this paint stuff aint i lol lol lol

Posted Image


ive not put little words on this as i think you can guess what the things are

as you can tell im painting the shell BRG but its just dauned on me that i havent got a roof seam to define white union jack roof and green body any ideas what i can do to overcome this

Edited by MINIMON, 14 February 2007 - 09:03 PM.


#13 $way

$way

    One Carb Or Two?

  • Members
  • PipPipPipPipPipPipPip
  • 720 posts
  • Location: Essex
  • Local Club: ...

Posted 14 February 2007 - 11:55 PM

im guessing now your refering to the rear subframe that will stay std are you thinking im going to replace the whole floor with alloy ?


haha its so confusing :( i did think you were going to yes. leaving a 5" lip make sense.

cant see any picture??

i dont think youd get away with anything other than having one colour without a roof seam... others might have suggestions...

#14 MINIMON

MINIMON

    Speeding Along Now

  • Members
  • PipPipPipPipPip
  • 454 posts

Posted 15 February 2007 - 08:31 PM

this is the pic Posted Image

not sure about this colour idea what do you thing ?
my idea was,

one above the other on the bottom BRG on the top white

Posted Image

now int the next few pictures you will be able to see the frenched in light idea what do people think of this before i do it anyone also know how to do it before i go and do it in some really complicated way this is roughly if you add an inch or so how low the arches over the wheels will be and this is on 12" wheels so will be 2" lower to the ground in theory

ive just recived an order from minispares and ive got a pedal box pin finally ive looked and asked everyone for one but there comments were no dont have any and i asked minispares and they gave me a choise dependant on year

i also managed to cut the nsf floor pan to small :P :D

ive managed to finally take the doors off and they dont look all too bad

Posted Image

Posted Image

Posted Image

Posted Image

Posted Image


i quite like the no arch look ive got ideas for my 7x10s i always struggeling as to what arches to get now o know im not getting any

Posted Image

below is probably my most popular pic so far yum yum yum yum yum yum yum yum yum
Posted Image

Posted Image

Posted Image

56kers if your still managing to hang on thanks very much for the patience and sorry for all the pics

Edited by MINIMON, 28 February 2007 - 10:36 PM.


#15 MINIMON

MINIMON

    Speeding Along Now

  • Members
  • PipPipPipPipPip
  • 454 posts

Posted 21 February 2007 - 07:28 PM

well what does everyone think dont bother about holding back go for it ,say what you think if you think it say it


if any bad comments are written i will have my revenge muwhahahahahahahahahaha anyway please comment


0 user(s) are reading this topic

0 members, 0 guests, 0 anonymous users