Jump to content


Photo
- - - - -

Step By Step Engine Build, No Waffel, Just Building..


  • Please log in to reply
116 replies to this topic

#16 AndyMiniMad.

AndyMiniMad.

    Up Into Fourth

  • Members
  • PipPipPipPipPipPipPipPipPip
  • 3,290 posts
  • Location: Under The Bonnet.

Posted 11 December 2011 - 05:24 PM

Thanks guys...

Im waiting for some bits from Minispares before I can get much more done..I did get my diff back from Guessworks and this is how I did the preload..

First I fitted the side plate and gasket on the drivers side..

Posted Image

Then I fitted the cover plate on the side that will need to be shimed and pushed the diff over to the drivers side as far as it would go, I measured the gap betwen the side cover and the bearing..

Posted Image

The gap is 0.008" and when added to the gasket thickness 0.002" (crushed) makes a gap of 0.01"

According to Minispares the preload on these type of bearings is 4thou....So by my calculations i need a shim at 0.014"

I dont have any shims that make the exact preload, but I reckon that the hylomar will create the extra 1thou required..

Posted Image

So thats the diff shims sorted....

#17 AndyMiniMad.

AndyMiniMad.

    Up Into Fourth

  • Members
  • PipPipPipPipPipPipPipPipPip
  • 3,290 posts
  • Location: Under The Bonnet.

Posted 15 December 2011 - 10:32 PM

Its been a while since my last update on this engine build, Ive been busy building the gearbox for this engine, As this is just about the engine build Im not going to go into great detail about the box...Its a standard box with all new bearings and Baulk rings, Central oil pick up, 3.44 FD. and a cross pin diff.

Posted Image

Anyway the next bit was to get the box and short motor joined together, I cleaned the surfaces to get rid of all dirt and oil and then spread a thin layer of gasket sealent onto both the gearbox and block.

Posted Image

Posted Image

I placed the half moon seal onto the gearbox and did'nt forget to fit the "O" ring oil seal..

Posted Image

I use Loctite 5922, But Hylomar is just as good.

Posted Image

On go the new gaskets and then I carefully lowered the gearbox onto the block..

Posted Image

I ordered a new bolt kit from Minispares and tightened it all down..

Posted Image

The gaskets are always a bit to long so I trimmed them off once every thing was tight.

Posted Image

I cleaned up the timing cover back plate and stuck the gasket to the back of it..

Posted Image

This is it bolted to the block.. I had painted the cam plate bolts so as not to confuse them with others,

Posted Image

At this stage I realised I had forgotten to fit the Oil gallery plugs so I removed the plate and fitted them.

The next bit is to fit the oil pump...if you dont fit it at this stage you will find it hard to get the timing gear on as it will push the cam out the other end of the block..

Gasket in place...I dont use any sealent on this gasket,

Posted Image

High capacity oil pump Fitted...I filled it with oil before fitting... a lot of the oil will leak out, but it helps when priming the pump later if some oil is in there..

Posted Image

Edited by AndyMiniMad., 15 December 2011 - 10:45 PM.


#18 AndyMiniMad.

AndyMiniMad.

    Up Into Fourth

  • Members
  • PipPipPipPipPipPipPipPipPip
  • 3,290 posts
  • Location: Under The Bonnet.

Posted 15 December 2011 - 11:03 PM

Next was to fit the timing gear..I made sure that Piston 1 was at TDC and pushed the gears on over the woodruf keys..I lined them up dot to dot which will be fine for this engine spec.

Posted Image

Edited by AndyMiniMad., 15 December 2011 - 11:09 PM.


#19 AndyMiniMad.

AndyMiniMad.

    Up Into Fourth

  • Members
  • PipPipPipPipPipPipPipPipPip
  • 3,290 posts
  • Location: Under The Bonnet.

Posted 15 December 2011 - 11:16 PM

So here it is all lined up and with the tensioner fitted.

Posted Image

The oil thrower ring is fitted to the crank with the F towards the timing cover.

Posted Image

I cant tighten the cam bolt yet untill I get the transfer housing and flywheel fitted, this will enable me to lock up the engine with an old mains bearing.

So with all that done I fitted the core plugs.. A bit of sealent and then useing a suitably sized socket I hamered them in.

Posted Image

#20 PhilipGCaldwell

PhilipGCaldwell

    One Carb Or Two?

  • Members
  • PipPipPipPipPipPipPip
  • 870 posts

Posted 16 December 2011 - 08:17 AM

I've read that dot to dot sproket method can be out by as much as 12 degrees, worth checking for peace of mind?

#21 AndyMiniMad.

AndyMiniMad.

    Up Into Fourth

  • Members
  • PipPipPipPipPipPipPipPipPip
  • 3,290 posts
  • Location: Under The Bonnet.

Posted 16 December 2011 - 02:33 PM

Ok what do people think? do you want to see how to time in a cam with a DTI? or are you happy with dot to dot?

#22 danny1

danny1

    In the navy you can sail 7 peas

  • Members
  • PipPipPipPipPipPipPip
  • 1,321 posts
  • Local Club: bumpstart

Posted 16 December 2011 - 03:32 PM

id like to see it with dti, as ive never seen it done before, if its not to much trouble

#23 liirge

liirge

    Up Into Fourth

  • Members
  • PipPipPipPipPipPipPipPipPip
  • 4,097 posts
  • Local Club: EDMC AND MMC

Posted 16 December 2011 - 03:34 PM

id like to see it with dti, as ive never seen it done before, if its not to much trouble

It's the most laborious task that one has to do on an engine build!

#24 Ethel

Ethel

    ..is NOT a girl!

  • TMF Team
  • PipPipPipPipPipPipPipPipPipPipPip
  • 25,415 posts
  • Local Club: none

Posted 16 December 2011 - 04:27 PM

Maybe a separate topic on cam timing?

Great effort Andy, it must take some self control to take piccies when you're more concerned with getting it together properly.

A few of my quirks:

I like to run all the studs & bolts into their holes before I start so I know there'll be no issues when the engine is half built and that everything can torque up cleanly (no stiff or bottomed threads). I'd also give the C washer a good coat of RTV. Some will also prime the oil pump with LM grease - but you might have another way when you get round it :). We could also have a discussion on when's best to fit the pump & maybe we should make it clear that centering the rocker pads is a good idea, but not if your are reusing part worn rockers.

By all means tell me to butt out of your topic if you like, I only commented because it's looking good enough to pin :thumbsup:

We could open another to discuss the issues it throws up.

#25 AndyMiniMad.

AndyMiniMad.

    Up Into Fourth

  • Members
  • PipPipPipPipPipPipPipPipPip
  • 3,290 posts
  • Location: Under The Bonnet.

Posted 16 December 2011 - 05:29 PM

Thanks Ethel thats good advice..I will post the cam timing in this thread, and if its ok ill do another thread just with the cam timing...Im actually quite enjoying taking the photos and documenting everything.

#26 jinjrich

jinjrich

    Super Mini Mad

  • Members
  • PipPipPipPipPipPip
  • 543 posts
  • Location: York
  • Local Club: YMMOC

Posted 16 December 2011 - 05:33 PM

Fantastic. Really helpfull and a good build.

#27 Ethel

Ethel

    ..is NOT a girl!

  • TMF Team
  • PipPipPipPipPipPipPipPipPipPipPip
  • 25,415 posts
  • Local Club: none

Posted 16 December 2011 - 05:40 PM

I was thinking several smaller topics might be easier, you can then just put hotlinks in.

So if you're just timing a cam, fitting out a head etc. you have all you need in one topic. But you can still follow through a full rebuild by following the links.

It'd also mean we can cover different setups without rewriting lots, for example, we could add a link to fitting roller rockers next to one for setting up the standard ones.

#28 Carlos W

Carlos W

    Mine is purple, but I have been told that's normal

  • TMF+ Member
  • PipPipPipPipPipPipPipPipPipPipPip
  • 10,110 posts
  • Location: Sittingbourne, Kent

Posted 16 December 2011 - 05:44 PM

I'll have the laptop in the garage when I build my engine using this thread

Or...... I could just build the engine in the living room????

#29 AndyMiniMad.

AndyMiniMad.

    Up Into Fourth

  • Members
  • PipPipPipPipPipPipPipPipPip
  • 3,290 posts
  • Location: Under The Bonnet.

Posted 16 December 2011 - 06:18 PM

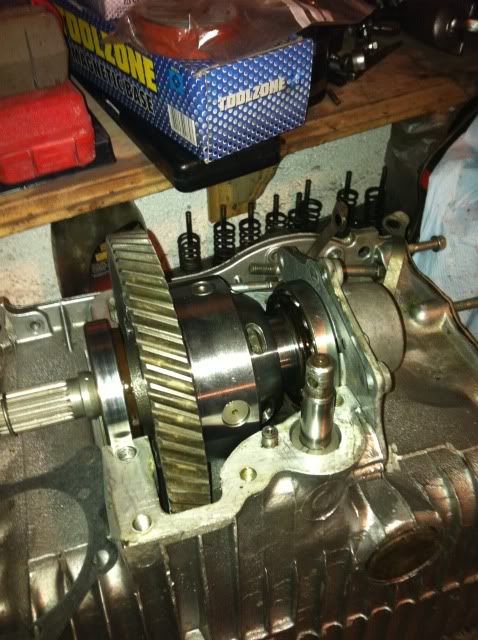
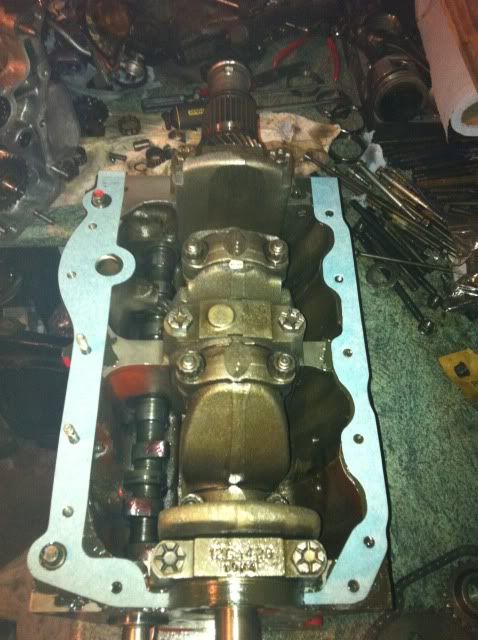
This bits for you then Danny1...

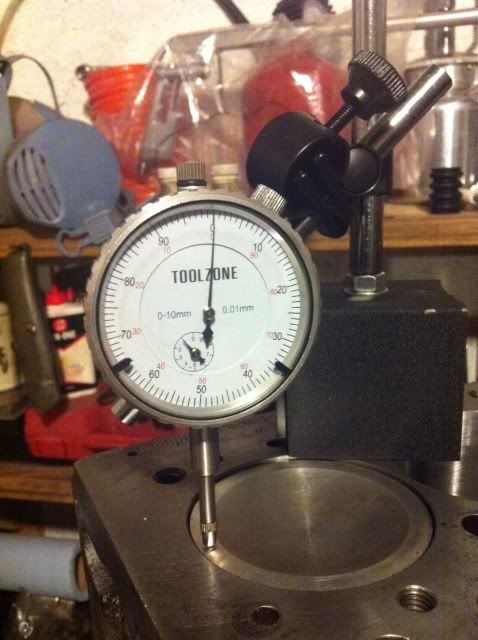
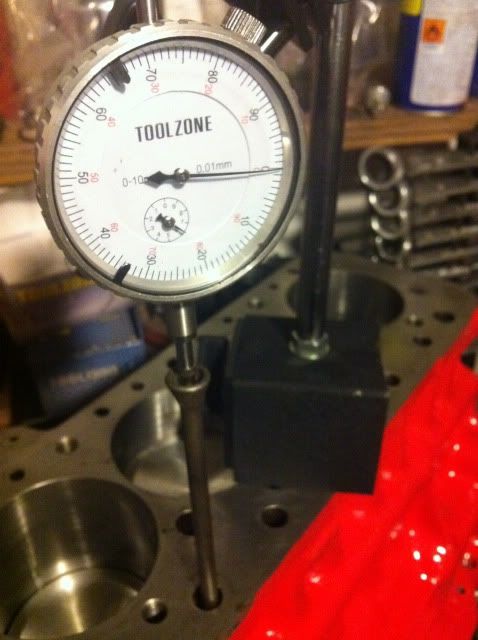
So first thing to do is to set the DTI up on piston number 1, Thats the one nearest to the front, (water pump end), of the block. Set it with a small preload, you will get much more accuracy with the readings

Turn the crank untill the piston is at TDC...you will see the dial spin round and then stop.it will then go back the other way..turn the crank untill the dial reaches the point where it changes direction. This point is TDC. Now zero the dial and move the crank back and fore a small amount to check its at zero on TDC.

Posted Image

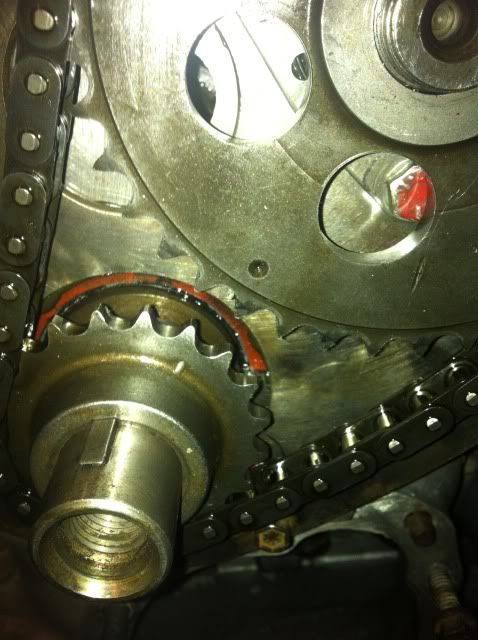
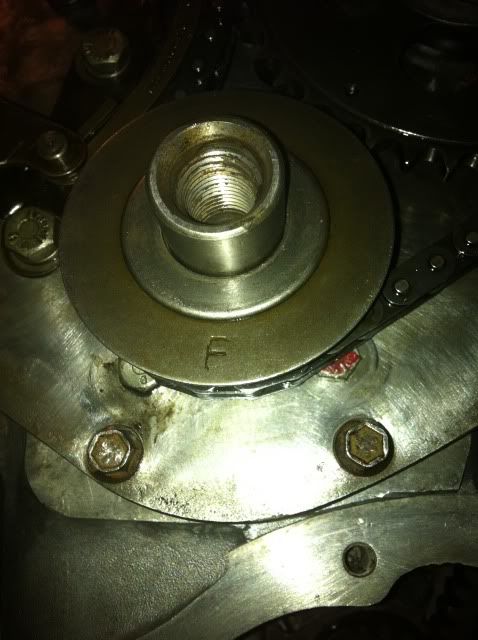
Next you can loosly fit the protractor wheel to the end of the crank and fit a bit of stiff wire. I use a bit of fence wire and attach it to the timing cover bolt. Turn the wheel so its TOP mark is uppermost and tighten the bolt so its fixed to the crank..Then move the bit of wire untill it points to the TOP mark..

Posted Image

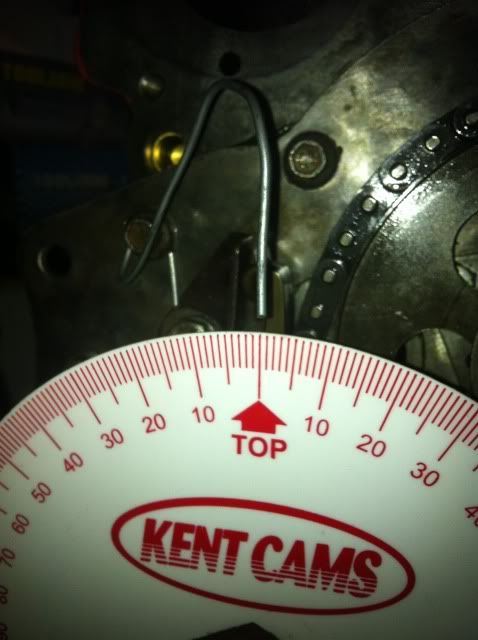
Ok so now you are at TDC with a zero reading on the protractor wheel...

Next you pop a push rod down the number one inlet hole, (second one from the front) and make sure its seated in the follower. Then you can set up your DTI onto the push rod..again with a little preload.

Posted Image

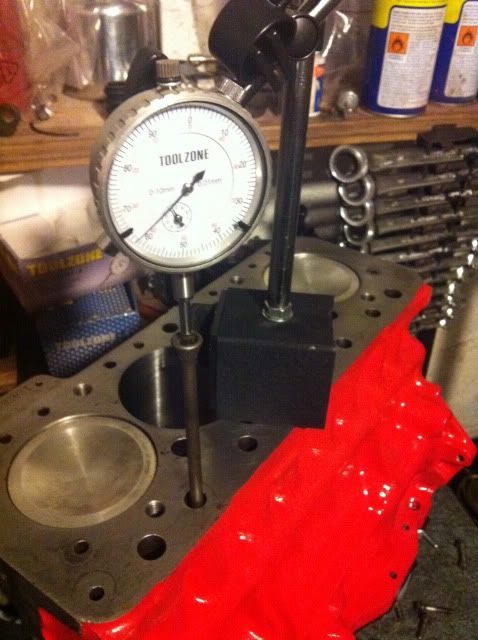
Dont wory about the reading on the DTI at this stage. Right so now you need to turn the crank forwards, Thats clockwise when looking at the front, You will see the DTI spin round a few times and then slow down and stop. move the crank back and fore untill you are sure the needle is at the point where it changes direction. Again zero the DTI. The cam is now at maximum lift on number 1 inlet .
Posted Image

My protractor wheel was reading 112deg ATDC at this point of maximum lift.

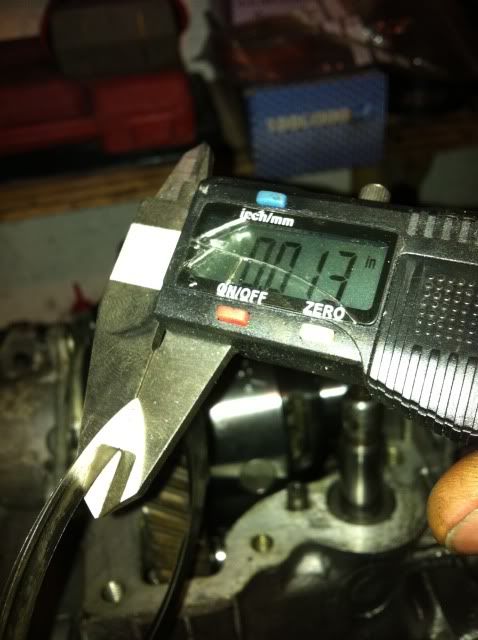
Turn the crank backwards untill the DTI reads 0.025"

Next you need to slowly turn the crank forwards until the DTI reads 0.005" mark..Mine is a metric DTI so the reading is 0.127mm. you will find this quite tricky to get exact and a bit of forwards and backwards movement on the crank will be required to get the reading spot on, but dont cheat here as its critical to your timing.

Posted Image

Note that because the crank has actually moved slightlybackwards at this stage my DTI has a reverse reading, but its 0.127mm from the zero point.

Once you have got it spot on then take a note of the reading on the protractor wheel
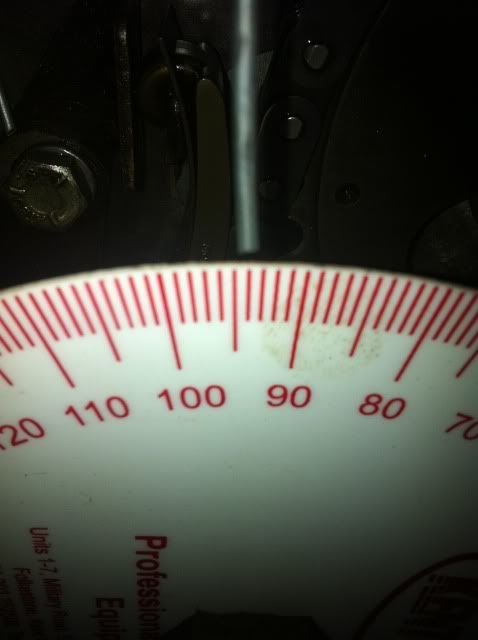
Posted Image

Mine shows 94 deg.

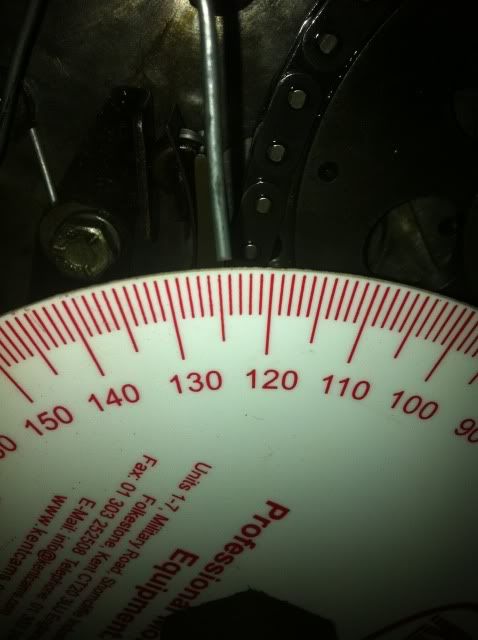
Next you continue to turn the crank forwards untill the DTI goes back to the 0.005" mark. it will move away and go back as the cam lobe goes over the max lift and drops off the other side..then you can take another reading off the wheel..

Mine says 124.5 deg..

Posted Image

Right so now its time for the maths...you add the two wheel readings together...94+124.5 = 218.5

next you divide that by 2...so 218.5 divided by 2 equals 109.25 deg...And thats what my cam its timed in at 109.25 deg after TDC..

Now considering the max lift reading was 112deg..thats my cam timed in 3 deg advanced. The Spec for the MG cam from Rover says it should be 110 deg ATDC. So im pretty much bang on the money at dot to dot..I could retard it with offset woodruf keys by a few degrees and maybe gain a small amount of torque, but im not going to bother with this spec of engine. Dot to dot turns out to be fine.

#30 chrisj

chrisj

    Mini Mad

  • Members
  • PipPipPipPip
  • 283 posts
  • Location: Leicestershire

Posted 16 December 2011 - 09:10 PM

Fantastic thread Andy! really well put together.

When you say set the DTI with a little preload i assume this means a small amount of pressure on the pin of the DTI thats touching piston/pushrod?

Keep up the good work!


0 user(s) are reading this topic

0 members, 0 guests, 0 anonymous users