Jump to content


Photo
- - - - -

1994 Red Sprite Project


  • Please log in to reply
152 replies to this topic

#31 rodandtom

rodandtom

    One Carb Or Two?

  • Members
  • PipPipPipPipPipPipPip
  • 998 posts
  • Location: Dover

Posted 12 October 2014 - 12:11 PM

Not too much done today. I just put some last bits of filler to take out any little pin holes. 


With the n/s door  I put a flexible seam sealant under the lip that gets folded around the door frame. Some of that had oozed out and there was residue on the metal so today I removed all of that, rubbed it down again, etch primed and undercoated it. I think the door is ready to go back on. Any touch ups to the tack welds used to hold it on to the frame can be done with it mounted on the car.


I also undercoated some of the areas I had filled and sanded yesterday to get a seal on to it.


Next, I had a small rectangular patch to the front valence where I had cut out a rust patch months ago. That got tacked in and now I need to grind it, fill it and sand it.


Rod


Edited by rodandtom, 12 October 2014 - 04:03 PM.


#32 ToM 2012

ToM 2012

    Up Into Fourth

  • Members
  • PipPipPipPipPipPipPipPipPip
  • 4,066 posts
  • Location: halesowen

Posted 13 October 2014 - 06:13 AM

Coming along nice rod keep up the good work will be a nice mini once restored cheers Tom

#33 rodandtom

rodandtom

    One Carb Or Two?

  • Members
  • PipPipPipPipPipPipPip
  • 998 posts
  • Location: Dover

Posted 26 October 2014 - 04:32 PM

Got the passenger door on. Also ground down the welds for the front valence patch and filled it.


Also rubbed down the boot lid and sprayed it in etch and primer.


When I get it painted would it be better to leave the boot and bonnet off so they can paint those without fittings on do you think?


Rod


#34 rodandtom

rodandtom

    One Carb Or Two?

  • Members
  • PipPipPipPipPipPipPip
  • 998 posts
  • Location: Dover

Posted 18 November 2014 - 08:47 PM

At the weekend I rubbed down the filler over the front valence and re-filled some small bits to build up to a good finish. My son, Tom, got to cleaning all the glue from the inside of the door frame and roof where the rubbers and the roof lining were removed. Also, there was some very light surface rust on the inside of the roof so we treated that, rubbed it down, etch primed and undercoated it.


I also put another hefty order in with MiniSpares so my wheel arches are on the way. I will get those test fitted. I am thinking about leaving them off and having them painted as well as the wing painted and then fitting them. It should provide for better rust protection that way.


I took the chrome off the front of the bonnet. There are a few light surface spots that will come out when I get a sanding disk on them. 


Is it costly to get bits re-chromed do you know?


Rod


#35 rodandtom

rodandtom

    One Carb Or Two?

  • Members
  • PipPipPipPipPipPipPip
  • 998 posts
  • Location: Dover

Posted 23 November 2014 - 01:42 PM

I am trying to finish off one or two things before I get it painted. I want to weld up the drainage holes in the floor. I tried putting a piece of copper behind and welding up the hole. It worked ok but its not great. The hole is too big. So this morning I spent a few hours cutting discs about the size of a 10p. I wire brushed them and etch primed them. Next will be trimming each one to fit the holes and weld them in.


I also finished off sanding the filler over the weld in the front valence patch and etch primed that.


I bought these wheel arches http://www.minispare...|Back to search

 but I can't see how to fit them yet. There are no holes so I'm not sure how to attach them to the body yet.


Rod


#36 big-jay

big-jay

    Super Mini Mad

  • Members
  • PipPipPipPipPipPip
  • 518 posts
  • Location: Birmingham
  • Local Club: British Mini Club

Posted 23 November 2014 - 07:00 PM

Hi rod, just had a read through and your doing some excellent work mate !

I used to have those arches you've bought, their easy to fit. You just have to pop rivet them to the wheel arch lip.

#37 rodandtom

rodandtom

    One Carb Or Two?

  • Members
  • PipPipPipPipPipPipPip
  • 998 posts
  • Location: Dover

Posted 27 November 2014 - 05:23 PM

So, had a day off and thought I would spend some time on the car. Got it out of the garage, got the welder all set up, got everything ready and my auto-switching welding mask has broken! 


Put it all go, trot off to Machine Mart to get another one. Go back home.


Got the car out of the garage again, got the welder all set up again, got everything ready and got cracking finally.


I welded on the two brackets that sit just in front of the front valence. I also welded in all the 10p size pieces I cut previously in to the floor to block the drain holes. Ground it all down, etch primed and brushed some seam sealer over them.


A good job finally done!

Attached Files


Edited by rodandtom, 27 November 2014 - 05:54 PM.


#38 rodandtom

rodandtom

    One Carb Or Two?

  • Members
  • PipPipPipPipPipPipPip
  • 998 posts
  • Location: Dover

Posted 01 December 2014 - 06:43 PM

Did a test fit of the front o/s wheel arch. It looks like a little bit of tweaking will be necessary to get the right fit but it will go. I've drilled about 6 or 7 holes in the fibreglass and I will use rivets to fix them to the arch. I'm using screws to hold them in place while I get all the fitting right. I'll take them back off for painting and only rivet once that's done.


I've drilled 2mm guide holes but I will use 4mm when I get it all in place.


Rod


#39 rodandtom

rodandtom

    One Carb Or Two?

  • Members
  • PipPipPipPipPipPipPip
  • 998 posts
  • Location: Dover

Posted 09 January 2015 - 11:50 AM

Been a while since I gave an update so here we go - 


Done lots of little things like fitting strengtheners between the A Panel and the Wings and so on. 


Yesterday I put seam sealer around the wing joints, removed the glass winder mechanisms and removed the bonnet badge. All I need to do now is remove the doors and strip the last bits of door furniture off, load them and the boot lid in to the car and it all goes off for spraying tomorrow!


I can't wait to see it done!


Rod


#40 rodandtom

rodandtom

    One Carb Or Two?

  • Members
  • PipPipPipPipPipPipPip
  • 998 posts
  • Location: Dover

Posted 10 January 2015 - 03:47 PM

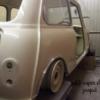
She went off on the back of a wagon today and I cleaned the garage out. 


Rod


Photos added. This is the 'before' shots - and just look at my empty garage.


Attached Files


Edited by rodandtom, 10 January 2015 - 10:19 PM.


#41 rodandtom

rodandtom

    One Carb Or Two?

  • Members
  • PipPipPipPipPipPipPip
  • 998 posts
  • Location: Dover

Posted 25 January 2015 - 03:02 PM

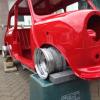
While the car is off being painted I am trying to get a few things ready for its return.


Today I cleaned up the wheel boxes and pipes associated with it - see photo. Quite pleased with the way they came up. Anyone know what metal they are?


I also stripped down the wiper motor and I now need to get new bushes and limit switch to fit and rebuild it. Here are a few photos for those who are interested: -


Rod

Attached Files


#42 rodandtom

rodandtom

    One Carb Or Two?

  • Members
  • PipPipPipPipPipPipPip
  • 998 posts
  • Location: Dover

Posted 28 January 2015 - 11:57 AM

Hi,


Went to visit my little Sprite today in the paint shop. Here she is on a ramp being prepped.


Rod


Attached Files


#43 Ben_O

Ben_O

    Mill Road Garage

  • Paint Doctor
  • PipPipPipPipPipPipPipPipPipPip
  • 9,781 posts
  • Location: Isle of Wight

Posted 28 January 2015 - 12:21 PM

Looking good Rod!


#44 MrBounce

MrBounce

    Up Into Fourth

  • TMF+ Member
  • PipPipPipPipPipPipPipPipPip
  • 2,563 posts
  • Location: The Manroom in Ipswich

Posted 28 January 2015 - 12:44 PM

That's some good work there Rod. You can be rightly proud of yourself :gimme:


#45 rodandtom

rodandtom

    One Carb Or Two?

  • Members
  • PipPipPipPipPipPipPip
  • 998 posts
  • Location: Dover

Posted 08 February 2015 - 07:20 PM

She is due back this week. So I am busy cleaning up bits and pieces.


I stripped down, cleaned and re-greased the wiper motor and replaced the position switch and the circuit board with brushes.


Next I stripped down the heater. I've rubbed down and painted all the metal bits. I'm going for the same red as the body will be. The only problem with it is that the heater matrix just won't run clean when I am flushing it. I think I am going to have to do a new matrix and I've got to cut new foam to go all over the heater. I plan to cut the foam and spray it (it's light blue at the moment so I will go black on the foam I think) tomorrow and then put it together.


It's really nice just to potter around with stuff now that the main bodywork is done.


Rod


0 user(s) are reading this topic

0 members, 0 guests, 0 anonymous users