Jump to content


Photo
- - - - -

R1 Race Spec


  • Please log in to reply
81 replies to this topic

#1 brandon7

brandon7

    Mini Mad

  • Members
  • PipPipPipPip
  • 274 posts

Posted 26 October 2008 - 09:48 PM

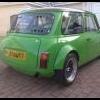
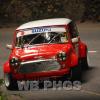
This mini was originally a rally car, which ended its rally days in a granite wall. It was straightened and had a new steel front put on. Its a Mk 3 1974 Morris mini.

Im Mark I live in Jersey, Channel Islands. There is a great club motorsport scene here having a hill from the national British Hillclimb championship. I come from a background of driving Caterhams for the last 5 years or so on tracks around Europe as my dad is a car nut and Ive been lucky enough to be along for the ride since about 98.

I knew I wanted something that could potentially keep up with a 7 around the track also lightweight and high reving. After seeing a lot of the projects on here I was sold as Ive always had the Mini Bug and built up A series minis as a teenager.
Some of its features include

Full Welded Cage in Kawasaki Green
2007 R1 Motor (Courtesy of Malc)
Willwood 4 pots
Ltd Slip Diff
Alleycat wheels/w Yoko A048r
Shell to be Sprayed Black

These pictures span a period of about a year from Nov 2007 when I got the shell through to October 08 when I decided what conversion to do to getting my kit ordered and in the shell etc.
Today we got alot done so I thought id finally get this up.
Cheers!

Attached Files


Edited by brandon7, 19 February 2009 - 10:42 PM.


#2 Sam Walters

Sam Walters

    Up Into Fourth

  • Members
  • PipPipPipPipPipPipPipPipPip
  • 2,765 posts

Posted 26 October 2008 - 10:09 PM

kool :thumbsup:

it seems you will be needing a photo bucket account sometime soon however!

#3 *franky*

*franky*

    Mini Mad

  • Members
  • PipPipPipPip
  • 159 posts

Posted 27 October 2008 - 06:08 PM

very very nice love the colour of the frame.. >_<

#4 Baldspeed Racing

Baldspeed Racing

    One Carb Or Two?

  • Members
  • PipPipPipPipPipPipPip
  • 1,185 posts
  • Location: Southam

Posted 28 October 2008 - 11:15 AM

nice frame colour lol but shes gonna be well cool once built up me thinks

#5 fatmini

fatmini

    One Carb Or Two?

  • Members
  • PipPipPipPipPipPipPip
  • 735 posts
  • Local Club: no

Posted 28 October 2008 - 11:57 AM

looks like a five min job !!lol nice colour

#6 brandon7

brandon7

    Mini Mad

  • Members
  • PipPipPipPip
  • 274 posts

Posted 30 October 2008 - 07:18 PM

nice frame colour lol but shes gonna be well cool once built up me thinks


Cheers would be more fitting if it was a Kawasaki zx10 motor but hey i dont think anyone will mind! haha
cheers for your comment, much appreciated! Was always keen on your minis paint job also

looks like a five min job !!lol nice colour


this is just a very small amount of photos i had my hands full most of the time...
are you talking about 5 mins on the day or overall?
and its only a test fit of the frame it took a few hours. we had to remove the rear valance to get the frame in as you can see...
so im in the middle of designing a removable rear valance incase it ever needs to come out again.

drilling all holes in frame tonight, making up new bulkhead so cage arms can come through. Also test fitting arches so will get a few extra pics up before its removed for spraying.

cheers all, watch this thread in next couple months its gonna kick off once its sprayed

mark

#7 philly c

philly c

    Speeding Along Now

  • Members
  • PipPipPipPipPip
  • 316 posts

Posted 30 October 2008 - 07:28 PM

Alright mark

Was just wanting to know how far you were going to go with the fitting of the kit before you send the shell off to be sprayed??What colour you going for??

Have you chosen a dash system as yet??I have narrowed it down to either race tech or etb as chris says you get alot for your money with the etb but i just like the look of the display on the race tech that bit more sounds fussy but hey:P


Phil

#8 brandon7

brandon7

    Mini Mad

  • Members
  • PipPipPipPip
  • 274 posts

Posted 31 October 2008 - 06:34 PM

Alright mark

Was just wanting to know how far you were going to go with the fitting of the kit before you send the shell off to be sprayed??What colour you going for??

Have you chosen a dash system as yet??I have narrowed it down to either race tech or etb as chris says you get alot for your money with the etb but i just like the look of the display on the race tech that bit more sounds fussy but hey:P


Phil


Hi Phil, good question, I dunno I change my mind every week about my methods, so really could have done with a bit of extra info on all this stuff myself but its challenge hey!
So at the moment its to....
Get it all squared up and holes drilled for the fame etc. Mark out on the car where the roll cage bars are going to be with a pen so you know where to cut the dash later. Cut hole in transmission tunnel for floor bar. Get my arches on and get the holes drilled for them. Mark out and make a new bulkhead around the front arms of the cage. Make some kind of removable rear valance.

As for any of the actual body prep im really not good at bodywork/painting (Tried a few times before and it was a nightmare. So ive saved a bunch of money to pay for that)

Then Take it all out. Weld in new bulkhead. Weld hole in transmission tunnel . Cut bigger hole for steering rack spline to come through floor.
Have it professionally preped and sprayed all Black

Then cut and fit the dash possibly before , probably at the same time as refitting the frame to the shell as its going to be very awkward either way im sure!? We had to have the car right up on its nose to get the cage in last time so bit worried about the paint this time. Hopefully it will line back up again. Then once thats bolted it should be more straight forward!

As for the dash system just went with the original bike clocks off my engine so they all match up. Its designed for the motor so will be best suited. Has a load of diagnostic stuff on it for the engine aswell as change lights, neutral insicator, revs adn speed etc. So no worries there, I guess if you dont have the clocks ETB seems a good choice or just a STACK system.

Got any better ideas for the order of fitting/refitting!? cheers

Mark

#9 philly c

philly c

    Speeding Along Now

  • Members
  • PipPipPipPipPip
  • 316 posts

Posted 03 November 2008 - 06:55 PM

hey Mark hows the project looking??

I picked up the kit yesterday and a few additions as well, will post some pics up tomozz!The finish on the frame is second to non very impressed!

My plan of attack is to fit the kit into the shell again and drill all necessary holes as well as see where the arches are in relation to the wheels and clearance issues. Am i right in thinking that the cage is govered by where the front subframe mounts and then its simply a case of making sure the rear of the cage closest to the engine is equal on either side of the car inside the shell at the back?

I want to get as many holes drilled and compleated as possible before spraying.

There is a large hole in my bulck head where there was a previously a webber box wich i will have to tackle. Think i will just weld a new plate in place. Are you sealing around where the cage goes through the bulk head??


Dont suppose you have any pics of how the front subby goes together??Would be most greatful!

Cheers Phil

#10 brandon7

brandon7

    Mini Mad

  • Members
  • PipPipPipPip
  • 274 posts

Posted 05 November 2008 - 10:59 PM

hey Mark hows the project looking??

I picked up the kit yesterday and a few additions as well, will post some pics up tomozz!The finish on the frame is second to non very impressed!

My plan of attack is to fit the kit into the shell again and drill all necessary holes as well as see where the arches are in relation to the wheels and clearance issues. Am i right in thinking that the cage is govered by where the front subframe mounts and then its simply a case of making sure the rear of the cage closest to the engine is equal on either side of the car inside the shell at the back?

I want to get as many holes drilled and compleated as possible before spraying.

There is a large hole in my bulck head where there was a previously a webber box wich i will have to tackle. Think i will just weld a new plate in place. Are you sealing around where the cage goes through the bulk head??


Dont suppose you have any pics of how the front subby goes together??Would be most greatful!

Cheers Phil


Im starting to think you have to play it by ear alot more than people take for granted as new things crop up everytime you get to work on your car, but its great..... Yeah you got the main idea with what you said there. Dont foget about your dashboard and making a list of things to do before you have it sprayed. I should be just a bit ahead of you so ill keep you posted on your topic for sure mate

As for lining up you need to tap a 12mm metric thread through the tower bolts for the front arms. Get them in, then the floor bar connecting to the two down pillars of the cage on the Aframe. Then that should be square toally with the front frame. After fitting my shell is a tad twisted and i need to manipulate my shell back into that position. So a mix of pushing, wooden spacers etc should do it. No other choice really?

If you had a webber box like me just take out the whole bulkhead right to the edges. As you will appriecate the space, then measure up for your new bulkhead when the cage is in remove, weld and refit. As for sealing im thinking about that one, but yes it has to be sealed for MSA.

Ill mail you the pics I had of my front sub setup as I had issues with this. If you want to give me a call Ill talk you through what I know.

Cheers

#11 philly c

philly c

    Speeding Along Now

  • Members
  • PipPipPipPipPip
  • 316 posts

Posted 06 November 2008 - 09:16 PM

cheers mark

might just do that have been busy tonight in the workshop doing the front subframe, myne apperas different to yours might be either the older or newer one not sure??The bulk head idea sounds like a master plan might take some pics of the finished subframe to make sure i am right, have got most things on ok the only thing i am stuck on is the bottom of the coilovers (adjuster end) do they have any of the thick spacers in there as they dont seem as tight as say the bottom arms as the collovers have a fair bit of movement in them a pic might help prob have somethng a miss


Cheers

Phil

#12 Gsybeach

Gsybeach

    Stage One Kit Fitted

  • Noobies
  • PipPipPip
  • 69 posts

Posted 05 December 2008 - 10:02 AM

Your project looks great!
I live accross the water in Guernsey and am waiting for my race spec kit to arrive!

Can you tell me, did you bolt the cage feet directly to the floor or did you weld plates to the floor first. I was wandering whether this was an MSA rule to have plates welded to the floor?

I chose to build mine differently by spraying first (probably a big mistake), and now, after reading this forum, I fully expect my paintwork to be shot by the end of the build!!!

Attached Files


#13 brandon7

brandon7

    Mini Mad

  • Members
  • PipPipPipPip
  • 274 posts

Posted 07 December 2008 - 07:19 PM

Your project looks great!
I live accross the water in Guernsey and am waiting for my race spec kit to arrive!

Can you tell me, did you bolt the cage feet directly to the floor or did you weld plates to the floor first. I was wandering whether this was an MSA rule to have plates welded to the floor?

I chose to build mine differently by spraying first (probably a big mistake), and now, after reading this forum, I fully expect my paintwork to be shot by the end of the build!!!


Hi good to hear from ya! I welded in plates on the underside of the car along the edge that connects to the frame and where the front subframe connects to the floor and welded plates in on the inside of the car for cage feet. You will definatly want to do at least the cage feet if you plan on doing any competiton, its just not worth the hassel if they have a problem. Ill get some more pics up if you want?

I am doing a test fit there is a load more fabricating with the race spec kit than you might think. Got all holes drilled etc Its all coming out next weekend and getting preped and sprayed then refit so i know it all goes in
Your shell looks great but your going to have to cut off your rear valance to get the kit in if its the race spec one. just have to watch it i guess with your paint.

What engine you going for? my mail is [email protected]
cheers
mark

#14 Gsybeach

Gsybeach

    Stage One Kit Fitted

  • Noobies
  • PipPipPip
  • 69 posts

Posted 07 December 2008 - 11:02 PM

Thanks Mark. Yeah any pics of this would be great!
My original plan was to just do the road version but z-cars managed to convince me that the race spec was the way to go, so I have gone for the Busa version.
I knew about the rear valence and I am also in the process of working out how I am gonna re-attach it. I didn't realise the transmission tunnel needed to be cut for the floor bar though???
Sound like I am going to have far more work than I first thought. It sounds like you are doing a good job of yours and it looks great in the pics. Love the green powdercoating.
Keep us updated, and I might start my own build diary with pics on here shortly.

cheers, Ben.
[email protected]

#15 z cars chris

z cars chris

    Speeding Along Now

  • Members
  • PipPipPipPipPip
  • 469 posts

Posted 13 December 2008 - 03:45 PM

ben your kits at powder coating back tuesday i think so we should get it built up ready for shipping just this side of christmas
ive done the wiring loom already for the engine so just a matter of building it up
chris


0 user(s) are reading this topic

0 members, 0 guests, 0 anonymous users