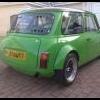
this took a while. chopped these arches up alot to make them fit my wheels right. they used to be migila arches. off to prep and paint next week once the kit is out so more to come soon.

R1 Race Spec
Started by
brandon7
, Oct 26 2008 09:48 PM
81 replies to this topic
#17

brandon7
-
- Members
-

- 274 posts
Mini Mad
Posted 15 January 2009 - 09:01 AM
Bit of a set back yesterday. My shell and frame have no been separated again with holes all drilled, measurements taken for arches to fitting of the bulkhead etc so as soon as its sprayed up its ready for straight fitting.
Had message on answer machine saying I need to go down to speak with the guy who's doing my prep and paint.
Turns out under my primed paint, moisture has been collecting as some of the panels were replaced by the previous owner and he used un-origonal mini parts or the factory primer was removed at some point. The shell is solid but its now covered with what in the trade the call 'spiders'. Tiny surface rust spots which have small wiggly lines coming out of them where the rust is spreading. Im having to get up there and help him take the car all the way back to bare metal now.
On the upside there will not be a speck of rust on my car when its done and I know it will be a good job as this bloke is a top guy for the job.
So if on your project you suspect any rust under the paint remember its a mini and they love rusting, take no risks in painting over it. The true extent to this surface rust was not noticeable until we started sanding down primer. If you have a car in primer make sure its in a very dry environment or be prepared for extra work. Here are some pics of rust discovery and stripping and some bodywork
Cheers
Mark
Attached Files
-
 14012009095.jpg 536.66K
70 downloads
14012009095.jpg 536.66K
70 downloads
-
bare.jpg 171.98K
48 downloads
-
side.jpg 150.83K
33 downloads
-
side2.jpg 189.46K
49 downloads
Edited by brandon7, 19 February 2009 - 11:02 PM.
#18
cptkirk
-
- Members
-
- 1,799 posts
Camshaft & Stage Two Head
- Location: West Sussex
- Local Club: B.M.C. + Chiminiclub
Posted 17 January 2009 - 09:51 PM
bummer.....best of luck with getting it stripped back, bet thats labour intensive.....
#19
brandon7
-
- Members
-
- 274 posts
Mini Mad
Posted 28 January 2009 - 09:39 PM
Whole car now back to bare metal and all sorted properly and very glad I did. Including the whole of the inside and outside and underneath. (Pics for all of it) Car in etched primer now just waiting for my sill to replace sort out he nasty hole you can see, test fit the doors, tidy my arch cuts and test fit arches. Speaking of doors got my street fighter aluminum doors in the week. They look awesome, seems a shame to paint them.
Removal of the kit has been 1 step back but will hopefully put us two steps forward. But I have really dug deep and sorted this shell out and am cutting no corners with the finish
Decided to prep it then 2 pac primer then paint the inside in (satin black), and spray the engine bay in its outside gloss black then refit the kit with etc.
This way if someone scratches it on refitting its not the end of the world then once its rolling again have it painted black before the bast*rd rusts again!
Here are some few pics off my phone of the fabrication and body prep. Pics cant explain how many hours over weeks me and the welder guy have spend on this. Choose yours shells wisely future buyers.
You can see the removable rear valance which looks great with exhaust cut all measured out. flush locks all fitted and most of the car ready for primer next week. also the transmission tunnel cut for the floor bar has been sorted. As well as a large cut where the steering column comes through as its hard to predict its position as it attached to the front frame rather than the car, and a plate will be fitted after. More to come soon
Cheers
Attached Files
-
14022009124.jpg 143.75K
34 downloads
-
14022009130.jpg 139.39K
38 downloads
-
14022009127.jpg 180.07K
46 downloads
Edited by brandon7, 19 February 2009 - 11:11 PM.
#20
brandon7
-
- Members
-
- 274 posts
Mini Mad
Posted 15 February 2009 - 05:03 PM
Working on car all weekend. While I was getting on with sorting the floor out on the inside the guy who does my welding was doing an engine swap on his OMS and the dimensions look very similar.
Cool pic I thought
Cool pic I thought
Attached Files
-
14022009134.jpg 208.35K
95 downloads
-
14022009132.jpg 220.2K
146 downloads
Edited by brandon7, 19 February 2009 - 11:07 PM.
#21
cptkirk
-
- Members
-
- 1,799 posts
Camshaft & Stage Two Head
- Location: West Sussex
- Local Club: B.M.C. + Chiminiclub
Posted 18 February 2009 - 12:13 PM
Why not chop the floor out the mini and drop it onto the OMS, you should only need 2 foot wide arches to cover the wheels.....ha ha.....
#22
brandon7
-
- Members
-
- 274 posts
Mini Mad
Posted 26 February 2009 - 08:57 PM
Last day of prep tomorrow few very minor bits left before primer next week. All the arches fitted now, wasnt as bad as I expected it to be. Tidied my original grinder cuts on wheel arch with large snips.
Fitted all door latches and adjust the seals so they close perfectly. Worth doing before its primed as you need to bash the frame a bit and but of door bending here and there.
The repair on quater panel and sill went ok but badly pressed panels don't make life any easier thats for sure!. This should be the last pics of my shell like this, time for some colour!
Shows brackets for miglia arches without having to screw through them. These arches needed alot of work before painting. Very cracked on the edges
26022009188.jpg 46.4K
81 downloads
26022009197_2.jpg 48.51K
74 downloads
Time for primer now. Arches test fitted.... And the rest (EDIT: Also shows Minidoor company Streetfighter doors. V light!)
26022009200.jpg 52.15K
79 downloads
26022009198.jpg 50.19K
67 downloads
Fitted all door latches and adjust the seals so they close perfectly. Worth doing before its primed as you need to bash the frame a bit and but of door bending here and there.
The repair on quater panel and sill went ok but badly pressed panels don't make life any easier thats for sure!. This should be the last pics of my shell like this, time for some colour!
Shows brackets for miglia arches without having to screw through them. These arches needed alot of work before painting. Very cracked on the edges
26022009188.jpg 46.4K
81 downloads
26022009197_2.jpg 48.51K
74 downloadsTime for primer now. Arches test fitted.... And the rest (EDIT: Also shows Minidoor company Streetfighter doors. V light!)
26022009200.jpg 52.15K
79 downloads
26022009198.jpg 50.19K
67 downloads
Edited by brandon7, 26 February 2009 - 08:58 PM.
#23
cptkirk
-
- Members
-
- 1,799 posts
Camshaft & Stage Two Head
- Location: West Sussex
- Local Club: B.M.C. + Chiminiclub
Posted 27 February 2009 - 08:08 AM
Looking good - cant wait to see what colour you decide to go with.
#24
brandon7
-
- Members
-
- 274 posts
Mini Mad
Posted 02 March 2009 - 12:51 PM
Dropped it off today at spray shop for its 2 pac primer and satin black on inside. Picking it up Wed or Thursday for kit refitting this weekend if all goes to plan....
02032009210.jpg 48.91K
59 downloads
02032009210.jpg 48.91K
59 downloads
#25
philly c
-
- Members
-
- 316 posts
Speeding Along Now
Posted 06 March 2009 - 05:56 PM
LOOKING GOOD ITS WELL ABOUYT TIME I ADDED SOME MORE PICS OF MY PROGRESS!!!!HOW HAVE YOU ADDACHED YOUR REAR VALANCE?IS IT REMOVABLE AND DONT SUPPOSE YOU WOULD MIND GOIGN TO THE TRUBBLE OF TAKING A PIC??
#26
brandon7
-
- Members
-
- 274 posts
Mini Mad
Posted 07 March 2009 - 08:41 AM
LOOKING GOOD ITS WELL ABOUYT TIME I ADDED SOME MORE PICS OF MY PROGRESS!!!!HOW HAVE YOU ADDACHED YOUR REAR VALANCE?IS IT REMOVABLE AND DONT SUPPOSE YOU WOULD MIND GOIGN TO THE TRUBBLE OF TAKING A PIC??
Hi phil hope these help ill get you some fresh pics when the kit is back in and once its painted, as at the moment its in pieces but you should be able to see from this. The best thing to do would be to reattach a lip to the outside on the shell and then bolt a normal valance up to that and just stick on a normal mini bumber to hide the join. For some reason i was tempted to do this and I think it looks cool. Looking forward to seeing how its looks when its painted.
04022009091.jpg 53.66K
58 downloads
04022009100.jpg 45.13K
50 downloads
06022009108.jpg 46.43K
61 downloadsCar back from primer today and refitting the kit will get pics up Sunday night. so check it out
Cheers
#27
Saxo-Fiesta-Mini
-

- Members
-
- 2,889 posts
Up Into Fourth
- Local Club: LCMOC
Posted 07 March 2009 - 09:46 AM
looks good be great to see this one finished are you reallyjuts droppin the shell on a kit car lol  good idea
good idea
#28
brandon7
-
- Members
-
- 274 posts
Mini Mad
Posted 08 March 2009 - 06:53 PM
So had the car back from first paint job Friday. Inside is painted black and the outside just primer so we can get on with most work without worrying about scratching. Managed to get a full days work on it today.
Started out by sound insulating the roof with Dynamat extreme. Such easy stuff to work with and got it done in about an hour or so with a wooden roller i bought for £3.40 at small decorating shop. Better than Dynamat's £13 quid one with super rubber handle... load of boll*cks
08032009214.jpg 43.03K
49 downloads
Once that was done I wanted to get the black roof lining in which we used spray adhesive to get on, starting at one end and working back leaving edges to tuck into the gutters. It looks amazing and it was important to get this done before the kit was refitted for obvious reasons.
I forgot to take a picture of this so ill get one up when I next go to my lockup.
Then got the front frame bolted back up, before I had a bunch of people arrive to help refit the rear frame. After it was in, got a few main bolts in and rolled it out into the sun for a few pics quick before it went down.
In the end got most of the bolts into pre-drilled holes from last time. Just need to sort it and get it properly lined up next week. As well as sorting the steering rack position, floor bar etc.
Happy its all back in now, I don't think these pictures do the car justice at all and it just looks incredible when its in front of you compared to the last time I had it in (even in mat grey). A good days work! Cheers
08032009236.jpg 29.44K
83 downloads
08032009239.jpg 48.84K
133 downloads
Started out by sound insulating the roof with Dynamat extreme. Such easy stuff to work with and got it done in about an hour or so with a wooden roller i bought for £3.40 at small decorating shop. Better than Dynamat's £13 quid one with super rubber handle... load of boll*cks
08032009214.jpg 43.03K
49 downloadsOnce that was done I wanted to get the black roof lining in which we used spray adhesive to get on, starting at one end and working back leaving edges to tuck into the gutters. It looks amazing and it was important to get this done before the kit was refitted for obvious reasons.
I forgot to take a picture of this so ill get one up when I next go to my lockup.
Then got the front frame bolted back up, before I had a bunch of people arrive to help refit the rear frame. After it was in, got a few main bolts in and rolled it out into the sun for a few pics quick before it went down.
In the end got most of the bolts into pre-drilled holes from last time. Just need to sort it and get it properly lined up next week. As well as sorting the steering rack position, floor bar etc.
Happy its all back in now, I don't think these pictures do the car justice at all and it just looks incredible when its in front of you compared to the last time I had it in (even in mat grey). A good days work! Cheers
08032009236.jpg 29.44K
83 downloads
08032009239.jpg 48.84K
133 downloadsEdited by brandon7, 10 March 2009 - 12:14 AM.
#29
philly c
-
- Members
-
- 316 posts
Speeding Along Now
Posted 09 March 2009 - 06:39 PM
Those pics are great i take it that you are going for the smoothy boot look then??i dont no if i want to go for the smoothey boot look or keep the rear bumper with a chrome rail still??
i do like the smoothey boot though although there wont ever really be a smooth look at the joint line will always be there??
Phil
i do like the smoothey boot though although there wont ever really be a smooth look at the joint line will always be there??
Phil
#30
brandon7
-
- Members
-
- 274 posts
Mini Mad
Posted 10 March 2009 - 08:14 PM
Yeah Ive always liked the smoothy boot look so I thought id try something different. Basically to keep a bumper is ALOT less hassle just need to add a lip to the outside.
The join will always be there but I don't think you will really notice it once its all painted. Have a look at the pics above, gives you an idea of how it will look.
Get some more pictures of your build up. This forum has gone quiet!
The join will always be there but I don't think you will really notice it once its all painted. Have a look at the pics above, gives you an idea of how it will look.
Get some more pictures of your build up. This forum has gone quiet!


0 user(s) are reading this topic
0 members, 0 guests, 0 anonymous users


