Edited by irishdude, 27 April 2009 - 06:00 AM.

Supercharged K20a2 Vtec - Race Spec
Started by
cptkirk
, Oct 26 2008 12:27 PM
1102 replies to this topic
#91

irishdude
-

- Noobies
-

- 124 posts
Mini Mad
Posted 27 April 2009 - 05:56 AM
Great work, this is coming along, with its ups and downs... Thats car building, but it will be so worth it when you are finished
#92
cptkirk
-
- Members
-
- 1,799 posts
Camshaft & Stage Two Head
- Location: West Sussex
- Local Club: B.M.C. + Chiminiclub
Posted 28 April 2009 - 09:22 AM
Great work, this is coming along, with its ups and downs... Thats car building, but it will be so worth it when you are finished
I know it will be, thats what keep driving me forwards.
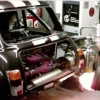
Not much to report, in the middle of making plugs for inner arch moulds. Due to the size of the arches they are proving somewhat challenging. Hope to have photos by the end of next weekend.
On the advice of a friend I made a list of all the jobs that need doing, crikey there is a shed load of stuff left to do and I now find myself waiting on two plates to hold the scoops in before I can move forward with the sealing of the rear bulkhead. Which is holding up putting the engine back. The one bonus is that because there is sooooo much still to do I dont find myself sitting idle.
#93
brandon7
-
- Members
-
- 274 posts
Mini Mad
Posted 29 April 2009 - 09:35 AM
what are you doing about the inner arches? I came to the conclusion i might be just as well off cutting them in half so i could get them in easier (tight fit huh). Are you using the same screw holes as for your outer arches to secure the inner ones? Cheers
#94
cptkirk
-
- Members
-
- 1,799 posts
Camshaft & Stage Two Head
- Location: West Sussex
- Local Club: B.M.C. + Chiminiclub
Posted 29 April 2009 - 10:35 AM
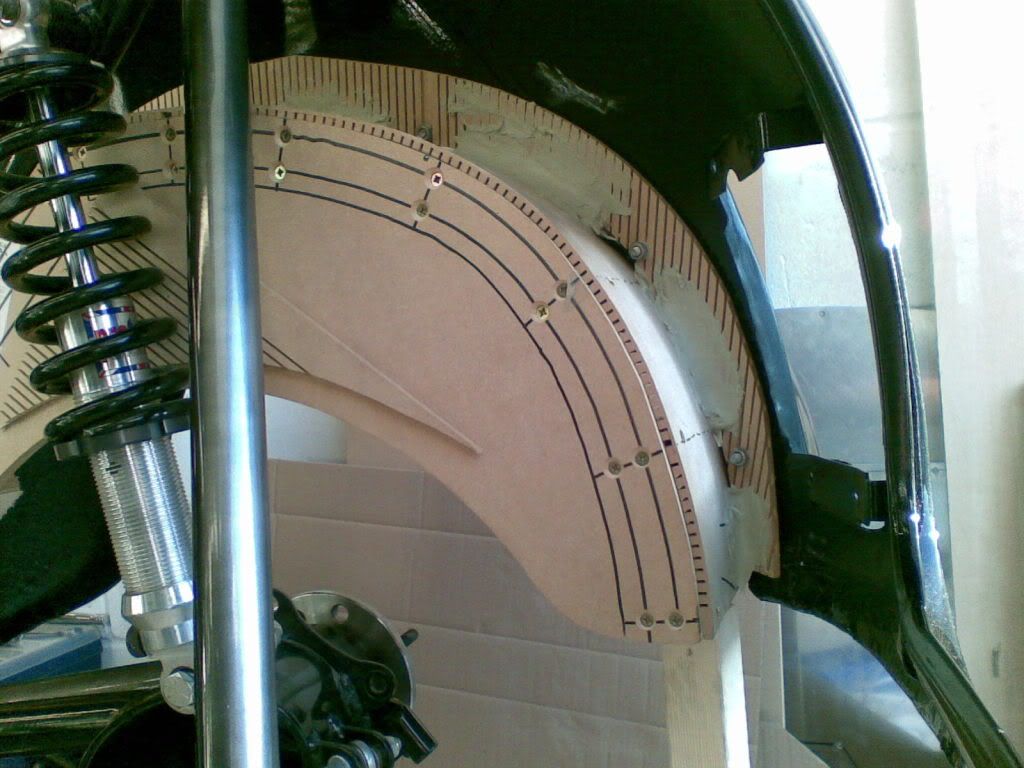
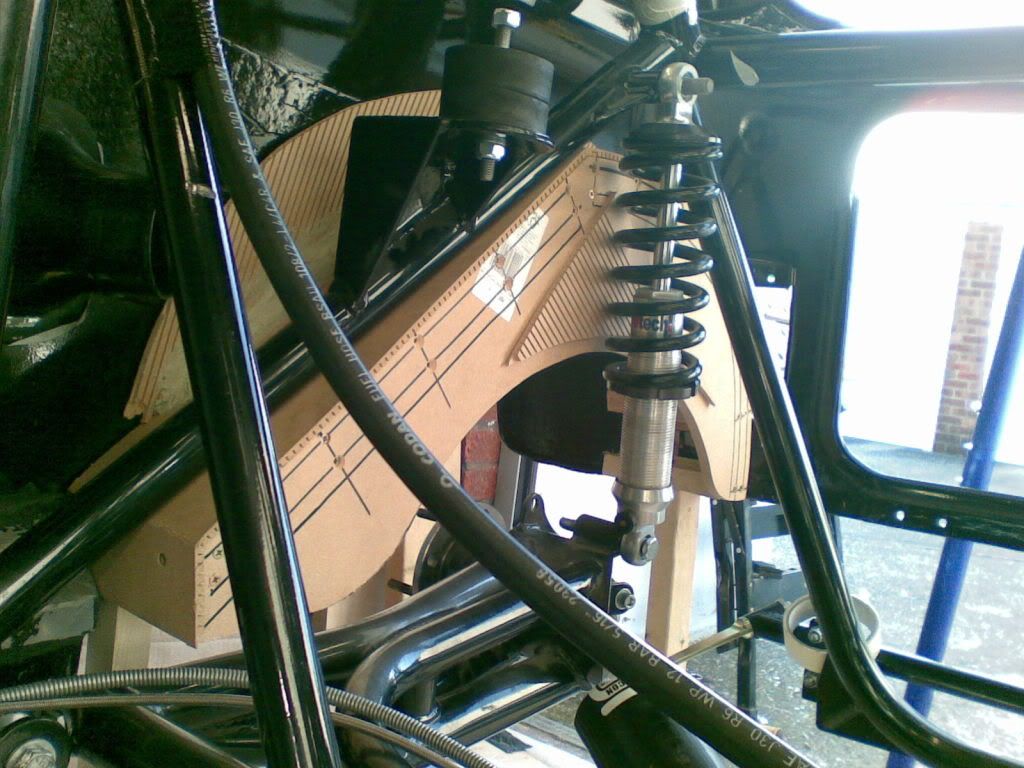
I am starting from nothing with the inner arches. Because the outer arches are sooooo massive they require a slightly different approach. And I think that the inner arches that Z’s supply would have been too small. From what I can see the outer arches are mostly stuck to the body rather than bolted, but I still have a good 30mm of flange to work with inside the arch.
I have started making a plug that utilises the angled part of the frame that goes from the top of the suspension unit to the front of the rear suspension arm. The arch follows this angle to the top then follows the radius of the outer arch down to the rear of the car. Once I have made the plugs I will take a photo and post it on here, then all will make perfect sense – honest.
I wont have to cut mine as I will be putting them in place before the engine goes back in or if engine is in I will remove the suspension arms to get them in – that’s the plan, but as we all know the best laid plans often go to sh!t.
#95
cptkirk
-
- Members
-
- 1,799 posts
Camshaft & Stage Two Head
- Location: West Sussex
- Local Club: B.M.C. + Chiminiclub
Posted 29 April 2009 - 09:06 PM
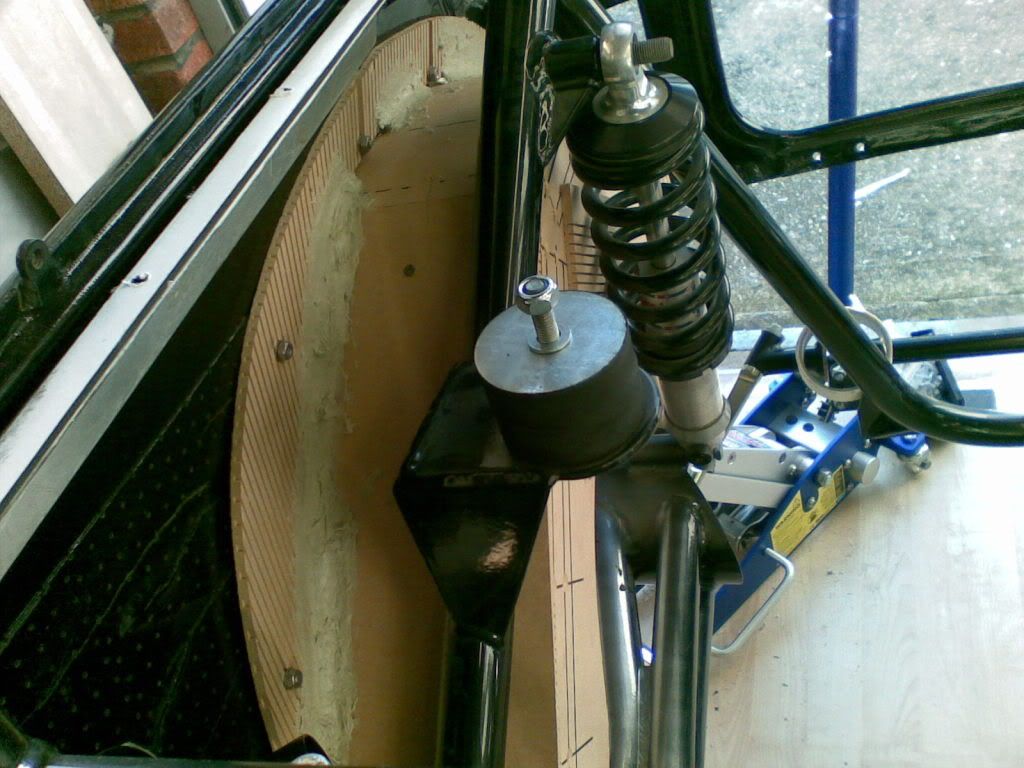
So I spent some time on the inner arches this evening and have got the O/S to the gluing the flange to the main body of the plug (woop woop for Gripfill).
I would like to say that whoever thought up bendy MDF needs a medal it is just whats needed when you have the curves of the body to contend with when try to make a flange for the arch.
Maybe now you can see what I was ranting on about in the post before this.
I would like to point out it is a work in progress and there is still alot to do before it is ready to make a mould. Plus I still have to do the N/S.......
#96
cptkirk
-
- Members
-
- 1,799 posts
Camshaft & Stage Two Head
- Location: West Sussex
- Local Club: B.M.C. + Chiminiclub
Posted 29 April 2009 - 09:13 PM
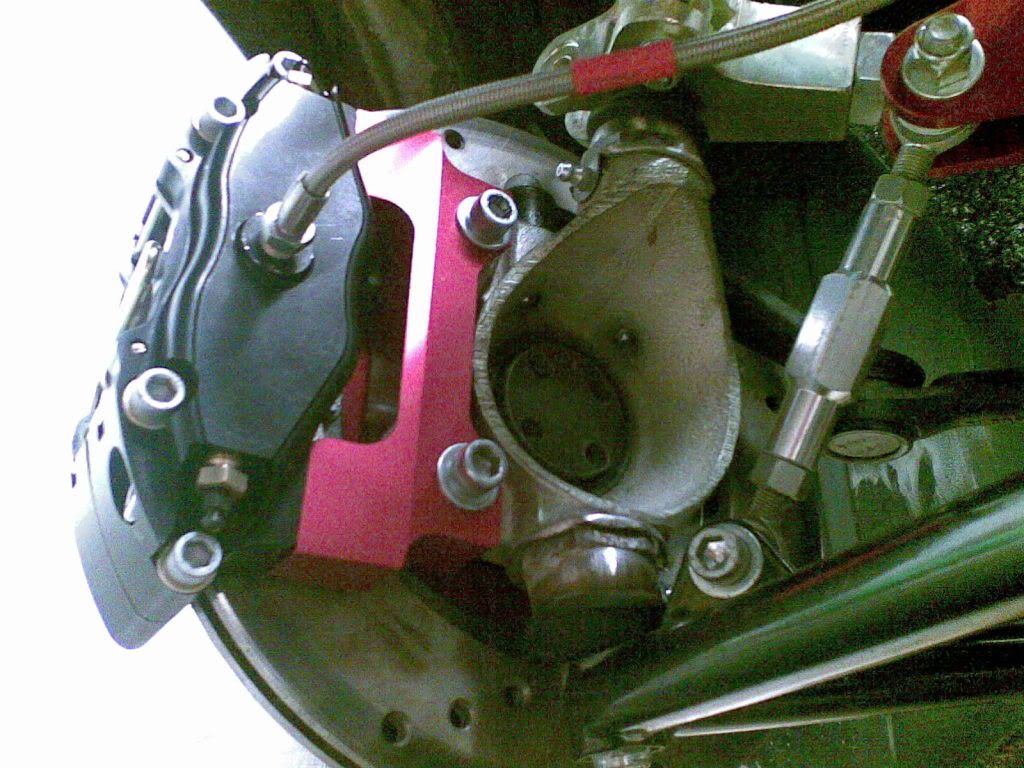
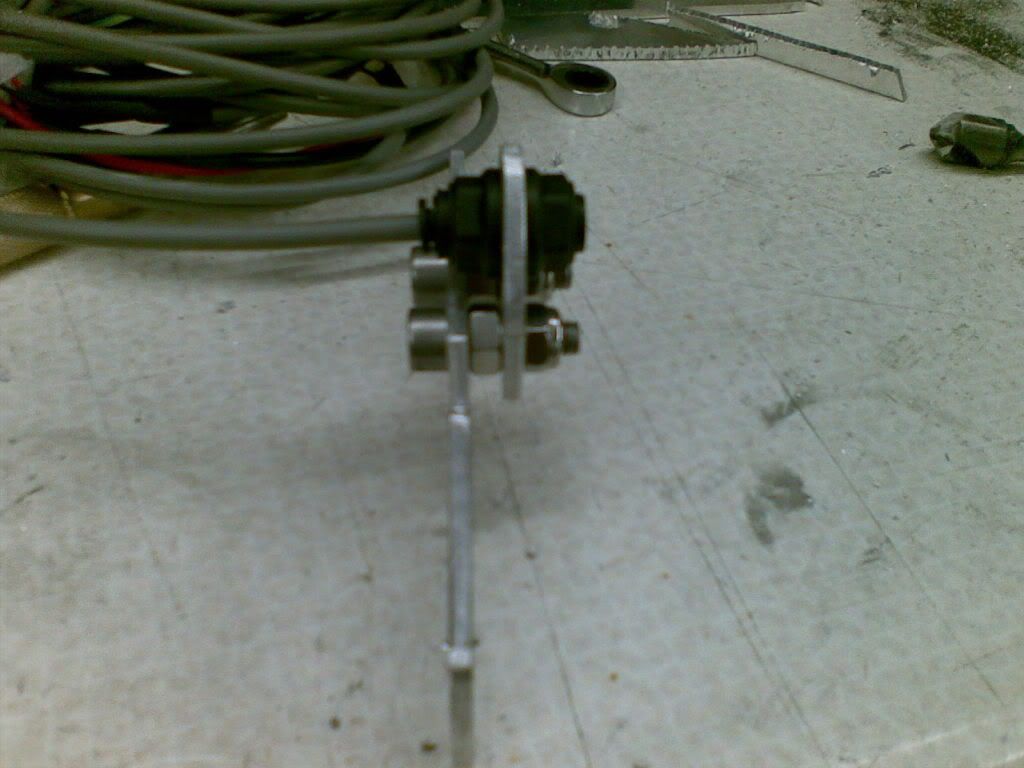
Once I had thoroughly covered my finger in gripfill making the inner arches I set about making the speed sensor mount, please excuse the photos, out of focus and grainy comes to midn but you get the idea:
We start with a picture of where it is going and then onto the mount with sensor in and then the mount in place (minus the sensor as I think I need to buy some longer bolts for the caliper so no point mounting fully at this point), I also need to stick the magnet to the shaft.
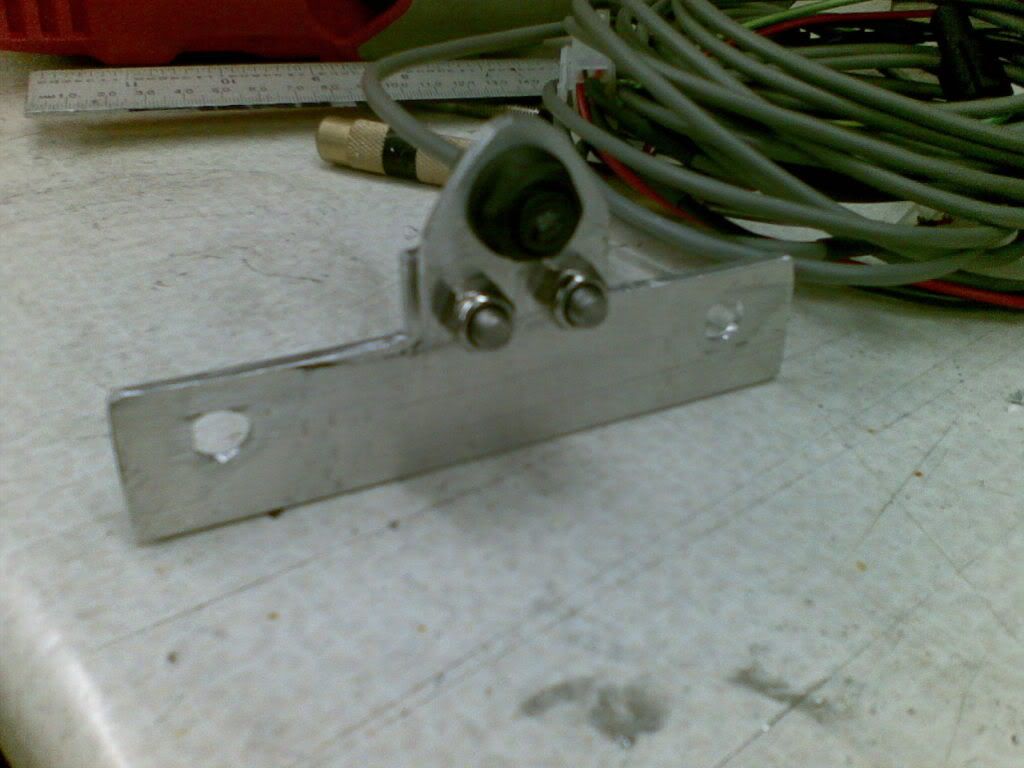
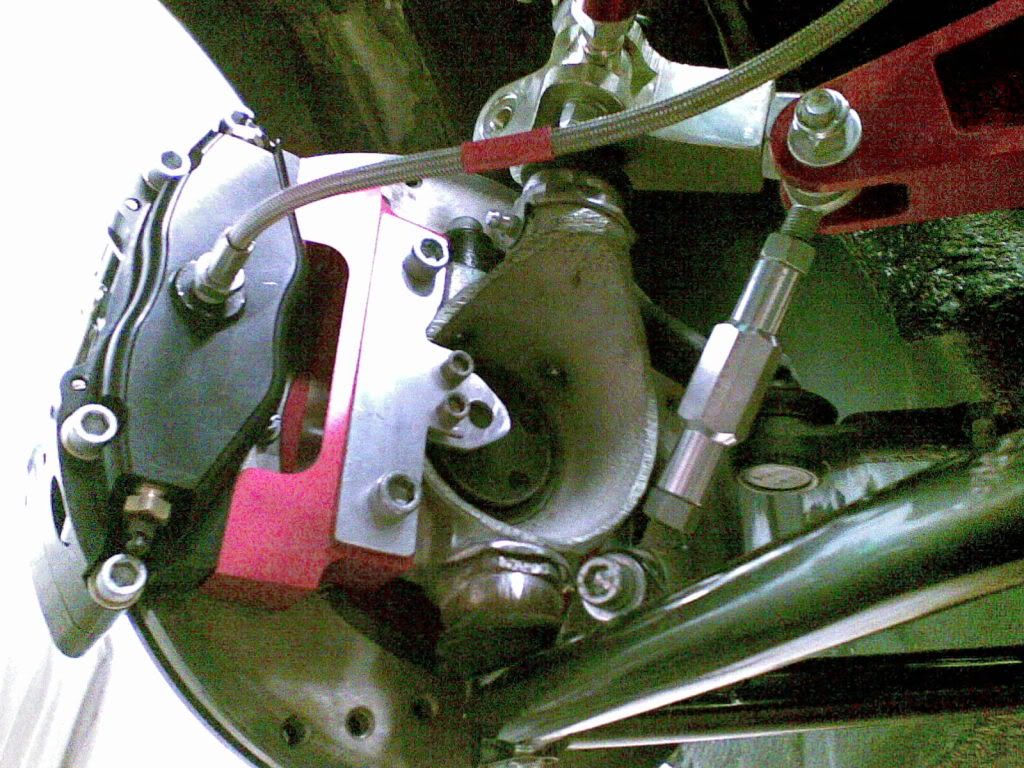
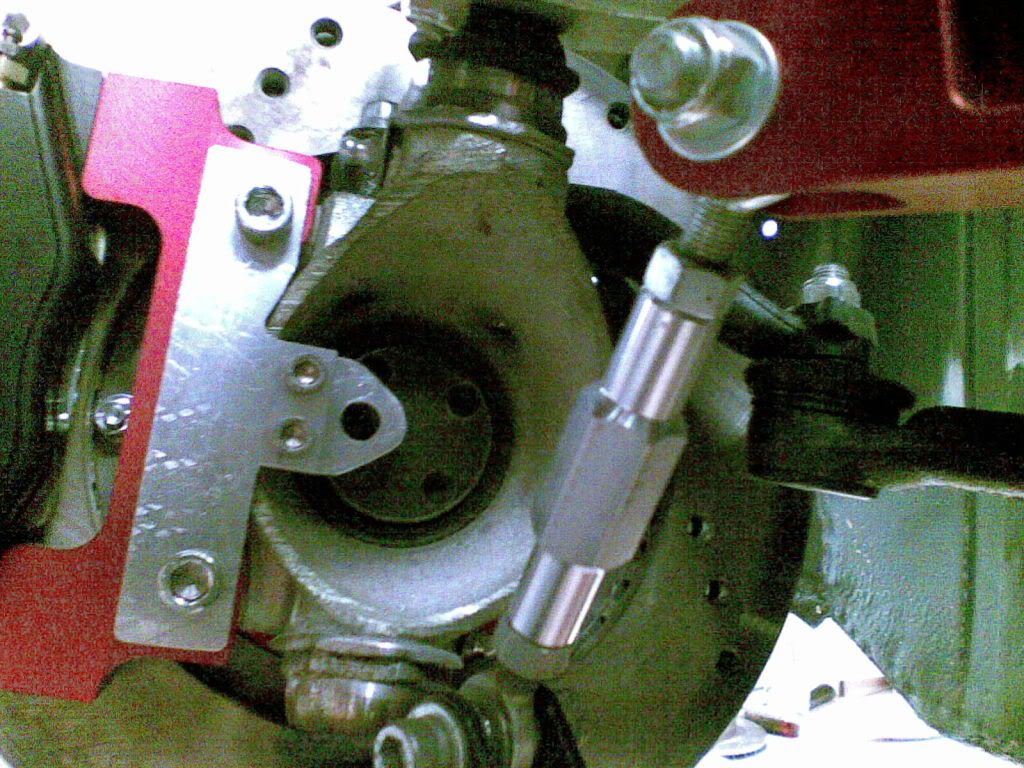
We start with a picture of where it is going and then onto the mount with sensor in and then the mount in place (minus the sensor as I think I need to buy some longer bolts for the caliper so no point mounting fully at this point), I also need to stick the magnet to the shaft.
#97
1987_ParkLane
-

- Members
-
- 2,671 posts
Up Into Fourth
- Location: N/A
- Local Club: The Mini Forum
Posted 29 April 2009 - 09:24 PM
Hey, I keep flicking back through you thread, and it really amazes me, unluck about the engine stuff, but loving that speed sensor thing, keep it up, it'll get there  .
.
.
#98
cptkirk
-
- Members
-
- 1,799 posts
Camshaft & Stage Two Head
- Location: West Sussex
- Local Club: B.M.C. + Chiminiclub
Posted 29 April 2009 - 09:27 PM
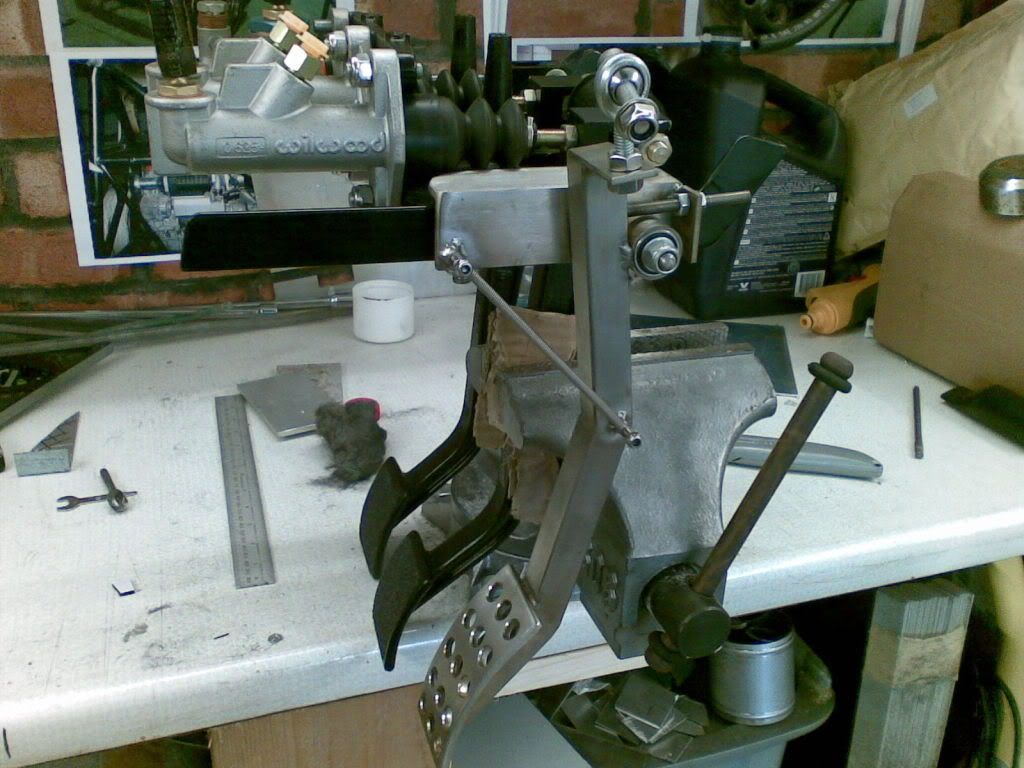
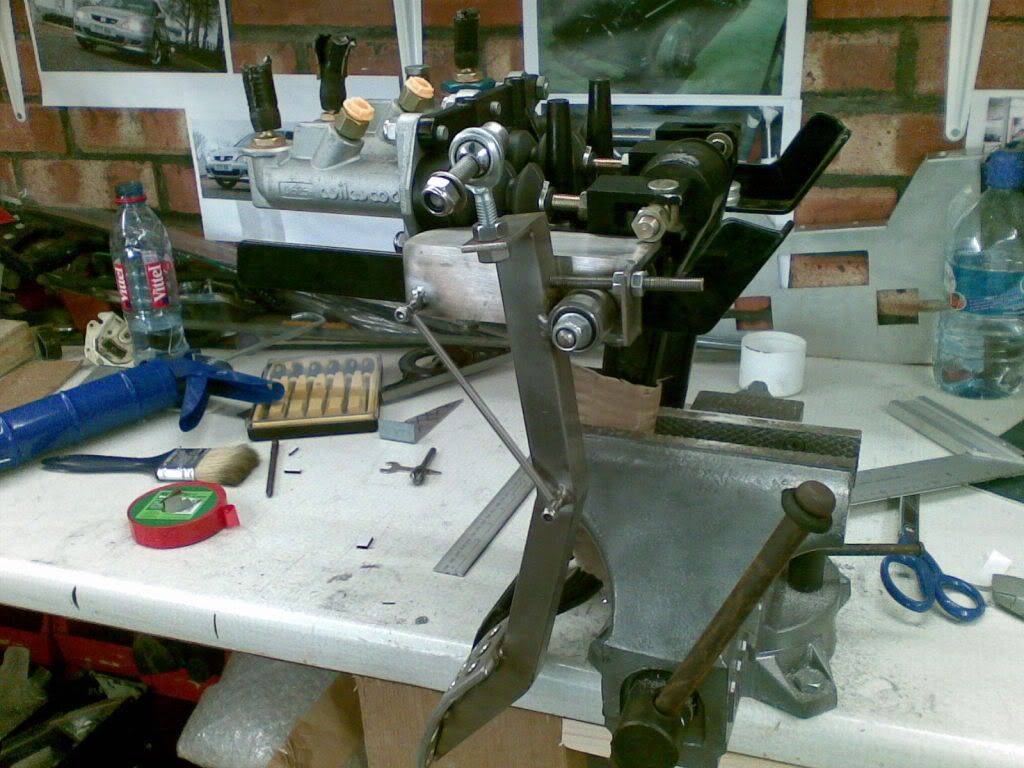
I also got around to taking a couple of snaps of the throttle pedal with the spring and adjustable return stop now attached:
#99
irishdude
-
- Noobies
-
- 124 posts
Mini Mad
Posted 01 May 2009 - 06:01 AM
I also got around to taking a couple of snaps of the throttle pedal with the spring and adjustable return stop now attached:
Very nice work.. Some amazing fabrication there. Liking the Inner arches
#100
cptkirk
-
- Members
-
- 1,799 posts
Camshaft & Stage Two Head
- Location: West Sussex
- Local Club: B.M.C. + Chiminiclub
Posted 01 May 2009 - 08:17 AM
Very nice work.. Some amazing fabrication there. Liking the Inner arches
Thanks Bryan
I see it like this with these projects; everyone wants to do it differently and some may have no idea where to start, if I show the things that I have done people can choose to copy (which I dont mind as long as they dont end up with an identical car) or it can spark an idea for a different way of doing things. I also hasten to say that alot of what I am building I haven't tested in earnest so be aware, if copying, that it may not work.
All said I just love making things, there's few better feelings than coming up with an idea, drawing it out and then making it with your own two hands (plus sometimes the hands of others when you need a bit of machining or ali welding doing).
It's a man thing.........
#101
Gingerjoe
-

- Members
-
- 1,908 posts
Camshaft & Stage Two Head
- Local Club: Tmf
Posted 02 May 2009 - 12:01 AM
Easy dude! still whaching this & still looking fantastic! keep it up!
#102
cptkirk
-
- Members
-
- 1,799 posts
Camshaft & Stage Two Head
- Location: West Sussex
- Local Club: B.M.C. + Chiminiclub
Posted 02 May 2009 - 05:03 PM
Easy dude! still whaching this & still looking fantastic! keep it up!
Thanks - will do....
#103
cptkirk
-
- Members
-
- 1,799 posts
Camshaft & Stage Two Head
- Location: West Sussex
- Local Club: B.M.C. + Chiminiclub
Posted 02 May 2009 - 05:08 PM
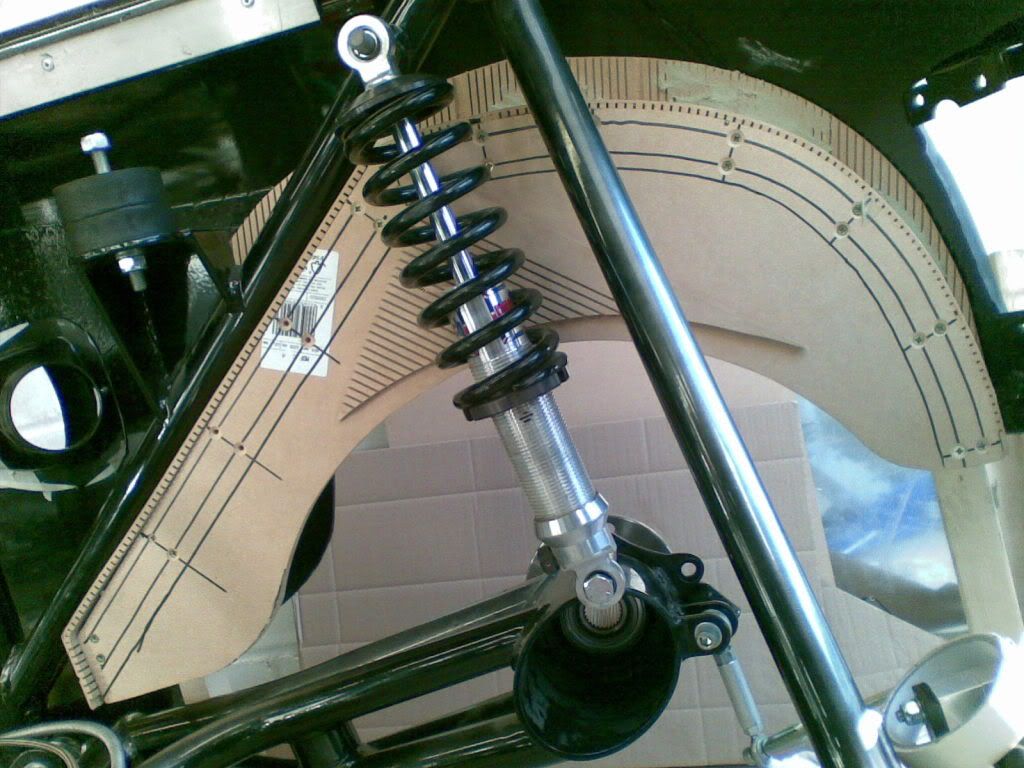
Update on inner arches:
O/S pulled out, thought I would show the photos so you can see why you have to use bendy mdf when trying attch the flange to the arch, serious curves:
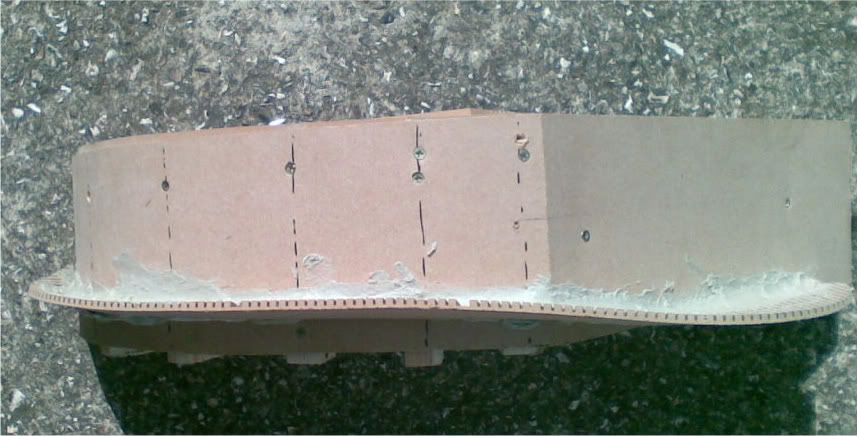
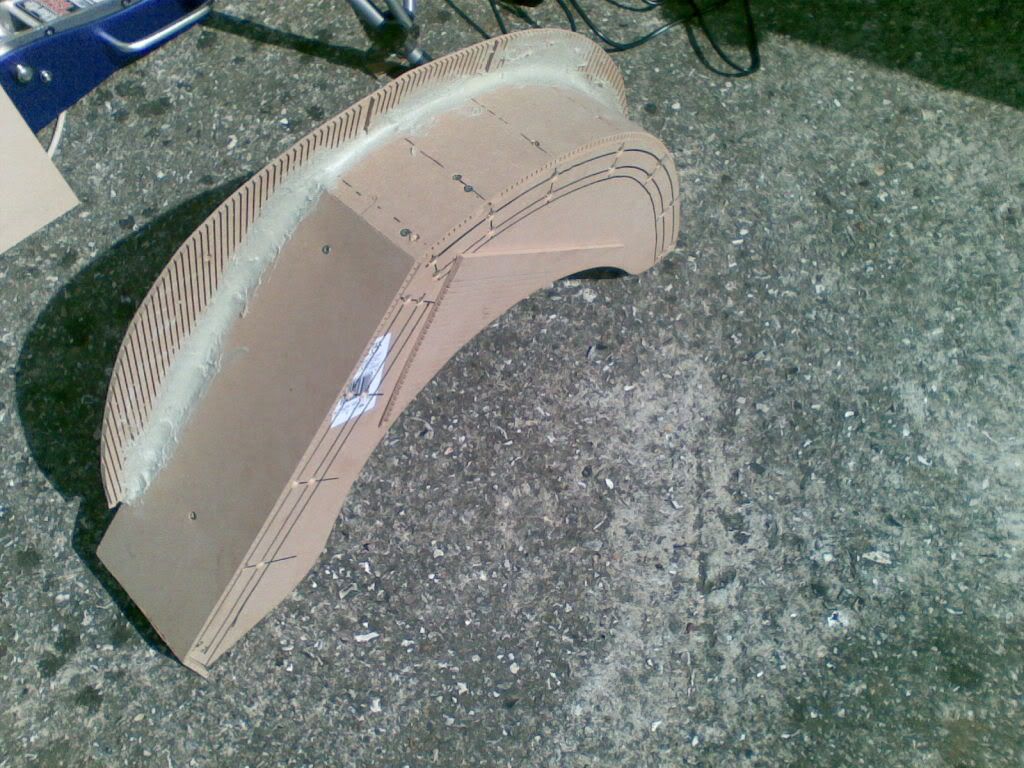
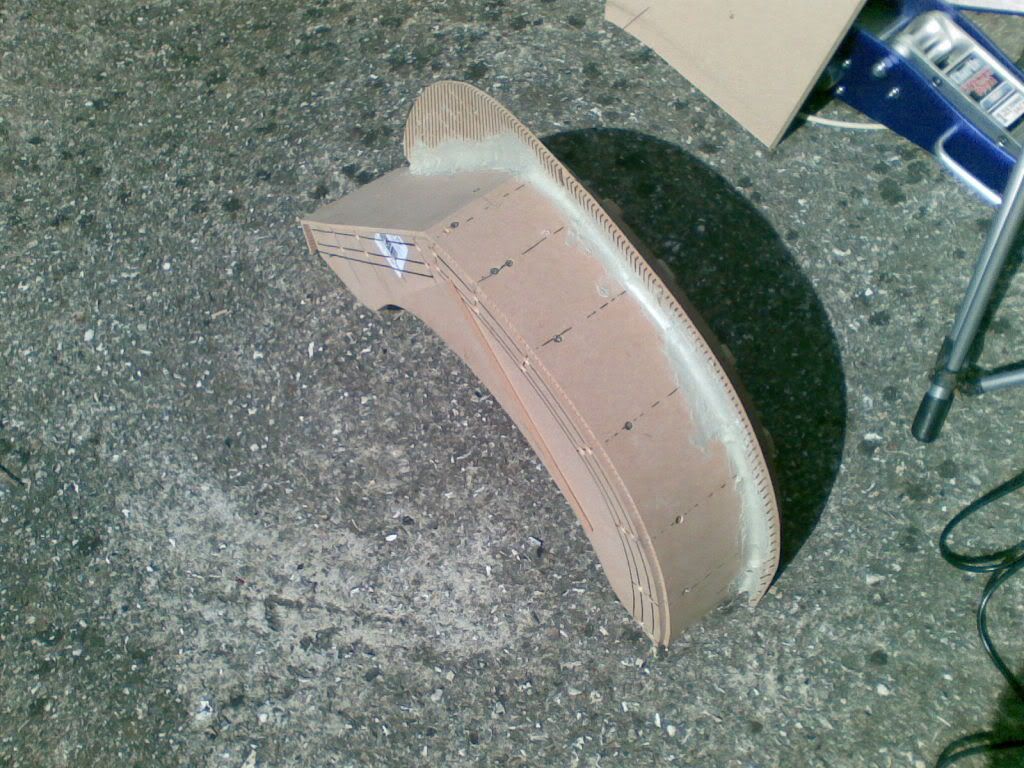
More to come as the N/S is made and then onto filling, smoothing, priming and then hand over to my mate Stuart to finish off and make me some fibreglass arches.......
O/S pulled out, thought I would show the photos so you can see why you have to use bendy mdf when trying attch the flange to the arch, serious curves:
More to come as the N/S is made and then onto filling, smoothing, priming and then hand over to my mate Stuart to finish off and make me some fibreglass arches.......
#104
cptkirk
-
- Members
-
- 1,799 posts
Camshaft & Stage Two Head
- Location: West Sussex
- Local Club: B.M.C. + Chiminiclub
Posted 02 May 2009 - 05:21 PM
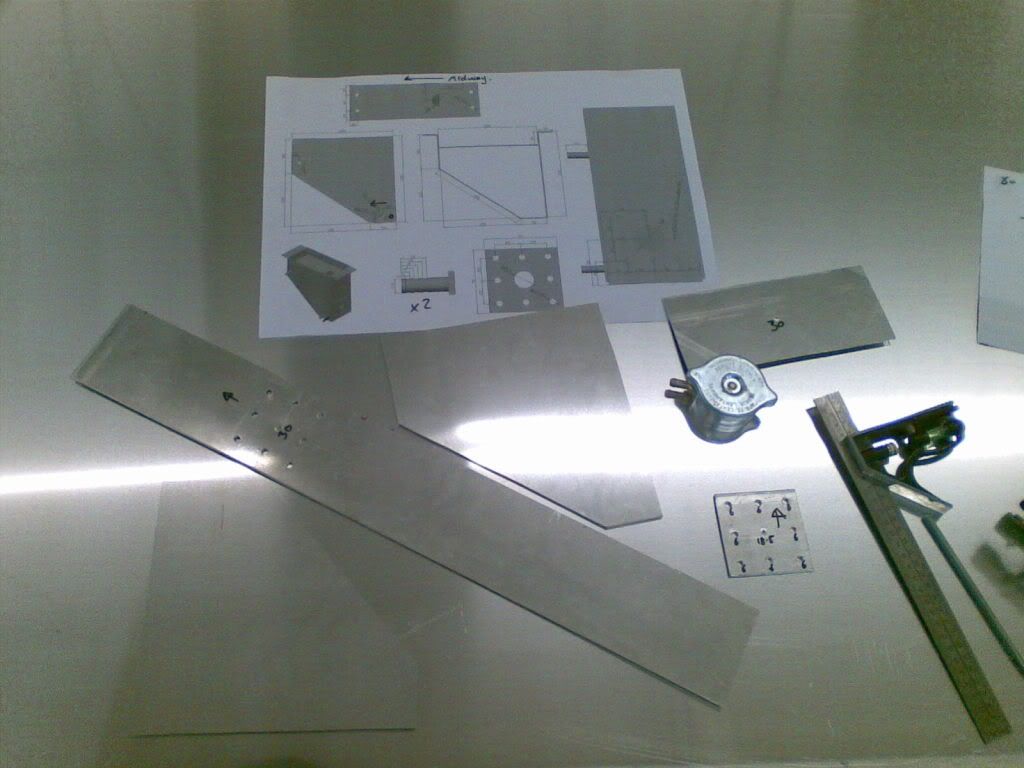
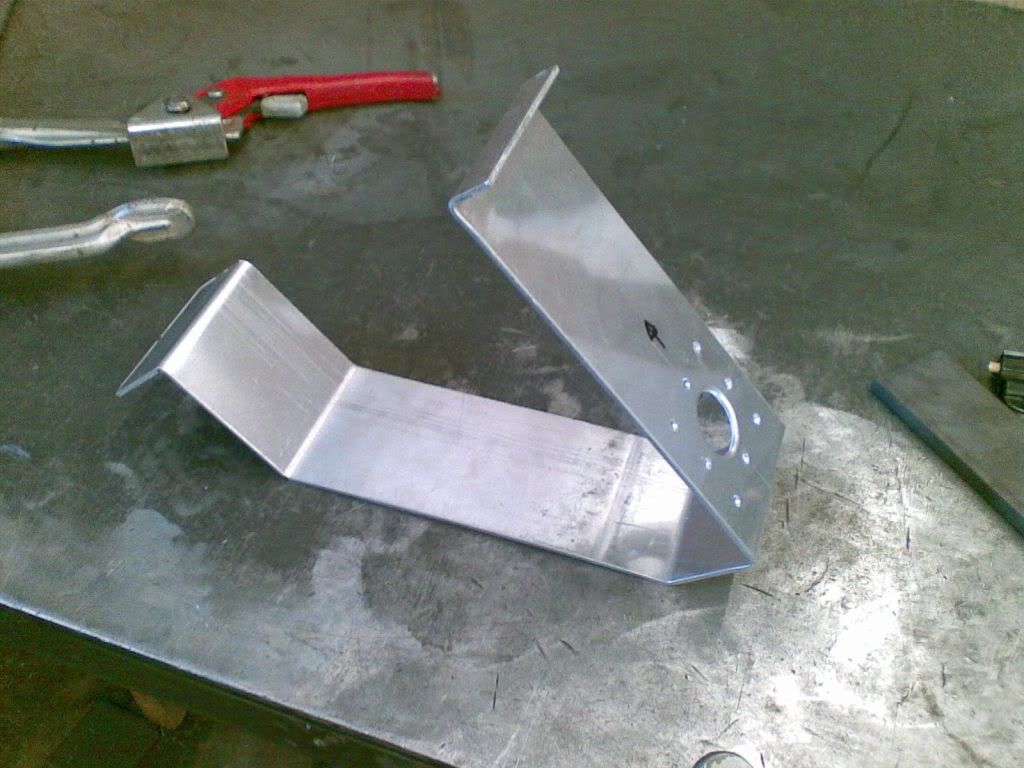
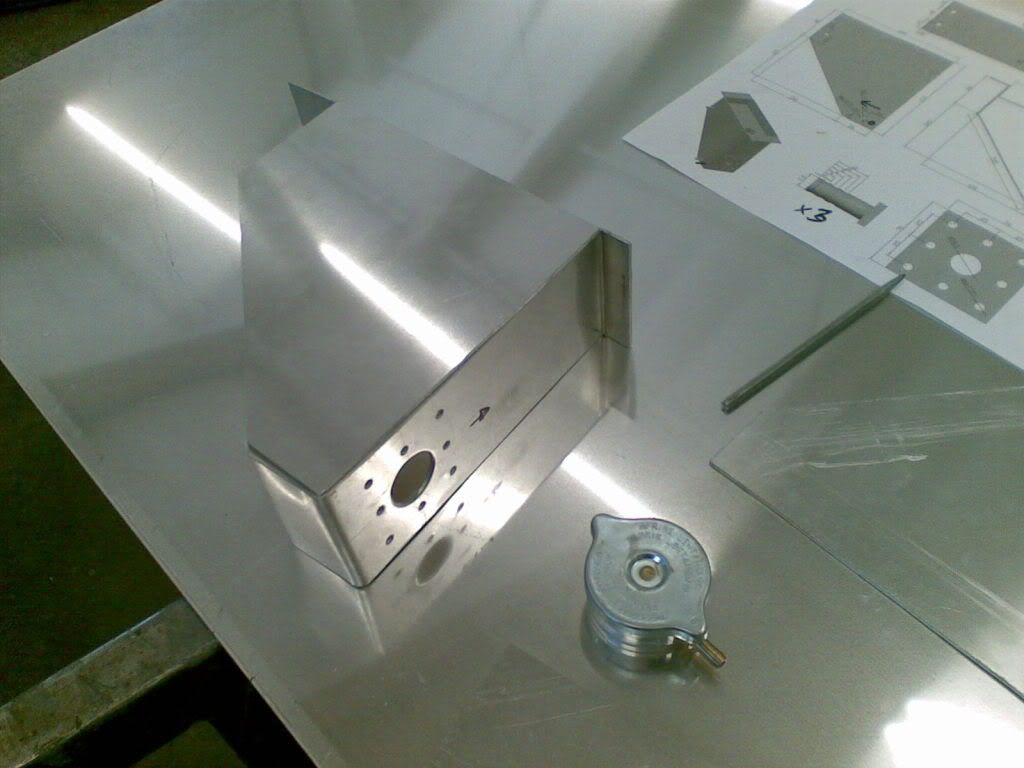
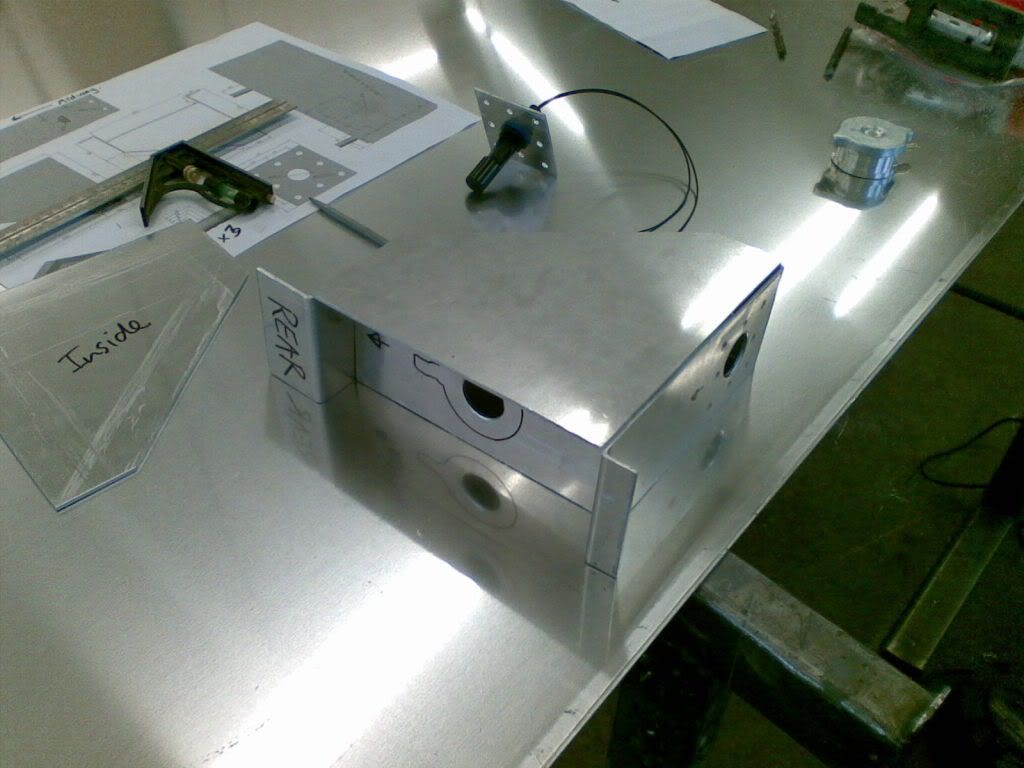
Started making my expansion tank this morning at my good friend Stevie G's place.
So as you can see in the drawing in the first photo, I had drawn up and checked the volume of a suitable exp tank approx (2.25L) I have incorporated into the design a float switch to warn against low water in the tank, incase of leaks more tha anything else. The finished article will have the usual one inlet, high up, but two outlets, one for the engine coolant system and one will initially be unusd but is intended for the intercooler water system, the benefit of which is that the I/C coolant then is also pressurised, aiding to the efficiency of the pump if the outlet is connected in the right place.
I reached the stage of it needing welding and its missing the holes for the inlets and outlets as I need to talk to the Barry the Welder about hole distances.
We start with photos of the flats parts then onto a bit of bending and how to overcome not having a bending machine available, then just some shots of the parts offered up. Hopefully it will be welded up in the week and ready for installation next weekend - woo hoo.....
#105
Saxo-Fiesta-Mini
-

- Members
-
- 2,889 posts
Up Into Fourth
- Local Club: LCMOC
Posted 02 May 2009 - 05:54 PM
great work fella really like the fabrication work you do very well made makes me know i need to improve my fabrication


0 user(s) are reading this topic
0 members, 0 guests, 0 anonymous users


