Yes , you're right I shouldn't have to shorten the drive shafts to sort the geometry out, but I honestly don't think I have an option. I have explored every other avenue believe me. We're only talking about 5mm off the right hand shaft, but it's the hassle.
I could do with knowing how much toe-in is needed on the rear wheels (if any). Hopefully it'll need a shed load, then I won't need to shorten the drive shaft :grin:
D.D.


THE BUZZ WAGON!
Started by
Dick Dastardly
, Oct 04 2005 09:47 AM
315 replies to this topic
#47

markrally
-

- TMF+ Member
-

- 1,378 posts
Z Cars
- Local Club: Miniaddicts.co.uk
Posted 01 November 2005 - 03:21 PM
well we could all do with knowing what the alignment settings are, prehaps ade and pete can shed some light on it or prehaps dale can???Yes , you're right I shouldn't have to shorten the drive shafts to sort the geometry out, but I honestly don't think I have an option. I have explored every other avenue believe me. We're only talking about 5mm off the right hand shaft, but it's the hassle.
I could do with knowing how much toe-in is needed on the rear wheels (if any). Hopefully it'll need a shed load, then I won't need to shorten the drive shaft :grin:
D.D.
Mark :wales:
#48
Custom_Minis
-
- Traders
-
- 702 posts
One Carb Or Two?
Posted 01 November 2005 - 07:47 PM
Hi D.D
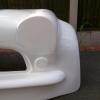
Thanks for the pic consent, I'll get them on the web site ASAP. Was it a single or double skin boot you had off us??
Through the web site or at a Mini show??
Car is looking great by the way!
Les.
Thanks for the pic consent, I'll get them on the web site ASAP. Was it a single or double skin boot you had off us??
Through the web site or at a Mini show??
Car is looking great by the way!
Les.
#49
pete
-

- Members
-
- 680 posts
Super Mini Mad
Posted 01 November 2005 - 08:31 PM
The only settings I can remember are:
camber about 1 - 1.5 degrees
caster 5 degrees
Loads of rear toe-in but wasn't paying attention as to how much. They had to make a 5mm spacer to fit between cv joint and hub to take up excess freeplay on the drivers side.
Pete
camber about 1 - 1.5 degrees
caster 5 degrees
Loads of rear toe-in but wasn't paying attention as to how much. They had to make a 5mm spacer to fit between cv joint and hub to take up excess freeplay on the drivers side.
Pete
#50
Dick Dastardly
-
- Members
-
- 261 posts
Mini Mad
Posted 02 November 2005 - 09:14 AM
Thanks for the figures Pete.
Good news on the rear toe-in then- I might be alright after all :wink:
It's odd that there was too much free play on your car Pete, yet on mine the free play has never been that great on the drivers side- it's always had more on the passenger side. I suppose it's just down to the individual build up of each rear end, and the manufacturing tolerances involved.
Was the set-up at Chris's expensive? What's the prognosis on your engine?
Custom-minis, the boot was a single skin, and purchased off your website.
Bye for now
D.D.
#51
pete
-
- Members
-
- 680 posts
Super Mini Mad
Posted 02 November 2005 - 04:48 PM
Setup was at our expense. £211 each. If I had had the settings I would have got a mate who has all the equipment to do it for me. Slightly dissapointed at the cost escpecially as they only used bits of string to create straight lines down both sides to take measurements from.
Ordered complete oil/water pump internals and all relevant seals/gaskets. Also got to order new housing as I was hoping it could be salvaged but it appears beyond repair.
Had one of the big ends apart and it seems ok. Suppose I will find out when it's all back together.
Pete
Ordered complete oil/water pump internals and all relevant seals/gaskets. Also got to order new housing as I was hoping it could be salvaged but it appears beyond repair.
Had one of the big ends apart and it seems ok. Suppose I will find out when it's all back together.
Pete
#52
Dick Dastardly
-
- Members
-
- 261 posts
Mini Mad
Posted 03 November 2005 - 09:51 AM
Sorry to hear about the engine Pete. The oil/water pump is deep in the bowels of the crankcase isn't it? Downer. :sad: Still, the cold winter nights would be utterly boring without something to tinker with. Now, they'll simply fly by! :grin:
I've done a similar thing to the string with the initial setup of my geometry- 2 parellel lines of tape set at the track width running down my garage floor. This gives me a reference to measure back to. Got both sides of the car doing the same thing now, just not sure they're doing the right thing!
At the price Chris charges, I think I may go to an airfield day, and play with my own settings....
#53
markrally
-
- TMF+ Member
-
- 1,378 posts
Z Cars
- Local Club: Miniaddicts.co.uk
Posted 13 November 2005 - 10:19 PM
Any updates? or is the garage the coldest place on earth at the moment??? :fear:
Mark :wales:
Mark :wales:
#54
Dick Dastardly
-
- Members
-
- 261 posts
Mini Mad
Posted 14 November 2005 - 08:54 AM
The garage is not a nice place at ths time of year, but I have managed to do a couple of minor things recently. I've got the throttle cable and linkage in, after modifying the linkage somewhat, and using a solid top link rather than cable.
I've also got the header tank installed, and the radiator hoses fully plumbed in now.
I was intending to fit the fuel hose and pressure regulator this weekend, and then get started with the brake hoses, but I didn't get any time at all, so they're the next jobs for this week.
After those jobs, it's the dreaded wiring!.......and then hopefully we'll see if the engine works.
How are you getting on?
D.D.
#55
maph2
-

- Members
-
- 1,291 posts
One Carb Or Two?
- Location: Warwick
- Local Club: Poor Boys Warwick
Posted 14 November 2005 - 03:13 PM
DD - gald to here the build to getting there. i see the arches are on (bet they took a while!!).
bit concerned about toe in/out issue. after watching the build dvd, the amount of fuss they make on making sure the cage is right etc etc. surely you don't have to cut the driveshaft.
for the money z cars are charging (now £5k plus vat), i would expect a bit more quality control.
bit concerned about toe in/out issue. after watching the build dvd, the amount of fuss they make on making sure the cage is right etc etc. surely you don't have to cut the driveshaft.
for the money z cars are charging (now £5k plus vat), i would expect a bit more quality control.
#56
markrally
-
- TMF+ Member
-
- 1,378 posts
Z Cars
- Local Club: Miniaddicts.co.uk
Posted 14 November 2005 - 04:31 PM
Im nearley all spent up now, still deciding on servo/ bias pedal box or straight master cylinder for the brakes, im gettin loads of ideas as im going to seam weld and strengthen a bit yet as hese kits havnt been going long so the stresses and strains arent showing yet so im using my expierience from the rallying to build some strength into the mini.After those jobs, it's the dreaded wiring!.......and then hopefully we'll see if the engine works.
How are you getting on?
D.D.
I have also been offered a complete set of front brakes off the last of the AUSTIN ROVER Group A mini coopers, i cant wait to see them, and see if they will fit under my 13's. They may make the KAD's look pants.... :sick:
Ive got all the replacement body panels etc so it is all down to me now, i decided to build the front subframe propereley first time replacing all the bearings, ball joints and suspension arms etc and shot blast everything and powder coat it all etc so i havnt done much on the shell till i get the front end on wheels.
More pics please........
Mark :wales:
#57
Dick Dastardly
-
- Members
-
- 261 posts
Mini Mad
Posted 15 November 2005 - 05:06 PM
Sounds like a very similar approach to mine Mark. Everything on my car is either new, or has been taken off and made like new :cheese:
On the subject of the rear toe-in, I may have been a little hasty
After forcing myself to watch the build DVD again, it would appear the correct rear toe-in is roughly equal to a shed load! i.e 5mm over the distance of the wheel rim! I remebered the figure of 5mm, but wrongly associated this figure as being 5mm over the length of the sill. 2 vastly different angles!
What 5mm over 325mm equates to is a toe-in angle of 0.88 degrees! This equates to 24.37mm of slip for every revolution of the wheel! Or to put it another way 24 metres of sideways slip for every mile travelled!!! Or, to put it another way- completely shagged rear tyres very very quickly :saywhat:
As a result, and also as a result of striving for ages to get 5mm of toe-in over the length of the sill, I'm leaving mine as it is for now. If it handles like a supermarket trolley, I may re-assess the issue at a later date...
My head hurts again.
D.D.
#58
Dick Dastardly
-
- Members
-
- 261 posts
Mini Mad
Posted 16 November 2005 - 05:11 PM
I need help. Really really basic question this, but how can you identify the new (plastic resevoir) clutch master cylinder as opposed to the single line brake master cylinder? Bearing in mind, I only have one or the other so cannot compare the 2! I'm worried I have been sold the Brake master cylinder, and not the clutch one as agreed. Problem is, it was an ebay job about 12 months ago.
I know that the brake master has a bigger mounting foot than the clutch master, but I can't compare anything. There is a "notch" out of the mounting foot on the cylnder I have, and the reason I think it's the brake master cylinder is that when secured next to my tandem brake master, the resevoir appears to sit very close to the outlets.
Any thoughts?
D.D.
#59
markrally
-
- TMF+ Member
-
- 1,378 posts
Z Cars
- Local Club: Miniaddicts.co.uk
Posted 16 November 2005 - 05:17 PM
Im just gonn eat my tea and i will measure the clutch cylinder for you??
Mark :wales:
Mark :wales:
#60
Dick Dastardly
-
- Members
-
- 261 posts
Mini Mad
Posted 16 November 2005 - 05:24 PM
Cheers! you're a star 


0 user(s) are reading this topic
0 members, 0 guests, 0 anonymous users


