Jump to content


Photo

Starting A Boot Install


  • Please log in to reply
25 replies to this topic

#16 skaterava

skaterava

    Camshaft & Stage Two Head

  • Members
  • PipPipPipPipPipPipPipPip
  • 1,857 posts
  • Location: Herts

Posted 14 December 2009 - 06:47 PM

Not sure if it was mentioned, but i think the effect your looking for on the perspex with the mini logos is referred to as etching. Getting perspex sheets custom etched might be a little pricey, the cheaper alternative is to have the logos cut out of a transparent etch vinyl and then stick them on. I dont have any in stock, but Roofless on here might be able to hook you up.


Cool, I have a friend nearby who's always building bits and pieces so i'll talk to him first, he used to "etch" perspex all the time so hopefully he'll still have access to whatever machine does it :thumbsup:

Nothing to add dont know much about laquer myself just wanted to say its good to see someone having a good go at building something for there mini make sure you take plenty of pictures and post them

Subscribed :(


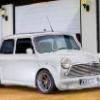
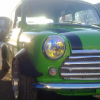
Progress has been maade! I was outside in the cold and rain, but finished off today looking almost like an install! :lol:

The woodwork is very messy though,for some reason i just cannot cut straight with a jigsaw! I can sort it out with some sandpaper, just got too cold today though :genius:

here's what it's looking like at the moment:

Posted Image

Posted Image


Amp still hasn't been painted, i'm a bit hesitant because a) i don't know how to lacquer anything, and b) I got a great deal on it, and don't want to break/ruin it :)


That little rectangular hole on the bottom left in the first photo is for the wires to travel through.

EDIT: although now that i think about it, i could have always drilled holes directly behind the amp, that probably would have looked better too... :dontgetit:
a learning curve i suppose :thumbsup:

Edited by skaterava, 14 December 2009 - 06:49 PM.


#17 tcw_lk

tcw_lk

    Passed Test

  • Noobies
  • PipPip
  • 33 posts
  • Local Club: Mighty Mini Club of Sri Lanka

Posted 23 December 2009 - 04:55 PM

u could hav fitted the amp straight away at the back of the rear seat :)
much easier and less weight adding.

#18 Brams96

Brams96

    Up Into Fourth

  • TMF+ Member
  • PipPipPipPipPipPipPipPipPip
  • 2,308 posts
  • Local Club: Kentish Mini Club

Posted 23 December 2009 - 08:53 PM

Good progress, a little bit a day keeps it ticking over towards the finish. That is a fairly thick piece of wood the amp is mounted on, if you want to save a bit of weight you could go half that thickness.

I'm still a bit confused about lacquering, am i right in saying i need to sand the amp down a bit, clean it, paint it and then spray lacquer over?


Tha laquering part is simple. Do as you said above, do 2-3 coats of colour and 2-3 of clear, leaving about 20-30 mins between coats. Use the same type of primer/colour/laquer too (all the same brand ie Halfords, plasticoat etc) The trick is to do thin layers and not be tempted to spray a thick coat on. In this weather I would make sure the amp and paint are at room temp before spraying, preferably spray inside the garage if you can that way you can leave it to dry between coats. I actually sprayed mine and then put it in my spare bedroom in the house to dry properly, a bit smelly but it soon goes.

although now that i think about it, i could have always drilled holes directly behind the amp, that probably would have looked better too...
a learning curve i suppose


That's what it's all about! :xmas: You could always cut and glue a small piece of wood in to cover that hole and re-drill them behind the amp, also if you put the wires through at the top back you wont catch them when putting things in the box. :)

Keep it up.

#19 Brams96

Brams96

    Up Into Fourth

  • TMF+ Member
  • PipPipPipPipPipPipPipPipPip
  • 2,308 posts
  • Local Club: Kentish Mini Club

Posted 30 December 2009 - 08:13 AM

Any updates Skaterava?

#20 skaterava

skaterava

    Camshaft & Stage Two Head

  • Members
  • PipPipPipPipPipPipPipPip
  • 1,857 posts
  • Location: Herts

Posted 31 December 2009 - 12:54 PM

Nope! Seeing as i don't have a garage, the install has been on hold :P it's been far too cold and rainy lately to work outside! I will probably try to clean out my dad's shed and try working in there, but that could take all day :P

I'm going to pick up some perspex and a fibreglassing kit in the first week of the new year. I did have a look in B&Q but their acrylic sheets were too thin and really flimsy. Any other time i have free, i'm going to start sanding down and smooth out all the rough and bumpy bits on the wood frame :P

Also, does anyone know where i can buy some decent sheets of sponge? The type you get on car seats. I need something underneath my boot board so the install won't get jolted when i'm driving along.

Edited by skaterava, 31 December 2009 - 12:55 PM.


#21 Brams96

Brams96

    Up Into Fourth

  • TMF+ Member
  • PipPipPipPipPipPipPipPipPip
  • 2,308 posts
  • Local Club: Kentish Mini Club

Posted 04 January 2010 - 09:11 AM

Try a carpet store for some foam underlay or try Dunelm Mill they do dense foam chair swabs and other thinner stuff. They are also a good place to get vynal if you were going to cover it, or for anything else.

#22 skaterava

skaterava

    Camshaft & Stage Two Head

  • Members
  • PipPipPipPipPipPipPipPip
  • 1,857 posts
  • Location: Herts

Posted 16 January 2010 - 11:30 AM

Right, the snow has started to melt, so soon this install will be back on track. Luckily my dad (a building contractor) has managed to get hold of lots of upholstery sponge while clearing out an old restaurant, so that's sorted. Next thing on the list is the perspex. Anyone know where i can pick this up? I've visited B&Q and Homebase and their perspex is either rubbish or really expensive.

#23 Brams96

Brams96

    Up Into Fourth

  • TMF+ Member
  • PipPipPipPipPipPipPipPipPip
  • 2,308 posts
  • Local Club: Kentish Mini Club

Posted 16 February 2010 - 01:24 AM

Hey hows the install going? Here's a LINK to a PERSPEX company that one of the other guys on here used for his install (Check out Starting a New Install)

#24 Down&Out

Down&Out

    The King Of Retro Cool

  • Traders
  • PipPipPipPipPipPipPipPipPip
  • 4,833 posts
  • Location: -

Posted 16 February 2010 - 03:13 AM

Purple and blue will go fine :D

#25 skaterava

skaterava

    Camshaft & Stage Two Head

  • Members
  • PipPipPipPipPipPipPipPip
  • 1,857 posts
  • Location: Herts

Posted 16 February 2010 - 01:35 PM

Hey hows the install going?


No progress to be spoken of :lol: don't you just hate it when life gets too busy for the enjoyable things?

Oh, and i did leave my MDF frame for the install in the shed, but my dad did some clearing out and must have thought it was junk, because its remains in a fire he made to get rid of all the useless wood.

Project restart then, and the first thing i'll do is buy thicker MDF. The thinner stuff i used was rubbish anyway.

More news on payday, which is in about a weeks time.

#26 MGBailey007

MGBailey007

    One Carb Or Two?

  • Validating
  • PipPipPipPipPipPipPip
  • 725 posts
  • Location: Accrington
  • Local Club: North West Mini Club

Posted 21 December 2011 - 03:37 PM

looks good mate


0 user(s) are reading this topic

0 members, 0 guests, 0 anonymous users