oooooooh.. what about those quick release pins for standard grilles, can they not be adapted?
Lester


Wire Mesh Grills
Started by
miniman24
, Apr 26 2010 06:32 PM
37 replies to this topic
#32

miniman24
-
- Traders
-

- 1,696 posts
Camshaft & Stage Two Head
- Location: Up North
Posted 01 May 2010 - 06:36 PM
Great idea, cant see why not!oooooooh.. what about those quick release pins for standard grilles, can they not be adapted?
Lester
Dont know why I didnt think of that *facepalm* !
#33
minilester
-

- Noobies
-
- 770 posts
One Carb Or Two?
Posted 03 May 2010 - 02:07 PM
christ theres just not enuff time to do anything lately... did u take those picture's miniman 24?... as i would love to see them so i can make a start on mine please
Lester
Lester
#34
miniman24
-
- Traders
-
- 1,696 posts
Camshaft & Stage Two Head
- Location: Up North
Posted 03 May 2010 - 03:24 PM
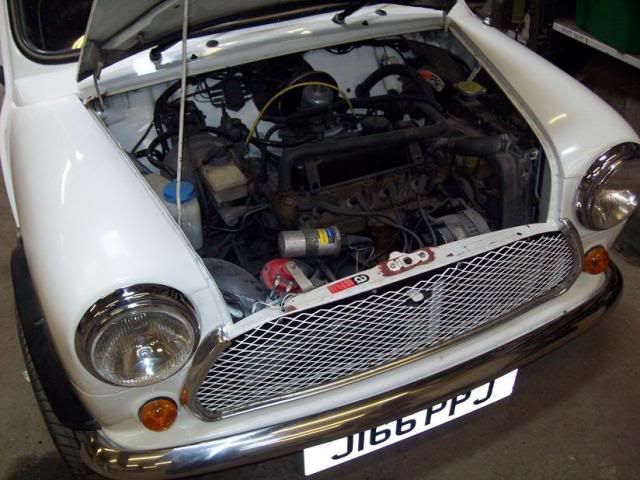
Sure have! My photobucket wasnt working properly yesterdaychrist theres just not enuff time to do anything lately... did u take those picture's miniman 24?... as i would love to see them so i can make a start on mine please
Lester

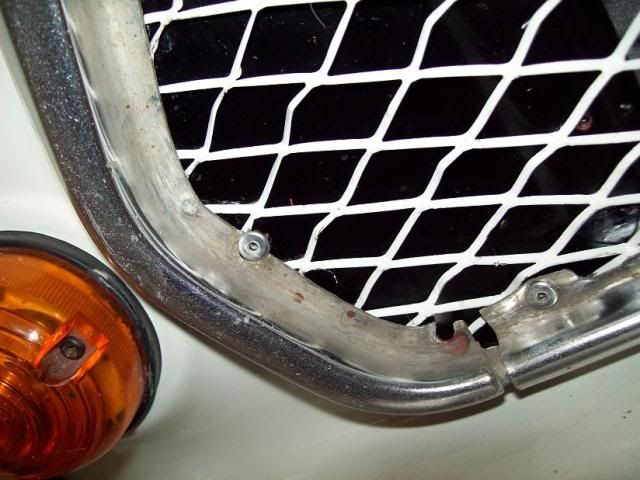
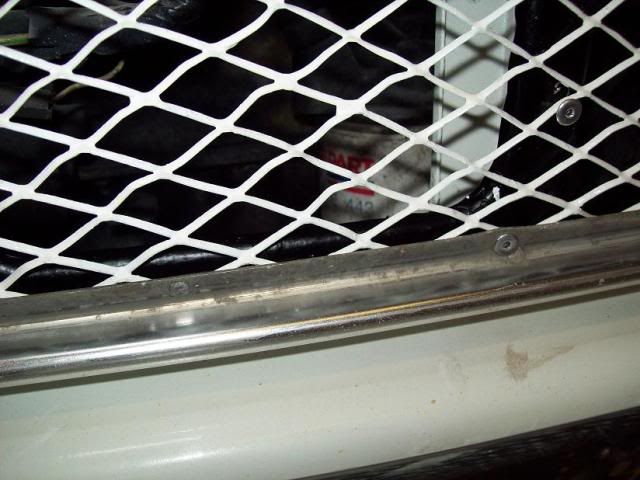
Heres a close up of the edge, as you can see the mesh goes between the frame and chrome surrounds, and uses the securing rivets of the surrounds to stay in place:
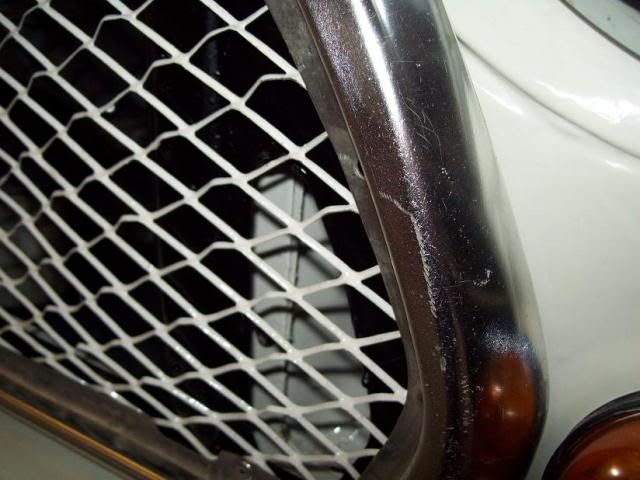
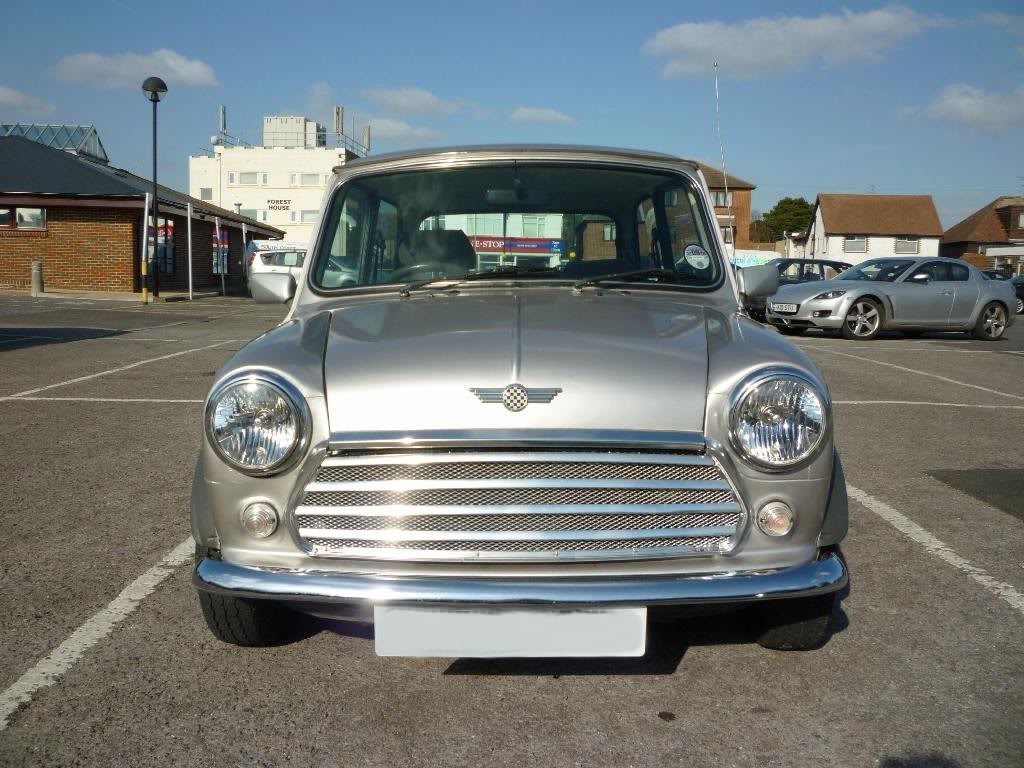
With the result of the whole thing looking tidy round the edges, as the surround hides the rough cut edges:
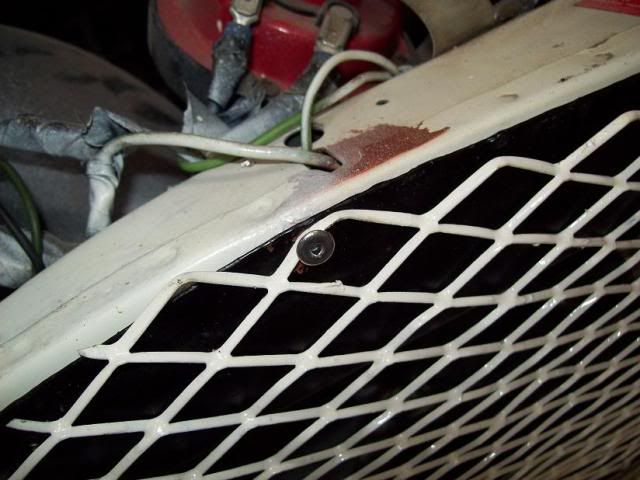
Here you can see the bit usually hidden by the bonnet, and these rivets secure both the mesh and the frame:
And the bottom surround, also on top of the mesh: (you can also see one of the rivets that only secure the mesh to the frame, near the top right, theres 5 of these)
Hope that helps, if you need any more please feel free to ask

Edited by miniman24, 03 May 2010 - 03:26 PM.
#35
electricjim
-

- Members
-
- 237 posts
Mini Mad
- Location: uk
- Local Club: WSMOC
Posted 03 May 2010 - 06:51 PM
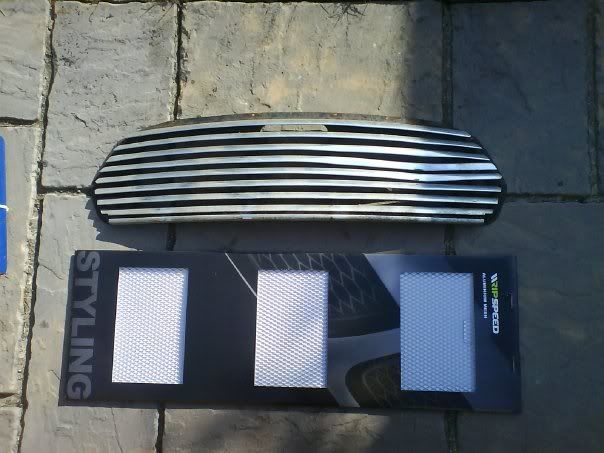
heres mine, took all the slats off, hamerited the backing plate polished up the slats, put some halfords sports mesh behind and used the slats riveted back on to hold it in place then cut off the excess.
#36
samsfern
-

- Members
-
- 5,243 posts
Likes Rovers, loves Jeremy Kyle
- Location: Ringwold, kent
- Local Club: medway mini club/medwaymonkeys
Posted 03 May 2010 - 06:56 PM
^^^ i like that, do you mind if i steal your idea and do mine like that??
#37
miniman24
-
- Traders
-
- 1,696 posts
Camshaft & Stage Two Head
- Location: Up North
Posted 03 May 2010 - 07:07 PM
Thats a good idea, would have done that if all my slats wernt knackered lol!
#38
electricjim
-
- Members
-
- 237 posts
Mini Mad
- Location: uk
- Local Club: WSMOC
Posted 03 May 2010 - 10:53 PM
most the slats were knacked when i bought the grill from the salvage yard, i spent probably too long straightening them up, cleaning them and getting into trouble for knakering the scouring pad  , not to mention to time i took brushing off the flaky paint and rust before painting it.
just found how it was when i picked it up you can even see the shadow of where of 4 spots where in front of the grill to give you an idea of the ground in crud
, not to mention to time i took brushing off the flaky paint and rust before painting it.just found how it was when i picked it up you can even see the shadow of where of 4 spots where in front of the grill to give you an idea of the ground in crud
Edited by electricjim, 03 May 2010 - 11:00 PM.


1 user(s) are reading this topic
0 members, 1 guests, 0 anonymous users


