Jump to content


Photo
- - - - -

1979 Rust Heap Clubman Rebuild


  • Please log in to reply
625 replies to this topic

#91 rich2

rich2

    Speeding Along Now

  • Members
  • PipPipPipPipPip
  • 351 posts

Posted 07 May 2011 - 09:09 PM

I tried the driver's door on for size today and as I feared, the lip of the flitch sticks out too far. DOH! So some surgery occurred:

Posted Image

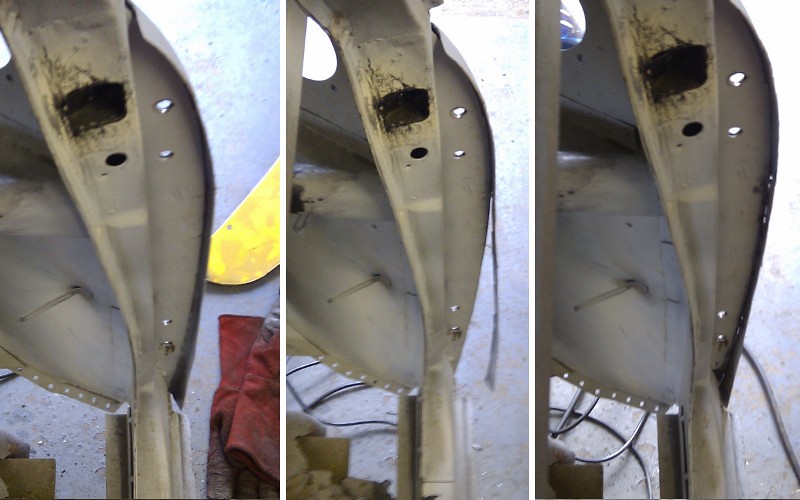
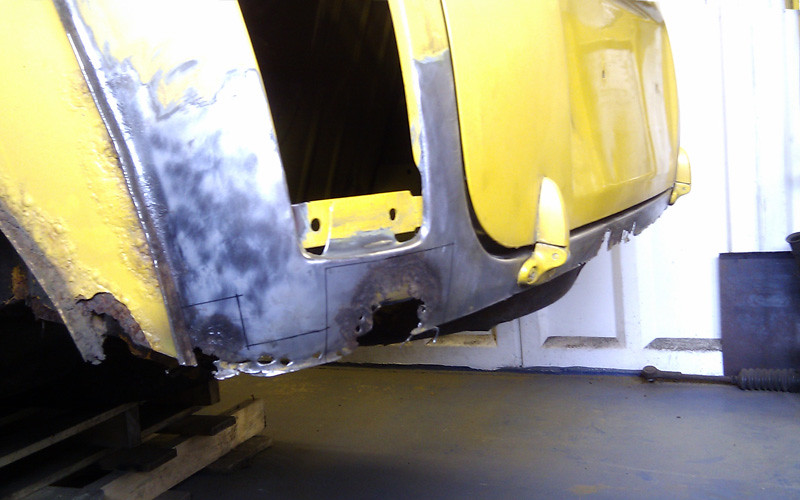
Hopefully everything will line up a bit more nicely now when I fit the A panel. I tried the old one on as a test, and the edge lines up with the door step. Nice!

Posted Image

#92 B-shaw

B-shaw

    One Carb Or Two?

  • TMF+ Member
  • PipPipPipPipPipPipPip
  • 944 posts
  • Local Club: www.clubpolo.co.uk

Posted 07 May 2011 - 10:10 PM

Love this dude

Nice work on the fabricating and welding n whatnot :)

#93 BusheyTrader

BusheyTrader

    Speeding Along Now

  • TMF+ Member
  • PipPipPipPipPip
  • 481 posts
  • Location: Bushey
  • Local Club: Nope

Posted 08 May 2011 - 07:34 AM

Just read your thread from start to finish. Impressive fabrication. You're an engineer of some sort I reckon?

I did the same as you, bought sight unseen off the internet. The guy described it as rusty, he wasn't wrong.

I'll keep watching,

Adam

#94 mini_in_progress

mini_in_progress

    Super Mini Mad

  • Members
  • PipPipPipPipPipPip
  • 641 posts

Posted 08 May 2011 - 09:27 AM

ive also just read this from start to finish and think your doing a top job, im picking my mini up this week and i aint really looked at it, hope it aint this bad as i was hoping to have it done by mitp 2011 lol :) keep it up mate

#95 skoughi

skoughi

    One Carb Or Two?

  • Members
  • PipPipPipPipPipPipPip
  • 1,199 posts
  • Location: Lerwick
  • Local Club: Shetland classic car club

Posted 08 May 2011 - 02:29 PM

Just been looking through and you've given me a moral boost for my equally rotten clubman (My Fixerupper, 73 clubman. It's on here somewhere) These clubmans are sooo rusty! Whole new floor, sills and both doorposts plus many other repairs. Taking the drivers doorpost apart just now. Was going to make my own outer a post as i did on the passengers side and as you have but have thought sod it and going to buy a door step/a post panel. when i did the passenger post i positioned the door in the apperture with wedges, cable ties etc where i wanted then bolted the panels that formed the post on the door hinges. helped to get everything in its right place. Then fixed everything in place with clamps/self tappers knowing the door and a panel lined up nicely. You're doing great, keep it going!

#96 kitroxin

kitroxin

    Speeding Along Now

  • Traders
  • PipPipPipPipPip
  • 494 posts
  • Local Club: Celtic Minis

Posted 08 May 2011 - 03:06 PM

Just read this all.. I am amazed by the standard of work, and I like the idea of styling the mini in a similar way to that skyline. Maybe look at getting 'Supertrax' wheels as I think that would fit this image.. I have some on my project and i love them!

Kit

#97 rich2

rich2

    Speeding Along Now

  • Members
  • PipPipPipPipPip
  • 351 posts

Posted 08 May 2011 - 08:06 PM

B-Shaw: Cheers mate!

You're an engineer of some sort I reckon?


LOL no! I'm learning as I go along. I spend 8 hours a day sitting at a computer for my day job. I've just had a look at your thread and we seem to be tackling the same areas. I'll keep looking to compare notes!

mini_in_progress: Cheers! Good luck with the project! Yes I suspect I'm in for the long haul! :thumbsup:

skoughi: That sounds like a good approach. I may yet do something like that too as I will be replacing steps, sills and quarter panels. Also, as I came across a new pattern door post for less than a tenner at himley today, I did kind of wonder why I'd bothered rebuilding my knackered one! :crazy:

kitroxin: Yes! I like the supertrax wheels! I haven't really looked into wheels yet, but I really love the wheels Rays make. Not sure how well they would suit a mini, and pretty sure they are not available in any sizes to fit one either!

#98 skoughi

skoughi

    One Carb Or Two?

  • Members
  • PipPipPipPipPipPipPip
  • 1,199 posts
  • Location: Lerwick
  • Local Club: Shetland classic car club

Posted 09 May 2011 - 05:19 PM

Went and ordered a step and a post repair section from m machine today about £55 odd. Will save so much work trying to make one. Did that on the passenger side, took ages and not really happy with the shape to be honest. So now on the drivers side i have new flitch, inner a post, outer a post/step and sill all going together at once! I'll bolt the flitch repair and inner a post onto the hinges of the door and get the door on the lock catch and hold in place with the cable ties, wedges etc so its all nice even gaps. Then fix everything else in place so it all lines up. Sills, door steps and across the car are all checked with a level or laser level so both sides are the same. At least then i know it will all line up nicely once its welded in place. An old panelbeater once told me; minis, as long as the wheels are in the right places, the windows fit in the holes and the doors fit then everything else, well just do what works!

#99 BusheyTrader

BusheyTrader

    Speeding Along Now

  • TMF+ Member
  • PipPipPipPipPip
  • 481 posts
  • Location: Bushey
  • Local Club: Nope

Posted 11 May 2011 - 09:23 PM

Almost forgot ;

The workshop's too clean and tidy. >_<

I take comfort in Boycie's comment. "Although it's worth remembering Minis are rarely the same both sides, even from new..." My tape measure agrees.

I wasn't as brave with my flitch panel. I was nervous about losing the reference points if I cut out too much of the bad stuff so its been a case of cut out and butt weld in new metal = slow progress.

Edited by BusheyTrader, 11 May 2011 - 09:45 PM.


#100 rich2

rich2

    Speeding Along Now

  • Members
  • PipPipPipPipPip
  • 351 posts

Posted 14 May 2011 - 11:54 PM

The workshop's too clean and tidy. :thumbsup:


I'm a clean freak! :)

So after seeing some stunning works of art at himley last week, I realised it was high time to get my finger out with this bodywork malarky. Got straight on the phone on monday to order the NS inner wing. The inside of the dash is now clean and primed, so the front end is definitely getting somewhere.

Posted Image

Much umming and arring about what to do next. Decided the next big step is boot floor and heel board. The problem in this area is the arches and quarters are also cheese, and the rear end of the floors need repairing. With so much major surgery on the cards, it seemed sensible to attempt to rescue the rear panel as a money saving exercise. Also fancied a challenge. :D 
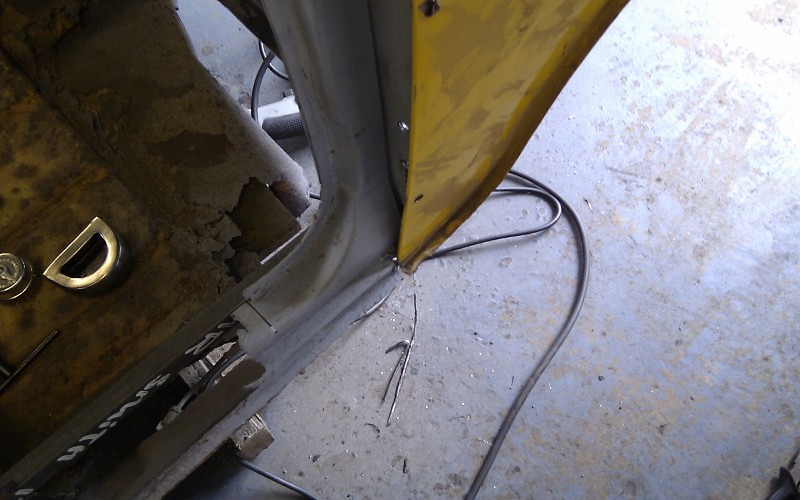
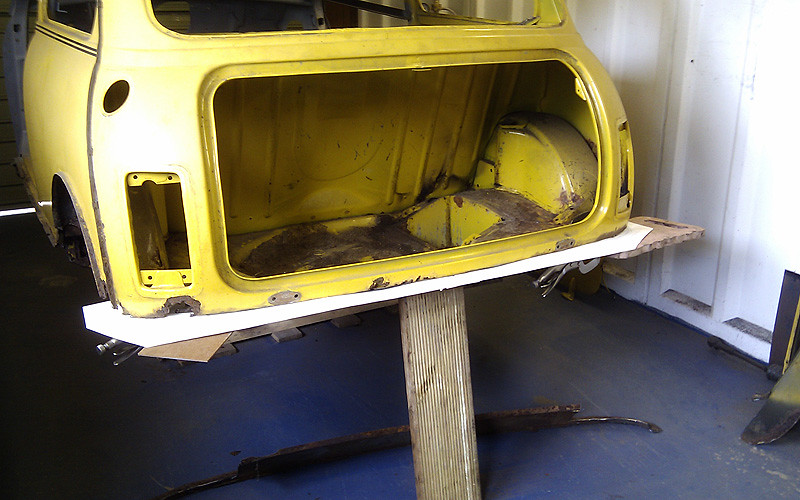
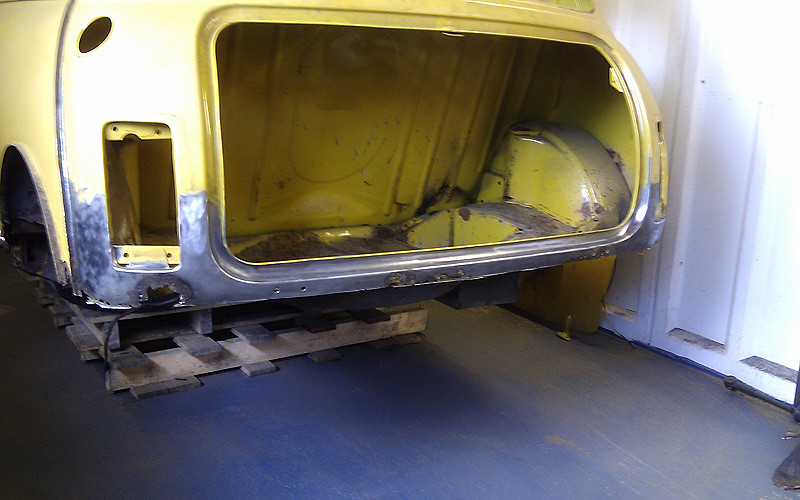
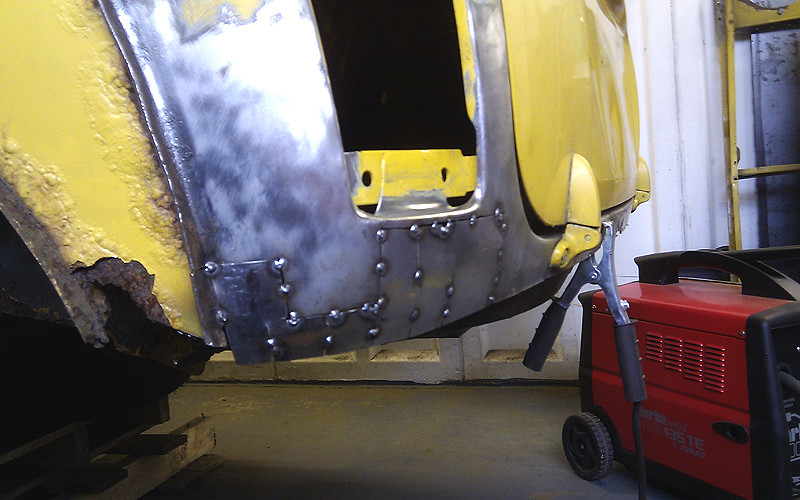
A solid rear panel will also give me something to weld the boot floor to.
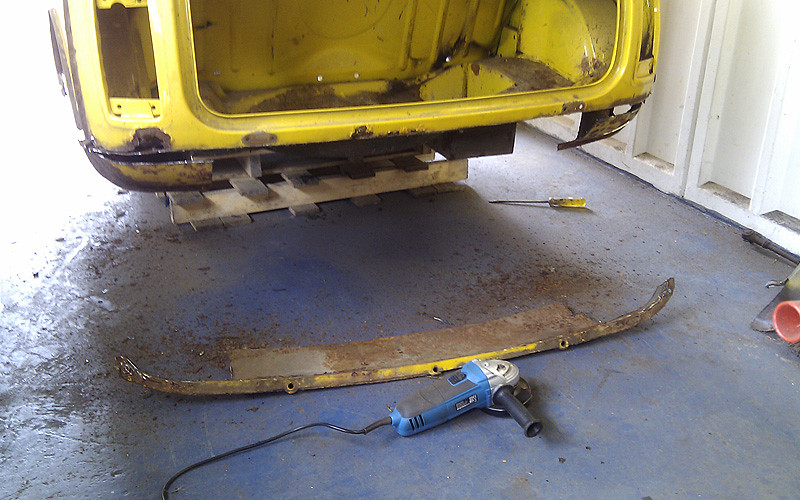
First of all, whipped off the rear valance complete with the lip. It was a crust sandwich:

Posted Image

Templating up for a new lip:

Posted Image

And cut out:

Posted Image

Paint stripped the disaster zone to assess the damage:

Posted Image

Luckily, the bad corrosion is contained in the lower couple of inches of the panel. Unluckily, there are compound curves to contend with.
Temporarily bolted the boot lid back on to make sure nothing was getting bent out of shape.

Posted Image

I saw a very helpful video on youtube about how to make a repair like this. Look up SWRNC (South West Rod 'n' Custom). The guy is a genius.

Posted Image

All welded up. Hopefully after a bit of grinding, flapping and filler it will be INVISIBLE!

Posted Image

The plan for tomorrow is to continue the rust repairs in this area, get the lip on, then see about cutting out the boot floor. I don't think I will need to put in any more bracing as the seat-back and parcel shelf etc should hold the rigidity. Please correct me if you know better!

#101 mini_in_progress

mini_in_progress

    Super Mini Mad

  • Members
  • PipPipPipPipPipPip
  • 641 posts

Posted 15 May 2011 - 07:28 AM

thats a very smart repair under the light there buddy.. i like!

picked mine up now and it seems just as rotten lol mainly the panel the rear subframe bolts too and the rear quarters and sills... but since your in notts too...... lmfao


keep up the good work buddy

#102 sonikk4

sonikk4

    Twisted Paint Polisher!!!

  • Admin
  • PipPipPipPipPipPipPipPipPipPipPip
  • 15,909 posts
  • Name: Neil
  • Location: Oxfordshire

Posted 15 May 2011 - 02:57 PM

Hi Rich tidy little repairs there. Once you have got the lip tacked in place at a minimum then you should be fine to sort the boot floor out. Everything else is still there so will be plenty strong enough not to require bracing.

#103 BusheyTrader

BusheyTrader

    Speeding Along Now

  • TMF+ Member
  • PipPipPipPipPip
  • 481 posts
  • Location: Bushey
  • Local Club: Nope

Posted 15 May 2011 - 04:21 PM

I checked out SWRNC on Youtube and clicked on the 1st clip I saw

OMG Bruno died :wub:

#104 grahama

grahama

    Up Into Fourth

  • Members
  • PipPipPipPipPipPipPipPipPip
  • 2,442 posts
  • Location: Warrington
  • Local Club: None in my area !!

Posted 15 May 2011 - 05:18 PM

Lovely work, very neat welding, keep it up.

Graham

#105 mini_legend

mini_legend

    Speeding Along Now

  • Members
  • PipPipPipPipPip
  • 395 posts
  • Location: Hull
  • Local Club: Outcast Car Club

Posted 15 May 2011 - 06:57 PM

We look to be in fairly similar boats mate lol. You are lucky with the 'lack of' rust you have! lol. But I'm quite novice, and my dad is teaching me bits n bobs, but I've just started my project a clubby estate, and it needs more than the one wing on the front, check out my thread mate! lol. I must be mad, 4 new floors, new doors (all 4) entire new front end, lots of repair work and maybe even a new engine! >_< 
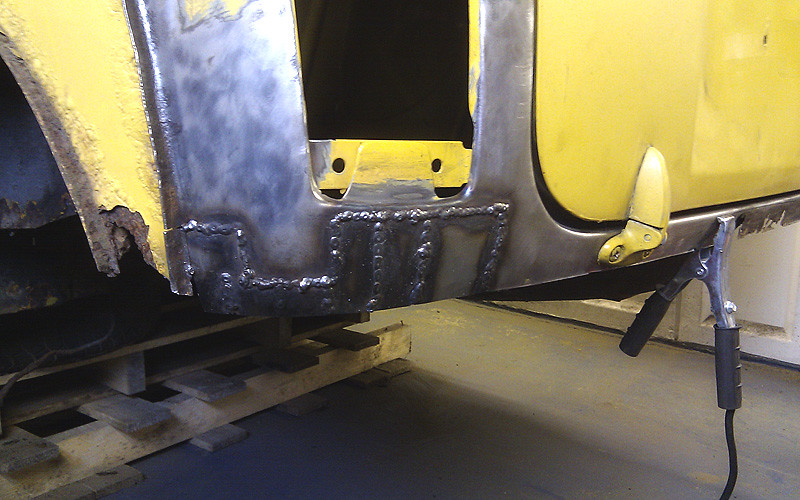
Will be gutted, but hey, if it needs to be done, it will. Impressive speed learning at the welding !! :(

I'll be watching intently, nice welder mate, what did that cost you ?? lol Mines a gasless MIG was about £150 :/


0 user(s) are reading this topic

0 members, 0 guests, 0 anonymous users