 )
)


1983 City E 998 To 1310 Cooper
Started by
jay whiting
, Sep 11 2010 07:47 PM
40 replies to this topic
#16

crazycoleman118
-

- Members
-

- 836 posts
One Carb Or Two?
Posted 03 October 2010 - 07:51 AM
what sort of theme are you going for with the car then? (sorry if youve allready said i get sidetracked when reading lots or writing )
)
#17
mackeellan
-

- Noobies
-
- 43 posts
On The Road
Posted 03 October 2010 - 01:36 PM
Hey, really enjoying this but struggling with computer so find it difficult to make any reply. Keep on, as there are probably plenty like me, good luck
#18
jay whiting
-
- Noobies
-
- 209 posts
Mini Mad
- Local Club: Gloucesters Mini-Rebels
Posted 03 October 2010 - 05:13 PM
What theme am i going for, well being as the shell was as solid as is and me always wanting a Cooper S but never had the money for a genuine one i decided to build one. The boot floor needed a repair panel but instead i cut the whole floor out and replaced, both sill are good on the car but again piece of mind so they are getting changed, door steps both had small holes in the so they got cut out and repaired, N/S heal board has a small hole so this will also get cut out and replaced. Both front floor pans had small holes in them so Plate or Replece (replace won). Both front wings were rescuable but again new WON at the end of the day. All the parts i have purchesd have been Heratige parts. The Subframs have had a full strip clean and rebuild and are now in paint ready for the final build with Poly bushes (front and rear). Onece the car is back in one bit (minus interia and glass it will get a full rub down, primer and respray. A RH tank will be found and fitted giving the Cooper S look, All new chrome bumpers and over riders have been sauced, the speedo is getting Changed for a 130MPH Cooper S, bonnet and boot badges have been purchased (Austin Cooper S) and the rear lights are getting the MK1 conversion. The only downside to my shell is that it has internal hinges and the fact its a 1983 give it away. But hey we all have to have a project and this is what route mine is taking. The engine is a 998 but i have a 1275 which i have striped out and cleaned ready for the block to go and get a 0.20 bore and deck, the cam will be changed to a 266 or something of that nature, duplex timing gear, 1.5 rockers and 1.1 SC drops with a 3.44 diff. Im not after huge power i have the skyline for that.
What i do want at the end of it all is a solid, rust free shell that looks good and has the reliability that all my cars must have, the car is not going to be a daily use car, but more a weekend and holiday/ show attending car. Its not that i want a show grade car and dont want to drive it, more i want the car to last, stay looking good and come out for the fun.
What i do want at the end of it all is a solid, rust free shell that looks good and has the reliability that all my cars must have, the car is not going to be a daily use car, but more a weekend and holiday/ show attending car. Its not that i want a show grade car and dont want to drive it, more i want the car to last, stay looking good and come out for the fun.
#19
jay whiting
-
- Noobies
-
- 209 posts
Mini Mad
- Local Club: Gloucesters Mini-Rebels
Posted 03 October 2010 - 06:28 PM
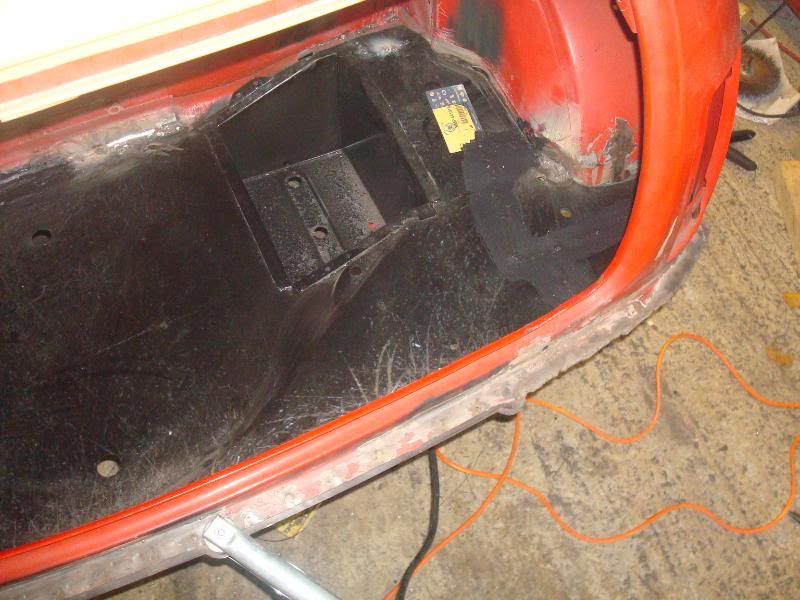
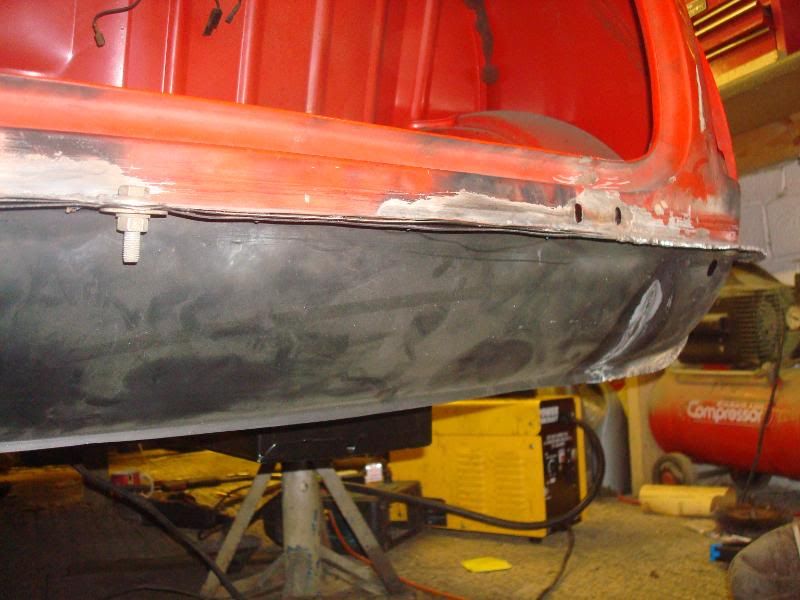
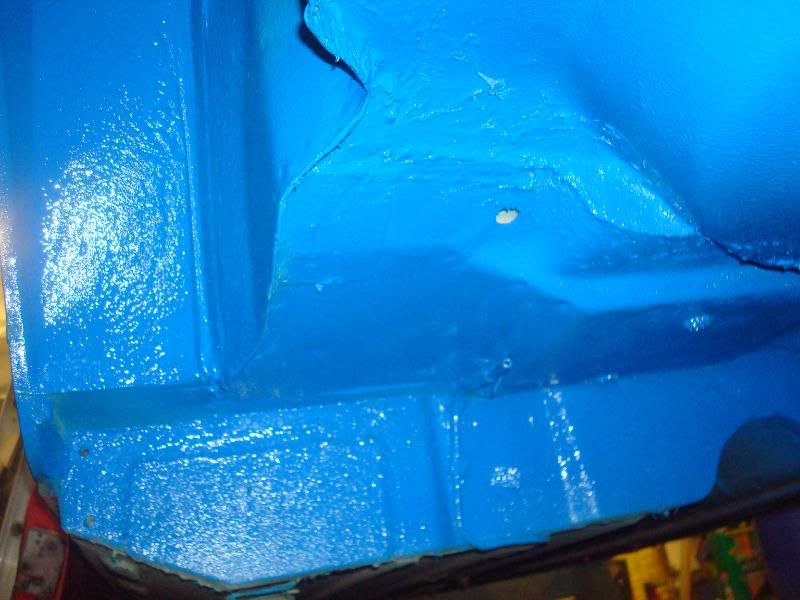
Right i better update on whats been going on i guess. The new boot floor is in and welded up. I went a little over the top with the welding as i welded the joint inside and outside. I still have to seam seal it all which i will do tomorrow i hope.
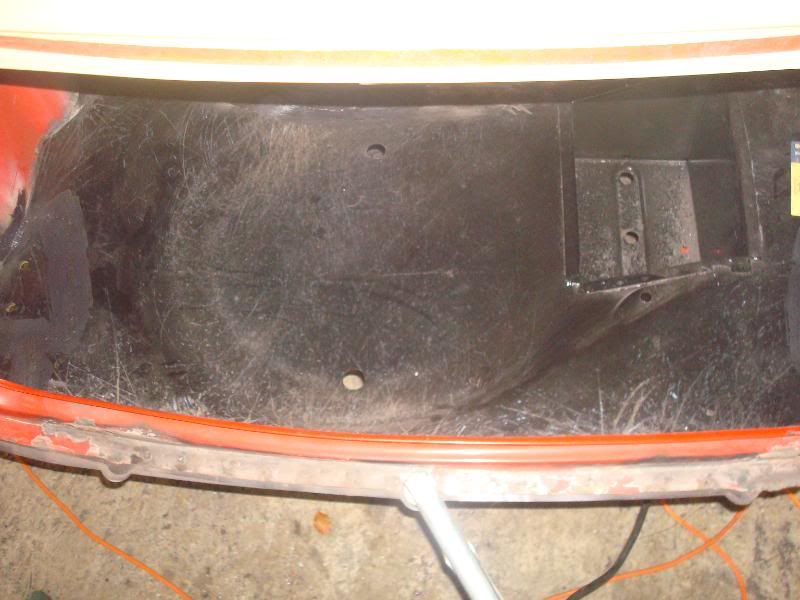
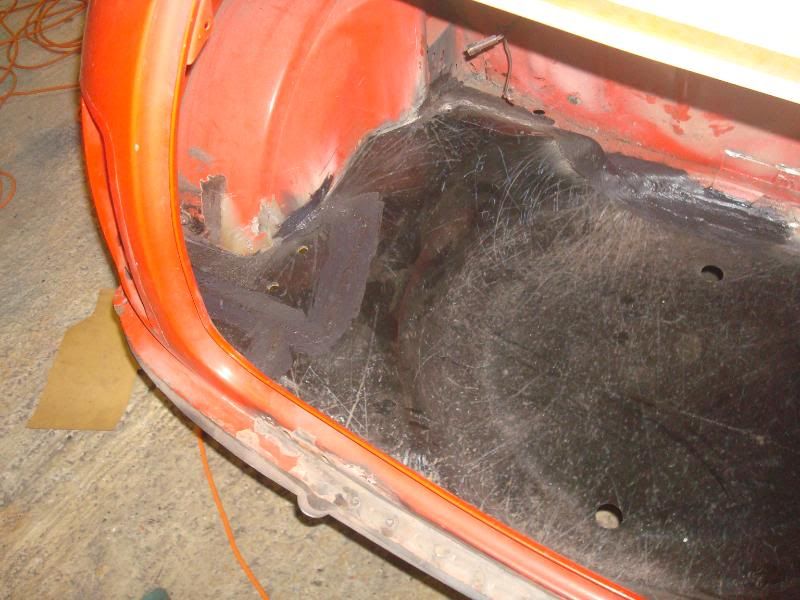
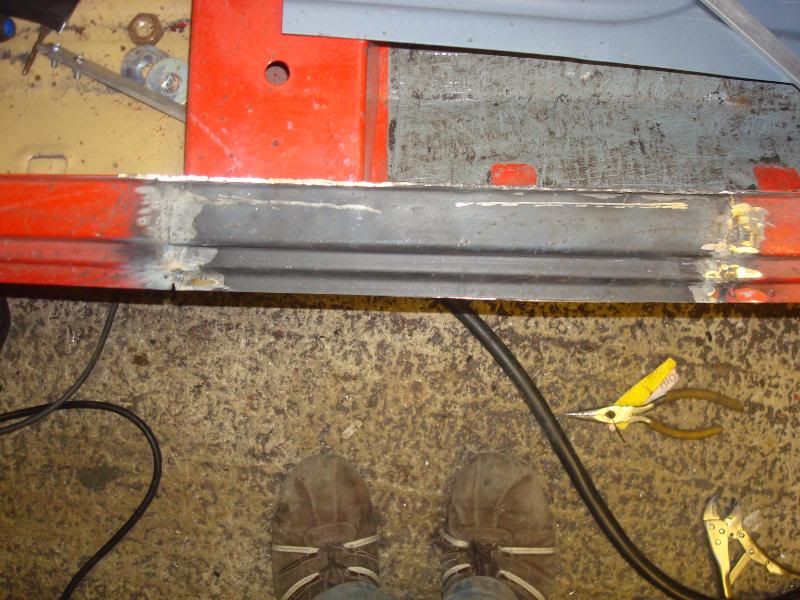
Then i got started on the door step. I am still working on this, its welded in and ground back awaiting finnishing which ill do in the morning.
The rear valence and new close panles now fitted. I have to finnish seam welding and grind back to complete this. I had to stop welding as my little boy wanted to come out in the garage today so he stoped play.
The rear subframe in paint (only one coat as yet.
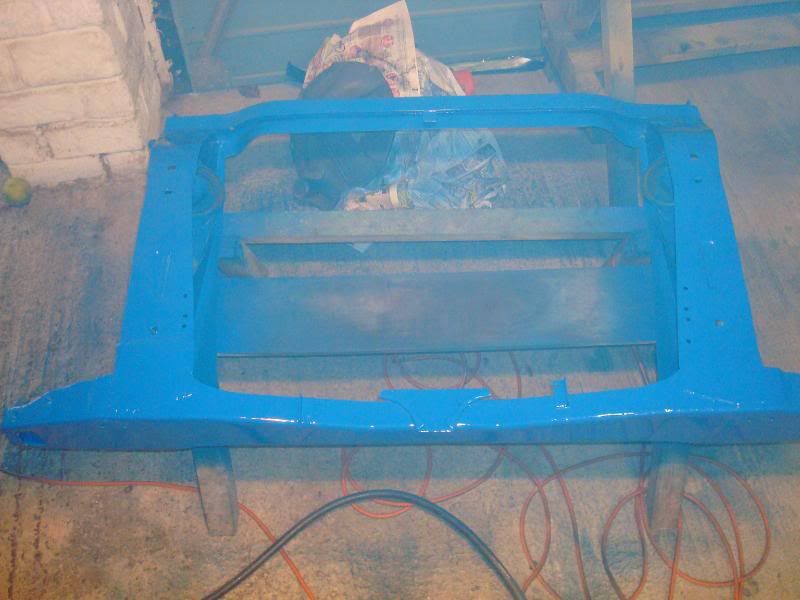
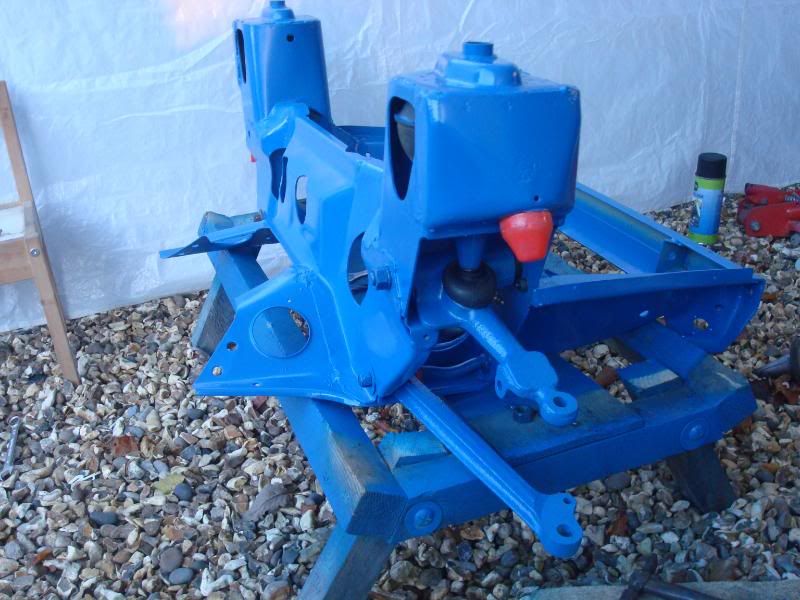
And the front sub in paint.
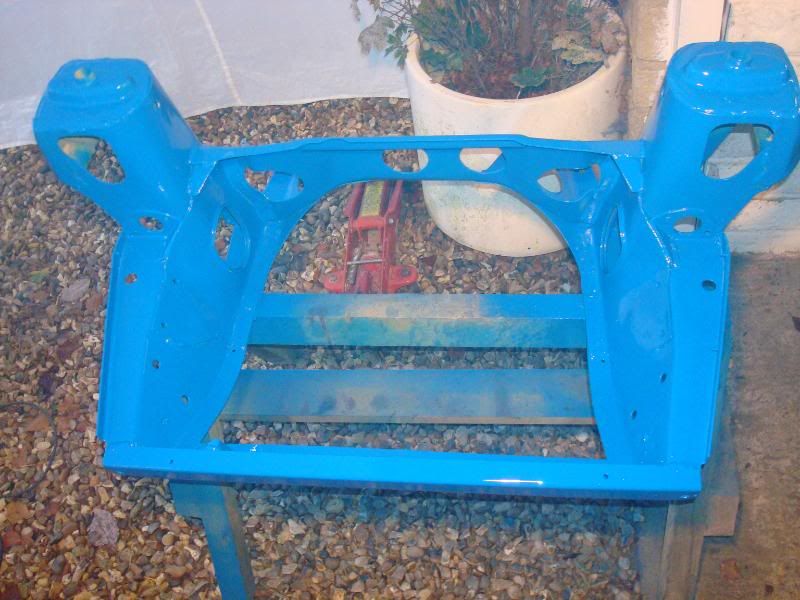
The front sub after two coats of paint and some of the poly bushes that will be fitted.

And one of the front wings trial fitted.

I will do some more work tomorrow. Hopefull get all the seams seald and the boot in primer. I have the other door step to do and the heal board and then ill move onto the wings. At this rate the car will be done on the next 6 weeks. And when it is, ill have to find something else to keep me ammused. (TRAILOR ;o)
The blue that has been used on the subframes will be carried to top and bottom arms, radius arms and back plates. It is also the colour that the car will be finnished in. The only difference with the body paint is that it will be coated in clearcoat loaded with a red metal flake and comelian pearl giving it a somewhat special finnish. You will all have to wait for that tho as im still playing with mix values. All will be revealed when im satissfied with the result.
Then i got started on the door step. I am still working on this, its welded in and ground back awaiting finnishing which ill do in the morning.
The rear valence and new close panles now fitted. I have to finnish seam welding and grind back to complete this. I had to stop welding as my little boy wanted to come out in the garage today so he stoped play.
The rear subframe in paint (only one coat as yet.
And the front sub in paint.
The front sub after two coats of paint and some of the poly bushes that will be fitted.
And one of the front wings trial fitted.
I will do some more work tomorrow. Hopefull get all the seams seald and the boot in primer. I have the other door step to do and the heal board and then ill move onto the wings. At this rate the car will be done on the next 6 weeks. And when it is, ill have to find something else to keep me ammused. (TRAILOR ;o)
The blue that has been used on the subframes will be carried to top and bottom arms, radius arms and back plates. It is also the colour that the car will be finnished in. The only difference with the body paint is that it will be coated in clearcoat loaded with a red metal flake and comelian pearl giving it a somewhat special finnish. You will all have to wait for that tho as im still playing with mix values. All will be revealed when im satissfied with the result.
Edited by jay whiting, 03 October 2010 - 06:37 PM.
#20
jay whiting
-
- Noobies
-
- 209 posts
Mini Mad
- Local Club: Gloucesters Mini-Rebels
Posted 04 October 2010 - 04:02 PM
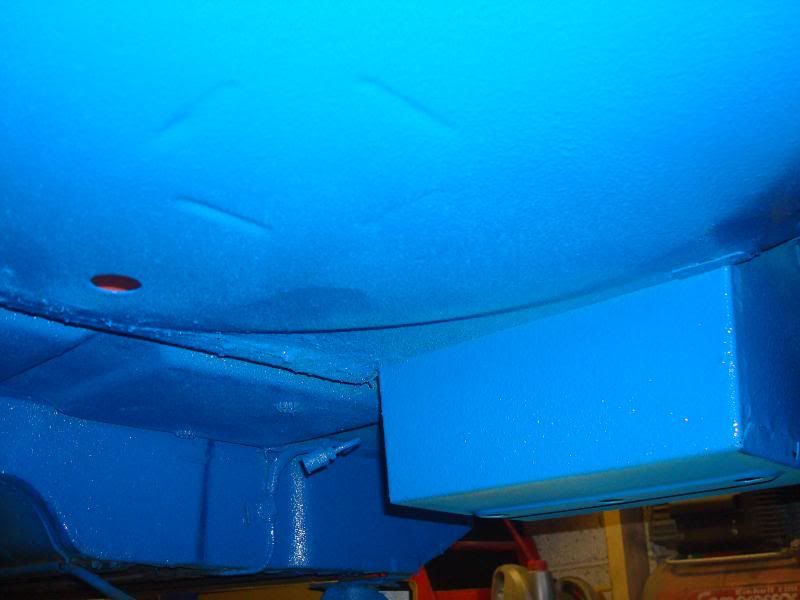
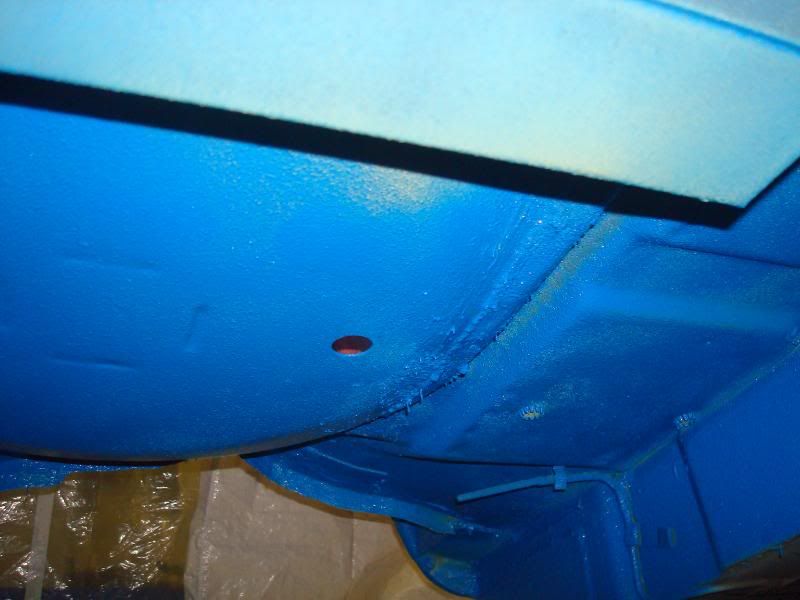
I got out to the garage for a few more hours again today and got quiet a lot done. I got all the seams sealed in the boot floor (inside and out). Then i got started on the heal board repair. after a good llok around the rear of the car i decided that i had got all the rust (rear end only) so it was time to treat with 905 stane chip. The floor and wheel arches all got a good coating and was left to dry. Then came a couple of coats of primer and finally some colour. Next up for the rear is the subframe, this will outside of the backend. Tomorrow i will try and get the inside of the boot finnished, i just need to weld on the wheelarch to floor supports and then the inside can go to paint as well.

Sorry for the amout of shots of the floor, i thaght it may interest some of you to see from different angles.
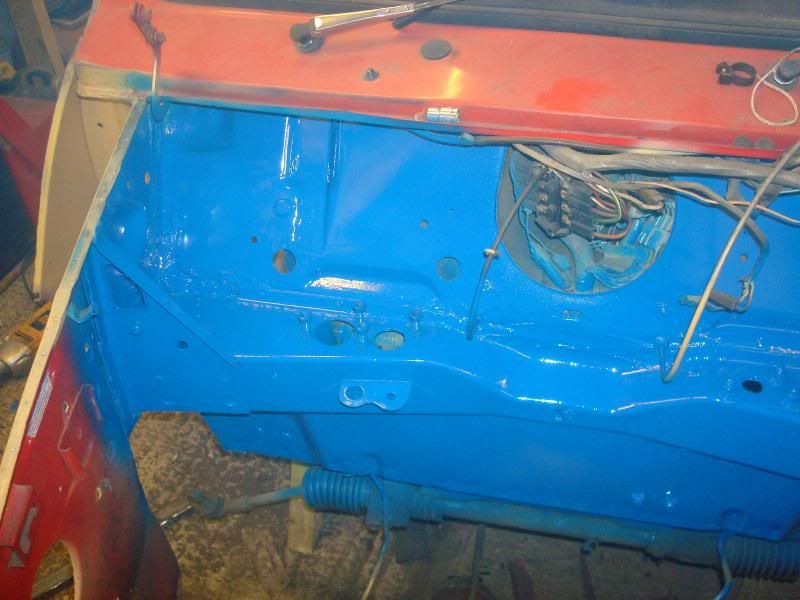
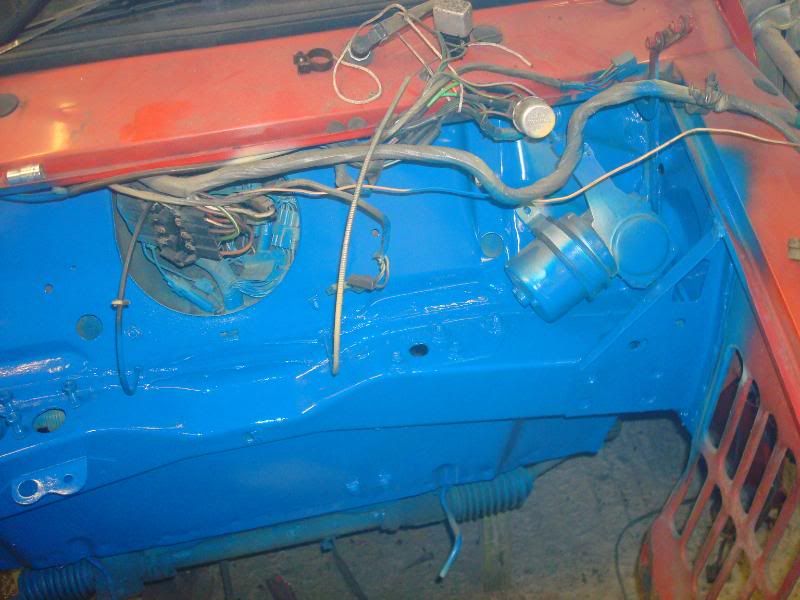
I also got a little colour into the front bulkhead as well today. I will get the inner wings sorted tomorrow as well and complete the engine bay.
The front subframe is also well under way to being complete as well.
Thats all for today folks, ill get some picys of the next lot as i get on with it in the morning.
Sorry for the amout of shots of the floor, i thaght it may interest some of you to see from different angles.
I also got a little colour into the front bulkhead as well today. I will get the inner wings sorted tomorrow as well and complete the engine bay.
The front subframe is also well under way to being complete as well.
Thats all for today folks, ill get some picys of the next lot as i get on with it in the morning.
#21
jay whiting
-
- Noobies
-
- 209 posts
Mini Mad
- Local Club: Gloucesters Mini-Rebels
Posted 12 October 2010 - 04:26 PM
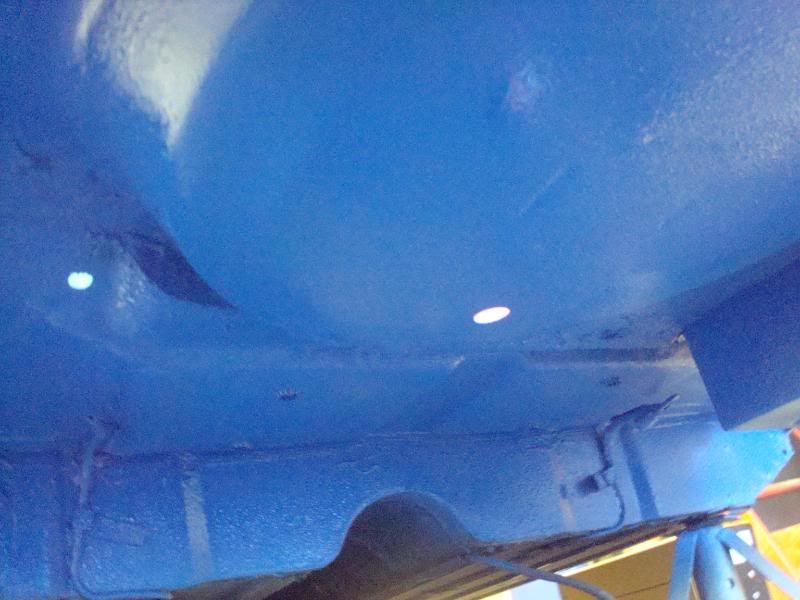
After a couple of days out of the garage, i finally got round to doing some more work. The steering rack was removed and work to the lower bulkhead and foot well was done. The front subframe was re fitted and built up. This means the front is now done as well. All thats left to do is the N/S front wing and a good full body inspection for minor knocks and dings before a good rub down and primer coats applied. So i guess you will be wanting to see whats been going on and where we are at with this project, so here you go:
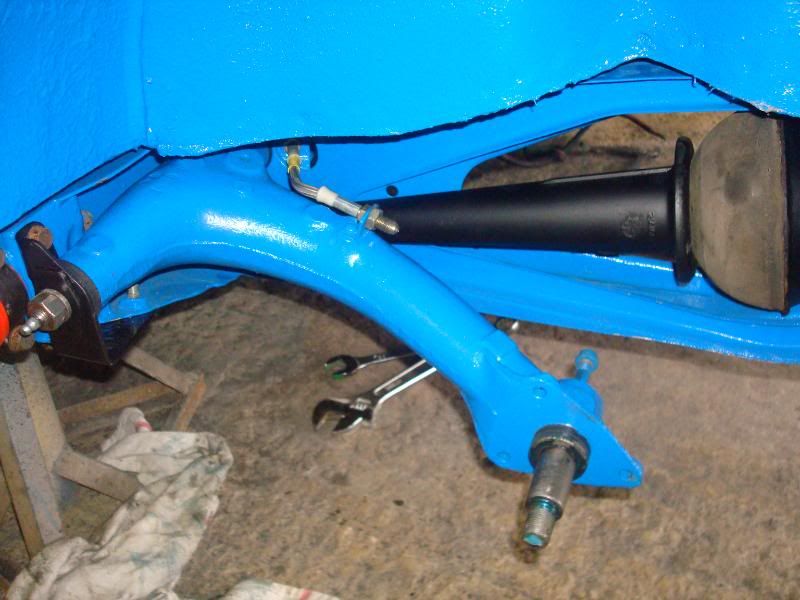
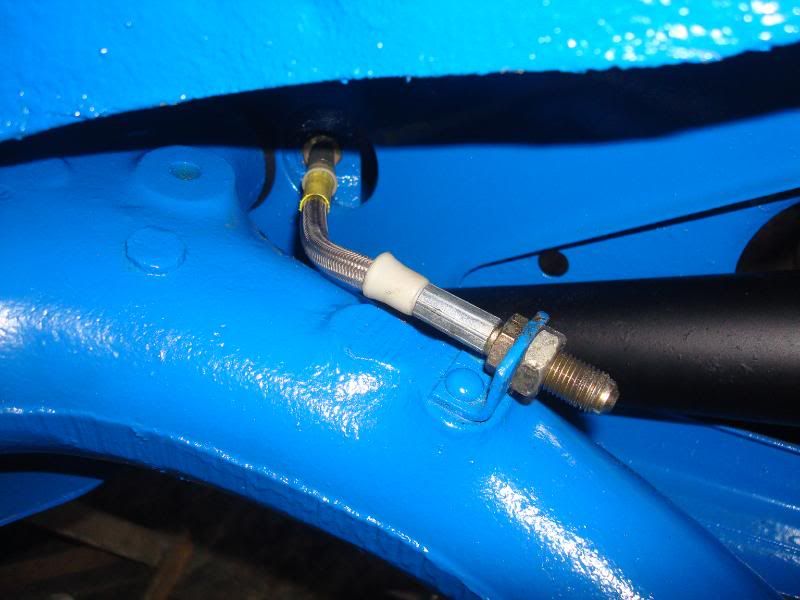
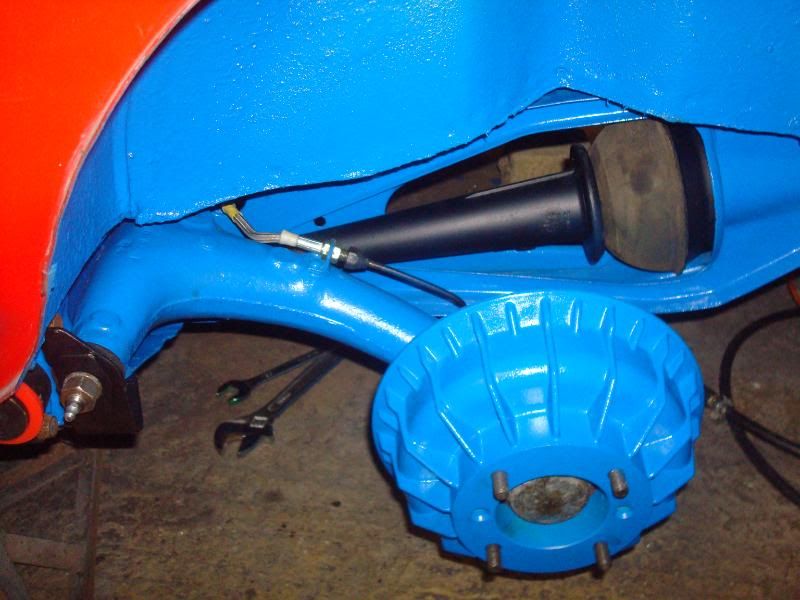
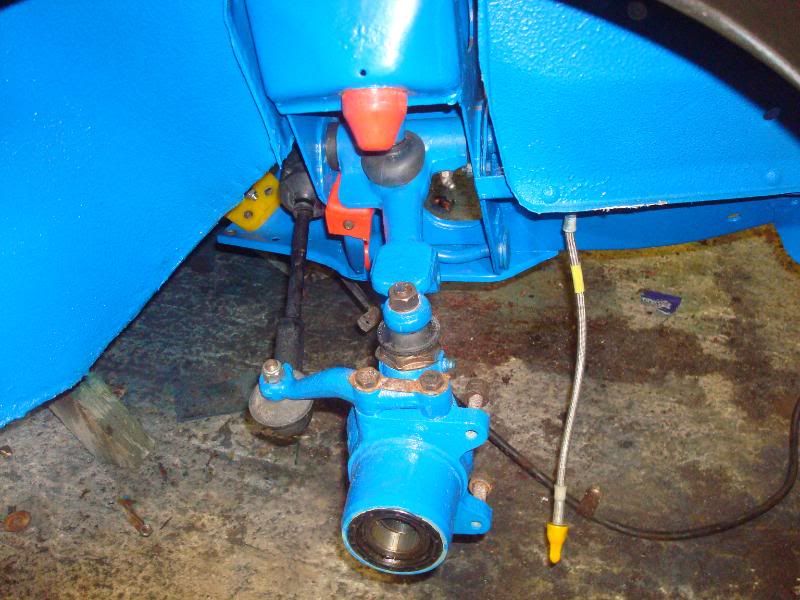
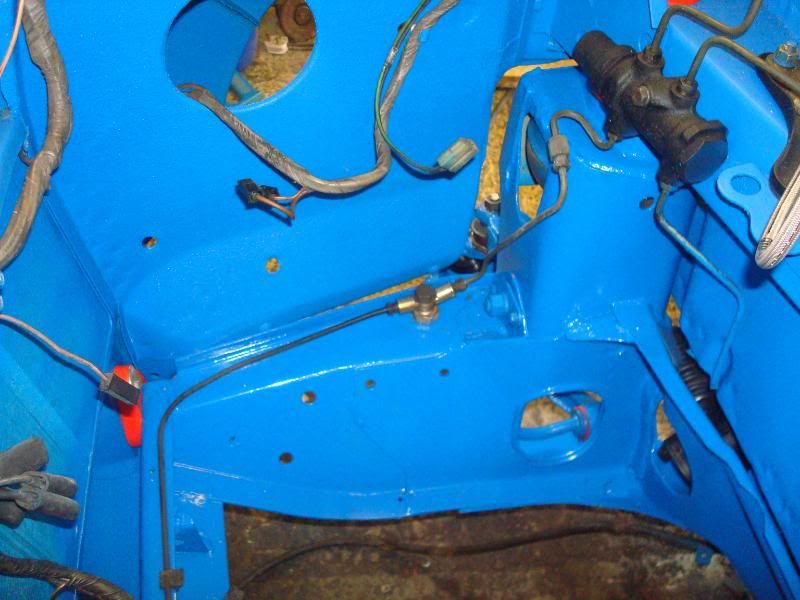
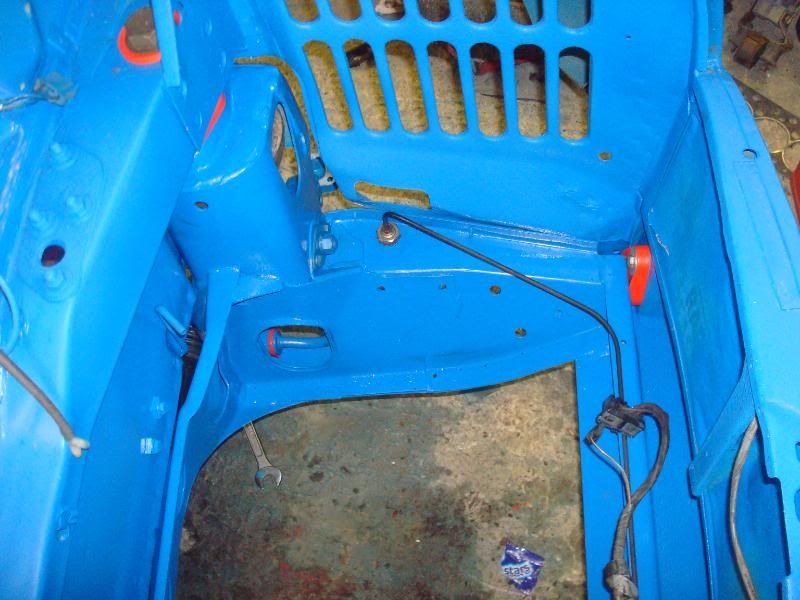
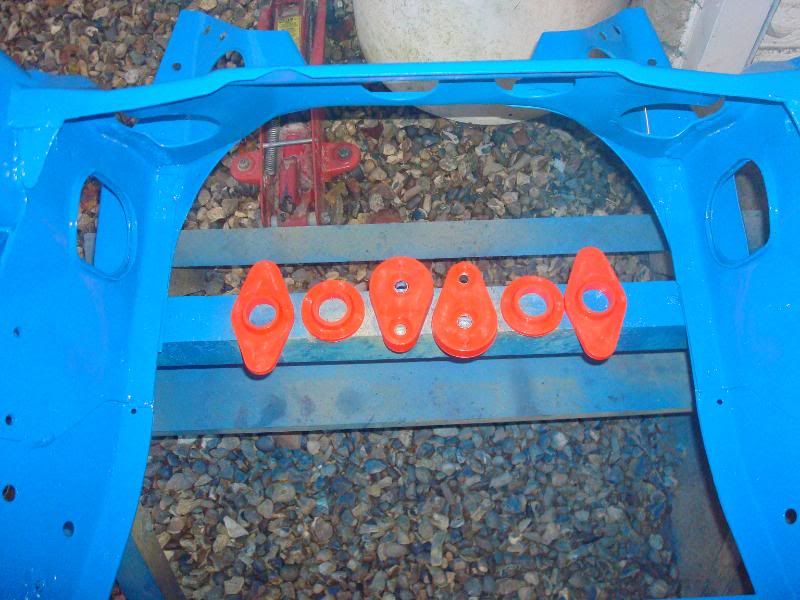
As you can see from the picys, i have fitted polly bushes to everything, no old style bushes to be found on any of the build. All the breakpipes have been replaced with new as well. The radius ars have all been fitted with new backplates, wheel cyilinders, bearings and shoes. The car will be getting new shocks all round. As the picys show, the car is currently still stitting on the cones, once the mot is out the way and the cars is back on the road and settled down, i will be changing these for coils to bring a little more moderness to the cars suspension along with a slightly softer ride.
As you can see from the picys, i have fitted polly bushes to everything, no old style bushes to be found on any of the build. All the breakpipes have been replaced with new as well. The radius ars have all been fitted with new backplates, wheel cyilinders, bearings and shoes. The car will be getting new shocks all round. As the picys show, the car is currently still stitting on the cones, once the mot is out the way and the cars is back on the road and settled down, i will be changing these for coils to bring a little more moderness to the cars suspension along with a slightly softer ride.
#22
Dannnn
-

- Noobies
-
- 62 posts
Stage One Kit Fitted
Posted 12 October 2010 - 05:21 PM
Great job so far! I would love to strip mine out one day and give everything a good respray. Would feel like a new car again!
#23
jay whiting
-
- Noobies
-
- 209 posts
Mini Mad
- Local Club: Gloucesters Mini-Rebels
Posted 13 October 2010 - 06:13 PM
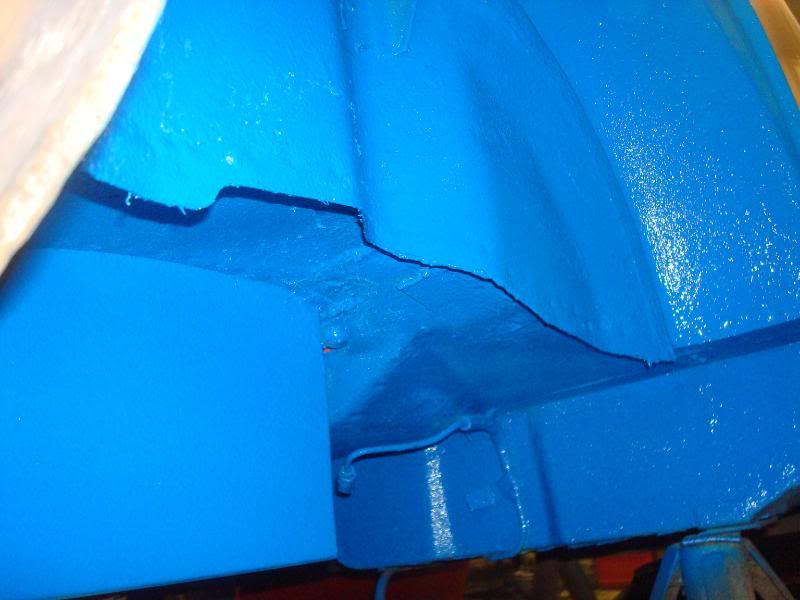
Thank you, its one of those things you just get your teath into and get on with. I got this mini to do a full and complete rebuild on. I was lucky to find a shell that didnt need to much work doing to it. I have gone a little over the top in the sence i didnt need to change some of what i did, but made a desission that if it had rust of any kind then it was going to get cut out and new fitted. The reality of this shell is that it needed a boot floor, door steps and a heal board but also got both wings, both sills, close pannels and foot wells. I then decided that i would also change the scuttle under plates.
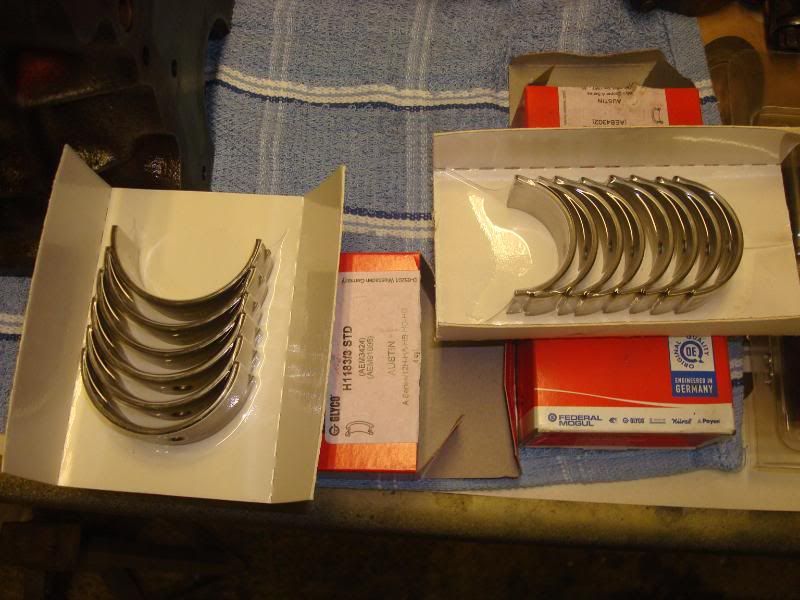
Well progress from today was that my 1275 engine went down to spam speed for the machine work to be started, it will be getting taken out 20thou to 1293, new cam bearings with a line bore, new followers and some high compression SLIPPER pistons, new mains and ends. The head has just been ported, nothing majour just some work on the valve throats. As im not looking for huge power i didnt se the need for large port work. Being as the head is Metro it is already fitted with the larger valves so that was money saved. Hopefully Spam will be ringing me in week to say its all acid bathed and machined so come and collect. This will allow me to start putting it back together and turn my now rolling shell back into a living breathing beauty.
The one thing that will need some work and thaught is giving here a name.......
#24
jay whiting
-
- Noobies
-
- 209 posts
Mini Mad
- Local Club: Gloucesters Mini-Rebels
Posted 18 October 2010 - 05:04 PM
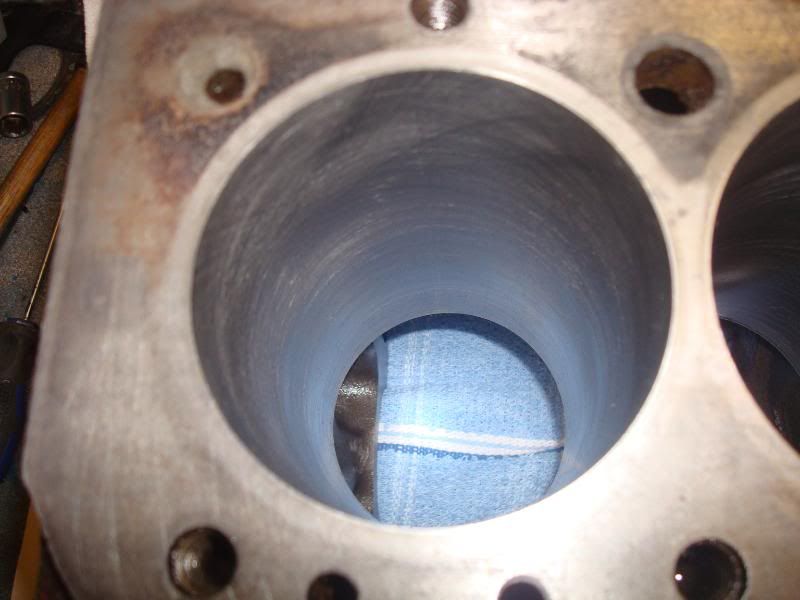
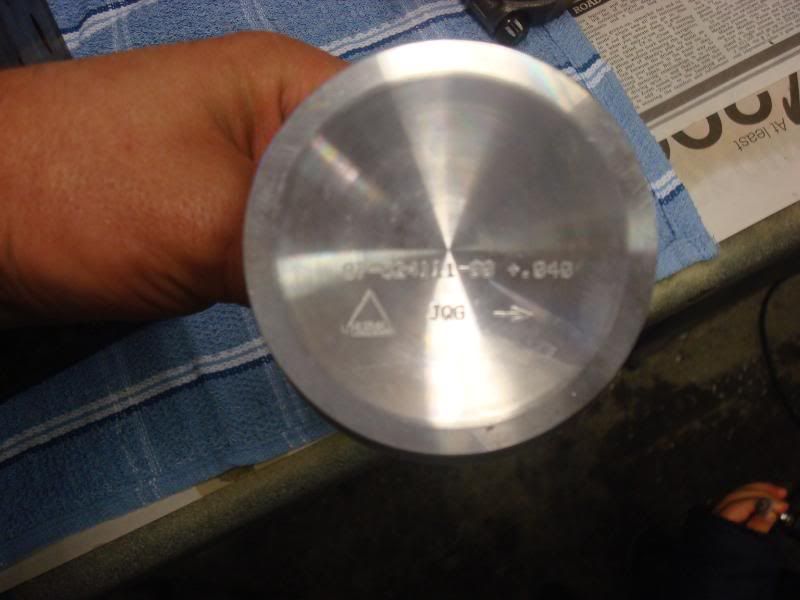
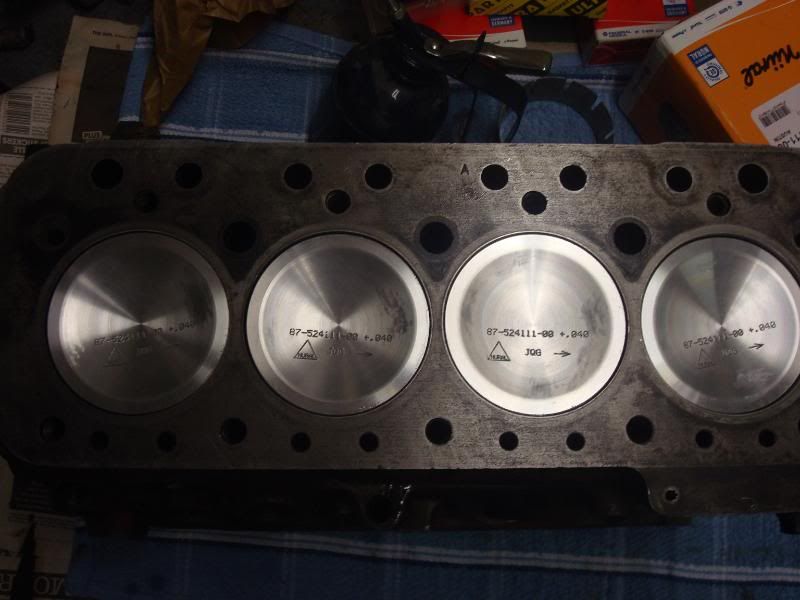
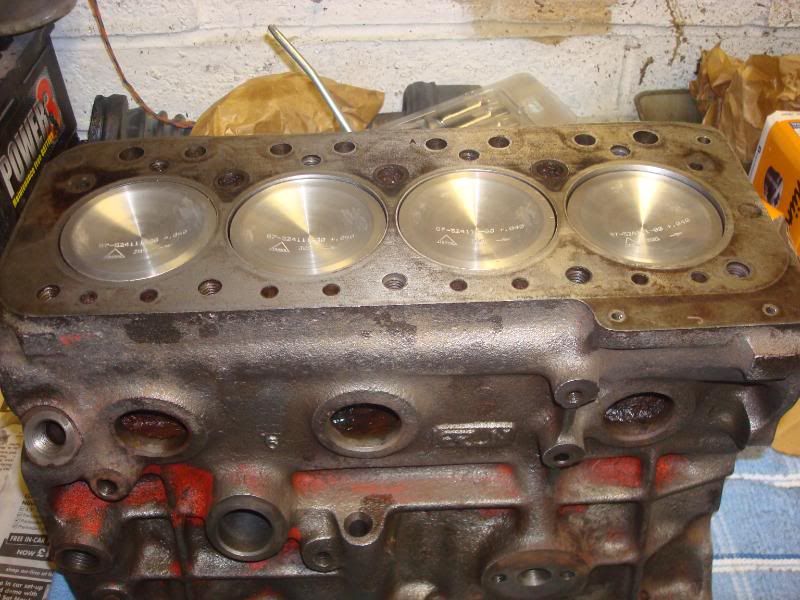
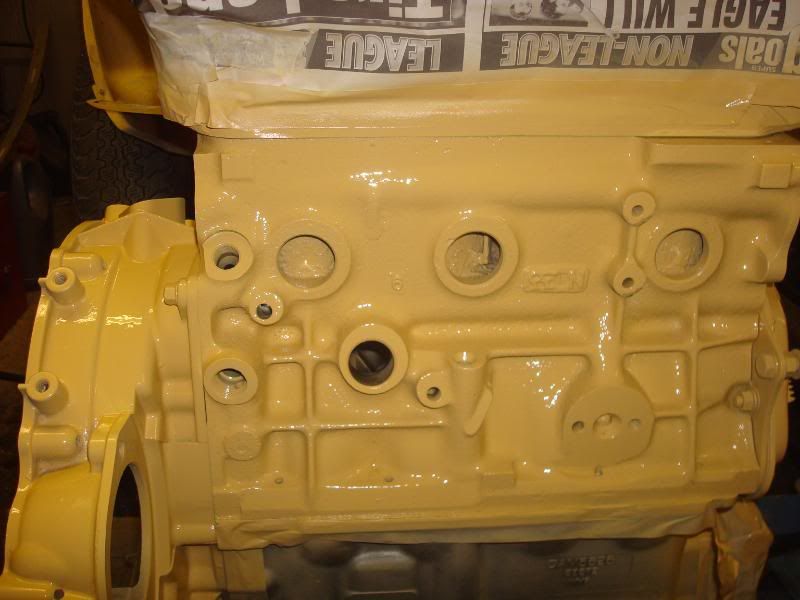
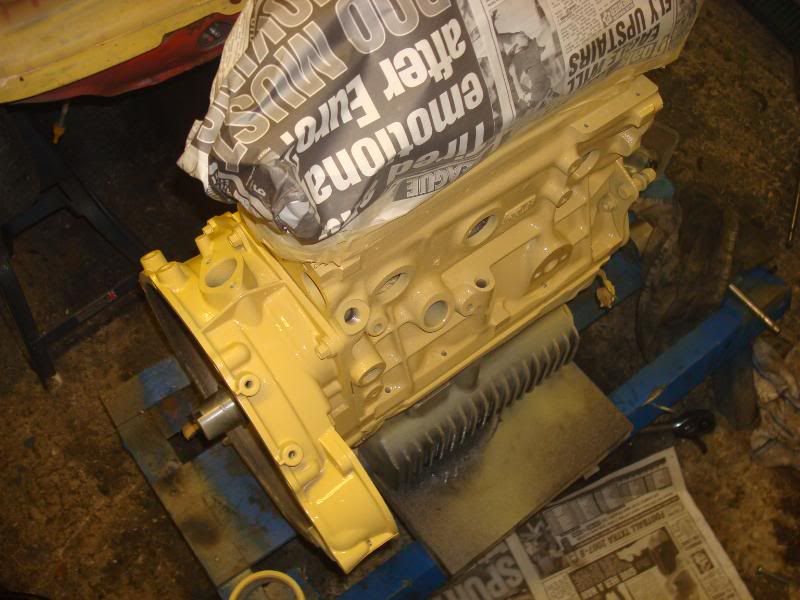
Quick update on the mini. Not much has been done over the last couple of days so not much to tell. I did get a call from my machine shop (spam speed) to say he had done the bore and hone work, fitted the new cam bearings and line bored them and it had all been acid dipped for cleaning etc, but could i go and see him as he had some worries about one of the bores. Well being as he is onlt 10 mins down the road i went to see what all the fuss was about. On arival i was faced with my new +0.20 slipper high comp pistons, and all the new goodies associated with a new build, rings, mains and ends. BUT after going into the machine shop to see what his concearns were, i noticed right away that NO1 had gone poruss (for those who dont know what that is), my engine is sleeved, and basically the bore wall has pretty much got a cavern in it (no fault of the machinist). So what do we do about it. There are three choices 1. Scrap the block and start again 2. Machine out the liners and fit new (expensive) 3. Bore again and see if a +0.40 bore goes beyond the porosity of the liner.
Me being me said lets do a +0.40 bore on the bad cyilinder and see what happens.......... At this poiint i left as i had stuff at home to do. As i left Spam said 'If you dont hear from me again today its worked and we are back in the game' As yet i have not heard from him so im hoping that when i go down there in the morning ill be looking at a block fully re-bored to 1310cc and yet another set of pistoms to match. If this is the case then ill be bringing it home and starting the build on the engine and gearbox.
So for those who are just starting out with a project mini and have never done anything like this before PLEASE PLEASE bare this in mind. Dont be to quick to blame the machinist if it all goes banana shaped. Yes sometimes the machine work can be to blame BUT on some occasions its the fault of the block. I have been getting engines machined for many years now and have seen many different things go wrong. 30% are due to bad machine work but 70% of all problems come from the subsrtate You take in to have machined.
The possative side to my block is that if in the morning it does all work out right, i have a 1310 not a 1293 as was the plan....... Whatever happens i will let you all know in tomorrow.
#25
jay whiting
-
- Noobies
-
- 209 posts
Mini Mad
- Local Club: Gloucesters Mini-Rebels
Posted 23 October 2010 - 06:58 PM
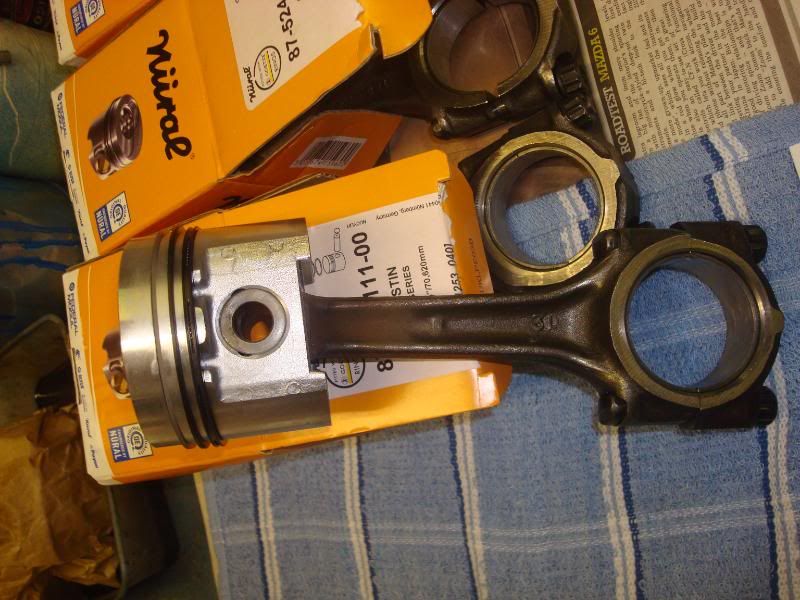
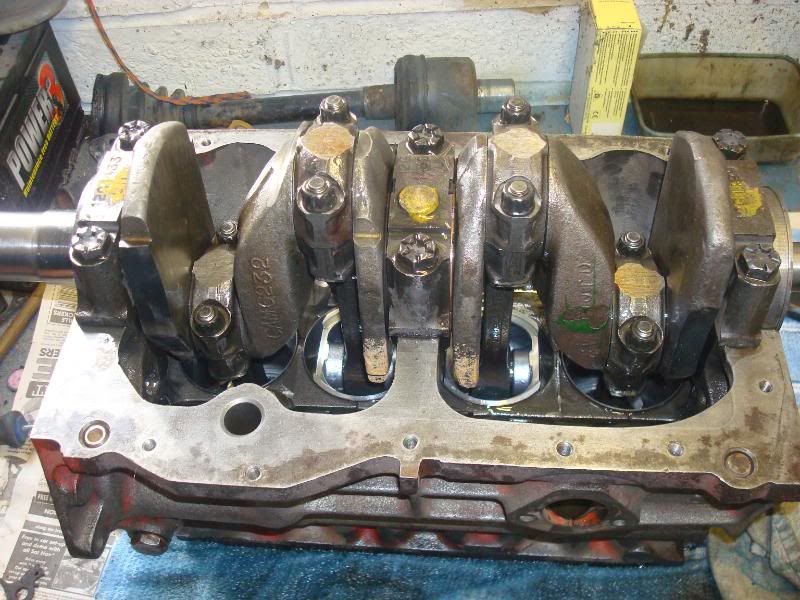
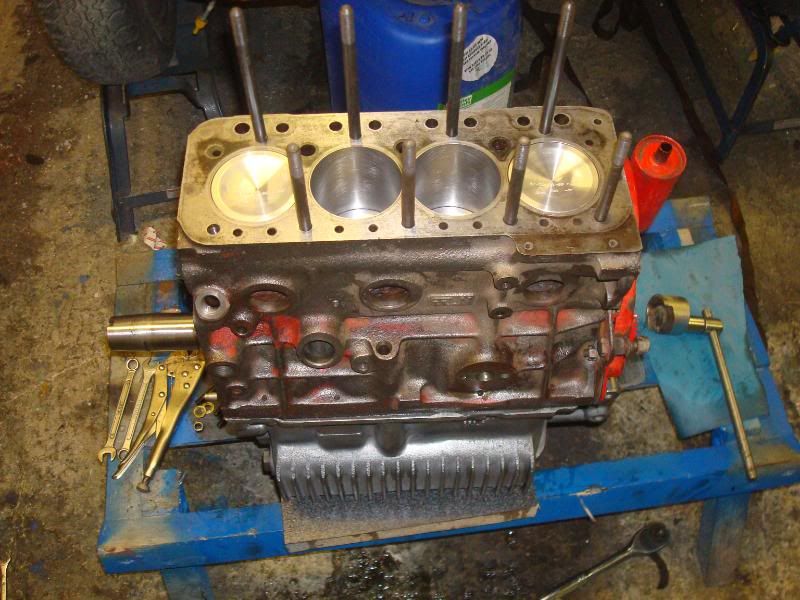
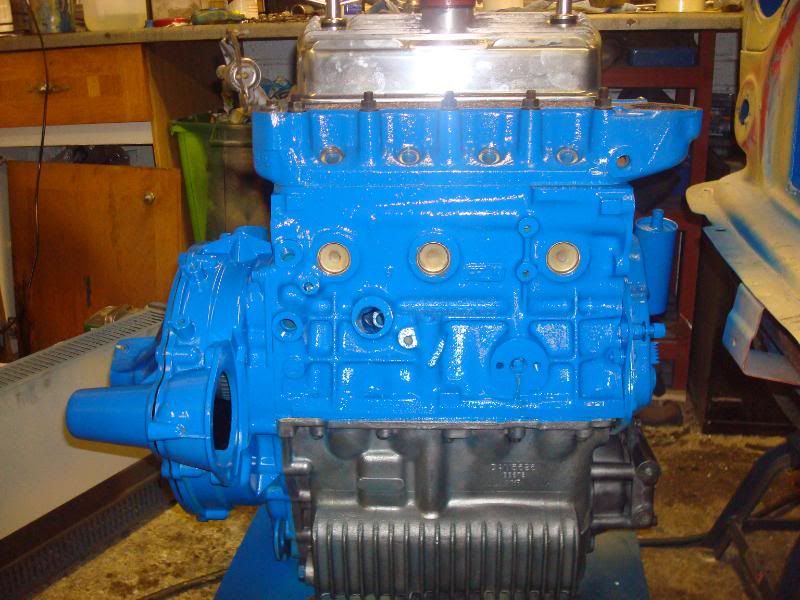
Hi everyone, sorry ive not been on and posted in a couple of days but work and home has taken some of my time away. So whats been going on. Well the porus bore is no longer a problem as the 0.40+ bor did work and went past the porus side of life. The block is now completed and the new 0.40+ pistons arrived with Spamspeed and are now fitted to the rods. After bringing it home i did the usual and gave it a good wash down to ensure no swarf or other badness remained in the block/gallerys. The bores got a soaking in oil and the pistons fitted, new big ends, new mains and the build began. I started today at about 12.00 and came back in from the garage at 7.oo this evening for tea. The engine is now built and all that is left to do to it is fit all the ansilarys and then lift it into the car for connection etc etc. As for the body of the car, i have now cut the hole for the R/H tank, all the welding is complete and prep work is under way to getting the inside in primer ready for top coat.
Here are some pics of whats been going on over the last couple of days, i hope you enjoy and as always any comment is welcome.


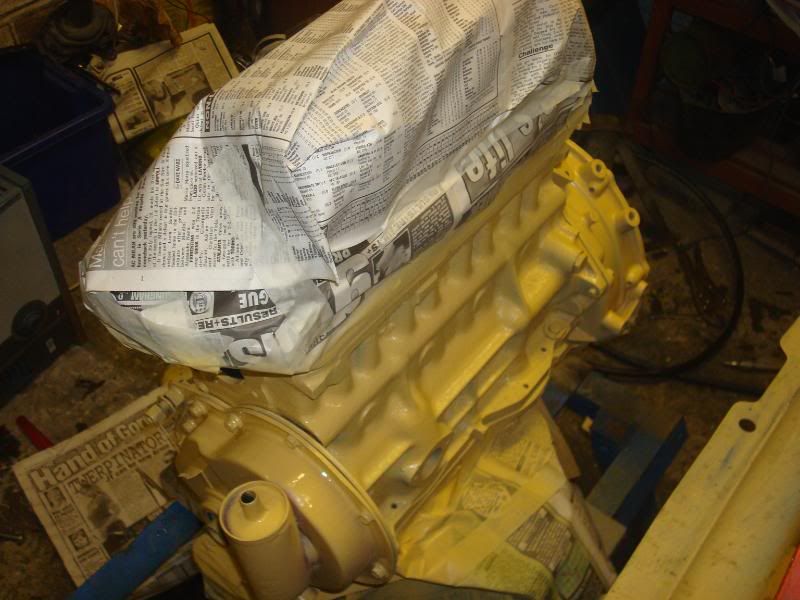
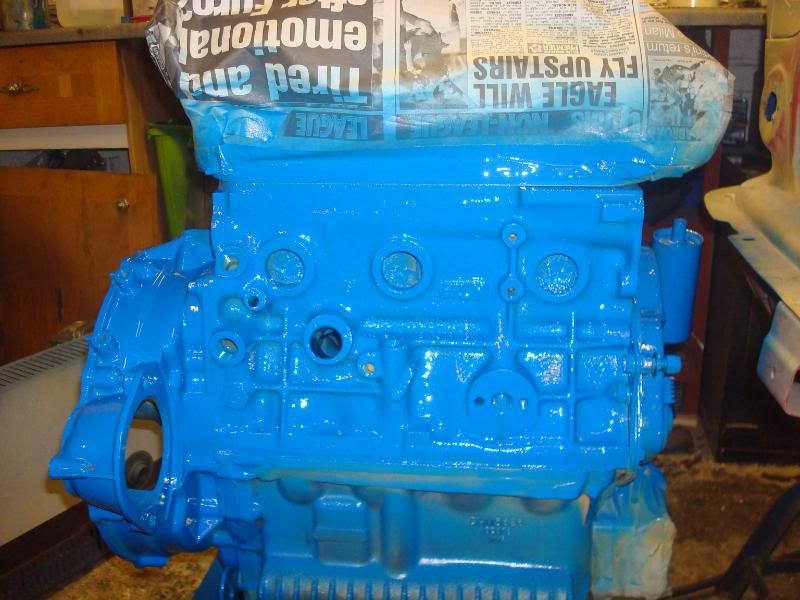
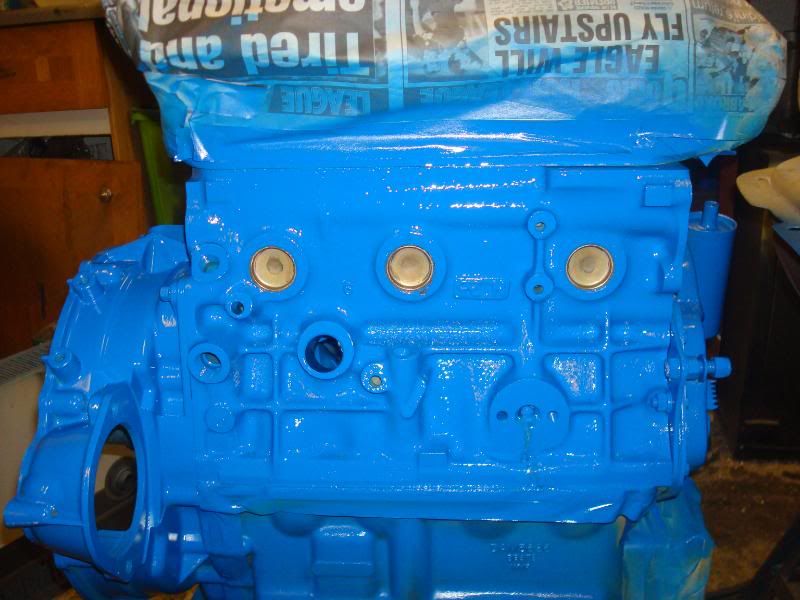
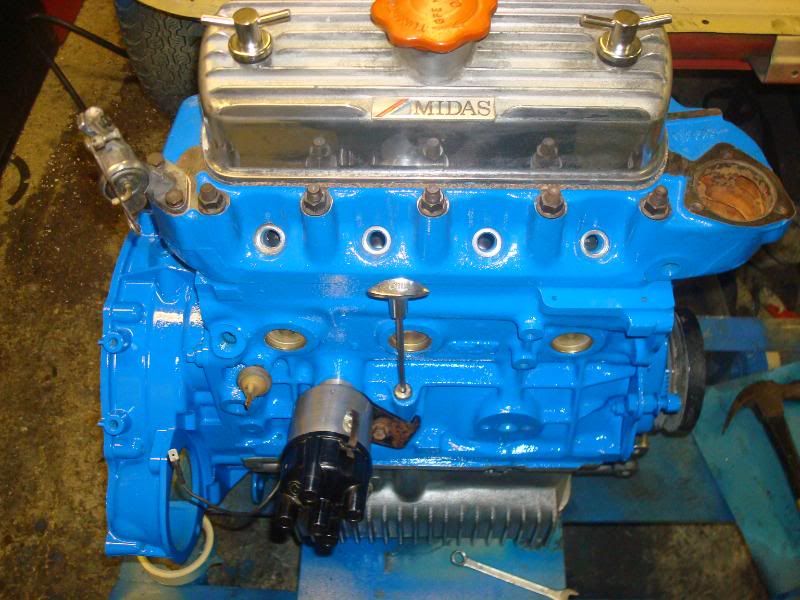
Please excuse the midas badge, that will be coming off and the rocker cover will be getting a fresh polish, its just there to keep everything covered over night.
Here are some pics of whats been going on over the last couple of days, i hope you enjoy and as always any comment is welcome.
Please excuse the midas badge, that will be coming off and the rocker cover will be getting a fresh polish, its just there to keep everything covered over night.
#26
Midas Mk1
-

- TMF+ Member
-
- 5,779 posts
Crazy About Mini's
- Location: Manchester
- Local Club: S.U.N.M.C
Posted 23 October 2010 - 07:03 PM
Looking Good! Nice project, I take it you like blue lol 
Think you should keep the Midas badge on the Mg rocker box
Think you should keep the Midas badge on the Mg rocker box
#27
jay whiting
-
- Noobies
-
- 209 posts
Mini Mad
- Local Club: Gloucesters Mini-Rebels
Posted 23 October 2010 - 07:15 PM
Lol, i stumbled on this blue by mistake, and well if your going to do something then i guess do it. All the running gear is all pained the same colour as the car will end up. Im not sure i will be keeping the MG cover on the engine, its just one i had laying around after scraping my midas so have put it to use for the night.
#28
RobP
-

- Noobies
-
- 23 posts
Learner Driver
Posted 24 October 2010 - 07:56 AM
Great work so far ! Really liking the blue theme as well.. keep up the good work 
#29
olds_kool_lews
-

- Traders
-
- 3,602 posts
Up Into Fourth
Posted 24 October 2010 - 11:22 AM
definitly a very blue car! u should call it the cookie monster or something! keep up the good work!
#30
Midas Mk1
-
- TMF+ Member
-
- 5,779 posts
Crazy About Mini's
- Location: Manchester
- Local Club: S.U.N.M.C
Posted 24 October 2010 - 11:26 AM
Lol, i stumbled on this blue by mistake, and well if your going to do something then i guess do it. All the running gear is all pained the same colour as the car will end up. Im not sure i will be keeping the MG cover on the engine, its just one i had laying around after scraping my midas so have put it to use for the night.
You scrapped your Midas!
 hope it wasnt a Mk1 or 2
Good Luck with the Build!


1 user(s) are reading this topic
0 members, 1 guests, 0 anonymous users


