Jump to content


Photo
- - - - -

Project Zippy - Mk1 1981 Midas Project.


  • Please log in to reply
783 replies to this topic

#781 MrBounce

MrBounce

    Up Into Fourth

  • TMF+ Member
  • PipPipPipPipPipPipPipPipPip
  • 2,650 posts
  • Location: The Manroom in Ipswich

Posted 08 May 2025 - 07:50 PM

As with many things on this car, certain items have to be sorted in order, otherwise you have to tear what seems like half the car apart to go back three steps (see assembly of the doors). I want to fit the headlining. However, there are a couple of things that need doing first. One is to wire up the interior light. Tink is going to help me with this as there's more than one wire and I get easily confused. However, the other thing that needs to go in before the headlining goes up is, of all things, the radio aerial.


I have one. However, given where it is (back of the roof) it needed to be a stubby one so the hatch glass doesn't hit it constantly. When I took the car apart, there was an aerial stub. I say "aerial stub". What I actually mean is something that looked like it came from the Titanic. It was a mass of rust and barnacles that vaguely looked like it was once an aerial stub. What it also was, was significantly longer than my new aerial base. This, of course, caused a problem. The Midas' roof is two skins of fibreglass - there was no way on this fine Earth that I was getting a nut on the threaded part of the stub as this was only about 16mm long. I needed to make a little clearance. Holesaws are wonderfully accurate and quite destructive pieces of kit. The "modification" took about 8 seconds. I am always impressed by the ridiculous amount of fibreglass dust it creates. My "Bane" mask kept this out of my fragile little lungs. Some other minor adjustment using the Powerfile saw me able to firstly get a metal plate in for it to earth against on the advice of my friend. Then it was a case of threading the aerial lead through the holes and into the car, then the nut back the other way so I could tighten it up. Except I couldn't. The nut had a serrated edge to one side, which was about 5mm deep. This meant that I couldn't get the thread on to the stub. A minute's further violence with a flap disc made it into a normal nut. Finally, I was able to properly tighten it using a 22mm ring spanner that I liberated from Shaun's garage when he moved house. Cheers! It actually looks pretty good. I will carefully tape up the lead to the roof and down the windscreen pillar another time. 


Job of the day: Fit this to the car.


QDS00Ef.jpeg


Violence was needed to make clearance for the 22mm nut.


lKaEptp.jpeg


Ring spanner was the only thing I had to fit. It did the job perfectly.


TFrMVoj.jpeg


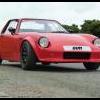
Fitted: Looks good with the colour scheme.


gKGKJTN.jpeg


And from the back. Nice!


yUzjfad.jpeg


#782 Ken555

Ken555

    Stage One Kit Fitted

  • Noobies
  • PipPipPip
  • 60 posts
  • Location: Aberdeenshire

Posted Yesterday, 08:15 PM

Have a think about fitting some sort of metal "Ground plane" under the aerial to improve reception.
On GRP cars they are needed.


#783 MrBounce

MrBounce

    Up Into Fourth

  • TMF+ Member
  • PipPipPipPipPipPipPipPipPip
  • 2,650 posts
  • Location: The Manroom in Ipswich

Posted Yesterday, 10:22 PM

Have a think about fitting some sort of metal "Ground plane" under the aerial to improve reception.
On GRP cars they are needed.


I have fitted one. I thought I had mentioned it, buy clearly not! I can assure you it is there!

#784 MrBounce

MrBounce

    Up Into Fourth

  • TMF+ Member
  • PipPipPipPipPipPipPipPipPip
  • 2,650 posts
  • Location: The Manroom in Ipswich

Posted Today, 08:49 AM

Time for more progress! Pushed the car out to give it a hoover inside after creating all the dust in the world with the holesaw. Then started on things in earnest. First thing was the connections on the earth bus bar. They were mostly crimped connectors, initially put on for speed. Out came the proper connectors and the heatshrink; the old connectors were unceremoniously cut off and thrown in the bin, with new, soldered and neat replacements added. Next job was to make sure that the aerial lead would stay put, and also to make sure it'd be in the right place for where a stereo will eventually go. Black gaffer tape did the job perfectly over the roof and the top of the door aperture, before dropping down the windscreen pillar and behind the dash. I cable-tied the excess into a more tidy bundle. I also made a small "adjustment" to the edge of the dash so the wire could easily pass through. 


The passenger door needed to go on, as this was also kicking around the garage. Door seal first, followed by the same process I did before: 2 Cosmic wheels with a couple of bits of wood to support the door, before lining the bolts up and doing them up with a cordless ratchet - I do not know how I ever got on without one of these! It wasn't in any way lined up, but it WAS on the car, which meant it was no longer in the garage.


Yesterday evening, I had a the delight of having not only Shaun over, but Tink too - this was for him to do the final bits of wiring around the dash area, and to also give me an idea of the final bits I need to sort to get any outstanding bits of wiring sorted, and there aren't many. So he set to with his tester, soldering iron, multimeter and know-how, whilst Shaun and I looked on in wonder at someone who actually knows what they're doing. I can do nut and bolts, but electrics is mostly beyond me. Tink makes it look easy, but then he has been doing it 35 years! So, this is what we had:


Indicators: working

Brake Lights: tested and working, but a switch needs to be rigged up as it was the earlier pressure based one (which I don't like) before I changed the braking system.

Horn: F loud!

Fuel Pump: brrrrrr!

Fan: working, but slightly squeaky, so that needs looking at, plus I need a switch for it, and to sort the earth wire properly.

Dash cluster lights: working, once we sorted 2 new bulbs.

Additional gauges: Oil pressure gauge needed an earth sorting, otherwise both are fine.

Switches: working.

Rev Counter: wired in and working perfectly. Plus it does that cool thing on start-up where it flicks to maximum, then back to zero. Like it.

Starter button: Oh yes!

Reverse lights: working, but need connecting up to the switch on the selector - need to wire this in.

Interior Light: needed a new loom made up - by me! - and I also need to get some door pins (and one for the rear hatch).

Sidelights: working.

Headlights: didn't work initially, but this was a loose pin on the switch. Once properly connected, boom! Bright light!

Wipers: Nothing. Initial check showed no problems, but then we realised that one of the connections on the fuse box had "missed". Once connected, 100% working.

Washer Motor: bzzzzz!


This is thankfully an uncomplicated car, at least electrically anyway, so there isn't much else that needs connecting. There are a few other things that I need to sort, such as the speedo cable, and the feed for the oil pressure gauge - both will need holes drilling through the bulkhead, but that won't be too much of a hassle to sort. Also the heater isn't quite mounted right - it needs to come forward about an inch, so that needs sorting too. Shouldn't be too awkward to sort. 


Whilst Tink was beavering away with the electrics, Shaun assisted me with aligning the rear hatch - this was sitting too far back and the latch would not go through the hole. Some releasing of bolts, moving the seal through 180 degrees, some pushing and shoving of the hatch glass, and a bit of hammer work of the latch bracket was all we needed. Tink also assisted in aligning the passenger door before we ran out of light and time. We did establish that the seal for the doors don't allow them to sit right at all though, so we may look at some alternatives.


A fantastic evening - thank you chaps.


Crimps?! This will not do at all!


EmdZyRO.jpeg


There - that's better!


a6p6hx5.jpeg


Aerial in right place behind the dash


NZORUDL.jpeg


And also taped to the roof and pillar


Y7eYTD1.jpeg


Door seal to go on


rXKAV0n.jpeg


Fitted


O02fw16.jpeg


Lining up the door


chq2eiQ.jpeg


And roughly bolted in place


ko2topJ.jpeg


Hatch fully aligned and working


9NJoo4X.jpeg


New loom for interior light


qHm4h3O.jpeg


Look! Working lights!


wCq0rYA.jpeg


Behind the dash, pretty much everything is working!


hif8veU.jpeg


2 user(s) are reading this topic

1 members, 1 guests, 0 anonymous users


    panky