Im following this ... Great project


Project Trig - More Fresh Powdercoat!
Started by
Mini 360
, Sep 06 2011 07:30 PM
853 replies to this topic
#61

Andrew O
-

- Members
-

- 1,425 posts
Previously known as Andrewo330.
Posted 07 September 2011 - 04:31 PM
#62
Mini 360
-
- Members
-
- 4,933 posts
Up Into Fourth
- Location: Aberdeenshire
- Local Club: Independent
Posted 08 September 2011 - 08:41 AM
Thanks andrew....from another AndrewIm following this ... Great project

#63
Zeemax Adventure
-

- TMF+ Member
-
- 301 posts
Speeding Along Now
- Location: Llandudno
Posted 08 September 2011 - 04:41 PM
Im another Andrew following this 
#64
Mini 360
-
- Members
-
- 4,933 posts
Up Into Fourth
- Location: Aberdeenshire
- Local Club: Independent
Posted 10 September 2011 - 11:35 PM
3 days till lift off  Cant wait!
Cant wait!
#65
Mini 360
-
- Members
-
- 4,933 posts
Up Into Fourth
- Location: Aberdeenshire
- Local Club: Independent
Posted 11 September 2011 - 05:43 PM
Bit more progress today. Spent most of the day filming for a project Im working on but got some time to work on the car too.
So I thought I would try and smarten up the calipers. Ideally I want new ones but will tart these up and get new ones another time. Money needs to go towards the body and these work fine.
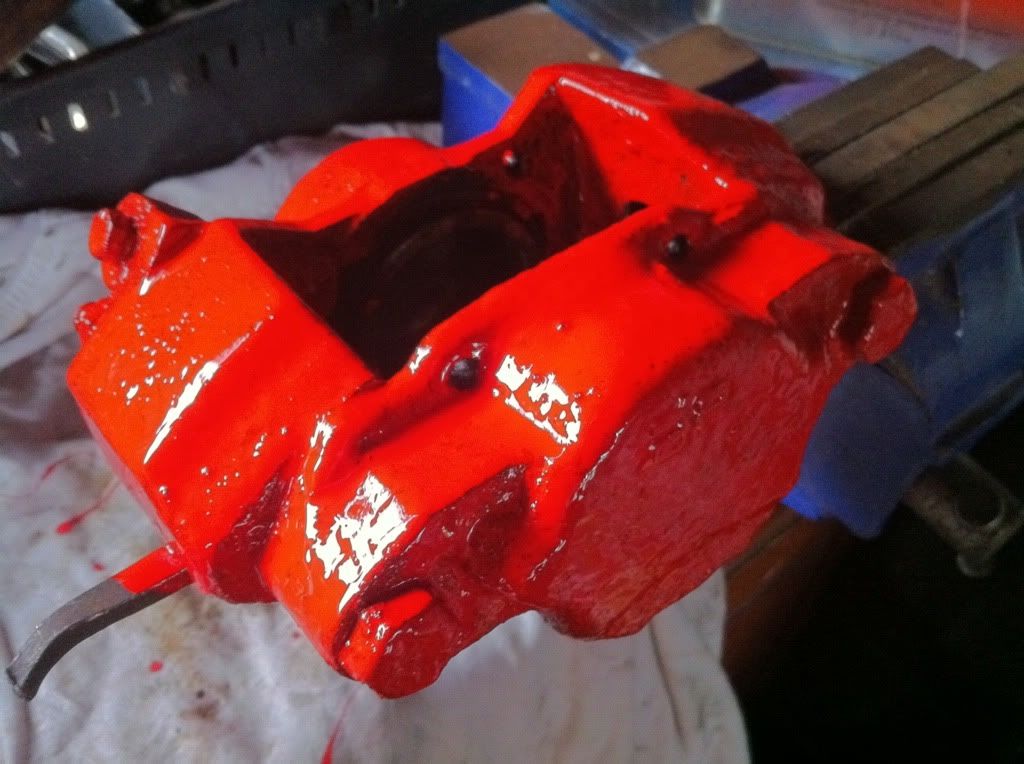
This is just one coat so will require more work.
2 Days till welding work commences!
So I thought I would try and smarten up the calipers. Ideally I want new ones but will tart these up and get new ones another time. Money needs to go towards the body and these work fine.
This is just one coat so will require more work.
2 Days till welding work commences!
#66
grahama
-

- Members
-
- 2,442 posts
Up Into Fourth
- Location: Warrington
- Local Club: None in my area !!
Posted 11 September 2011 - 07:46 PM
Have been having a read through and you indeed have some welding to go at !!! Look forward to watching progress.
Graham
Graham
#67
Mini 360
-
- Members
-
- 4,933 posts
Up Into Fourth
- Location: Aberdeenshire
- Local Club: Independent
Posted 11 September 2011 - 08:53 PM
As do you going by your signature!Have been having a read through and you indeed have some welding to go at !!! Look forward to watching progress.
Graham
Cheers mate
#68
MrBounce
-

- TMF+ Member
-
- 2,563 posts
Up Into Fourth
- Location: The Manroom in Ipswich
Posted 11 September 2011 - 09:09 PM
Loving this! Though the amount of rust on it makes me glad I've gone for Fibreglass...
#69
Mini 360
-
- Members
-
- 4,933 posts
Up Into Fourth
- Location: Aberdeenshire
- Local Club: Independent
Posted 11 September 2011 - 09:57 PM
5 days.....over 1,000 views...bloody hell
I did have a fibreglass bootlid but the fit was atrocious. Put me off fibreglass for life.
I did have a fibreglass bootlid but the fit was atrocious. Put me off fibreglass for life.
#70
Mini 360
-
- Members
-
- 4,933 posts
Up Into Fourth
- Location: Aberdeenshire
- Local Club: Independent
Posted 12 September 2011 - 07:38 PM
Bit more progress today before I ran out of room for parts. once the Mini goes off tomorrow things will be a LOT easier!
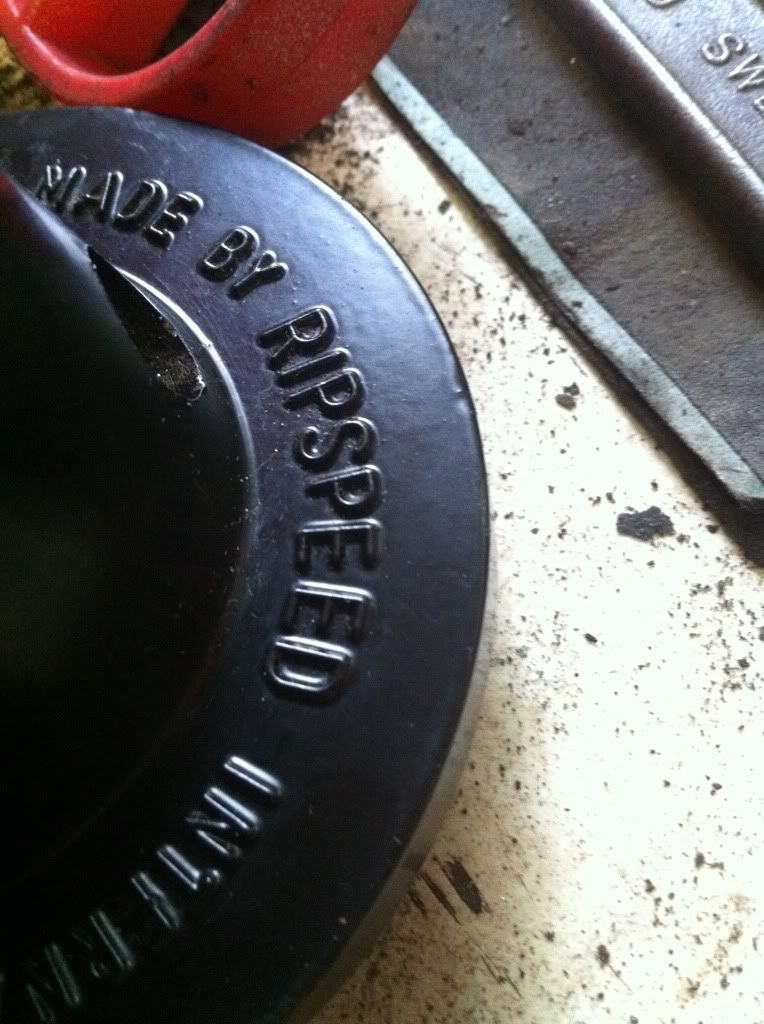
Cleaned up and painted my Hi-Los (adjustable height suspension for those who dont know....) Genuine Ripspeed goodness. Ripspeed used to be a stand alone company in the 70s-90s before Hellfrauds bought them over and ruined it by making chrome plastic tat for your corsa miiiiiin! So these are rally/race tested and quality parts!
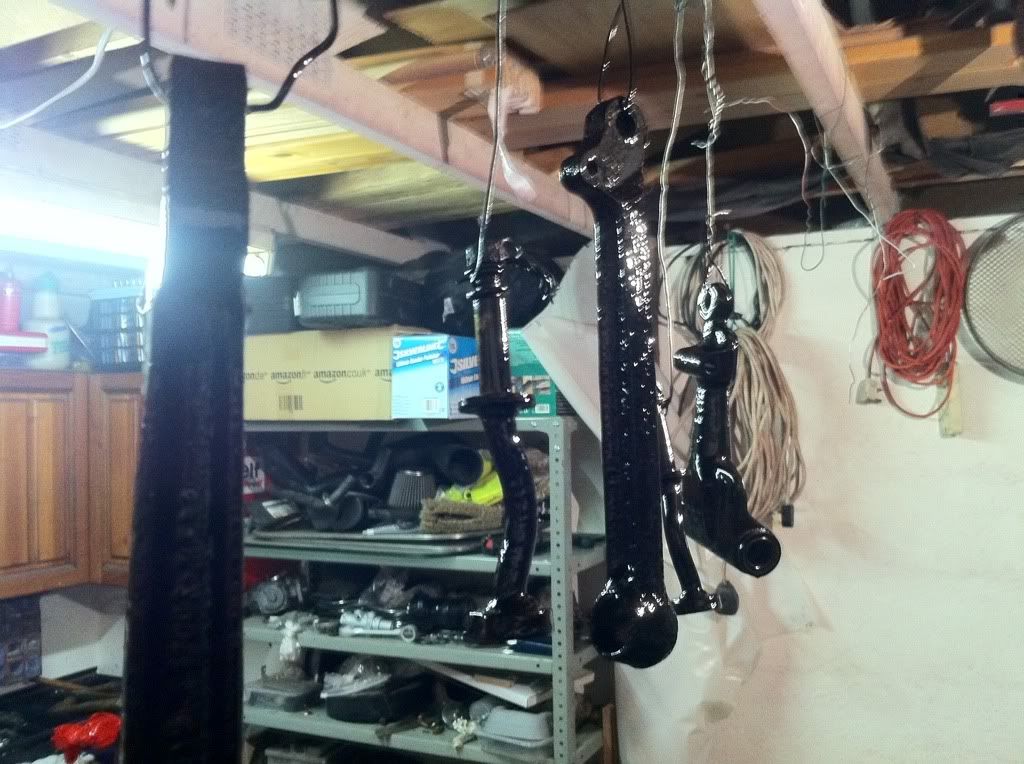
Then I set to work on the front suspension bits and pieces. All of these parts were heavily covered in surface rust. So I threw on some Deox Gel and left them for about and hour. Then wire brushed it off and rinsed to leave a perfectly clean, rust free part. This stuff is worth its weight in gold! Saves so much money on blasting! Not to mention powder coating as I sprayed them in gloss black hammerite. 5 coats should be enough I hope.....
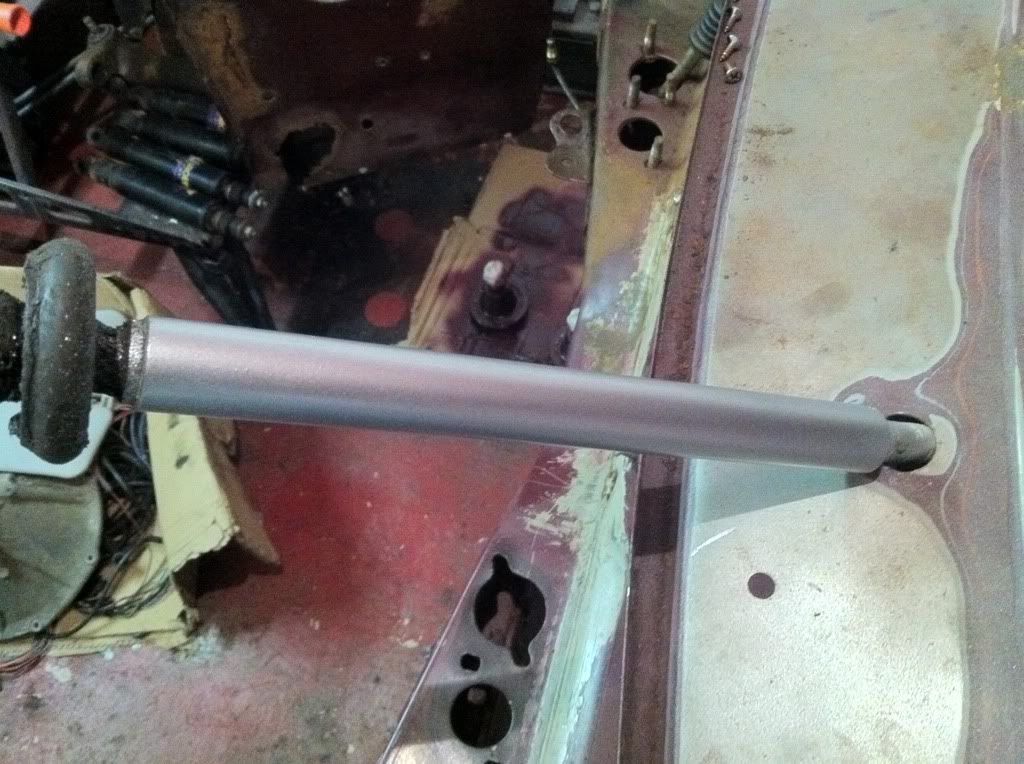
Also cleaned up and painted the Hi-Lo bars silver. Just need to go and get clear laquer to toughen up the finish a bit.
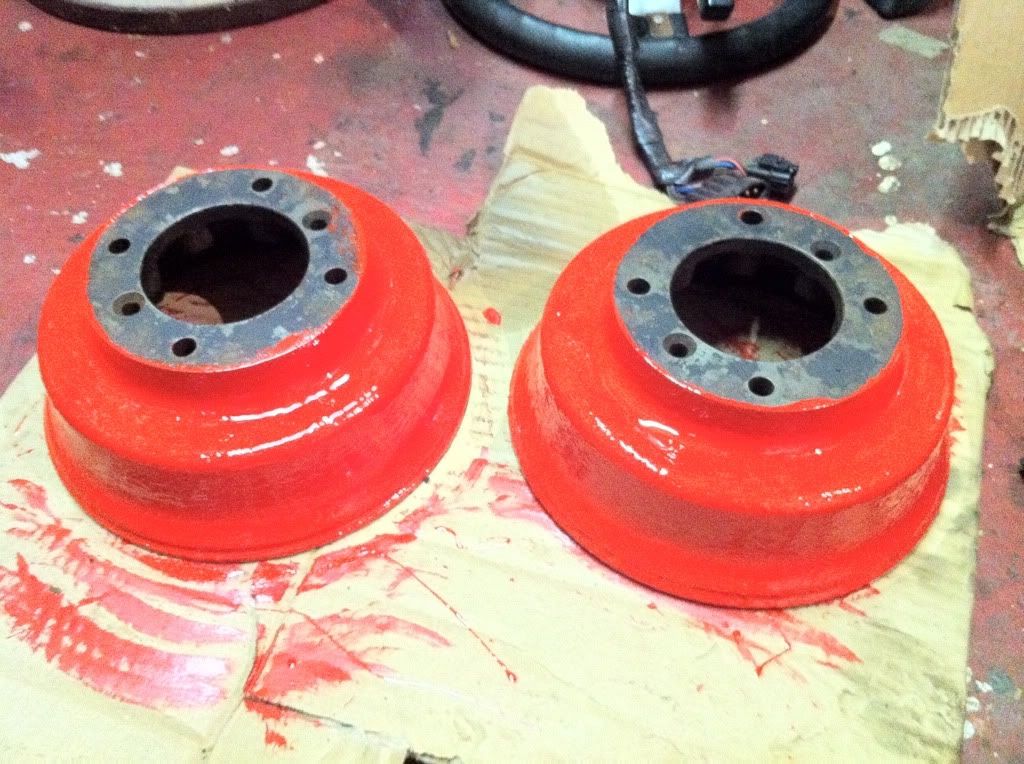
and also Deox'd the brake drums and painted them in smooth red Hammerite to match the front calipers. Not convinced on the colour myslef but will see what they look like on the frame/car. If I dont like they will be going back to black.
Also ordered a full car set of Polyurethane bushes from flo-Flex for £40. Cheaper than a set of rubber bushes.......weird considering ruber ones perish and get destroyed by oil in no time and these dont....... So they should arrive soon which means I can get to work on reassembling the subframes once they are back from blasting and coating.
And thus covers todays work. Tomorrow is Mini shifting day so work on the actual car should mount up pretty quickly from now on. Cant wait
Cleaned up and painted my Hi-Los (adjustable height suspension for those who dont know....) Genuine Ripspeed goodness. Ripspeed used to be a stand alone company in the 70s-90s before Hellfrauds bought them over and ruined it by making chrome plastic tat for your corsa miiiiiin! So these are rally/race tested and quality parts!
Then I set to work on the front suspension bits and pieces. All of these parts were heavily covered in surface rust. So I threw on some Deox Gel and left them for about and hour. Then wire brushed it off and rinsed to leave a perfectly clean, rust free part. This stuff is worth its weight in gold! Saves so much money on blasting! Not to mention powder coating as I sprayed them in gloss black hammerite. 5 coats should be enough I hope.....
Also cleaned up and painted the Hi-Lo bars silver. Just need to go and get clear laquer to toughen up the finish a bit.
and also Deox'd the brake drums and painted them in smooth red Hammerite to match the front calipers. Not convinced on the colour myslef but will see what they look like on the frame/car. If I dont like they will be going back to black.
Also ordered a full car set of Polyurethane bushes from flo-Flex for £40. Cheaper than a set of rubber bushes.......weird considering ruber ones perish and get destroyed by oil in no time and these dont....... So they should arrive soon which means I can get to work on reassembling the subframes once they are back from blasting and coating.
And thus covers todays work. Tomorrow is Mini shifting day so work on the actual car should mount up pretty quickly from now on. Cant wait
Edited by Mini 360, 12 September 2011 - 07:41 PM.
#71
Mini 360
-
- Members
-
- 4,933 posts
Up Into Fourth
- Location: Aberdeenshire
- Local Club: Independent
Posted 13 September 2011 - 05:04 PM
So today was the day of mini shifting. Out to Banchory to Kirkton autobody for welding and paint. As of tomorrow Im working there from 8-late to try and reduce my impending bill as much as possible!
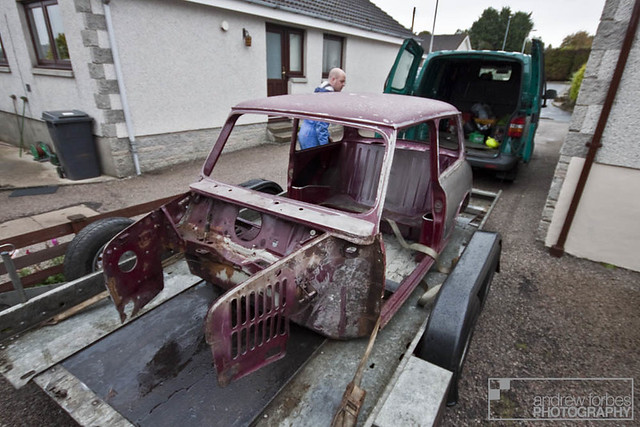
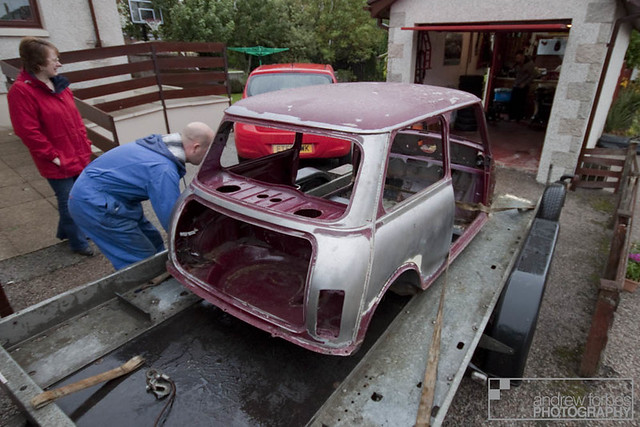
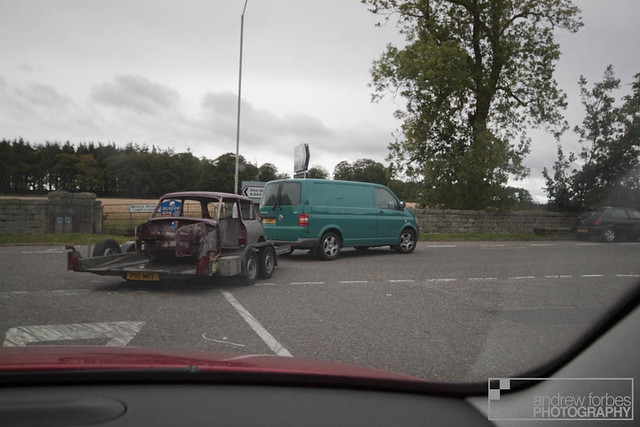
So called in a guy I know through a friend who has a trailer. Couple folk soon saw it on the trailer. 20 minutes drive and at Banchory. Got dumped into the corner of the workshop for the fun to begin. Tomorrow Im taking over my sills and inner wings to see what we can do with them. So progress ahoy!
Anyway the pics....
IMG_9757 by Andrew Forbes Photography, on Flickr
IMG_9760 by Andrew Forbes Photography, on Flickr
En route
IMG_9766 by Andrew Forbes Photography, on Flickr
Aaaand dumped, ready for working on.
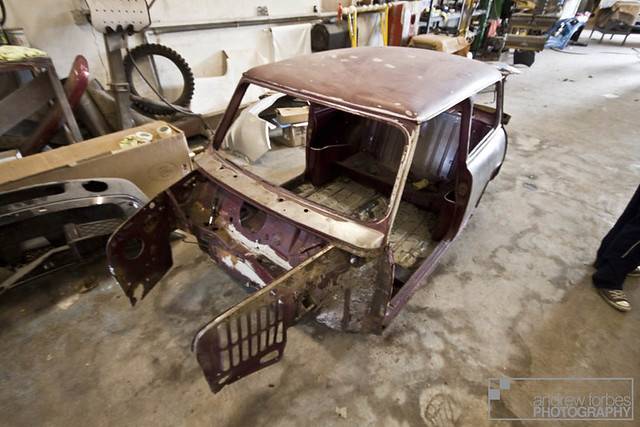 IMG_9771 by Andrew Forbes Photography, on Flickr
Doesnt take up much room so will busy myself away in the corner while customer cars are worked on by the guys
And where the car will end up in the end, the wall of fame
IMG_9778 by Andrew Forbes Photography, on Flick
Let the games begin and the bill mount up. In it for the long haul now!
So called in a guy I know through a friend who has a trailer. Couple folk soon saw it on the trailer. 20 minutes drive and at Banchory. Got dumped into the corner of the workshop for the fun to begin. Tomorrow Im taking over my sills and inner wings to see what we can do with them. So progress ahoy!
Anyway the pics....
IMG_9757 by Andrew Forbes Photography, on Flickr
IMG_9760 by Andrew Forbes Photography, on Flickr
En route
IMG_9766 by Andrew Forbes Photography, on Flickr
Aaaand dumped, ready for working on.
IMG_9771 by Andrew Forbes Photography, on FlickrDoesnt take up much room so will busy myself away in the corner while customer cars are worked on by the guys
And where the car will end up in the end, the wall of fame
IMG_9778 by Andrew Forbes Photography, on Flick
Let the games begin and the bill mount up. In it for the long haul now!
Edited by Mini 360, 13 September 2011 - 05:10 PM.
#72
analogue_radio
-

- TMF+ Member
-
- 4,897 posts
Up Into Fourth
- Location: Melton Mowbray, UK.
Posted 13 September 2011 - 05:54 PM
Good stuff 
#73
charliedurrant
-

- Noobies
-
- 519 posts
Super Mini Mad
- Location: Broadstairs, Kent
- Local Club: There isn't one down my way
Posted 14 September 2011 - 12:43 AM
Andrew,
It really is great to see all the photos - it's like watching it on tv without having to a the hard work!
Quick question, how did you polish the alternator? It looks better than new?
Charlie
It really is great to see all the photos - it's like watching it on tv without having to a the hard work!
Quick question, how did you polish the alternator? It looks better than new?
Charlie
#74
shysheep
-

- Noobies
-
- 7 posts
Just On Tickover
- Location: aberdeen
- Local Club: Aberdeen Mini Owners Club
Posted 14 September 2011 - 02:03 PM
NOT another thread on TRIG!!! 
#75
Mini 360
-
- Members
-
- 4,933 posts
Up Into Fourth
- Location: Aberdeenshire
- Local Club: Independent
Posted 14 September 2011 - 05:46 PM
Cheers!Good stuff
Andrew,
It really is great to see all the photos - it's like watching it on tv without having to a the hard work!
Quick question, how did you polish the alternator? It looks better than new?
Charlie
Cheers! Good to see folk are enjoying reading the thread! The alternator, I just painted it gloss silver and black Hammerite. No polishing involved
NOT another thread on TRIG!!!
Aye aye Gary min!
Update to come tonight.


0 user(s) are reading this topic
0 members, 0 guests, 0 anonymous users


