Project Trig - More Fresh Powdercoat!
#91
Posted 23 September 2011 - 07:37 PM
Makes sanding a breeze! Just used it on bits that a scotchbrite pad didnt smooth off. Didnt want to risk using too many discs when Im paying for them!
Once it was all smooth we popped some high build primer on the bare metal bits around the edge of the skin and the door bottom. Then we put some seam sealer on to protect it from rusting any more! Plan is to get the bottom of the doors stone chipped to again prevent rust as much as possible. this can be painted over too so will hardly be able to notice it!
So more work tomorrow morning which will mainly be alignment and possibly welding of the front panels! Should be good to see!
#92
Posted 24 September 2011 - 08:51 AM
#93
Posted 24 September 2011 - 02:37 PM
#94
Posted 24 September 2011 - 03:31 PM
#95
Posted 24 September 2011 - 07:44 PM
#96
Posted 25 September 2011 - 02:40 PM
So eventually with a bit of playing with the door hinge holes we got it mm perfect with no spacers/shims. Chuffed!
DSCF4478 by Andrew Forbes Photography, on Flickr
DSCF4481 by Andrew Forbes Photography, on Flickr
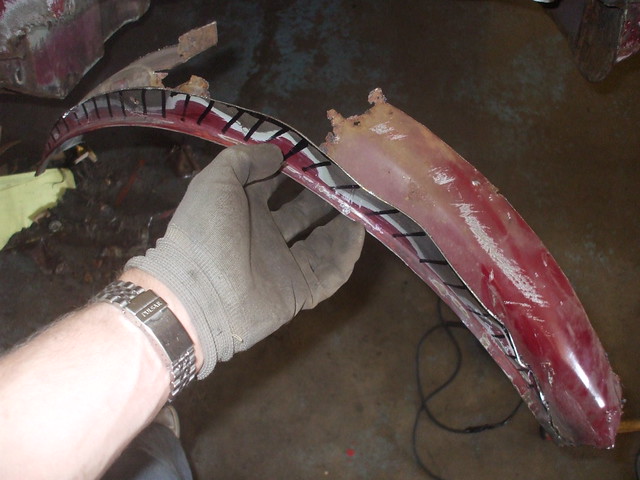
The door skin had warped/been bent a bit with positioning as you can see below......but a quick sesh with the hammer and dolly soon sorted that out. Sits flush now.
DSCF4486 by Andrew Forbes Photography, on Flickr
So here we have it. One door in perfect position. Hope the other side works out as easy as this one....
DSCF4494 by Andrew Forbes Photography, on Flickr
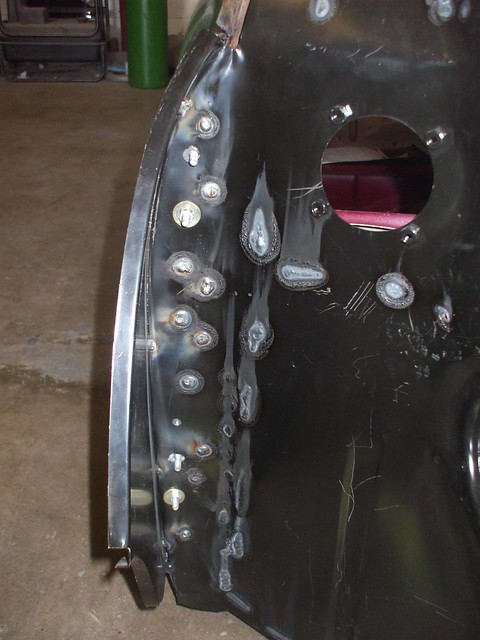
Then once we got that done the A panel quickly followed on and then we went onto the inner wing. These were spot welded everywhere at the factory but we have seam welded them as they have loads of points of contact so it should be a lot lot stronger. Plug welded it where it meets the door frame.
DSCF4497 by Andrew Forbes Photography, on Flickr
This was all welded from the inside of the bay so hence the burn through marks
DSCF4498 by Andrew Forbes Photography, on Flickr
and one from the inside. Looks a bit rough and ready but still needs cleaned up and then will be covered in paint, sound deadening and carpets. So you will never know
DSCF4499 by Andrew Forbes Photography, on Flickr
And this is the cars company for this week.....an SL63 AMG needing some boot paintwork. Sounds amazing!
DSCF4502 by Andrew Forbes Photography, on Flickr
So it may not seem like much progress but perfection takes time as they say....next out on tuesday morning/early afternoon before work in the evening. So should get more done then along the lines of the other door/inner wing/scuttle and possibly even outer wings as the front panel is perfectly in place.
Back to work after 2 weeks off tomorrow so now
#97
Posted 25 September 2011 - 02:43 PM
Cheers! Once the fronts done it will be on to the labour intensive paint prep....not looking forward to that one bit!Glad to see the project coming along. Its looking great, once that front ends welded up its really gonna take shape Good work!!!
Glad to hear its helping! Good luck buddy!What your doing is superb cant wait to see it when its finished!! Keep up the good work!! im now going to follow this its helping me for when i start to restore mine Chris
Thanksnice work!!
Why hello there fellow ScottishMini'erAnother Scottish student build, yay
#98
Posted 26 September 2011 - 06:23 AM
#99
Posted 27 September 2011 - 08:10 AM
#100
Posted 27 September 2011 - 09:15 PM
Either can I believe it or not! Im studying Graphic Design. Just gone into 3rd year Will hopefully pay the bills one day.....Looking great can't wait untill its finished, What are you studying at UNI
ThanksNice
#101
Posted 27 September 2011 - 09:15 PM
Got stuck into boot repairs/prep. This is the boot as was....
DSCF4506 by Andrew Forbes Photography, on Flickr
Not too bad but holes nonetheless so poked away at them and they got bigger....so out with the airsaw (epic tool!) and I was left with this.....
DSCF4508 by Andrew Forbes Photography, on Flickr
Was good to check the state of the valence closing panel. Thankfully it was fine so will get filled with Waxoyl so it stays that way! I made up a carboard template to plate up the hole and then set about a spare bit of metal, left over from the floorpan repair panel, with the tin snips.
DSCF4510 by Andrew Forbes Photography, on Flickr
Then made up another curved plate to match the contour of the inner arch to fix the other hole which also grew.....
DSCF4510 by Andrew Forbes Photography, on Flickr
Then made some holes in the other side and plate them up too. Just need welded up and the boots done. Glad thats the worst of the holes!
So progress again. Not much but still satisfying work. Love doing little bits like this Saved me some money doing it myself too!
Not sure when i will next be working on it due to Uni being useless and not giving me my timetable yet even though Im now back at Uni........so watch this space!
#102
Posted 01 October 2011 - 04:21 PM
Managed to get a morning on the car today. As I had made up panels for the boot already, I just needed Phil to weld them in. Boot now done! Just needs welds dressed up for paint and some seam sealer on.
DSCF4526 by Andrew Forbes Photography, on Flickr
And some of his quality welding.....
DSCF4527 by Andrew Forbes Photography, on Flickr
Since we still had a bit of time before I had to go to uni.....which was a waste of time anyway.....we got torn into tubbing the passenger side arch. First I stripped off the sealer/sound deadening/crap from underneath and then we cut out the lip and a larger section of the arch. Going to be doing it in one piece of steel again with another lip formed to get some strength back into it.
DSCF4514 by Andrew Forbes Photography, on Flickr
DSCF4515 by Andrew Forbes Photography, on Flickr
MBX'd..... I LOVE this tool!
DSCF4519 by Andrew Forbes Photography, on Flickr
Rest of the sealer off just to make sure theres no other nasties hiding anywhere
DSCF4522 by Andrew Forbes Photography, on Flickr
The cut away piece of arch
DSCF4524 by Andrew Forbes Photography, on Flickr
DSCF4525 by Andrew Forbes Photography, on Flickr
Couple repair patches to go in where the subframe mounts as its badly rusted but I just got a text saying its been repaired! So thats almost all the rust gone, just the passenger outer sill to go which isn't a massive job! Then its just front end final welding and it will be onto paint prep and painting. Starting to see the light at the end of the tunnel......
Im next out on Monday morning so should get the arch finally tubbed then, that is if Phil hasn't finished it off tomorrow morning though.......he fairly works on!
#103
Posted 01 October 2011 - 06:12 PM
#104
Posted 02 October 2011 - 01:06 PM
#105
Posted 03 October 2011 - 06:02 PM
The much needed pics!
Phil worked on after I left the other day to get the metal into place for the tub.
DSCF4530 by Andrew Forbes Photography, on Flickr
Leaving an ample lip for me to trim down this morning
DSCF4531 by Andrew Forbes Photography, on Flickr
And then the remaining bits that needed repaired were patched up. Doesnt look too pretty here but they are yet to be dressed up and the floor/arches are getting stone chipped and painted black anyway and the wheels/arches will easily cover it all. Function over form for once!
DSCF4534 by Andrew Forbes Photography, on Flickr
Trig gained a friend in the form of an Austin A35. Pretty solid looking thing but in for some welding work on the front arch.
DSCF4535 by Andrew Forbes Photography, on Flickr
And sill on. Hadrian panel but does the job....just.....fit was ok thankfully but did need a bit of tweaking to get right.
DSCF4537 by Andrew Forbes Photography, on Flickr
DSCF4538 by Andrew Forbes Photography, on Flickr
Progress progress! Roll on Friday morning
0 user(s) are reading this topic
0 members, 0 guests, 0 anonymous users