Jump to content


Photo
- - - - -

'cherry' The Red Mini Thirty.


  • Please log in to reply
205 replies to this topic

#136 joezone2001

joezone2001

    Speeding Along Now

  • Members
  • PipPipPipPipPip
  • 332 posts
  • Location: kirkby in ashfield

Posted 29 November 2012 - 04:03 AM

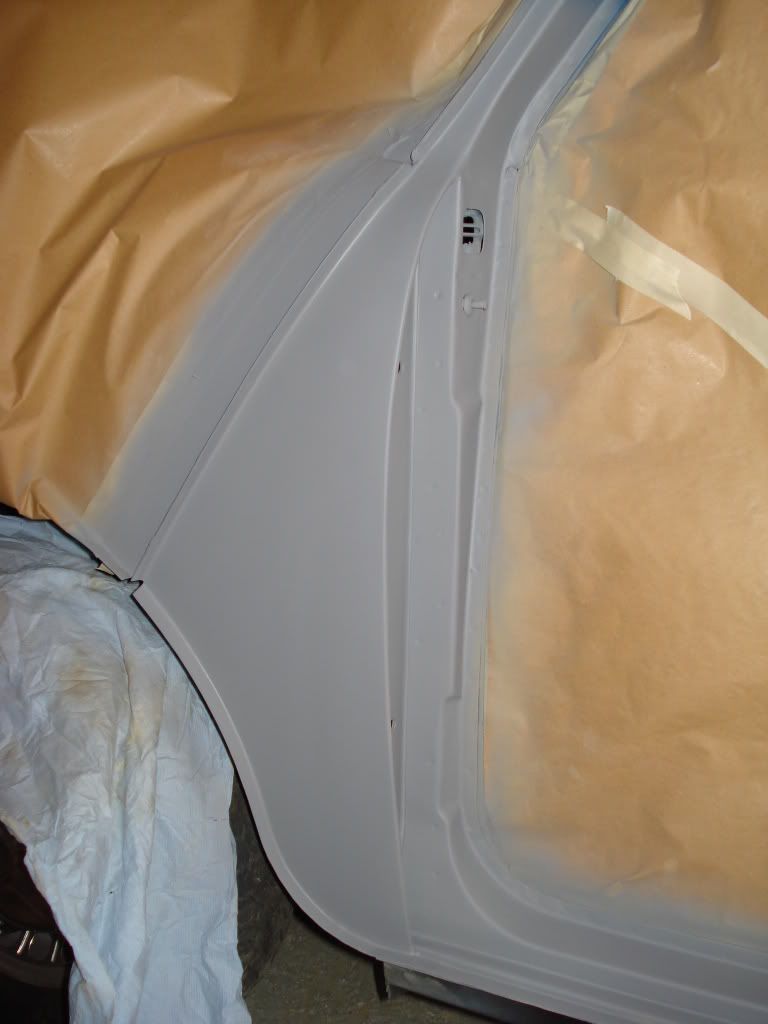
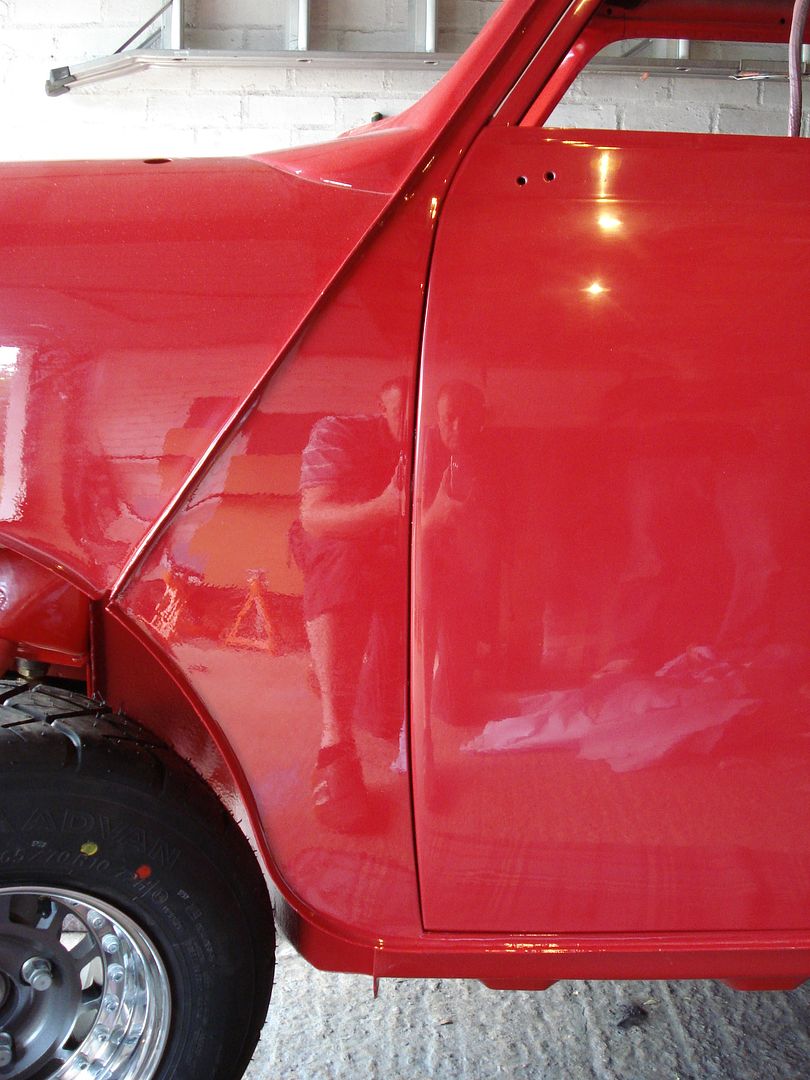
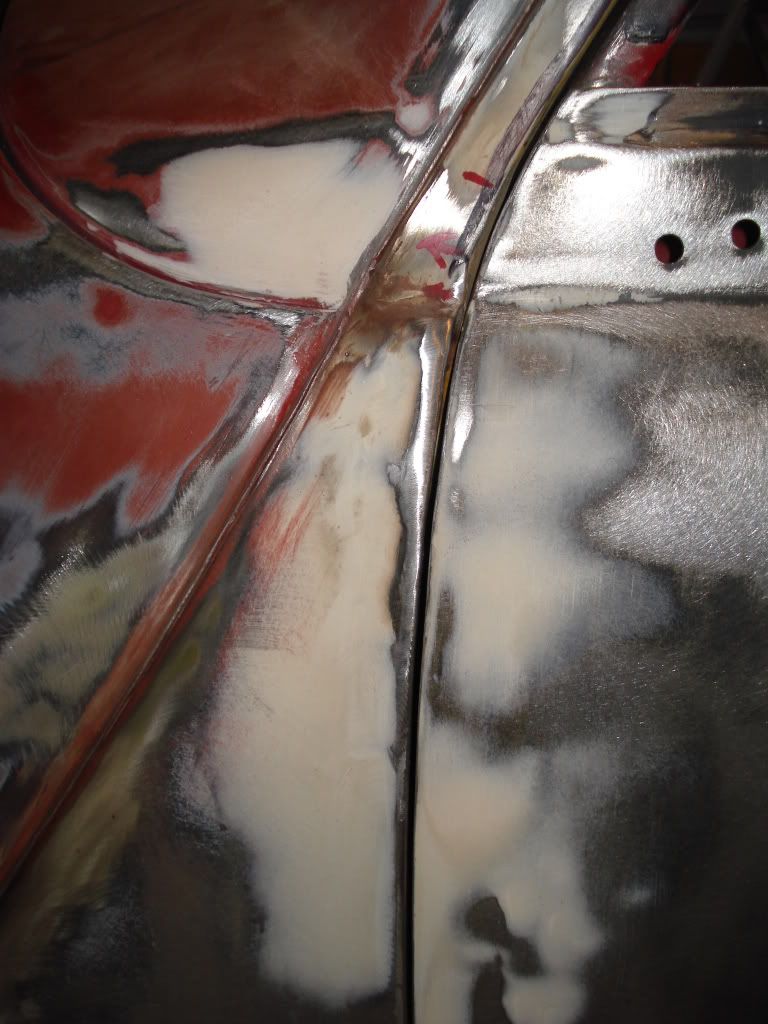
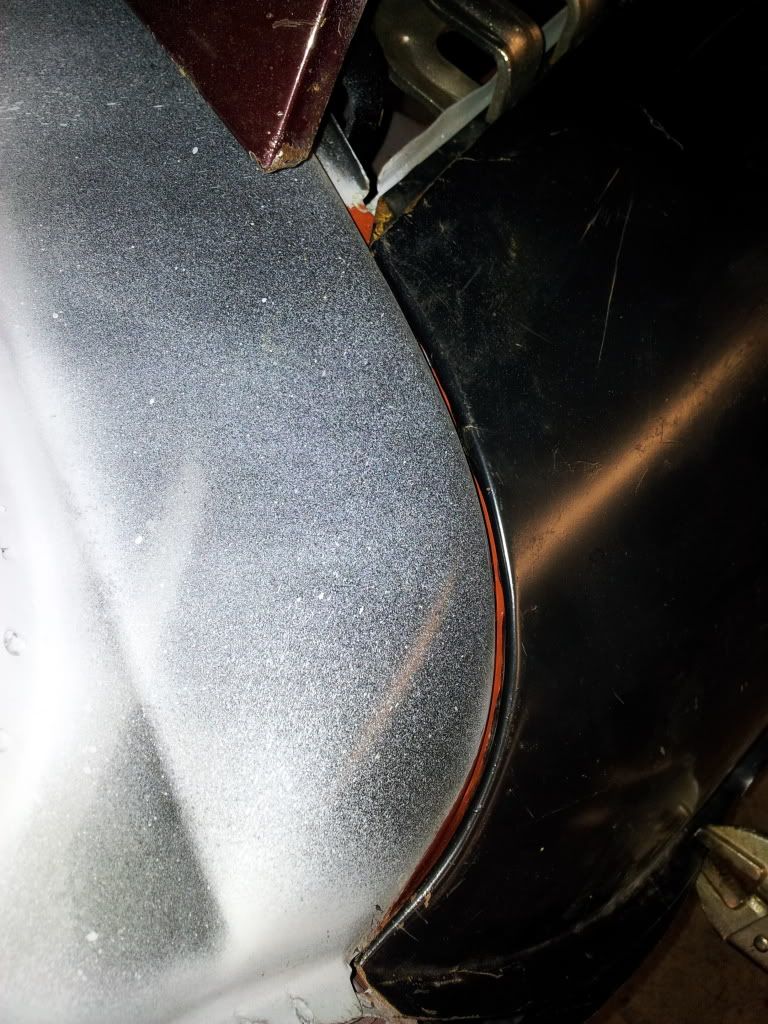
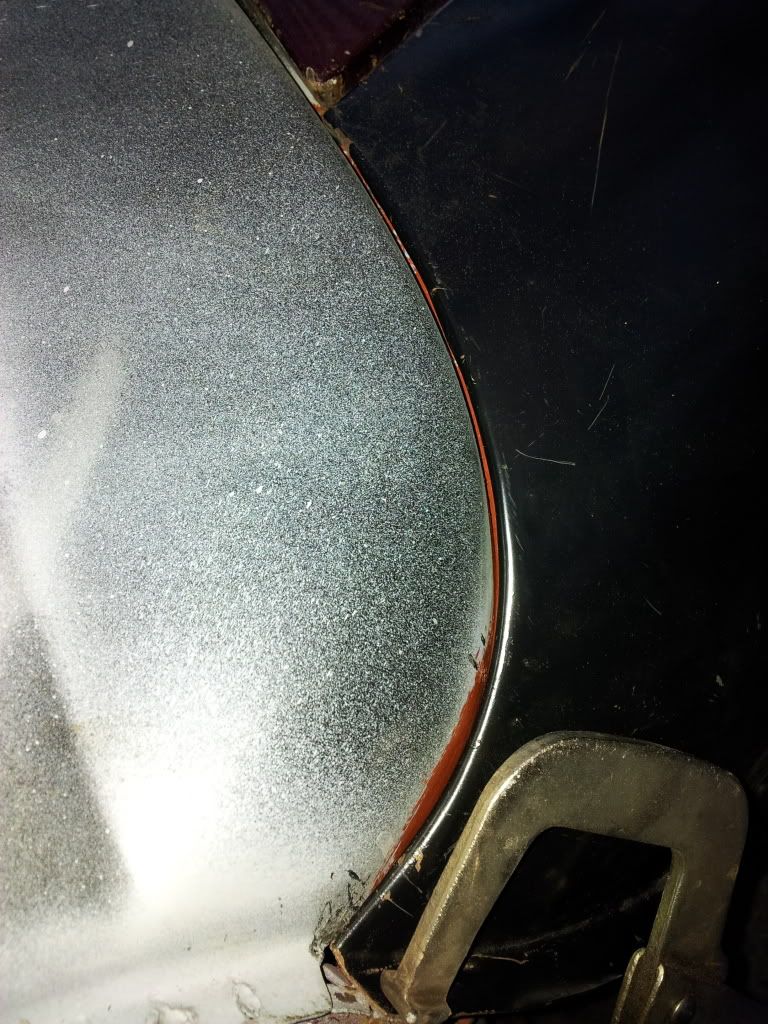
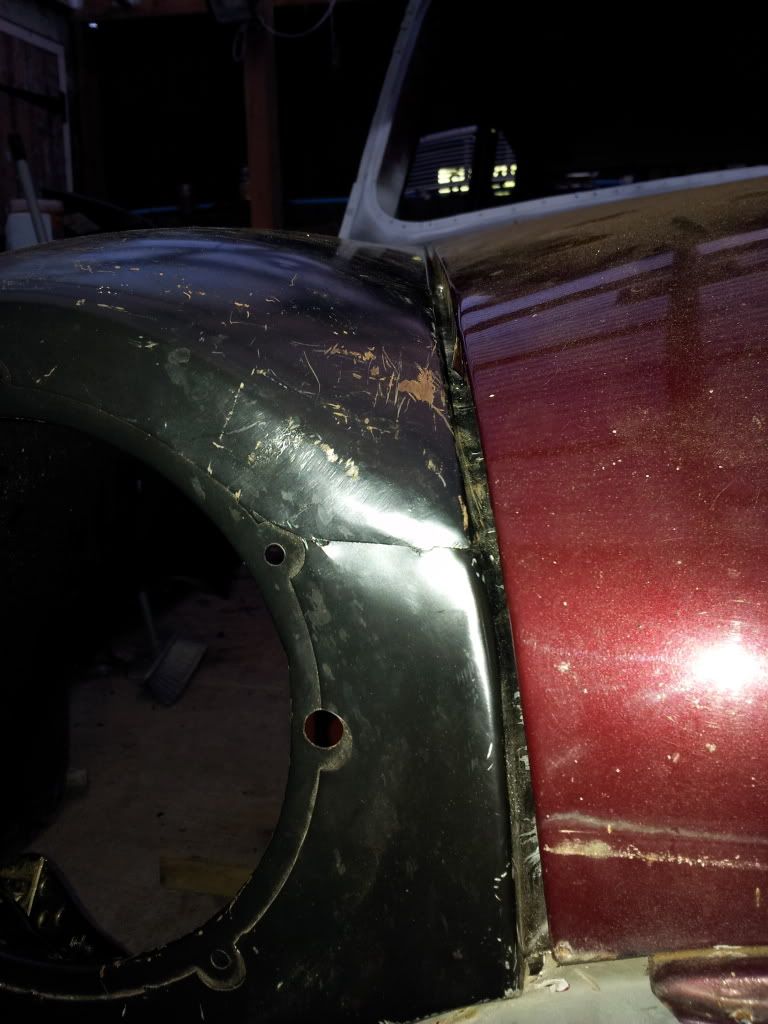
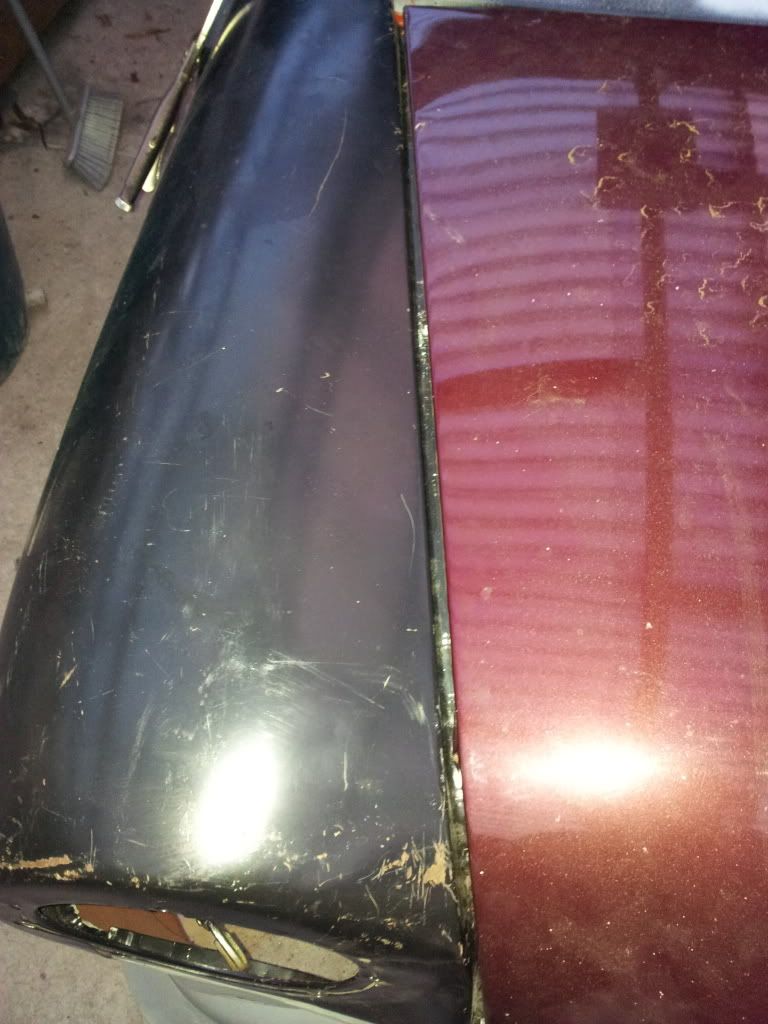
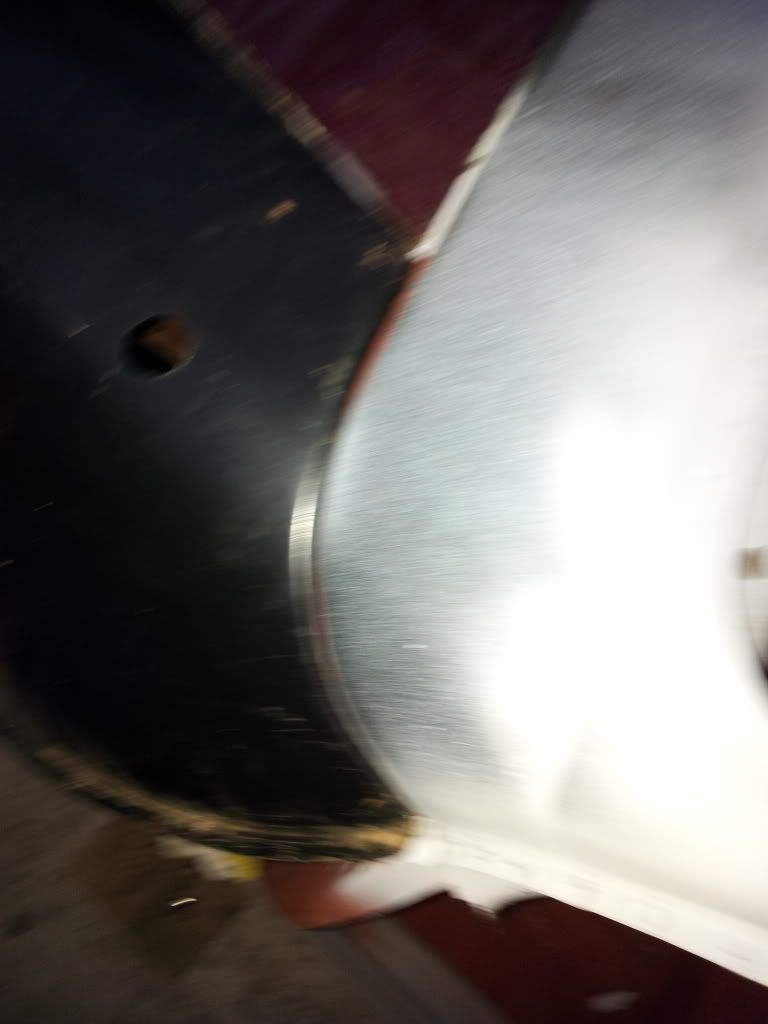
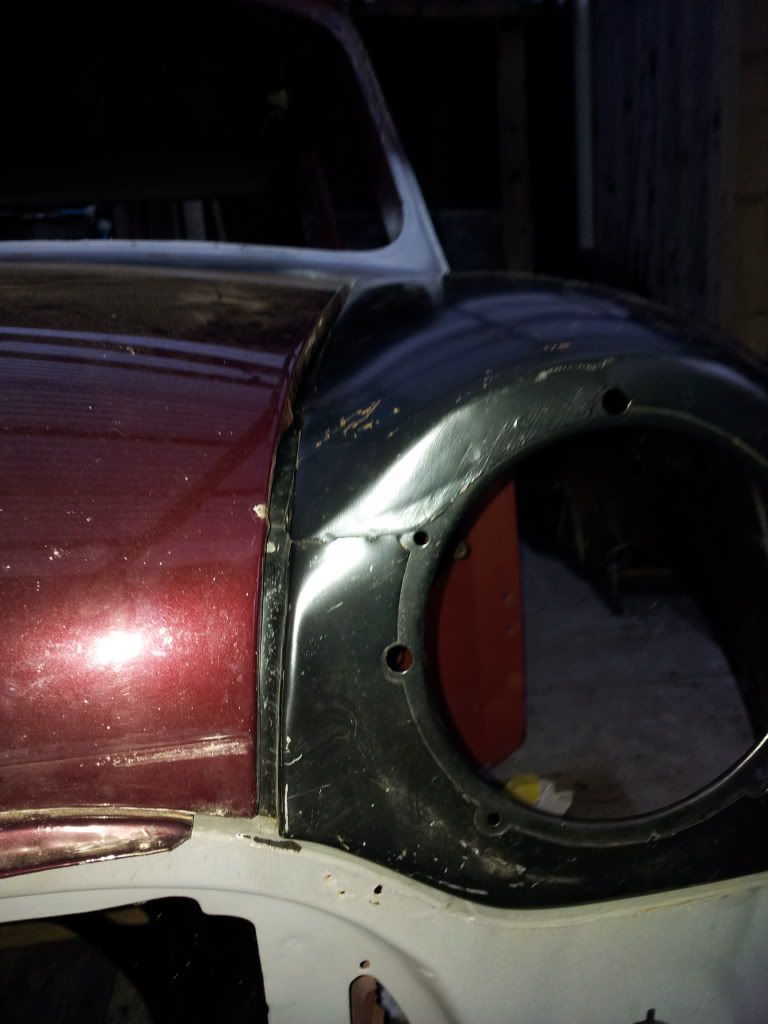
Wings are notorious for not fitting first time even Heritage. You will need to trim here and there and then use some brute force plus self tappers to align everything. Be patient thats the main thing.

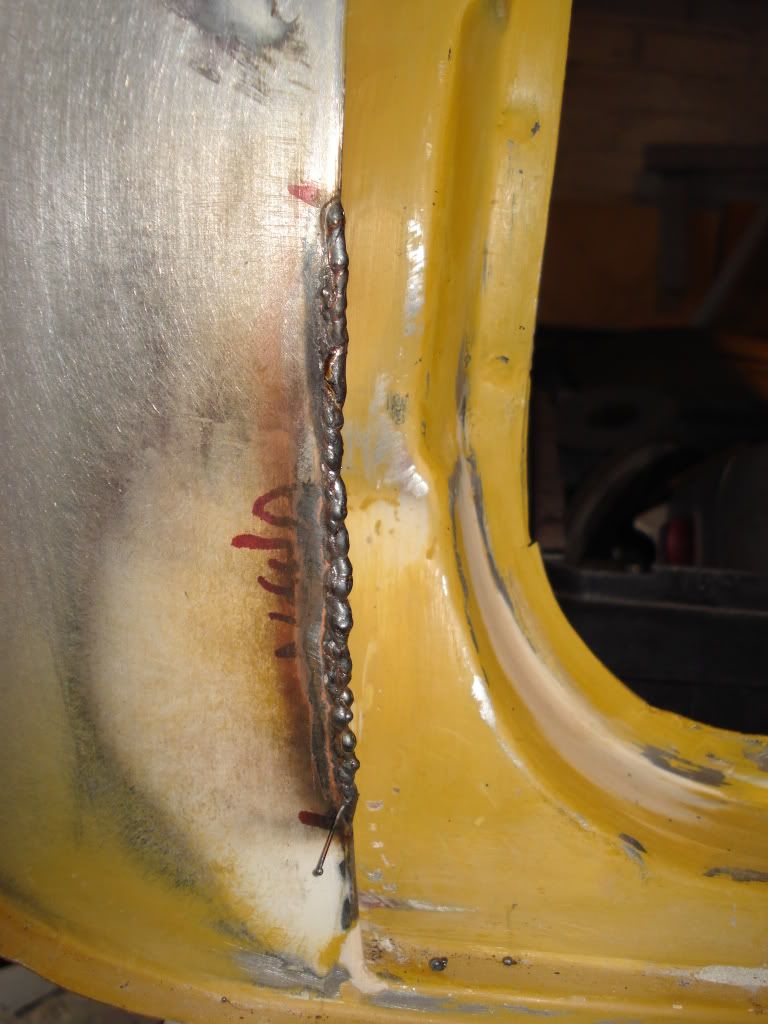
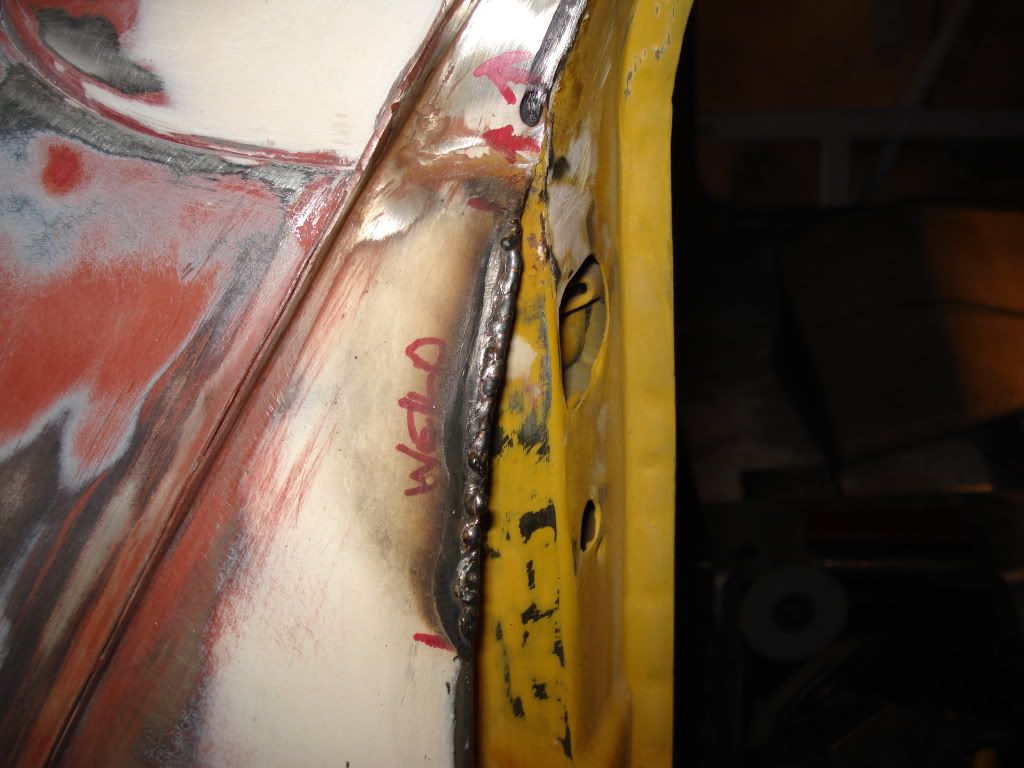
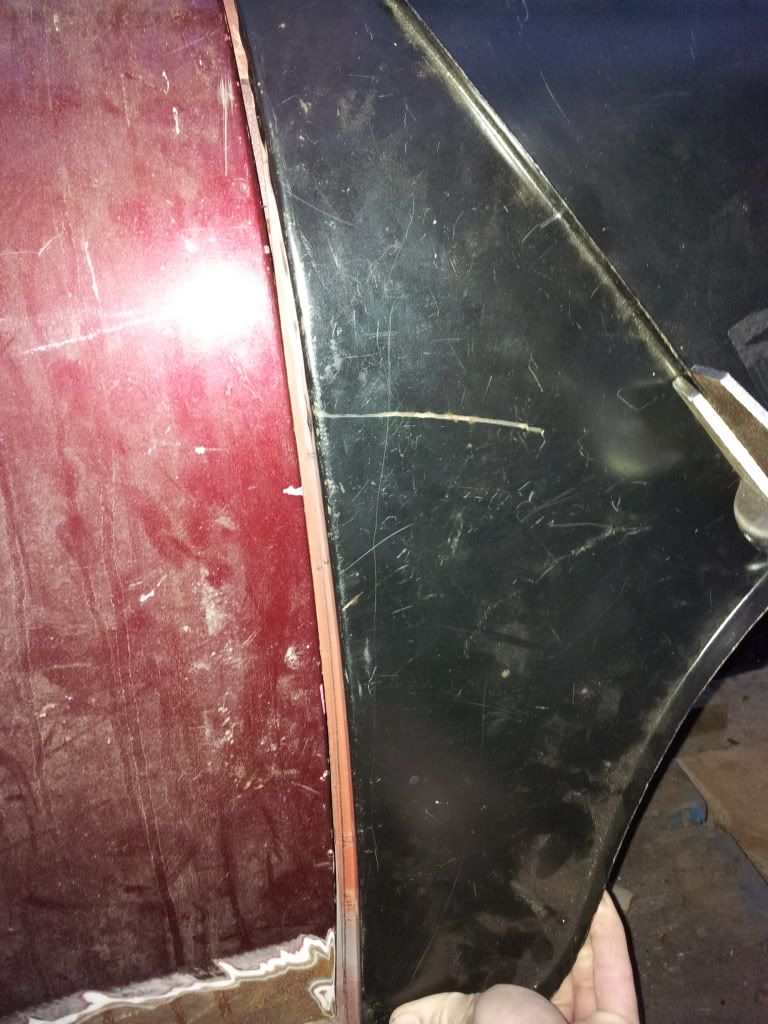
You really do not want to go the route i did which was to extend the bonnet each side and along the front as well.


Thanks for the comment Sonikk. I looked through your build with admiration when I saw your bonnet extensions. It looks like it came out really well. I will have another look later at the wings. I'll try to get some self tappers in like you said and pull them to shape that way.. They only cost £25 each so it's not a major setback if they end up need replacing again. I'll try and clamp the a panels in place also.

Cheers, Joe

#137 sonikk4

sonikk4

    Twisted Paint Polisher!!!

  • Admin
  • PipPipPipPipPipPipPipPipPipPipPip
  • 16,037 posts
  • Name: Neil
  • Location: Oxfordshire

Posted 29 November 2012 - 09:17 AM

Joe as a start offer the wings up, look at the back especially on the underside of the wing where there is a flange. Make sure this is not fouling on the bottom lip of the scuttle.

Next look at the front of the wing where it curves over down to the front panel. This sometimes is sitting hard against the small lip protruding up on the inner wing. You may need to trim the wing flange back here.

If you have had to do the above two items then retry the wing. This is where its handy to have somebody else available.Try and push the wing as far back as possible against the scuttle and at the same time as this do so at an angle IE with the bottom of the wing out. Now force the wing over as hard as possible (without bending it) against the inner wing flange as well. Get your mate etc to clamp the wing on the mounting flange in a couple of places then let the wing sit down.

Try your gaps on the A panel, front panel and bonnet (this where you need to fit self tappers to allow the bonnet to fit properly). If its looking better but still not right then repeat the above steps by adjusting any area that appears to be fouling until you are happy.

#138 joezone2001

joezone2001

    Speeding Along Now

  • Members
  • PipPipPipPipPip
  • 332 posts
  • Location: kirkby in ashfield

Posted 01 December 2012 - 10:56 PM

<p>

<br />
Joe as a start offer the wings up, look at the back especially on the underside of the wing where there is a flange. Make sure this is not fouling on the bottom lip of the scuttle.<br />
<br />
Next look at the front of the wing where it curves over down to the front panel. This sometimes is sitting hard against the small lip protruding up on the inner wing. You may need to trim the wing flange back here. <br />
<br />
If you have had to do the above two items then retry the wing. This is where its handy to have somebody else available.Try and push the wing as far back as possible against the scuttle and at the same time as this do so at an angle IE with the bottom of the wing out. Now force the wing over as hard as possible (without bending it) against the inner wing flange as well. Get your mate etc to clamp the wing on the mounting flange in a couple of places then let the wing sit down.<br />
<br />
Try your gaps on the A panel, front panel and bonnet (this where you need to fit self tappers to allow the bonnet to fit properly). If its looking better but still not right then repeat the above steps by adjusting any area that appears to be fouling until you are happy.<br />

<br />
<br />
</p>

Hi Sonikk

Thanks for the advice. It really helped. The wings actually fit really well now. I just needed to be a bit more bold with my clamps and not worry too much about bending things. I don't even think i need to trim anything.

Thanks again for the great advice, Joe

#139 joezone2001

joezone2001

    Speeding Along Now

  • Members
  • PipPipPipPipPip
  • 332 posts
  • Location: kirkby in ashfield

Posted 01 December 2012 - 11:11 PM

Hi all.
My wings now fit loads better thanks to some good advice, research and someone helping me. The issue I have now is that the Apanels that I have aren't big enough to fill the gap and dont cover the flange on the flitch panel.. Maybe this picture will help explain....

Posted Image

I can't see what the problem is. The wing seems to be in the right place as the old seem finishing strip still fits the seem properly without bending etc. The door hinge holes haven't moved as we repaired over them to keep the alignment and the door still fits properly. I can see that I could trim some of the flange on the flitch repair panel to fold the apanel around but it still wouldn't give enough.... Both sides are the same... Hmmmm....

Another thing I have discovered is that my bonnet may not be the original one and is bent in the middle. I think I can sort this on the bench though so this shouldn't be an issue.

Posted Image

As usual, thanks for looking. Comments and advice are always welcome.

Cheers, Joe

#140 sonikk4

sonikk4

    Twisted Paint Polisher!!!

  • Admin
  • PipPipPipPipPipPipPipPipPipPipPip
  • 16,037 posts
  • Name: Neil
  • Location: Oxfordshire

Posted 01 December 2012 - 11:32 PM

Looking at your picture your wing is sitting slightly low at the back along with the A panel. Whats the gap like at the back of the wing to the scuttle.
The bottom of the A panel should sit in a small gap where the doorstep lip is cut back. The bottom of it will then sit on the outer sill flange.

#141 sonikk4

sonikk4

    Twisted Paint Polisher!!!

  • Admin
  • PipPipPipPipPipPipPipPipPipPipPip
  • 16,037 posts
  • Name: Neil
  • Location: Oxfordshire

Posted 02 December 2012 - 12:01 AM

Although its not easy to see here as the door is not fitted the top of the A panel should be nearly in line with the swage line on the door.
Posted Image
The next picture will give you a better idea.
Posted Image
I did have large gaps that i had to deal with by adding metal to the edge of the door and the A panel. If you cannot get it to go back any further then add some weld to the A panel edge and then grind it straight, a bit like this
Posted Image
Posted Image
And you end up with these gaps
Posted Image

#142 joezone2001

joezone2001

    Speeding Along Now

  • Members
  • PipPipPipPipPip
  • 332 posts
  • Location: kirkby in ashfield

Posted 02 December 2012 - 12:22 AM

Hi Sonikk.
Thanks for the reply and the pictures. I have literally just been back out there to have a look at the wing and a panel again.. I have managed to get it a bit better I think. I've taken some more pictures although they're from my phone so aren't as good as the ones earlier. I got the wing a bit further back and I think it could do with trimming a bit on the lip round the scuttle..
Posted Image

Posted Image

Tomorrow I will have another look and maybe get some self appears in where I know it fits right.

Thanks for the great advice again. You've done a cracking job on your mini.
Cheers Joe

Edited by joezone2001, 02 December 2012 - 12:45 AM.


#143 sonikk4

sonikk4

    Twisted Paint Polisher!!!

  • Admin
  • PipPipPipPipPipPipPipPipPipPipPip
  • 16,037 posts
  • Name: Neil
  • Location: Oxfordshire

Posted 02 December 2012 - 12:29 PM

What you could do is to sort the gap on the A panel first so take the clamp off the wing to A panel flange.

Move the A panel back to get a more even gap. Then hold in place with a couple of self tappers. Now try the clamp again on the wing to A panel flange to see what happens. This may even help with the scuttle gap.

How ever if this does not work then what several other forum member have done is to split either the wing flange or the A panel flange then add a strip of metal in to fill the gap.

Have a look at the complete rebuild thread My Poor wee Mini Sky by Hugh J. Page 40. Hugh has battled along really well with this
http://www.theminifo...y/page__st__585

#144 joezone2001

joezone2001

    Speeding Along Now

  • Members
  • PipPipPipPipPip
  • 332 posts
  • Location: kirkby in ashfield

Posted 02 December 2012 - 01:17 PM

What you could do is to sort the gap on the A panel first so take the clamp off the wing to A panel flange.

Move the A panel back to get a more even gap. Then hold in place with a couple of self tappers. Now try the clamp again on the wing to A panel flange to see what happens. This may even help with the scuttle gap.

How ever if this does not work then what several other forum member have done is to split either the wing flange or the A panel flange then add a strip of metal in to fill the gap.

Have a look at the complete rebuild thread My Poor wee Mini Sky by Hugh J. Page 40. Hugh has battled along really well with this
http://www.theminiforum.co.uk/forums/topic/173406-my-poor-wee-mini-sky/page__st__585


Hi again. Thanks for the reply.
I have just come back in from outside (too cold! Haha) I think I have managed to get the gap around the scuttle sorted. I had to use my adjustment tool on the corner of the flap that goes round the scuttle. I have also got the wing to sit a bit further back. The A panel now fits better too. I can now see that I need to shave some metal from the flitch repair panel to be able to fold the A panel round. I think this will sort the door gap out as my flitch repair piece is straight whereas the door gap should be slightly bowed. The a panel follows the door gap and actually meets up with the top of the old panel and the bottom of the door frame. I will take a picture tomorrow.

Thanks for the advice and the link. I think I remember reading it at the time and dreading the time it came to fit my new wings. It's very helpful though. He's done a great job with it.
Cheers. Joe

#145 joezone2001

joezone2001

    Speeding Along Now

  • Members
  • PipPipPipPipPip
  • 332 posts
  • Location: kirkby in ashfield

Posted 04 December 2012 - 04:25 PM

Hi..
Bit of an update. I have decided that the wings and a panels I have are ok. It was just me not putting them on right.. (Dohh!) I think I have got the drivers side wing into a position I am fairly happy with. I have self tapped it into place to check panel gaps/clearances etc. I think it looks ok.... The a panel gap has closed up a lot as I have shaved a bit off the lip on the back of the wing, where it goes round the scuttle. I still need to cut some of the flitch repair panel but I don't think the door gap will be that bad. Here's some pictures...(they're bad as I used my phone again)

Round the scuttle
Posted Image

The a panel. I think I can close the gap up some more though.
Posted Image

The front of the wing (maybe able to close the gap a bit also)
Posted Image

Top view. (Is this gap good?)
Posted Image

I've not done that much work on the passenger side yet as I need to re-fit the door. My old hinges are still attached but the bolts are sheered so I need to drill and retap them. I did buy new hinges from wood and picket but there was too much play in them (even if I'd have brought them for my garden gate they'd have been sent back!) so I decided to refurb my old ones. The drivers side ones work great.

The wing is just rested on the car at the moment and already I am quite happy with it.
Rear view (sorry it's blurry)
Posted Image

Top view
Posted Image

Front view
Posted Image


Overall view. (Please excuse my messy 'man cave' haha)

Posted Image

Thanks for looking. Joe

Edited by joezone2001, 04 December 2012 - 04:26 PM.


#146 Jasonc

Jasonc

    Mini Mad

  • Members
  • PipPipPipPip
  • 183 posts
  • Location: Hampshire

Posted 05 December 2012 - 10:39 AM

Hi Joe,

Just a quick one to say still following and love the work you're doing Cherry is going to be a fantastic solid mini.

Keep up the good work!

Jason

#147 joezone2001

joezone2001

    Speeding Along Now

  • Members
  • PipPipPipPipPip
  • 332 posts
  • Location: kirkby in ashfield

Posted 05 December 2012 - 11:02 AM

Hi Joe,

Just a quick one to say still following and love the work you're doing Cherry is going to be a fantastic solid mini.

Keep up the good work!

Jason


Hi Jason
Thanks for the comment mate. Its good to know what I'm doing looks OK.. haha. She looks a mess in places as I haven't taken the paint off yet bit she will get there eventually.
Cheers, Joe

Edited by joezone2001, 05 December 2012 - 11:05 AM.


#148 Jasonc

Jasonc

    Mini Mad

  • Members
  • PipPipPipPip
  • 183 posts
  • Location: Hampshire

Posted 05 December 2012 - 11:10 AM

With your determination and hard wrok I am sure she will look the mutts!

#149 sonikk4

sonikk4

    Twisted Paint Polisher!!!

  • Admin
  • PipPipPipPipPipPipPipPipPipPipPip
  • 16,037 posts
  • Name: Neil
  • Location: Oxfordshire

Posted 05 December 2012 - 04:08 PM

Is the wing flange butting up hard against the inner winner flange at all?? if so trim a little bit of the wing flange off and try again to close the bonnet shut line up.

#150 joezone2001

joezone2001

    Speeding Along Now

  • Members
  • PipPipPipPipPip
  • 332 posts
  • Location: kirkby in ashfield

Posted 23 January 2013 - 03:32 PM

Hi all..

Been a while since I updated this.. Not much has happened to the mini over Christmas/new year due to other commitments (work mainly and now 'this' snow)

I went out today to start to clear off some of the surface rust from the new wings as I had noticed that there were quite a few blemishes in the black protection paint.. I got on with it by using an orbital sander and uncovered loads! Then disaster! The orbital sander started speeding up, shaking violently and spewing smoke out of the side! The switch had jammed and wouldn't turn off so I reached for the plug and the end flew off the sander, narrowly missed my head, went straight through my carport roof, through 8-9 inches of snow and now I can't find it.. Great!

Posted Image

Posted Image

anyway, I've now got a carport with a hole in it, I need to get a new sander and haven't got very far with the mini. Lol..

Hope everyone else is having better luck. Haha
Joe


0 user(s) are reading this topic

0 members, 0 guests, 0 anonymous users