Jump to content


Photo
- - - - -

1948 Chevy Pickup.


  • Please log in to reply
228 replies to this topic

#1 M44K TS

M44K TS

    Up Into Fourth

  • Members
  • PipPipPipPipPipPipPipPipPip
  • 3,104 posts

Posted 11 November 2012 - 09:02 PM

So, earlier this year, I had a perfectly nice Mercedes CLS as my daily driver, lovely car and all that, but not really what I always wanted, well, I had always loved the CLS when they were launched and after a lot of saving and juggling my finances, I bought one. Thing is, deep down, there was always a vehicle that secretly wanted, and it was old, American and pretty crude

So, the lunatic in me decided that I needed to scratch the old Chevy pickup itch that I've had for quite a few years.


So here goes..

I finally have my 2nd dream motor, (1st being the Mini of course!) A 1948 Chevrolet 3100, originally imported from Kentucky, It's spent some time in Indiana as there's a very faded 1988 approval sticker on the windscreen, must have been the last time it was on the road in the US. I bought it off a guy in Essex who imports them.

It would started life as a 6cyl 3.5 with a whopping 85hp and a 3 speed manual, (three on the tree) leaf springs all round and single leading drum brakes with no servo assistance!

It's now rocking a 5.7 V8 (Chevy small block) with a 750cfm 4 barrel Edelbrock carb and a TH350 3 speed auto 'box. The truck has a late Chevy Nova front clip, (Independent coil spring suspension, vented & servo'd discs and power steering via a quick steering box that gives it 2 turns lock to lock. The rear end is what's known as a Chevy 10 bolt, (amount of bolts on the diff casing) and is supposedly one of the toughest available, handy for the odd number 11! The standard leaf springs have been binned in favour of a 4 link rear suspension with coilovers. It's had a 12v conversion with a new wiring loom too.

The wheels are Cragar style 20" on the rears and 18" on the front.

I bought it with a very original and pretty ropey interior, my plan is to make it tidy on the inside with some modern creature comforts like a heater! I have bought a rear seat from an Audi A8 which is heated, has electric head rests and electric lumbar support so it'll be comfortable, the dash and behind the seats around the cab windows will be covered in leather and eventually, I have new black carpets ready to go in and I'll have some bespoke door panels made up to finish it all off

Anyway, the pics, think of it as a very condensed wip!

How I bought it...
Posted Image
Dash was pretty much original, just a bit tired.
Posted Image
Attacked it with the wet & dry and some satin black as a temporary measure
Posted Image
The Audi leather that will go in, just needs a frame made up and the wiring sorted
Posted Image
Some new LED tail lights as the originals were barely visible
Posted Image
Showing off it's 64 year old patina!
Posted Image
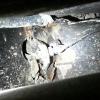
Original factory wood had seen better days, most of it had rotted through
Posted Image
Posted Image
Had the dash trims painted to tidy it up
Posted Image
Posted Image
New wood went in last weekend
Posted Image
Posted Image
Posted Image

Some arty shots from a few weeks back
Posted Image
Posted Image
Posted Image

Couple of videos
Ignore the wavy video, that was Youtube's own video stabiliser!


Unsure if this will work, but if it does, all I can say is, it was rude not to!


#2 Mini-Mad-Craig

Mini-Mad-Craig

    Crazy About Metro's

  • Members
  • PipPipPipPipPipPipPipPipPipPip
  • 9,298 posts
  • Location: Travelling in a fried out Kombi

Posted 11 November 2012 - 09:03 PM

What a beast mate! - YUM.

#3 M44K TS

M44K TS

    Up Into Fourth

  • Members
  • PipPipPipPipPipPipPipPipPip
  • 3,104 posts

Posted 11 November 2012 - 09:05 PM

Next came some engine bay trinkets...

Posted Image


How it looks with the new valve covers and air cleaner fitted. I will be painting the engine block black too hopefully.
Posted Image
Posted Image
Posted Image

Also tidied up a few bits on the 'bay, re-routed some of the conduit for the wiring harness, added a couple of p clips and tucked it out the way, just to tidy it up a bit. Desperately needs the firewall degreased and painted properly.
Posted Image
Posted Image
Posted Image

Also relocated the washer bottle to the bulkhead, I will be painting it black to make it blend in a bit, stuck out like a sore thumb before when it was on the inner wing.
Posted Image

Added a proper spade terminal & some spiral wrap to the auto choke power feed as the crappy spade that was on didn't really have a very good grip on the wire.
Posted Image

#4 M44K TS

M44K TS

    Up Into Fourth

  • Members
  • PipPipPipPipPipPipPipPipPip
  • 3,104 posts

Posted 11 November 2012 - 09:07 PM

Decided to paint the brake callipers, they were a bit dull and had a thin layer of rust on them, so out with the wire brushes on the drill and set to them. I did think about gloss black but thought satin just suits it better.


Posted Image
Posted Image


I ordered the Dakota Digital dials, I've opted for the silver alloy faces with red illumination, they should hopefully be here in a couple of weeks.

Yesterday, I got cracking with a things, the first, my mate said on Saturday that he thought he exhaust was blowing, I hadn't noticed, checked the drivers side manifold where the mounting flange meets the front pipe, 2 nuts had worked their way loose, must have been a gradual thing as I hadn't noticed, nipped them up and the engine sounds a lot smoother.

Also started a few interior jobs, first off, the observant folk may notice something is missing here...
Posted Image

That would be this, the old heater unit, total PITA to remove as I didn't realise there were 3 bolts on the rear holding the heater to the kick panel, not 2...
Posted Image
Posted Image

Means I have so much extra space in the foot well, handy for when I decide if I'm going to bother with a sound system, means I can possibly get some speakers hidden up there. I also added some black carpet to the kick panel as a temp. measure until I can get the new carpet in.
Posted Image

Glove box liner in, although I think I've ordered the wrong one as it's not a brilliant fit. Still though, for how often it'll get used, it'll be fine
Posted Image

Got the seats out yesterday to see where the new ones will need to go, I've had a talk with a friend of a friend who is a metal fabricator about making a frame up, I have an idea of how it needs to be fitted together, I just need to find out dimensions & draw a rough sketch so he can make a start.

They're a perfect fit width wise, I knew this already before I bought them, but I really think they look right at home. Will look even better with black carpet
Posted Image

This is about how far forward the seat base needs to be, it's roughly where the existing one is already so the seating position will be as
comfortable for reaching the pedals etc.
Posted Image
Fiddled with the contrast settings to get more of an idea of how it will look
Posted Image

Next, I needed to see how high the base needs to be, luckily next door to our unit are some builders, they have a stack of block paving blocks outside, so I 'borrowed' some lol It's about 6" high which is about the same as the current seats, the front area of the floor is raised slightly which helps angle the seat base down at the back.
Posted Image

You can see why I want rid of that horrible grey carpet!
Posted Image

I've been looking at carpet to cover the area behind the seats, below the rear cab windows. The windows sit on a double skinned panel which will be covered in black leather cloth when I remove the windows to renew the seals, but below that, it's single skin with strengthening supports which may be a bugger to cover. I need to measure up how much carpet I need as I've seen this mould-able carpet on ebay..
http://www.ebay.co.uk/itm/300512174472?ssPageName=STRK:MEWAX:IT&_trksid=p3984.m1438.l2648#ht_1407wt_827

That should help insulate the cab a bit plus make it a bit quieter.

#5 M44K TS

M44K TS

    Up Into Fourth

  • Members
  • PipPipPipPipPipPipPipPipPip
  • 3,104 posts

Posted 11 November 2012 - 09:07 PM

Behind the seats just about carpeted, only got one section to sort.

Bee noticing over the last few times I've driven the truck, there's a knock on the engine from about 2000 rpm, doesn't sound terminal like bottom end or anything as confirmed by a mechanic mate, he had his stethoscope round the engine and seems to think it's the mechanical fuel pump that's knocking, (for those that don't know, the mechanical fuel pump is on the side of the engine block and is driven by one of the cam lobes (OHV engine), Chris seems to think it's the lever on the pump that's in contact with the cam lobe that's knocking). Ordered one off ebay which should be here tomorrow to test it.


Anyway, the Dakota Digital gauges turned up Friday, so had a bit of a play about with them. Got stung for £125 import duty & VAT though, robbing bastards.

Posted Image
Posted Image
Posted Image
Posted Image
Posted Image
This will come in handy
Posted Image
Posted Image
Quick way of testing the temp. gauge
Posted Image
Posted Image
Redneck test bench
Posted Image
Demo mode
Posted Image
Chevy 3100 Pickup Dakota Digital VHX Gauges - YouTube

Can't wait to get them fitted, I'll have to wait until the dash is trimmed in leathercloth first though.

#6 M44K TS

M44K TS

    Up Into Fourth

  • Members
  • PipPipPipPipPipPipPipPipPip
  • 3,104 posts

Posted 11 November 2012 - 09:08 PM

Did a trial fit of them tonight, mainly to see how they go together, what wiring is needed etc.

Old & New
Posted Image
In the dash
Posted Image
Powered up, indicators, main beam and rev counter working
Posted Image
Figured out that I must have a late 70's Ford Mustang fuel sender judging by the resistance readings from the gauge, the existing fuel gauge read just over 1/2 a tank too so I'm hoping I have it right, not a major headache if I don't, you can custom set everything so can enter the full & empty resistance values to fine tune it. I tried a direct earth on the sender terminal on the original gauge, effectively giving 0 ohms and the needle shot to full, so going by the manuals I have found for them, it must be a Ford sender.
Posted Image

That's it for now, I've installed the speed pulse generator onto the speedo drive on the gearbox so just need to get my sat nav to count out a 1 mile stretch of quiet road so I can set up the pulse per mile for the speedo calibration as I have no idea what configuration of final drive/diff ratios the truck is running.

Also need to drain off the coolant to fit the temperature sender to the block, works out quite well as I'd like to do a full coolant flush ready for winter anyway for peace of mind as the coolant looks a bit brown.

I may also have to remove the distributor to get at the oil pressure sender, currently, they're both mechanical so they will need to be replaced with the senders that came with the gauges, just the oil sender is tucked down the back of the engine under the distributor so access may be a bit tight.

#7 M44K TS

M44K TS

    Up Into Fourth

  • Members
  • PipPipPipPipPipPipPipPipPip
  • 3,104 posts

Posted 11 November 2012 - 09:09 PM

Back at it again last night, first of all, relocated the 12v socket to original ignition switch hole, fits extremely well too, also moved the heat control for the heater to the choke cable hole as I did have it down between the 4 extra gagues, but, as they're now redundant, I had nowhere else to put it.
Posted Image

Took out the old mechanical oil pressure gauge and installed the Dakota Digital sender. Only snag I hit was the sender needed either a 45/90 degree end or an extension fitting as the sender fouls the inlet manifold when trying to fit the sender straight to the engine. So now, all I need to do is configure the speedo calibration by recording an exact mile, then the gauges are all ready to go.

I also tackled the fuel pump, not a very nice job as the only access was from inside the wheel arch with a quadruple jointed wrist as the top suspension arm blocks most of the access to the rear bolt. Anyway, it's fitted, and doesn't sound like it's knocking now. Wasn't the easiest thing to wrestle into place mind, the lever is so stiff on the new pump, it makes it tricky to push in to place to get the bolts lined up, you've also got to try and keep the little push rod that pushes against the fuel pump lever up out of the way too.

Nice and shiny new pump now though
Posted Image

I did make a huge ******* up though, I had the rigid fuel line to re fit, but the fuel filter was still full of fuel, so decided to start the engine with it disconnected from the pump to empty the line so nothing would spill on the floor whilst trying to refit it. What I didn't realise is about 30 seconds before hand, I had connected the incoming fuel line to the pump, (you can see where this is going!) Only realised after a couple of revs of the engine that something wasn't right, the smell of fuel and the huge amounts shooting out from underneath confirmed how much of a rookie mistake it was!

I'll put it down to it being late!

Then today, bit of a disaster, came down the unit with the intention of tidying out & sorting everything that's in the truck as over the last few weeks, everything's just either been dumped inside the cab or in the bed.

As the sun was shining, I thought I'd pull it outside and sort stuff there, fired it up and pulled it outside, the battery was a bit low from messing about with the gauges etc so let it run for a bit. That's when I noticed this....

Posted Image

Not good, thinking it was the bottom radiator hose as I had to pull it to one side a bit when refitting the fuel pipe to the pump last night, no leaks from there, then noticed coolant coming out near the oil filter at an alarming rate, couldn't quite see where it was coming from with it on the ground so jacked it up and had a look under, that's when I noticed this....

Notice the hole in the core plug?
Posted Image

Ordered a full set of core plugs off ebay so should be here in a couple of days with a bit of luck. On the plus side, I'll get to do the coolant flush sooner than I had anticipated.

With the whole lot tidied out, I needed to find somewhere to store the seats as they're sort of in the way.

Redneck MPV anyone?
Posted Image

Suppose the only good thing to come from today is that I now have a tidy truck and all my parts are sorted.

#8 M44K TS

M44K TS

    Up Into Fourth

  • Members
  • PipPipPipPipPipPipPipPipPip
  • 3,104 posts

Posted 11 November 2012 - 09:09 PM

If anyone watched "Strippers - cars for cash" on Nat Geo, you may have spotted my truck...

Grated it was in Darren's unit (Farmfresh) and was before I owned it...

Posted Image
Posted Image

Still, cool to see it on TV!

#9 M44K TS

M44K TS

    Up Into Fourth

  • Members
  • PipPipPipPipPipPipPipPipPip
  • 3,104 posts

Posted 11 November 2012 - 09:10 PM

got the leaking core plug out, put up an admirable fight too, beleive it or not, it was easier dropping the drivers bank exhaust off! I've got the rest of the core plugs to replace too as it would be daft not to whilst its got no coolant in, that's a job for another day this week.

Posted Image

Also going to take the opportunity to flush the engine through and clean the radiator out with some radiator flush, then I may as well replace the thermostat and radiator top hose with a stainless one.

#10 M44K TS

M44K TS

    Up Into Fourth

  • Members
  • PipPipPipPipPipPipPipPipPip
  • 3,104 posts

Posted 11 November 2012 - 09:11 PM

New thermostat & stainless radiator hose turned up so set about doing the coolant flush.
Posted Image

What a PITA it is too.

Basically, drain the system, run a hose through, refill and add the 1st bottle of stuff.

Run the engine for 30 mins on fast tickover.

Drain, flush and refill.

Add the 2nd bottle and run the engine for a further 30 mins on fast tickover.

Drain, flush and refill with coolant.

Bit of steamy coolant as the radiator heats up, bloody stinks.
Posted Image

Pretty sure it's not supposed to look like that
Posted Image
Posted Image

Pikey method of fast tickover
Posted Image
Posted Image

Why did I think it would be a good idea to do this when it's 2.c outside? At least the top of the radiator is handy for warming my hands and my Chinese has just been delivered :D

Just need to run it for a further 10 mins and then drain it, then I'll fit the new 'stat and hose ready for getting some coolant tomorrow and filling it up, hopefully for the final time.

#11 JustSteve

JustSteve

    Puke-Boy!!

  • Members
  • PipPipPipPipPipPipPipPip
  • 1,883 posts
  • Location: Long Eaton, Nottingham

Posted 11 November 2012 - 09:13 PM

My god, that thing is as cool as a koala in shades! :shades:

Edited by JustSteve, 11 November 2012 - 09:13 PM.


#12 billok

billok

    Mini Mad

  • Members
  • PipPipPipPip
  • 228 posts
  • Location: milton keynes

Posted 11 November 2012 - 09:14 PM

i like pickups of this age and especialy yours. isn't it hard to get parts in the uk?

#13 M44K TS

M44K TS

    Up Into Fourth

  • Members
  • PipPipPipPipPipPipPipPipPip
  • 3,104 posts

Posted 11 November 2012 - 09:14 PM

Cooling system thoroughly cleaned out, new 'stat fitted along with the stainless hose, not 100% sure on it though, might look better with some chrome/polished pulleys and brackets. Ran it for a good half hour to make sure there were no leaks, maintained good oil pressure and the water temperature stayed bang on 190.f with the fan cutting in and out at 87.c. Well happy with it now so can move on to the next job which will be tidying up the wiring for the new engine sensors.

Posted Image
Posted Image

I won a car of the month thing on another site which means I won a £100 canvas print of the truck, they requested a photo of me and the truck with the canvas print, I've had an idea about that too but you'll have to wait and see what it is!

So there we go, a very condensed project thread. The full one is available here:
http://www.rodsnsods.co.uk/forum/garage/1948-chevy-3100-a-60799

All my photos are as usual, on my fotki here:
http://public.fotki.com/marksheridan/car-stuff-1/1948-chevy-3100-v8/

#14 M44K TS

M44K TS

    Up Into Fourth

  • Members
  • PipPipPipPipPipPipPipPipPip
  • 3,104 posts

Posted 11 November 2012 - 09:21 PM

Thanks Craig & Steve.

Billok, mechanical wise, most consumable parts, engine dress up parts etc are available, it's stuff like all the rubber seals, window rubbers, headlining etc that all have to come from the US.

I think I've spent about £2k on parts from America plus import duty so far, but should have everything I need now.

#15 chipmongrel360

chipmongrel360

    Mini Mad

  • Noobies
  • PipPipPipPip
  • 103 posts
  • Location: Norn Iron

Posted 11 November 2012 - 09:48 PM

:gimme: that is awesome!! always wanted a big american motor.
those new dials are beaut as well :)


0 user(s) are reading this topic

0 members, 0 guests, 0 anonymous users