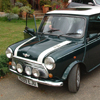
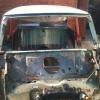
Crayford Convertible In For Restoration @ Mintec
#16

Posted 10 January 2013 - 10:04 PM
#17

Posted 11 January 2013 - 03:43 PM
#18

Posted 12 January 2013 - 08:29 PM
Coming along nicely there Tupers, the shrinker and stretcher do come in handy. Glad i got bought mine by my family.
Thanks Sonik, my estate is sat in the corner looking rather jealous of all the attention I'm giving this one at the moment.
Amazing project. Not normally a fan of the convertibles but this one is pretty cool and pretty rare I would imagine. Amazing how little strengthening there is to make up for no roof, I bet there is a lot of flex along the sills!
The original Crayford boxing along the sills and heel board is pretty beefy I can't see it flexing to be honest.
I started out friday by trimming down the final repair for the rear panel and carefully welding it in.


The lowest section of the quarter panels on each side had rusted through just behind the arch so I cut those out and made a pair of repair sections.


Obviously we need a new battery box for the boot so I set out modifying the tags on a latter one match the original.

After removing and cleaning the original tags I notched the new box and welded them in place.


I also unpacked the new boot floor that arrived on Thursday to give it a look over.

The new floors are the same as those of the last Minis and have a bump in the seat base that obviously wouldn't be there for this age of car.

As such I decided to remove the bump and let in the section I had salvaged from the original floor. After cutting out the bump I laid the old section over the top and used Clecos to hold it in place.


Then I flipped the floor over and marked section of old floor I wanted to keep and cleaned it with a scotch bright pads on the die grinder before tacking it in place.


I needed to get the shell off the pallets so I made a pair of legs to bolt onto the front damper mounts.

We decided to remove the companion bins as they were pretty rotten and will make working the the floor and heel board much quicker.


The last thing I did was to add some more bracing to the body and then started removing the heel board.


That's it until Monday, hopefully the flap wheel I've been waiting on will arrive and I can finish cleaning the hard to reach areas of the rear wheel arches and prep the boot floor and heel board for welding.
#19

Posted 14 January 2013 - 09:22 PM
#20

Posted 15 January 2013 - 07:46 PM
Stunning work and a really interesting read. Looking forward to the next update.
Thanks for reading, I'll try to keep up the interesting ness.
First job on the list for Monday morning was to finish welding the seat base up, then linish it down and spray some zinc on.

I also salvaged the spare tyre hold down from the old boot floor and started cleaning it on the wire wheel. It's would appear the car was green before it was blue.

Once it was all clean I sprayed the inside with zinc, welded it to the boot floor and put another coat of zinc on the outside.


Then I got back onto removing the rest of the heel board sills and straggling pieces of floor. The poor old girl's looking a little empty at the moment.


#21

Posted 15 January 2013 - 08:17 PM
#22

Posted 15 January 2013 - 08:25 PM
#23

Posted 15 January 2013 - 08:54 PM
and attention to detail
so the reinforcements were screwed / bolted / stitched
amazing car - a bit of the 60's coming back to life
#24

Posted 16 January 2013 - 09:51 AM
#25

Posted 16 January 2013 - 10:07 AM
#26

Posted 16 January 2013 - 06:44 PM
Super job. Should be compulsory viewing for owners who want their cars fixed by tomorrow morning for tuppence
Bernie Fineman and Mario Pacione should be chained to a chair & made to watch how it's done properly
Edited by sledgehammer, 16 January 2013 - 09:12 PM.
#27

Posted 18 January 2013 - 10:16 PM
Hell of a project you`ve got on there,great to see another special mini getting treated to a new lease of life.
Really enjoyed this thread so far, nice to see an interesting piece of history being restored to its former glory.
New life's what we're all about, getting to work on cool old cars like this is a plus.
Very nice welding & grinding
and attention to detail
so the reinforcements were screwed / bolted / stitched
amazing car - a bit of the 60's coming back to life
There where bolts along the bottom of the sills and up the A-pillar then self tapping screws into the tunnel and stitch welds all the way along. To say they where a pain to remove would be an understatement.
Great project! I'm liking the attention to detail in keeping the panels original by changing modern bits as required. ther really can't be many of these left now, so it's worth doing right. Must be an expensive job though!
I want to get in touch with the Crayford register at some point and find out how many there are now. I've only ever seen one other Crayford car in the flesh (Heinz Hornet) and only seen one other early style Crayford on the web.
Super job. Should be compulsory viewing for owners who want their cars fixed by tomorrow morning for tuppence
Very kind sir.
Bernie Fineman and Mario Pacione should be chained to a chair & made to watch how it's done properly
I don't know if that'd be safe, their heads may explode!
While checking the edges of the arches before fitting the floor in place I noticed some thinning of the metal at the back of N/S arch.
I didn't want to try and repair it with the boot in so chopped it out flushed in a nice fresh piece of steel.


After a little tinkering we got the battery box welded in.

It took a bit of heaving and levering but we got the boot floor in a popped a few bolts through the subframe mounts to hold it.

The trunnion holes lined up perfectly with the original gussets and I did a plug weld on each one to hold the floor up.


I added a few to the bumper rail as well.

The bottom of the seat back need a little tweaking as it had sprung out when I removed the original floor.
I used the porta power to pushed it back a few millimeters before holding it in with a couple Celcos.


I also got the heel board lined up and held in so I could check my measurements, thankfully it's all lining up the with factory drawings.

#28

Posted 19 January 2013 - 12:06 AM
#29

Posted 21 January 2013 - 10:00 PM
Ah, someone doing it right:) its a nice sight to see!
Cheers bud, we do try.
No huge mass of picture this evening as I've spent most of the day going around the car pulling off the last little pieces of floor and sill ready for when the half floors arrive.
I did however get the back end off the axle stands as I'm always fearful for damaging new floors.
I made a pair of frames from 30MM box that bolt to the front and rear damper mounts and sit the shell at a good working height and keep the weight off large flat panels. So far they're working really well and I think I'll probably end up making a few more for our other cars. All they really need now is a centre spar to join the two.


The only really noticeable panel removal today was the old section of from floor pan joined to the toe board. It's now all cleaned up and in zinc, just need something to replace it with now.


#30

Posted 21 January 2013 - 10:06 PM
Great thread keep em coming!
1 user(s) are reading this topic
0 members, 1 guests, 0 anonymous users


