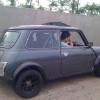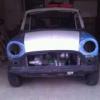
Fiat Punto 1.2 16V Conversion......... Time To Get It Finished!
#16

Posted 03 January 2014 - 09:41 PM
The 8v P75 is only 5bhp short of the 16v but because its a single cam means I can retrofit an Uno distributor,my original plan was to use 32mm motorbike carbs but making an inlet manifold was a right pain so I may go to plan B and modify the standard P75 inlet manifold to take some type of Weber twin choke.
Here's a link to some pics of mine.....
http://www.16vminicl...ead.php?t=29435
Good luck with you build.
#17

Posted 03 January 2014 - 11:12 PM
Another Fiat powered Mini, I started my own Punto engine conversion about 2 years ago but I went for an 8v Punto 75 engine and 5 speed box.
The 8v P75 is only 5bhp short of the 16v but because its a single cam means I can retrofit an Uno distributor,my original plan was to use 32mm motorbike carbs but making an inlet manifold was a right pain so I may go to plan B and modify the standard P75 inlet manifold to take some type of Weber twin choke.
Here's a link to some pics of mine.....
http://www.16vminicl...ead.php?t=29435
Good luck with you build.
Thanks bud, good luck with yours too. Just had a flick through your thread and really like the look of your subframe. Given me a few ideas for when I re-do mine. I think my whole engine is slightly further forward than yours as there was no way the driveshafts would have gone through the original holes and the gearbox clashed on the front of the frame too!
#18

Posted 04 January 2014 - 08:37 PM
Also got the KA dash stripped and had a look at how I'm going to get it to fit.
 image.jpg 68.07K
34 downloads
image.jpg 68.07K
34 downloadsGot loads of photos of other peoples that have been fitted and there's little bits from each I like.
 image.jpg 81.31K
38 downloads
image.jpg 81.31K
38 downloadsThink this one looks really good painted
 image.jpg 144.99K
44 downloads
image.jpg 144.99K
44 downloadsBut like the flocked look too
 image.jpg 57.26K
48 downloads
image.jpg 57.26K
48 downloadsI'm going to cut mine the same as this one as would like to keep the vents at both ends
 image.jpg 41.21K
30 downloads
image.jpg 41.21K
30 downloadsAlso going to try and keep the original mini heater and modify the panel in the KA dash for the on/off switch and adjuster from the mini one
Been speaking to someone breaking a Punto about cutting out the floor out where the gear stick mounts to. Would like to weld the whole thing into the mini floor as at the moment the Punto gear stick I have is trimmed down to fit in the mini tunnel and isn't as stable as I'd like. May also move it backwards slightly to make more room for the gear stick with the KA dash.
 image.jpg 75.41K
8 downloads
image.jpg 75.41K
8 downloadsThat will probably mean that the handbrake will then need moving back slightly too but as it's had a dodgy repair in the past I'll be making new brackets for that anyway
 image.jpg 62.88K
3 downloads
image.jpg 62.88K
3 downloadsOther than that just got the old sound proofing up from the rear floor to see what condition it was in underneath. All looks pretty good really
 image.jpg 85.15K
4 downloads
image.jpg 85.15K
4 downloadsAnyone know where I can buy these metal blanks for the floor? A couple are a bit bent up in the rear and the ones in the front foot wells will get replaced too
 image.jpg 76.96K
5 downloads
Edited by woody78, 04 January 2014 - 08:39 PM.
#19

Posted 04 January 2014 - 10:58 PM
Also check out the EPER Fiat parts catalogue on the Fiat Forum http://eper.fiatforum.com
#20

Posted 09 January 2014 - 06:20 PM
So then I started having a look at the KA dash again. I got a photo of the rear of the dash today to show the steel bar that runs through it.
 image.jpg 78.26K
10 downloads
image.jpg 78.26K
10 downloadsI'll be cutting out the mini's lower dash rail and using the KA's rail so that I can utilise as many of the dash components as possible. Otherwise a lot of the glove box is lost due to it clashing with the lower rail
So after taking a load of measurements this happened...
 image.jpg 74.74K
15 downloads
image.jpg 74.74K
15 downloadsHaving the two halves meant I could trim each end into the mini quite easily, then with them overlapping in the middle with a few clamps and a load of cable ties I could see it taking shape
 image.jpg 74.04K
39 downloads
image.jpg 74.04K
39 downloadsThere is hardly any room between the dash and where the gear stick mounts so this is why I will be moving the section of the floor backwards. I'll probably also move the crossbeam and handbrake backwards too to maintain a good driving position
 image.jpg 73.81K
19 downloads
image.jpg 73.81K
19 downloadsAnd there's even less room with this lower part of the dash fitted but I definitely want to keep this section
 image.jpg 70.21K
11 downloads
image.jpg 70.21K
11 downloadsIt looks like in going to be able to use the mini's heater too and just make up a new face plate to fit the KA dash
 image.jpg 59.53K
14 downloads
image.jpg 59.53K
14 downloadsSo last thing I did was strip the Corsa power steering column down to the bare minimum of what I need on it and size it up. Looks like this will fit fine under the dash too :)
 image.jpg 77.85K
5 downloads
#21

Posted 09 January 2014 - 10:02 PM
I really like this. Good work! ![]()
#22

Posted 10 January 2014 - 06:39 AM
#23

Posted 11 January 2014 - 07:50 PM
I got this frame from work as it was gunna be scrapped. Figured I'd be able to use it for making my subframe jig
 image.jpg 59.02K
6 downloads
image.jpg 59.02K
6 downloadsLittle bit overkill but I'll chop it down.....
 image.jpg 58.45K
1 downloads
image.jpg 58.45K
1 downloadsSo here's where I got to today. Made the top mounts which unbolt for ease of getting it in and out
 image.jpg 74.73K
11 downloads
image.jpg 74.73K
11 downloadsThen chopped it ready to make it shorter and then I'll start with the front section
#24

Posted 12 January 2014 - 05:43 AM
#25

Posted 12 January 2014 - 02:35 PM
#26

Posted 13 January 2014 - 06:32 PM
#27

Posted 19 January 2014 - 03:35 PM
Except I'll be returning the sills as they turned up like this.....
 image.jpg 66.84K
11 downloads
 image.jpg 66.16K
9 downloads
image.jpg 66.16K
9 downloadsAnyway Wednesday night I did some more trimming on the dash and held it together with some 1"x2" aluminium plates that will be riveted with countersunk rivets and filled over once finished but for now they're just held in with self tappers
 image.jpg 69.24K
21 downloads
image.jpg 69.24K
21 downloadsSo today I got the metal support bar that goes behind the dash cut down to shape and welded up so next job is to make the mounts for each end and weld them in
 image.jpg 71.02K
14 downloads
 image.jpg 73.65K
14 downloads
 image.jpg 30.98K
11 downloads
 image.jpg 51.4K
9 downloads
 image.jpg 58.95K
20 downloads
image.jpg 58.95K
20 downloadsSo once I've made these up I'll look at moving the gear stick mounting point backward before moving onto the rest of the floor.
#28

Posted 07 February 2014 - 03:21 PM
 image.jpg 70K
12 downloads
image.jpg 70K
12 downloadsI made the mounts on each side and then cleaned up all the edges except the top as I don't have a compressor yet and need the die grinder to get in there!
 image.jpg 61.83K
13 downloads
 image.jpg 59.81K
7 downloads
image.jpg 59.81K
7 downloadsYou can barely see these when the dash is mounted and shouldn't notice them at all once they're painted properly along with the interior
 image.jpg 53.89K
11 downloads
image.jpg 53.89K
11 downloadsSo here's a few photos of the support in place. From this I'll mount te heater matrix and possibly steering column support, but unsure now whether to use the power steering column from the Corsa....
 image.jpg 76.85K
14 downloads
 image.jpg 72.62K
11 downloads
 image.jpg 66.41K
11 downloads
image.jpg 66.41K
11 downloadsI put a few of the trim pieces in to get a better view of how it will look when finished. I still need to sand it all back and fibreglass and fill bits but I'll do that once I've started that stage with the shell
 image.jpg 71.23K
32 downloads
image.jpg 71.23K
32 downloadsSo the next task is to start welding the floors and to sort this problem....
 image.jpg 64.43K
19 downloads
image.jpg 64.43K
19 downloadsI need to move the mounting point for the gear stick backwards quite a bit. I think I'm going to go for MG ZR seats so I need to start measuring up to make sure wherever it's mounted is still comfortable
Edited by woody78, 07 February 2014 - 04:03 PM.
1 user(s) are reading this topic
0 members, 1 guests, 0 anonymous users


