Hi,
Restoring the mini, now I am in the stage of changing all floor panels (boot, central floor and complete door sills) as all these areas are rusted.
I bought the parts but I have not a clear idea how the floor panels connects with the inner/outer sill sections and the external sill cover.
Does somebody have a drawing or pictures how these parts are welded together?
Regards

Replace Complete Door Sills. How They Connect With Floor Panel? Any Photos?
Started by
Caribdis
, Jan 13 2014 07:23 AM
28 replies to this topic
#2

sonikk4
-

- Admin
-

- 15,909 posts
Twisted Paint Polisher!!!
- Name: Neil
- Location: Oxfordshire
Posted 13 January 2014 - 08:12 AM
What inner sill panels have you bought exactly?? Are they the inner sills from M machine where they go the full length of the floor to either the first flute in in the floor or down to the edge of the floor?
I am this week changing the inner sills and heelboard end on Wills Mini Special so have a look at that.
http://www.theminifo...s-mini-special/
Also in the three links below The Red One I have changed a inner sill and outer sill on that.
Also Project Erm has had floors inners sills outer sills and much much more.
#3
Dan
-

- TMF+ Member
-
- 21,354 posts
On Sabbatical
Posted 13 January 2014 - 03:57 PM
As standard the inner sill is part of the floor pressing, any replacement you buy is a repair panel and will need to be properly seam welded along the floor where you cut the old part away. The outer sill is welded over the top of this and to the door step and body side. There is no sill cover by design, cover sills are repair panels meant to keep the car on the road and hide the rot.
#4
Caribdis
-
- Noobies
-
- 22 posts
Learner Driver
- Location: La Coruña
Posted 13 January 2014 - 10:18 PM
Hi,
I ve bought parts number 12, 16, 8 and 5. (Attached parts image). Also the door step.
From the middle of the car, just the central tunnel is ok.
I am not so sure how to connect parts 16 with 12 and 8. Do they need to be cut for adapting them?
Doors step goes welded straight over the part 16.
I ve bought parts number 12, 16, 8 and 5. (Attached parts image). Also the door step.
From the middle of the car, just the central tunnel is ok.
I am not so sure how to connect parts 16 with 12 and 8. Do they need to be cut for adapting them?
Doors step goes welded straight over the part 16.
Attached Files
-
 image.jpg 74.18K
149 downloads
image.jpg 74.18K
149 downloads
#5
sonikk4
-
- Admin
-
- 15,909 posts
Twisted Paint Polisher!!!
- Name: Neil
- Location: Oxfordshire
Posted 13 January 2014 - 10:28 PM
Number 8 appears to be a oversill not a standard 4 1/2" sill. You really don't want to be fitting that.
Number 12 is a half floor with inner sill, number 16 appears to be a full length inner sill with outer sill attached.
Who's website did you get the picture from??
#6
Caribdis
-
- Noobies
-
- 22 posts
Learner Driver
- Location: La Coruña
Posted 13 January 2014 - 11:10 PM
From Minispares
I think there ll be necessary to cut some of the panels to make them fit together, isn't it?
The oversill I bought is the one with 6 marks. Why I shouldnt fit it? Is not suppose to be covering the inner sill?
I think there ll be necessary to cut some of the panels to make them fit together, isn't it?
The oversill I bought is the one with 6 marks. Why I shouldnt fit it? Is not suppose to be covering the inner sill?
#7
Dan
-
- TMF+ Member
-
- 21,354 posts
On Sabbatical
Posted 14 January 2014 - 01:00 AM
As said above the car DOES NOT have cover sills by design, they are a cheap and quick repair method to keep a rotten car on the road. You do not need them if you are changing the complete inner and outer sills properly. If you have bought half floors including inner sills then you don't need to also buy inner sills separately. The image you are choosing from is not an exploded image of the parts used to assemble a car. It is a diagram of the original parts and all the repair panels available, many of which do the same job as each other. Which repair panels you need depends on what is rotten. Repair panels are not the same as the original panels they are bits of panels or assemblies made to repair common damage economically.
#8
Caribdis
-
- Noobies
-
- 22 posts
Learner Driver
- Location: La Coruña
Posted 14 January 2014 - 07:13 AM
So as I understand from you, the combination of 16 and 12 (13 part is the combination of them) would replace completely the floor panel and part 8 wouldnt be necessary.
Do you have a photo or schema of a Mk3 car underside?
My problem is that as it was all rotten, I do not see any shape panel
Regards
Do you have a photo or schema of a Mk3 car underside?
My problem is that as it was all rotten, I do not see any shape panel
Regards
#9
sonikk4
-
- Admin
-
- 15,909 posts
Twisted Paint Polisher!!!
- Name: Neil
- Location: Oxfordshire
Posted 14 January 2014 - 09:42 AM
Right judging by what you are saying you need at a minimum a half floor each side plus outer sill and jacking points. Also what is the age of the car?? All of the following PARTS ARE FOR MK3 ONWARDS
So going on from that you will need the following (these are from M Machine http://www.m-machine.co.uk/cat.pdf) which are very good panels but cheaper than Heritage.
11.31.04.17 Floor, Half, LH, Mk1-5 65.00 £78.00
11.31.04.18 Floor, Half, RH, Mk1-5 65.00 £78.00
14.32.00.01 Sill, LH, Mk3-4 18.00 £21.60
14.32.00.02 Sill, RH, Mk3-4 18.00 £21.60
11.32.06.01 Jacking Point, LH, Mk1-4 6.50 £7.80
11.32.06.02 Jacking Point, RH, Mk1-4 6.50 £7.80
Now they do a half floor with outer sills fitted as well and i believe the jacking point which is this part
14.33.01.37 Sill & Floor Half Assembly, Complete, LH, Mk3-5 97.50 £117.00
14.33.01.38 Sill & Floor Half Assembly, Complete, RH, Mk3-5 97.50 £117.00
Now the following pictures are of my Clubman which is a MK3 car and will show you where the outer sill and jacking go
The first picture is with a oversill on which i removed to fit a standard width sill
This next picture shows you the inner sill and rear internal slinging point and seat belt mount
This picture shows the front internal slinging point
Jacking point
New jacking point installed
New standard width sill
Today i will be chopping out a complete inner sill on another mini so that will show you some better pictures of what things should look like.
There are other threads on the forum where they have replaced either the complete floor of half floors.
Now the panels i have mentioned already can be bought from Heritage. Minispares. Minispeed, Somerford minis all supply these.
If you pay £5 to become a TMF+ member you will get the following discounts off from two of the mentioned companies.
Minispares 7.5% discount on all of their items.
Minispeed 12.5% discount on Heritage panels only and 10% off all of their other items.
You do need to compare prices before discount to see which is best for you if you decide to use them
M Machine offer 10% on their panels. On the day of ordering (best to ring them) ask for the discount then. Also their price list is more than likely out of date so when you go to order ask for the current price.
Any issues etc then pm me and i will try to assist you. I wont be back online now till late afternoon as i'm off to work on a mini.
#10
domdee
-

- Members
-
- 1,183 posts
Formally known as dominicdee
- Location: hull
- Local Club: hull clubs on FB
Posted 14 January 2014 - 12:28 PM
love a good mk3!
#11
CBJ805T
-

- Members
-
- 431 posts
Speeding Along Now
- Location: Kenilworth
Posted 14 January 2014 - 12:46 PM
If its any help below is a basic cross section of the sill area:

The purple part is the inner sill and floor pan - this is single pressing and you can get options for different lengths of the horizontal portion (floor pan) - for instance 1st rib
The grey part is the door step
The green part is the outer sill (not an oversill)
Item 16 is an inner sill and floor pan to first rib and outer sill assembly.
#12
sonikk4
-
- Admin
-
- 15,909 posts
Twisted Paint Polisher!!!
- Name: Neil
- Location: Oxfordshire
Posted 14 January 2014 - 07:19 PM
As promised some more info.
This is a complete inner sill to first floor flute from M machine

Now with regards to the floor to rear heelboard info this picture will help to explain it. This is all spot welded together

The section marked tunnel is where you would cut along the length to replace a half floor. The welding method that must be used to join the floor to the tunnel is seam welding. Not spot or plug welding
Now this picture shows the inner sill area inside the companion box (box removed)

and within the the companion box area is the inner sill stiffener, this item runs under the B pillar but stops there. The other end of it sits on top of the inner arch front closeout panel

The front of the floor attaches as per this picture and is by spot weld

#13
Caribdis
-
- Noobies
-
- 22 posts
Learner Driver
- Location: La Coruña
Posted 14 January 2014 - 08:17 PM
Many thanks everybody for the information. It really helps me to understand that I know very little about this issue ;) Let me introduce me and the car for a better advise.
I live in Spain and I have an Innocenti Mini cooper MK3 with the austin 998 cooper engine with hydrolastic. I am restoring it with the help of a mechanic friend that did some Mini restoration before but the bodywork issue is out of his knowledge. Body task has been given to a modern bodywork garage. search and selection of panels is my scope.
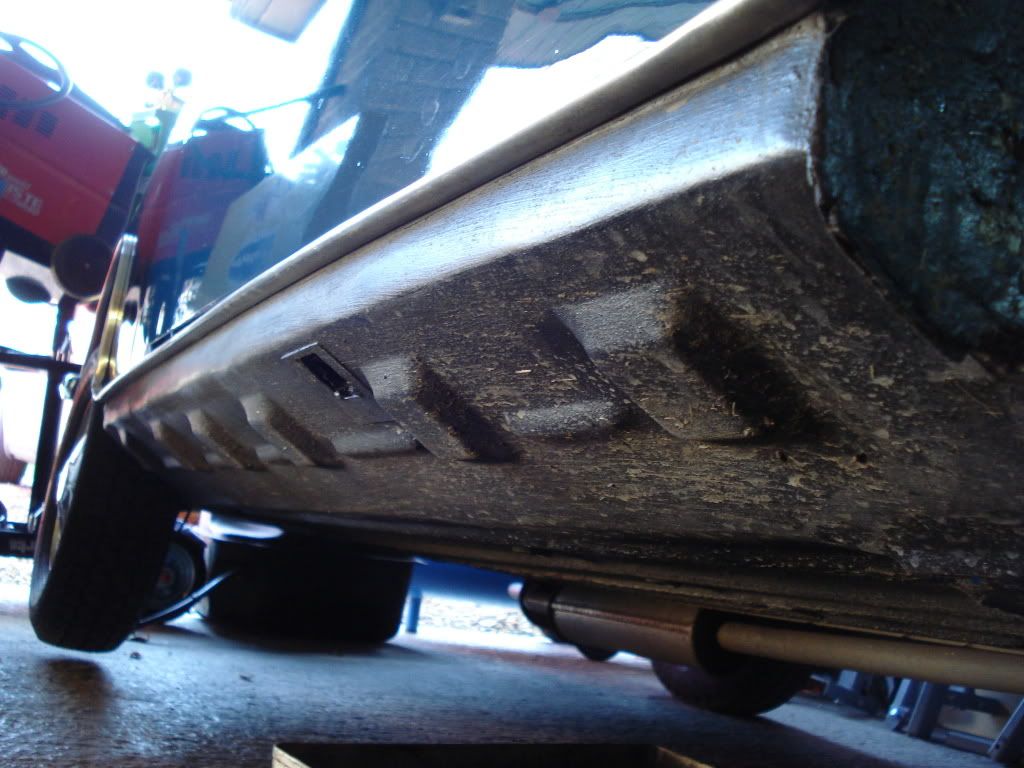
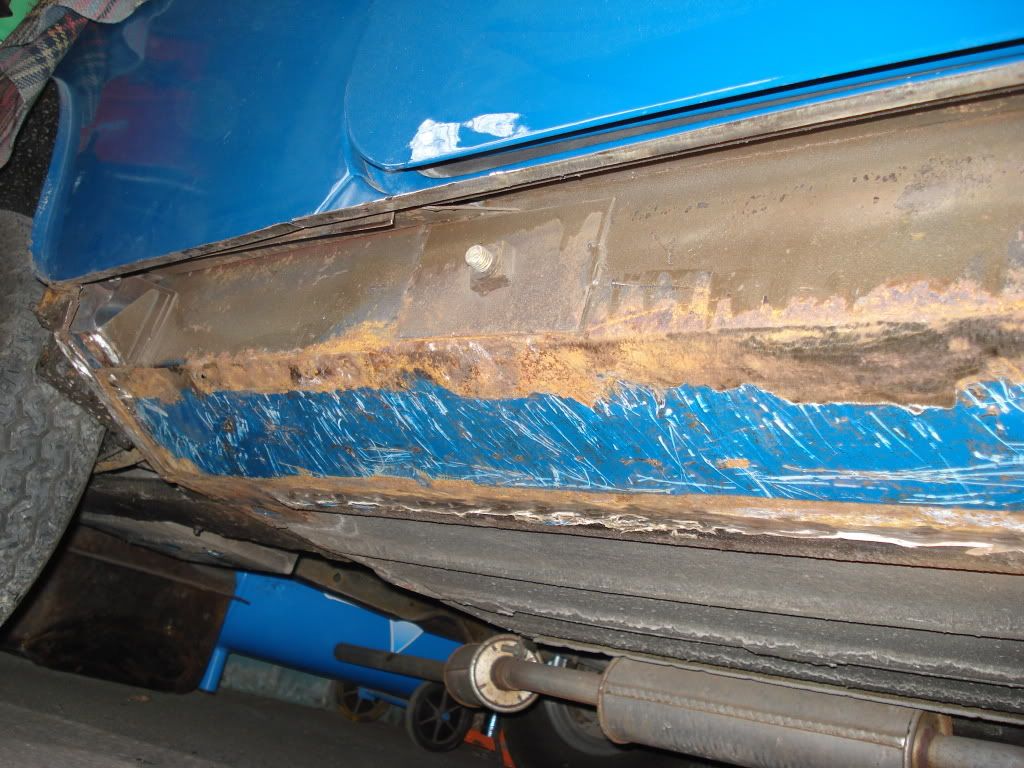
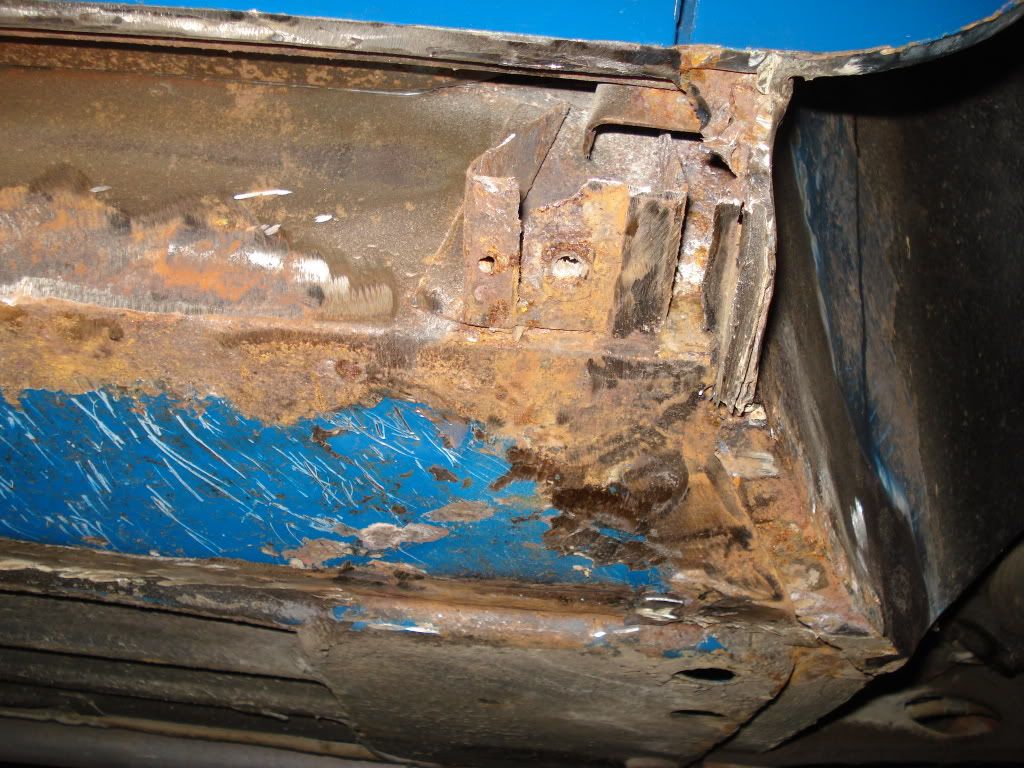
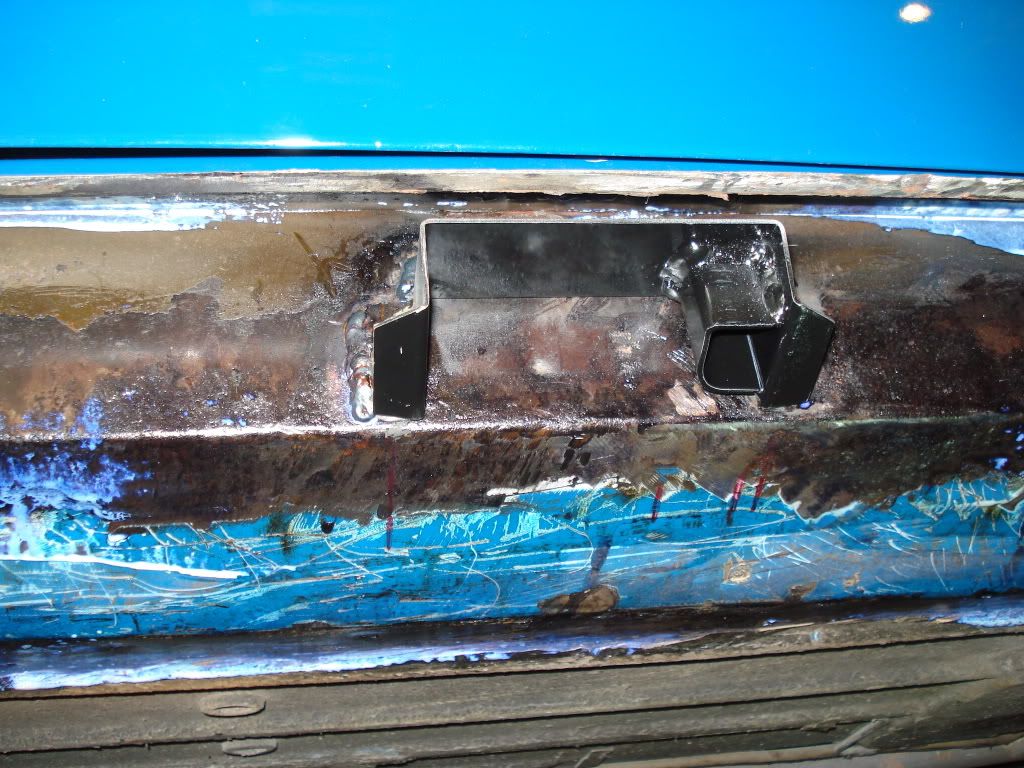
Floor in this car is the worst part and has to be replaced completely. At first I though just the central part was bad but when we started removing the rust, door step and inner sill disolved like sugar
See the condition of the floor.
Attached Files
-
IMG_0005.JPG 63.81K
39 downloads
-
IMG_0029.JPG 80.63K
62 downloads
-
IMG_0030.JPG 77.01K
60 downloads
-
IMG_0031.JPG 90.1K
37 downloads
-
IMG_1389.JPG 58.76K
31 downloads
#14
Caribdis
-
- Noobies
-
- 22 posts
Learner Driver
- Location: La Coruña
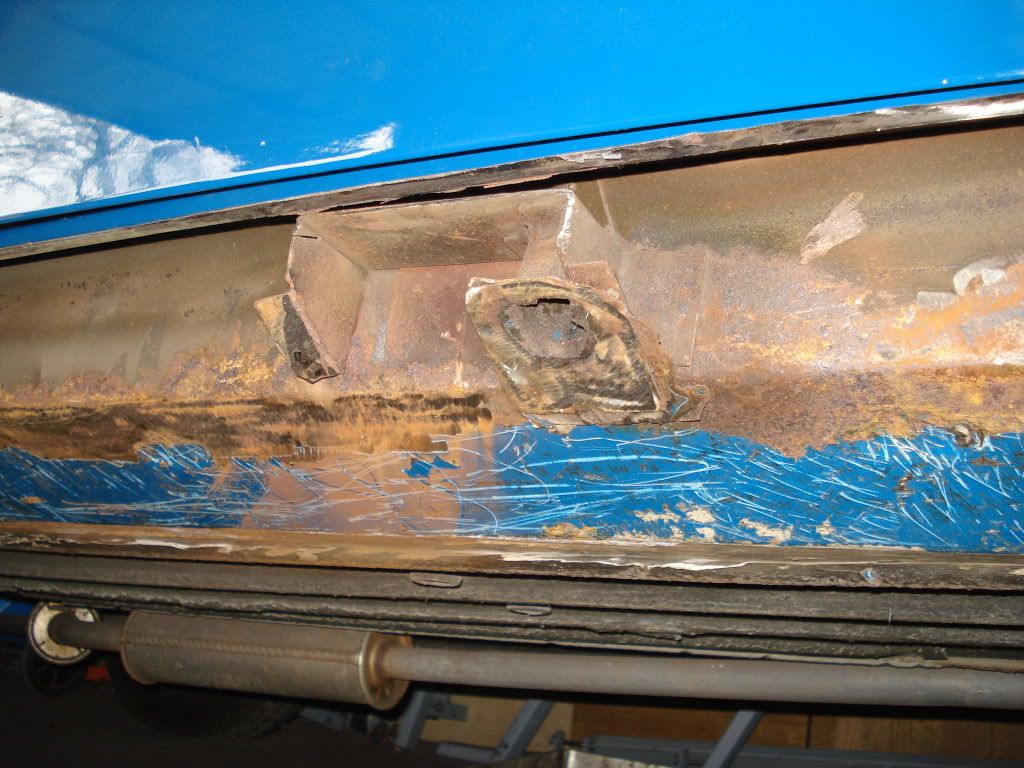
Posted 14 January 2014 - 08:20 PM
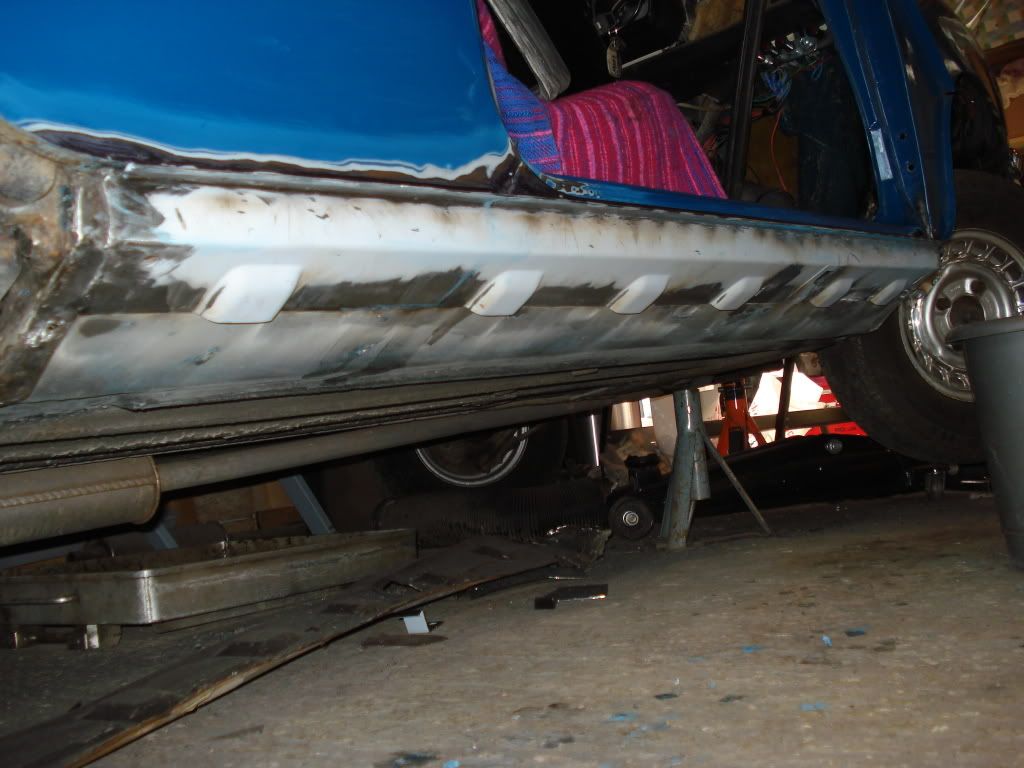
This is the status now.
Attached Files
-
IMG_1387.JPG 61.82K
68 downloads
-
IMG_1388.JPG 62.97K
42 downloads
#15
sonikk4
-
- Admin
-
- 15,909 posts
Twisted Paint Polisher!!!
- Name: Neil
- Location: Oxfordshire
Posted 14 January 2014 - 08:21 PM
Ahh oversills The cause of so much trouble. A word of warning do not let a garage jack your car as in your pictures. Those external slinging points ARE NOT JACKING POINTS. All that will happen there is it will push your floor up. It needs to be jacked on the subframes


0 user(s) are reading this topic
0 members, 0 guests, 0 anonymous users


